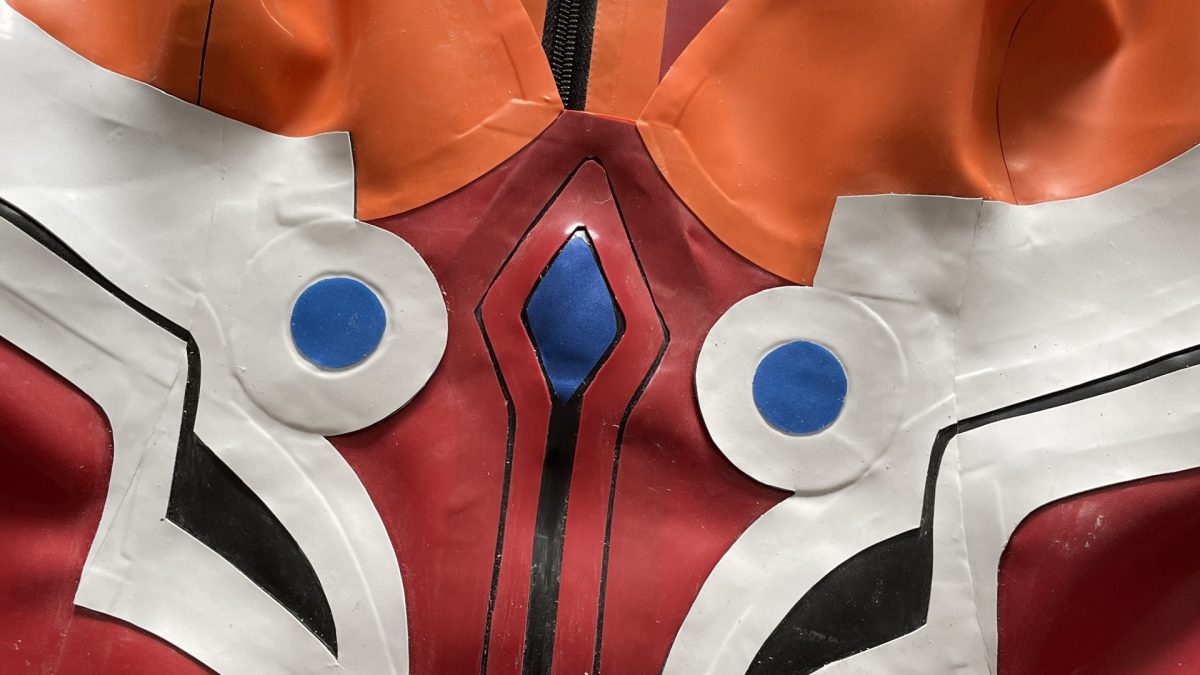
It’s been a while since I did a latex cosplay from scratch, but the release of the last Eva movie had me itching to do a new plugsuit … again, since I just started cosplaying Asuka, what, over the summer? Whoops!
There are still definitely some things I’d like to add to this, so ultimately I’ll likely pull some pieces and replace them with something else — but we are still living in a panini, so I mostly made this with Things I Already Had. I’ve already started talking to some of my prop maker buddies about casting some things when they have time, though, so cross your fingers for me! Hopefully that’ll all be done by he time I actually get to leave my apartment again and wear her somewhere.
But enough of that — let’s talk about building this cosplay!
Here’s the reference for Asuka’s outfit:

So, there’s two main parts of this outfit that I can break this down to: the bodysuit, and the thigh highs.
I already have base patterns for thigh highs and bodysuits, so I started by tracing those out and plotting in where I wanted the new colours. This process is known as colour-blocking — the patterns before any colour blocking are known as just blocks.
My colour-blocking also involved deciding whether things were going to be overlays or underlays — which, essentially, do what they said on the tin, overlays are glued over other latex, and underlays are glued underneath.
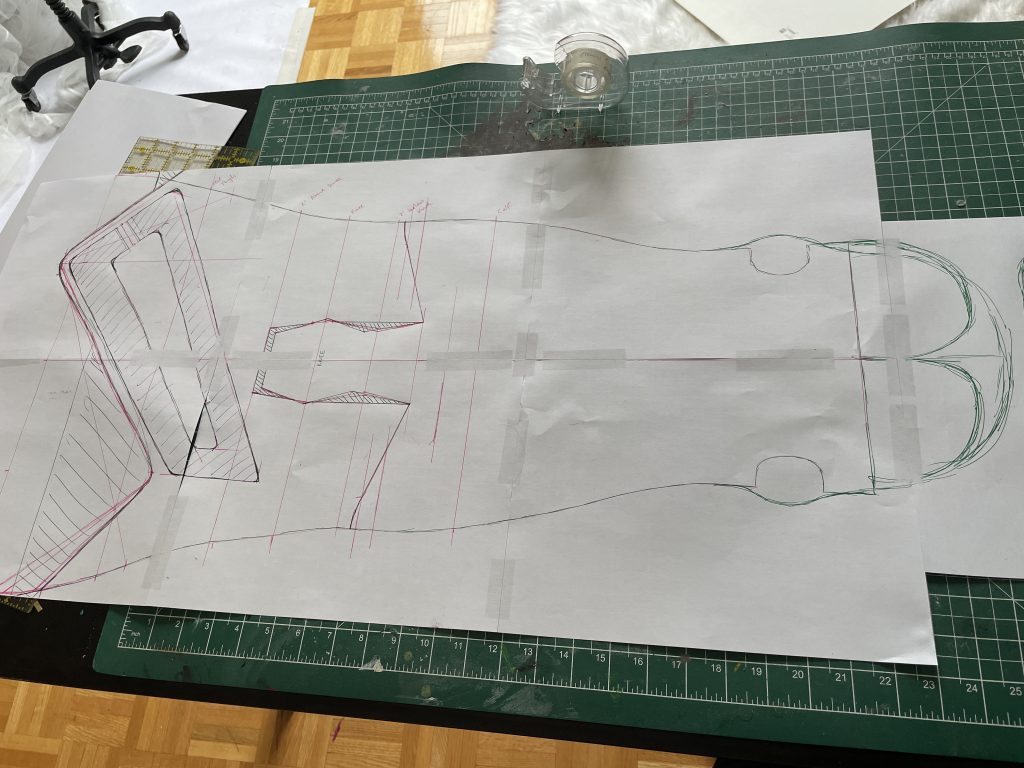
Here’s a look at the colour blocking for the thigh highs — I like to do it in different colours, so that I can tell what my planing lines are, and what my final lines are, when I’m tracing these pieces back out into the “final” pieces.
In this case, my planning lines are pink, and my final lines are either dark blue or green — because my dark blue pen died midway through. Here you can see the main “body” of the thigh high, my planning for the black knee underlay, the pattern for the red thigh overlay, and the Color-blocked black piece on the inside of the thigh. I also patterned out black toe caps, which you can see in green on the end there, though I left the cutouts in the ankles to allow air to escape — you can “blow out” (pop, essentially) the seams on a latex stocking if there’s nowhere for the air to go when you slide your foot into it, because latex done well is inherently air-tight!
So, I traced out the overlay, and the black piece, and just cut out everything else out of latex.
The first thing I did was the underlay — which is a weird and complex little shape, so I achieved it by tracing the negative space in the pattern and adding a seam allowance. Then I just glued it in — first on the top, and then the bottom, although this literally doesn’t matter.
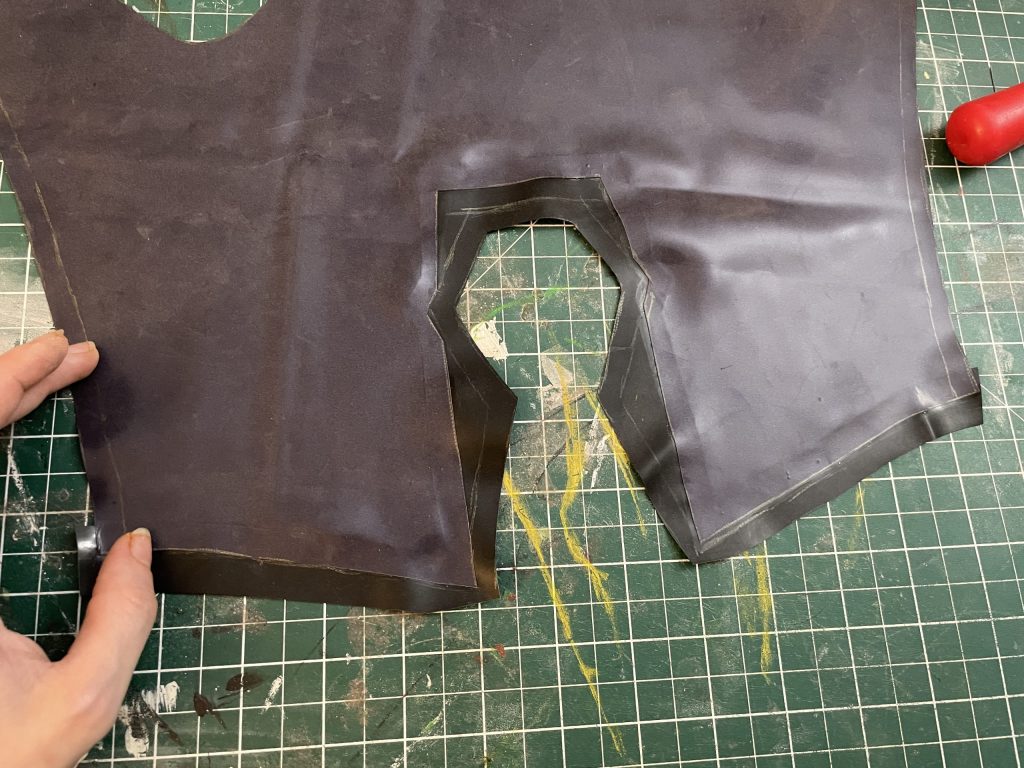
Here’s the front of the underlay.
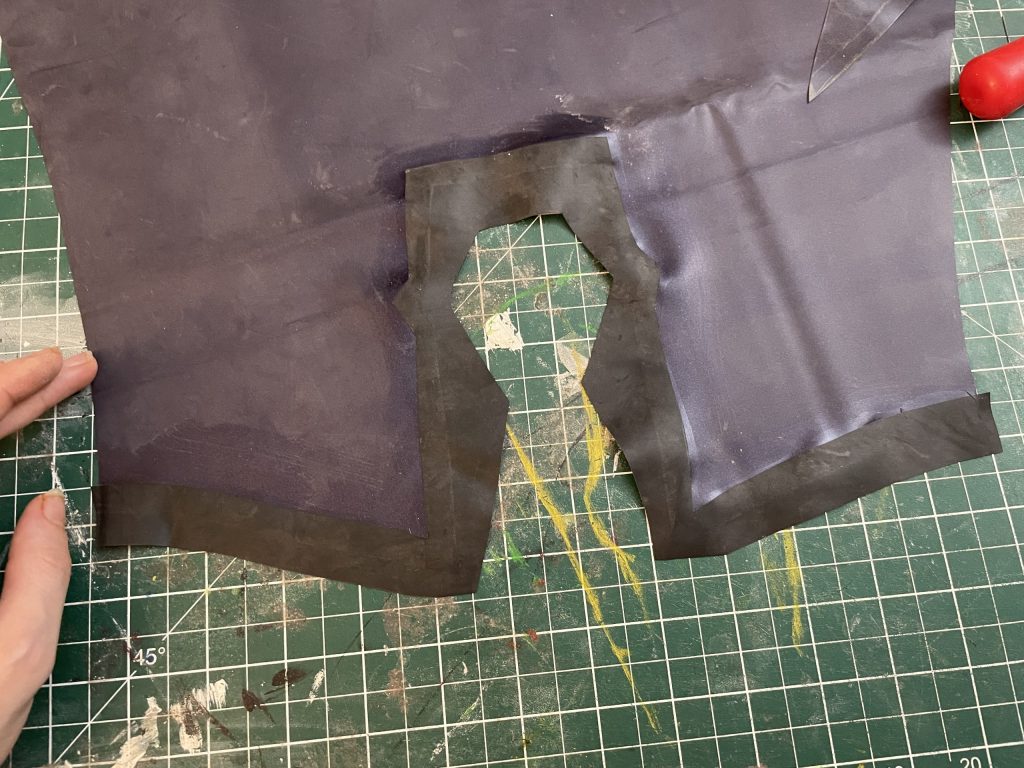
And the back! (Before I cleaned it, there’s some extra glue there.)
Then I had to line up the other side. This is really fiddly, because — well. Look at it.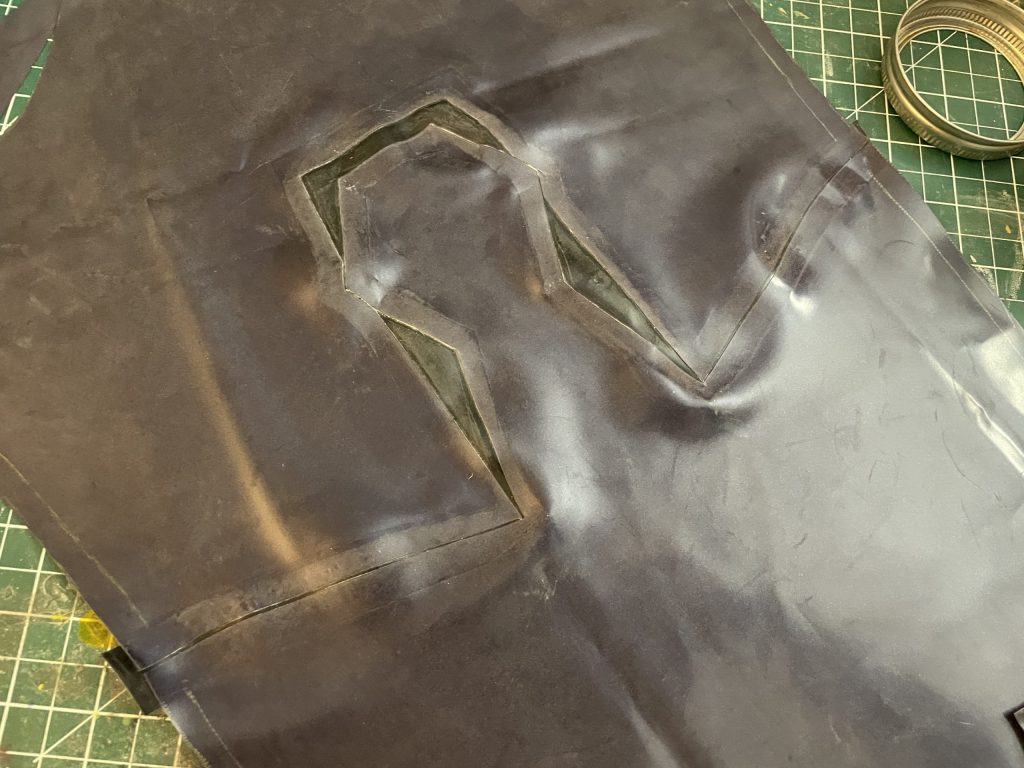
Because I wanted the line around the back of the calf to be as thin as possible, I didn’t cut anything off the lower piece, I just tried to line it up a little lower, which is why you can see some stretch making the vertices of the corners bubble. Ideally, you want your latex seams to lay as smoothly as possible, but especially in the cases of many of these underlays, a small amount of bubbling like this will disappear when the garment is stretched over the body, so while it’s not the most ideal, it doesn’t have a huge impact on the final garment. So I left it.
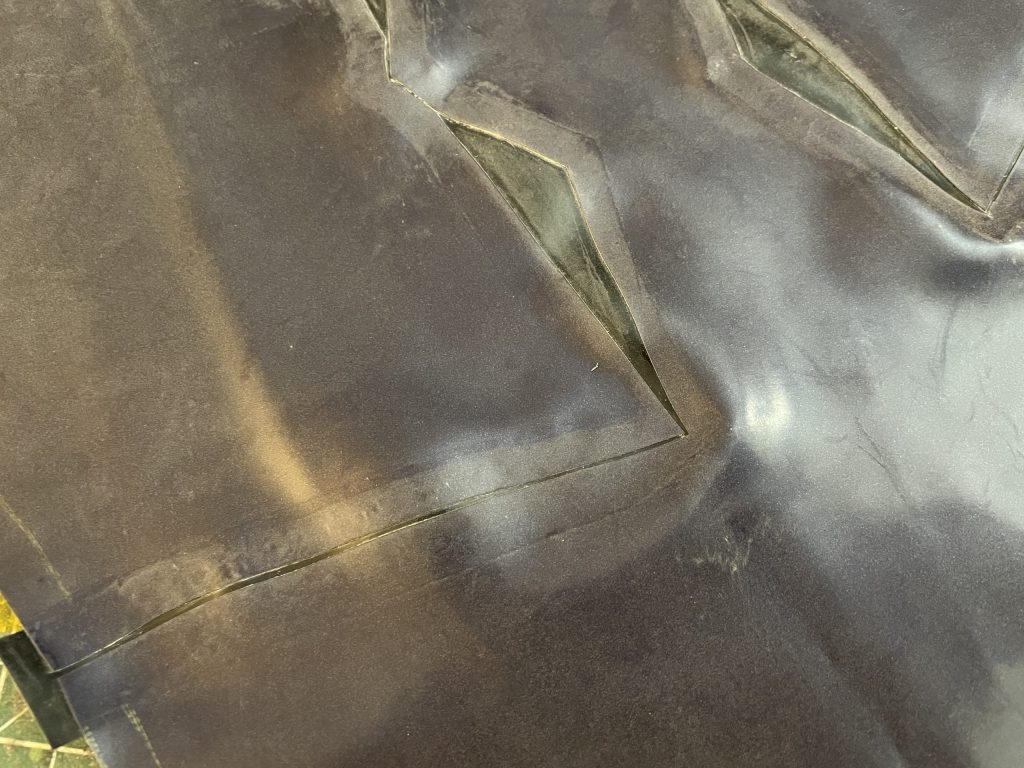
A close up of the underlay on the side. Mmm, satisfying.
Once those were together, I put on the red overlay —
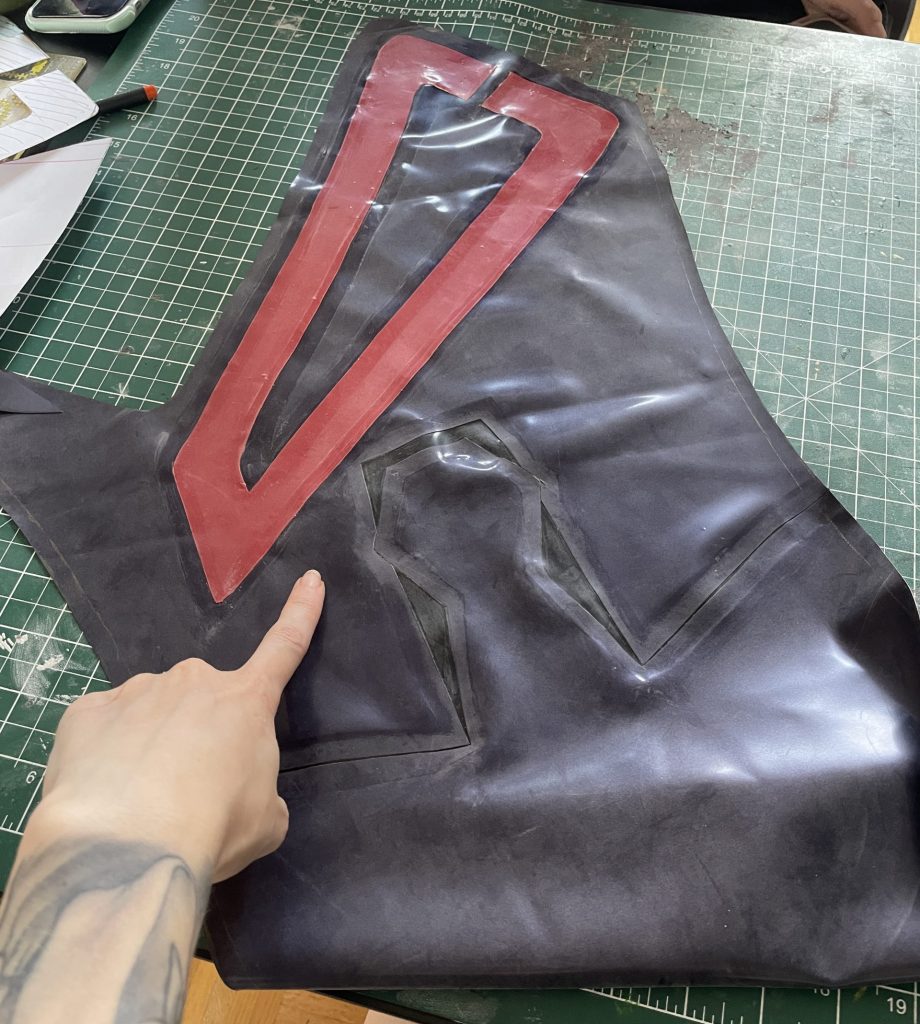
I believe I’ve already done a post on Overlays (tell me if I’m wrong, haha), but the quick version of the overlay process here was:
- Trace out the pattern of the red piece loosely, so that I know where it’s going
- Clean the area where the overlay will be going
- Clean the back of the overlay and apply Glue
- Overlays don’t always require glue on both sides if the cleaning is done well and the overlay will not be in a high stress area, so for this one I only applied glue to the back of the overlay
- Cover the majority of the cleaned area with (clean) paper, to keep accidental sticking from happening
- Start on one corner (I chose the one nearest my finger) and gently smooth the overlay down into place, sliding the paper out of the way as you approach.
Some overlays are large enough that they’ll sometimes get air bubbles in them — these are, in some cases, really really hard to avoid, and I still get them after a decade of Latex work. To fix these, flip your latex over and gently pierce the bubble with a pin, and then push the air out of the little hole you’ve made, very carefully, and smoothly, trying not to press the imprint of the bubble into the latex.
You can also gently pull up your overlay, in the case of bubbles that make weird imprints or just are stubborn, and then gently push the latex back down afterwards to fill in the space, again, being careful not to leave an imprint of the area you pulled up.
Then I put the black part on the inside of the thigh, and did up the back seam, which is the only seam in my stocking pattern that I like to use. Remember that little underlay line on the back of the thigh? I started there, made sure that matched up perfectly, and then worked down to the ankle, and up to the top of the thigh high separately, which is something I really recommend doing with long seams: start at the most difficult part that needs to line up, and work out to the edges. (Also, flip your long seams halfway through, making the previous bottom the top, to help equalize the stretch you’ll naturally put in your top piece of latex as it goes down.)
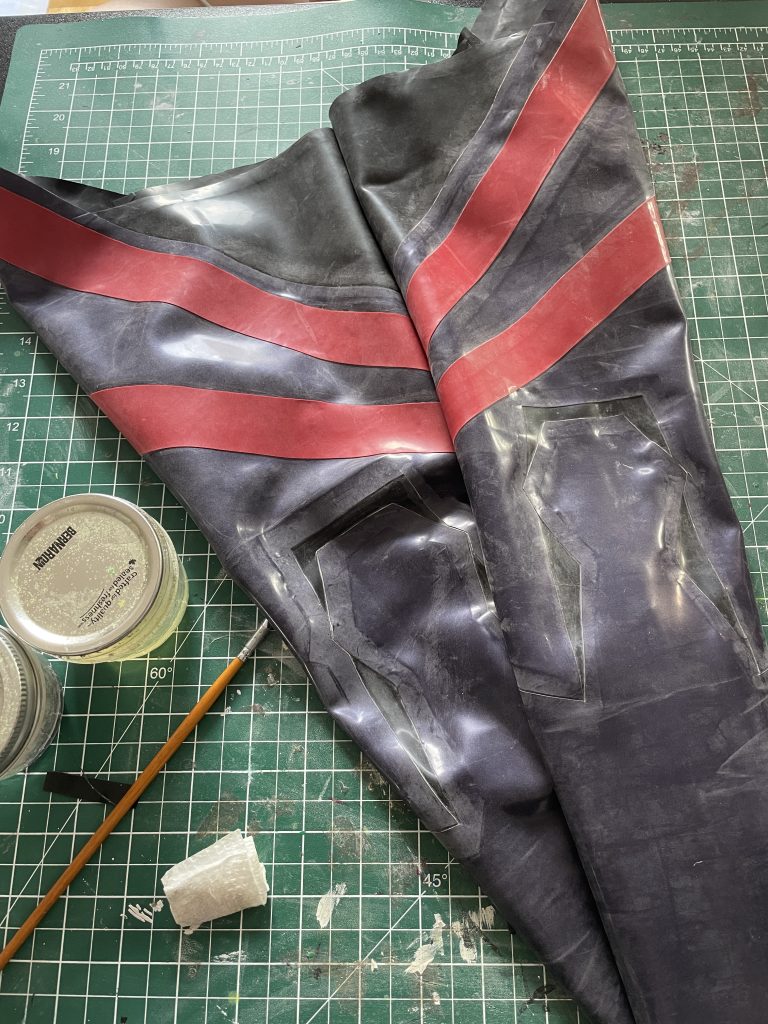
There they are, all cleaned and powdered.
One thing that you might not see, and which I’m not sure how to properly document in pictures, is how I got the top bits to stand up without any external support structures.
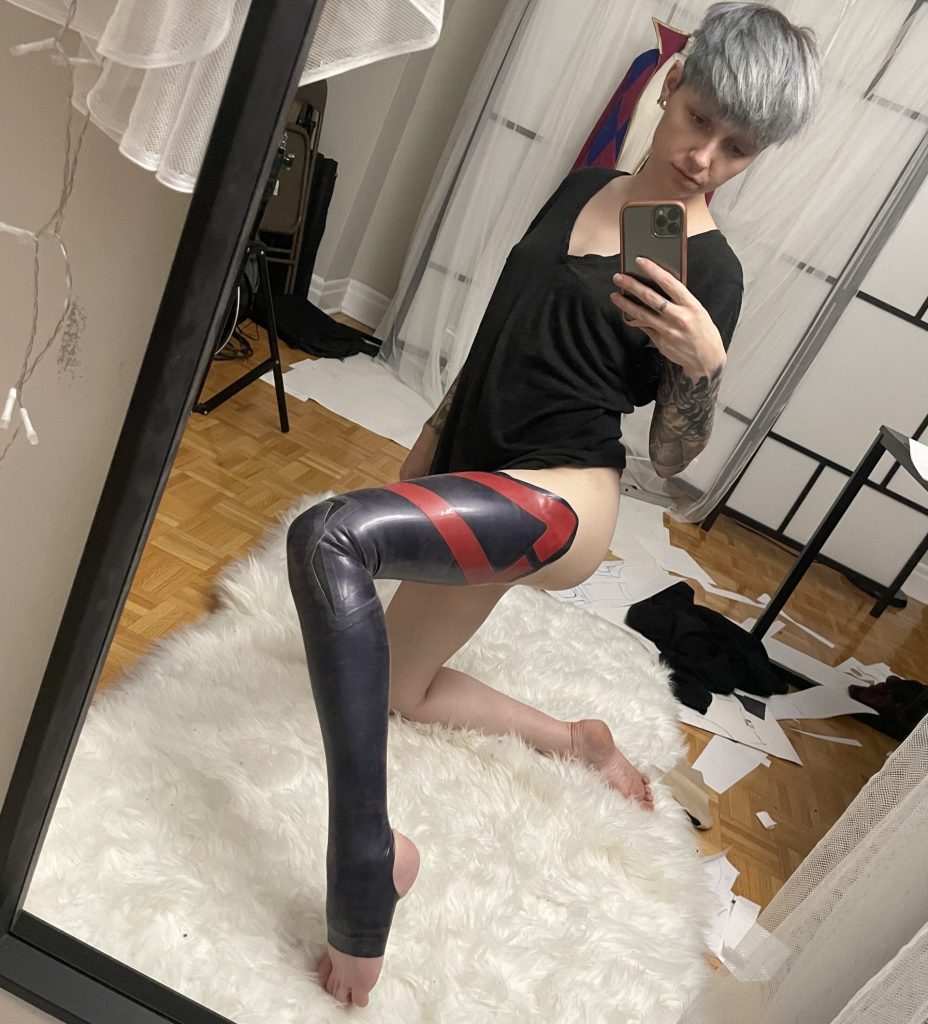
(I also hadn’t installed the toe caps yet on this picture, shhhh.)
You can see that the top bit, without any other latex in the area to hold it to my leg, isn’t quite painted on me like everything else in the thigh high. What I did, was laminate the top bit, that was floppy, to another piece of black latex. Lamination works like you’re doing a really big overlay. But for this overlay, I intentionally stretched the piece of latex I was applying to the back, in order to force the outer layer of latex to curve inwards, towards my leg! And I’m happy to say, it worked really well!
So next! The bodysuit!
I did this in a couple of pieces, to keep things from being overwhelming for myself — this is a complicated latex build, and my first on in a bit, so I was feeling a little rusty.The thigh highs were a sort of warm up for me.
For the basic shape of the bodysuit, I decided to use my pattern for 2B, since it’s sort of the same shape — I just drafted the bust shape to be lower — more cups instead of the sweetheart neckline 2B has — and re-drafted to a simpler collar, because of something I wanted to do on this, but more on the collar later.
(2B actually has a wholly-unneccessary 5-piece collar, three pieces in the front and two in the back. It honestly doesn’t fit any better than most other one or two piece latex collars I have, so I don’t draft them like that anymore.)
I traced the pieces of 2B’s old pattern out onto paper, and then I went ahead and did the blocking. It looked like this:
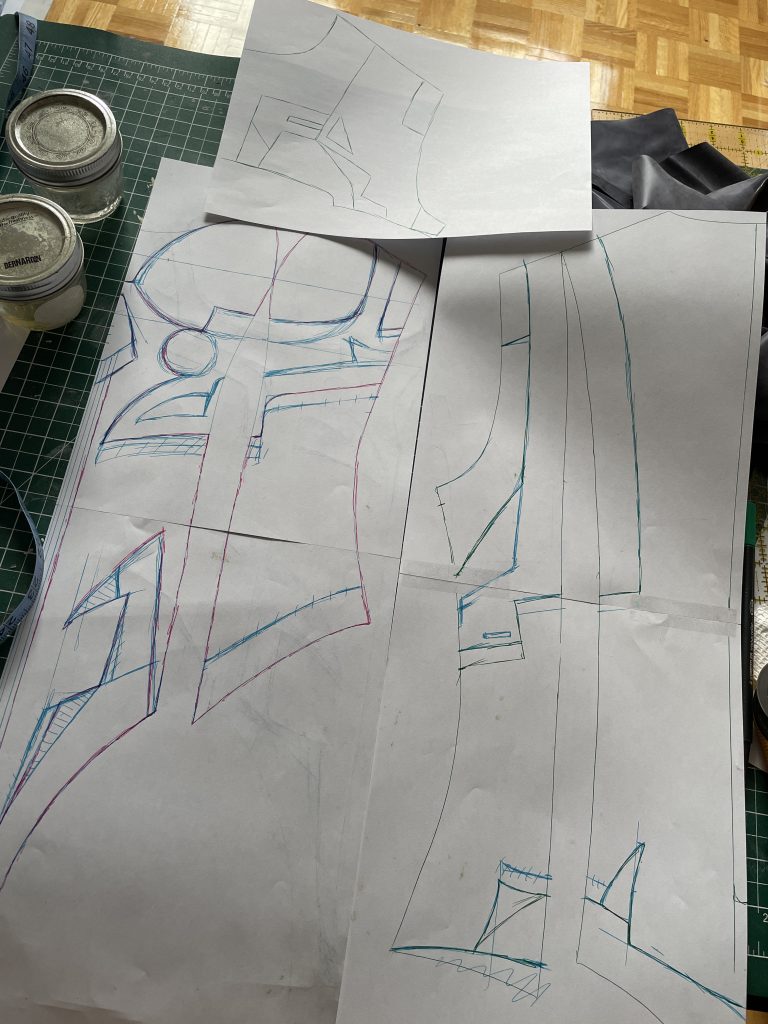
Here you can see, roughly, what all of my pieces looked like. Starting at the left, that’s the Center-Front, which is half-drafted because the other half needs to be perfectly mirrored, so I usually just flip the pattern piece over and then re-trace it upside down. Next is the side-front, and above that the above-bust and shoulders, shrug-like part — sans sleeves yet, you’ll notice. I didn’t even draft the sleeves until I’d mostly glue this together, because I needed a break from staring at so many lines. Then the last unaccounted for piece is the side-back.
Essentially, for colour blocking, what I did was stare at four different reference photos of that figurine of Asuka, gently draw in a basic shape, then come in with a ruler and make really light little lines until I felt like I had the angles right. I measured down/up from edges of side seams to make sure things would mathematically match. As you can see, I did some scratching out and re-working … but this is actually my second draft, after my first got too messy and I scrapped it. It happens sometimes!
From there, I had to do the same thing I did before — trace out all of the individual pieces of this pattern, and label them so I would figure out what they were, and then try to sort them all on my desk in a way that meant I wouldn’t loose any of the little pieces before I got to work.
I started with small pieces. I put the bra cups together, with an underlay instead of a traditional seam.
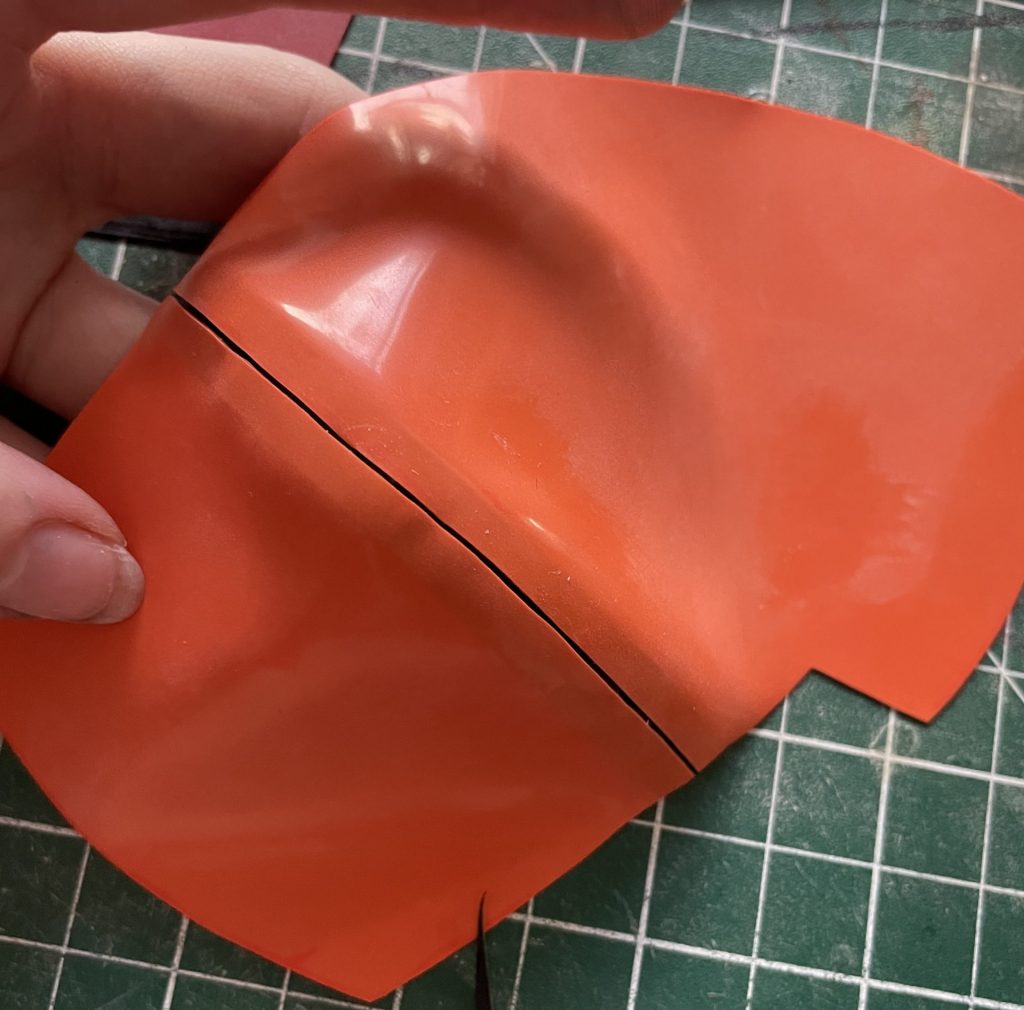
Because there seems to be a tiny black seam on the statue and I am an insane person.
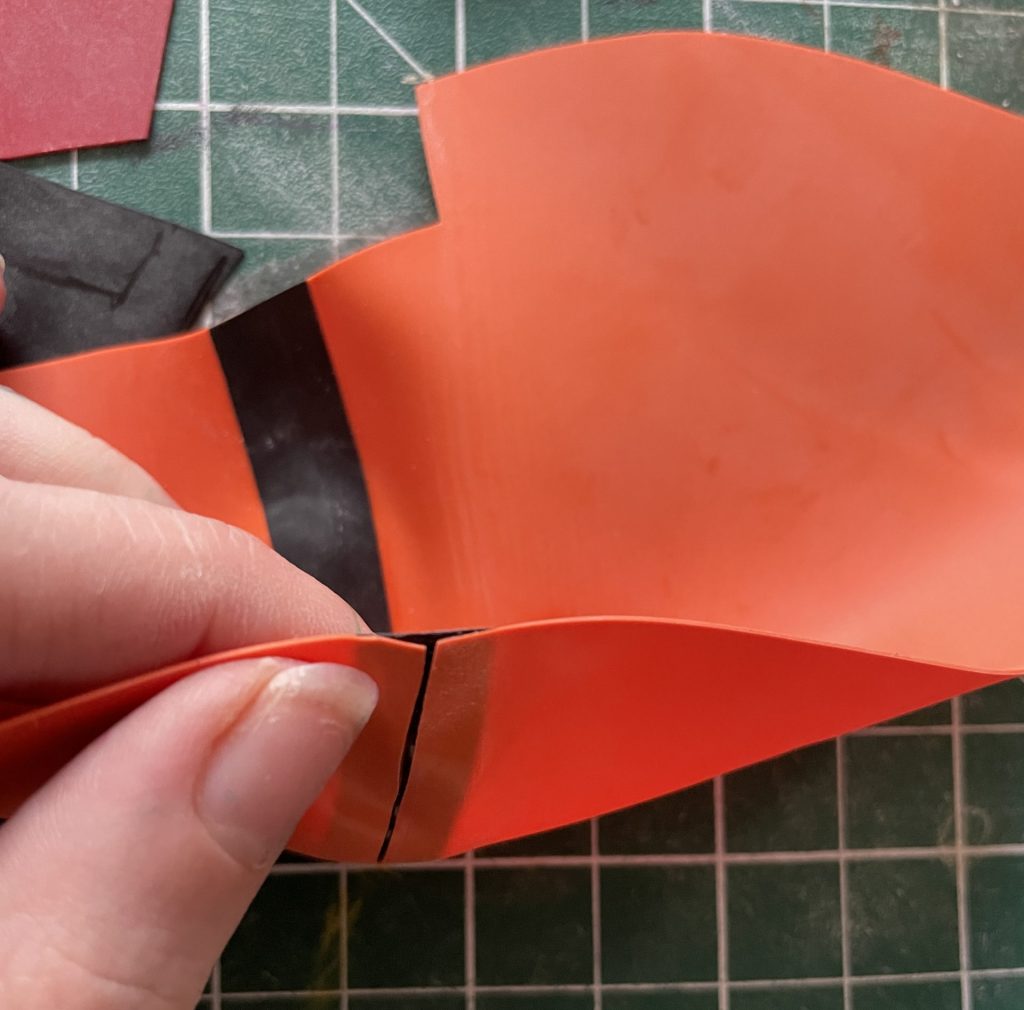
There’s a look at the back as well.
Then I worked on the “shrug” part, which had a lot of the most fiddly little parts that I was worried about losing.
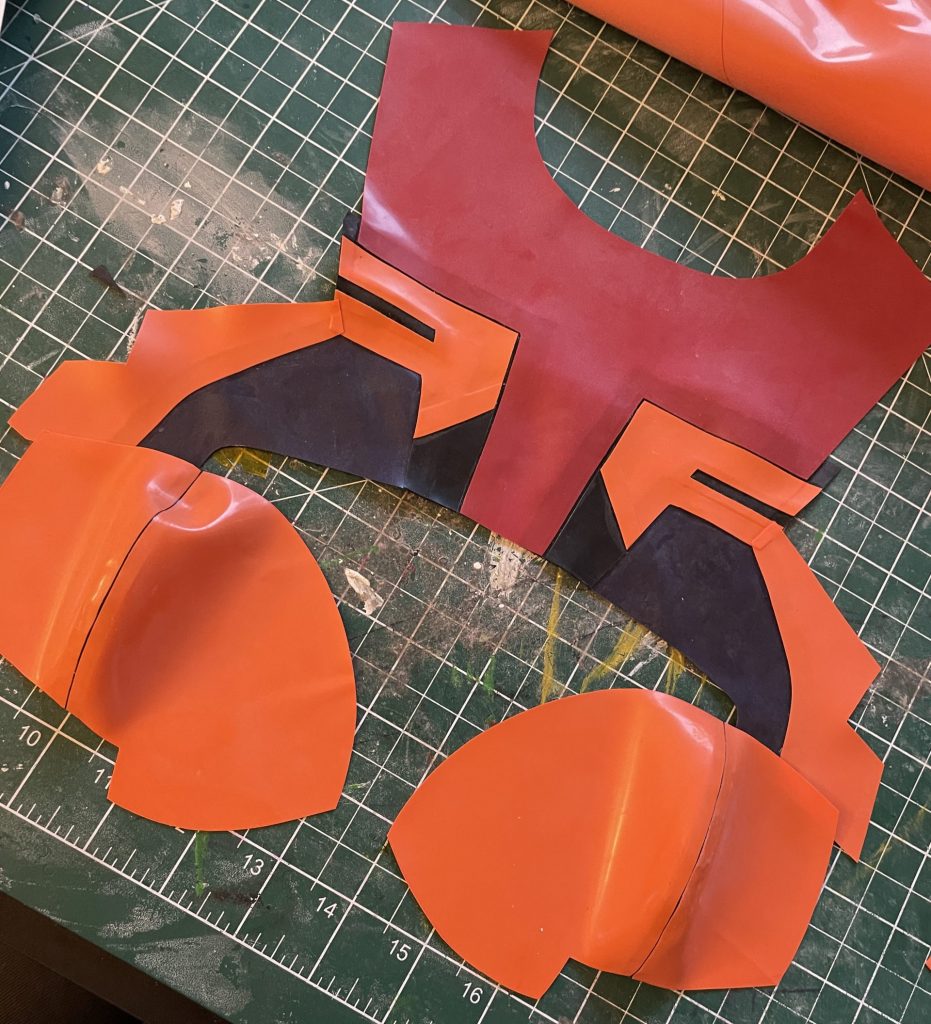
I underlaid the black underneath the red T-junction first, then put together the F-shaped orange pieces with the little black underlays for this, then attached them to the red via that previous underlay. Confused yet? Then I put the purple pieces on, and then the last orange pieces — you can see an ugly seam about where they attach to the other orange pieces, they’re going to be hidden under some white pieces, but I added those later — you’ll see why.
Next I worked on the front under the bust cups:
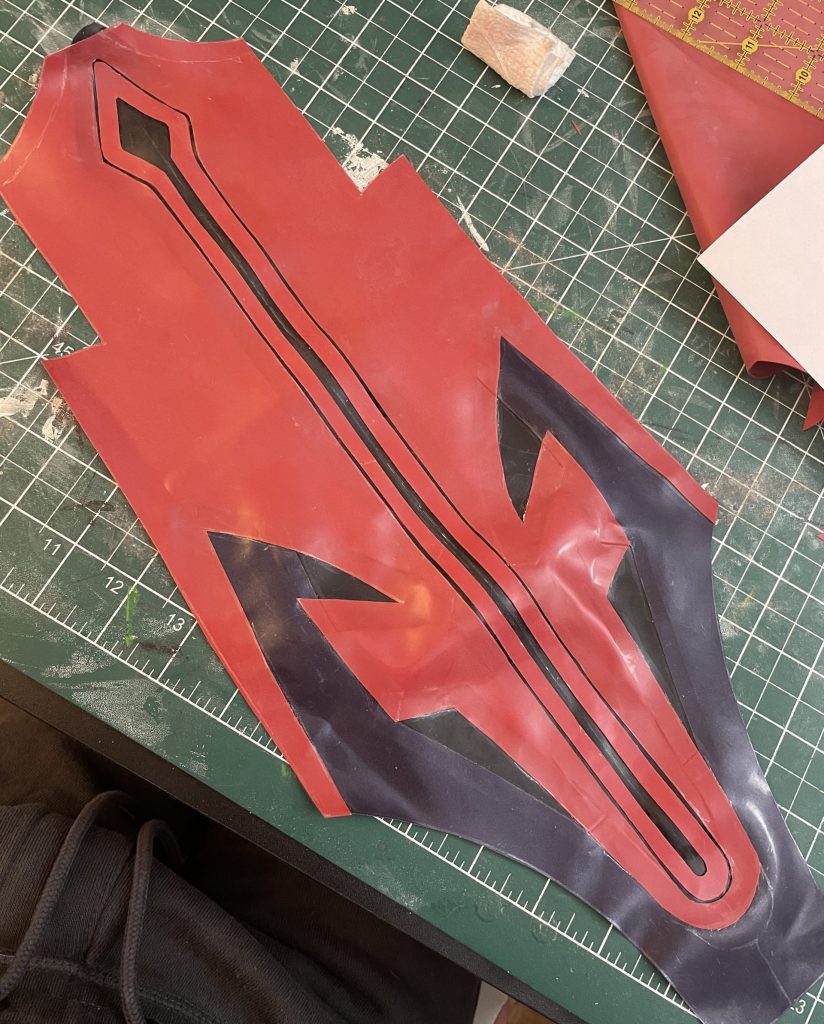
This is only the centre-front piece, before I added the side pieces on. Since I was working on some fiddly underlays, I didn’t want to have the side pieces flapping around.
The first thing I did on this piece was glue together the purple and black because of course that’s not designed to just be a single colour. Once that was on, I drew on where I had marked in the pattern that I wanted the overlay (I cut that bit out of the pattern, and then simply drew it on — and cut out the area inside of the thin black line you can see running down the centre.
Then I traced it out again, on a new piece of latex, and cut a new piece that was just slightly smaller, I think I marked out 2mm on the pattern, with the understanding that my pen marks, if I followed them, would make the actual cut of latex around 1mm smaller. Then I laminated that piece of latex to another piece of red latex, because I wanted that bit to be a bit thicker, I really wanted it to stand out — this works much the same way as just an overlay, I tend to laminate the piece onto a new sheet of latex, and then cut around it only after the lamination is done.
Then, inside that piece, I had to cut out the thicker channel, which I had also patterned out already, so I traced it out as well from the pattern, and then cut it very carefully with a small rotary cutter, punching out the ends with leather punches and a hammer.
Then I overlaid that onto a piece of black, marked the seam allowance to allow me to underlay it into the cutout I’d previously made, and then very carefully put the two together. This was a very fiddly seam, it took a lot of careful placing and stretching and doing over. But I think it looks phenomenal, so I think all of the stress was worth it.
Here’s what the front looks like from the inside, with all of the underlays:
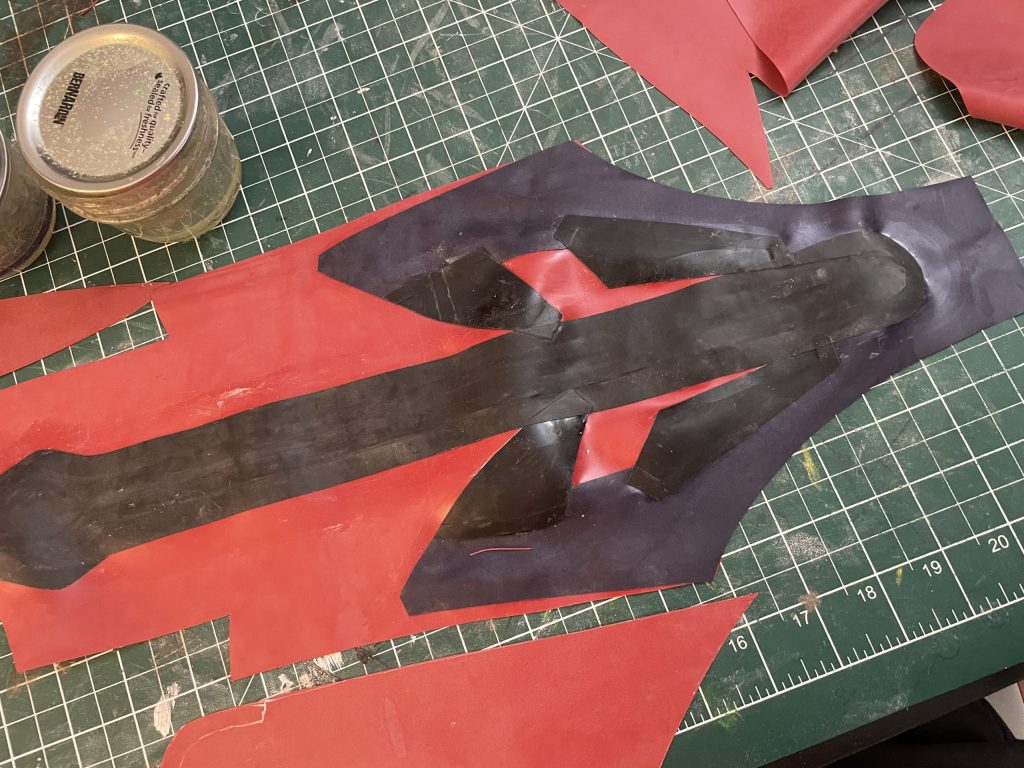
The next step was to put the side-front pieces on —
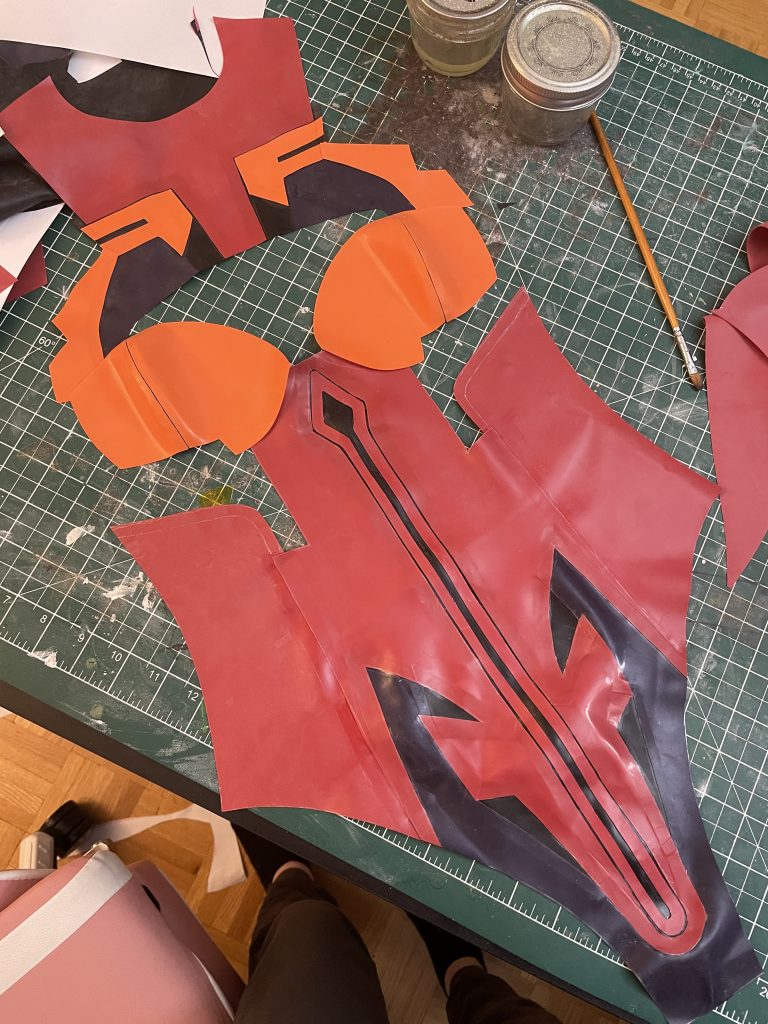
And here you can see it all laid out, sans the white.
Why sans the white pieces?
Well, two reasons. One, I didn’t have a ton of the white I wanted to use left, which is this gorgeous hand-poured, pure white latex sheeting (pure, white-white latex has been historically hard to get, and I had some left over from re-doing some of 2B earlier this year), so I had to carefully draft the sleeves still in order to make sure I had enough white, before I cut anything.
And two, I wanted to make sure all of the white was overlaid on top of everything else, but appear as one solid piece as much as possible itself.
(Also, please insert here that I did the back very much the same way as I did the front — I’ll go into a little more detail on this later, but apparently I didn’t actually document putting the back together? Whoops. It has a bottom purple and black underlay, and then the side-back seams, and I also inlaid the invisible zipper down the back at this point.)
Good news: I did wind up with just barely enough white, but I had to cut the sleeve into a couple of different pieces that I didn’t necessarily want.
That’s ok though because these sleeves look baller.
This is a sleeve pattern I have but I don’t always use, because I don’t love the two-piece sleeve, with a seam under the arm as well as over the arm to the shoulder — however, it fits really beautifully in the shoulder because the seam there is curved instead of just straight.
Here are the two separate pieces of the sleeve, after I’ve attached all of the colour-blocking:
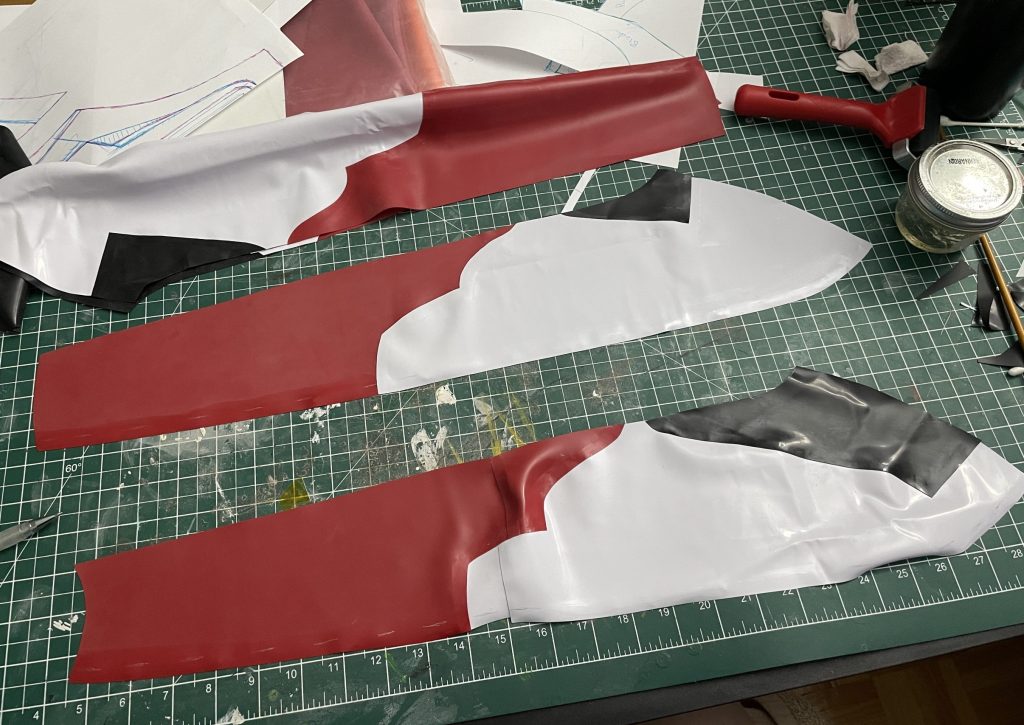
The closet pice is the back of the arm, which has a curved seam to put give in for the elbow, to make bending the arm in skin-tight rubber slightly more comfortable! Again, not a seam I generally put in, but it actually gave me some additional wiggle room on the white since I was running so low, so I left it.
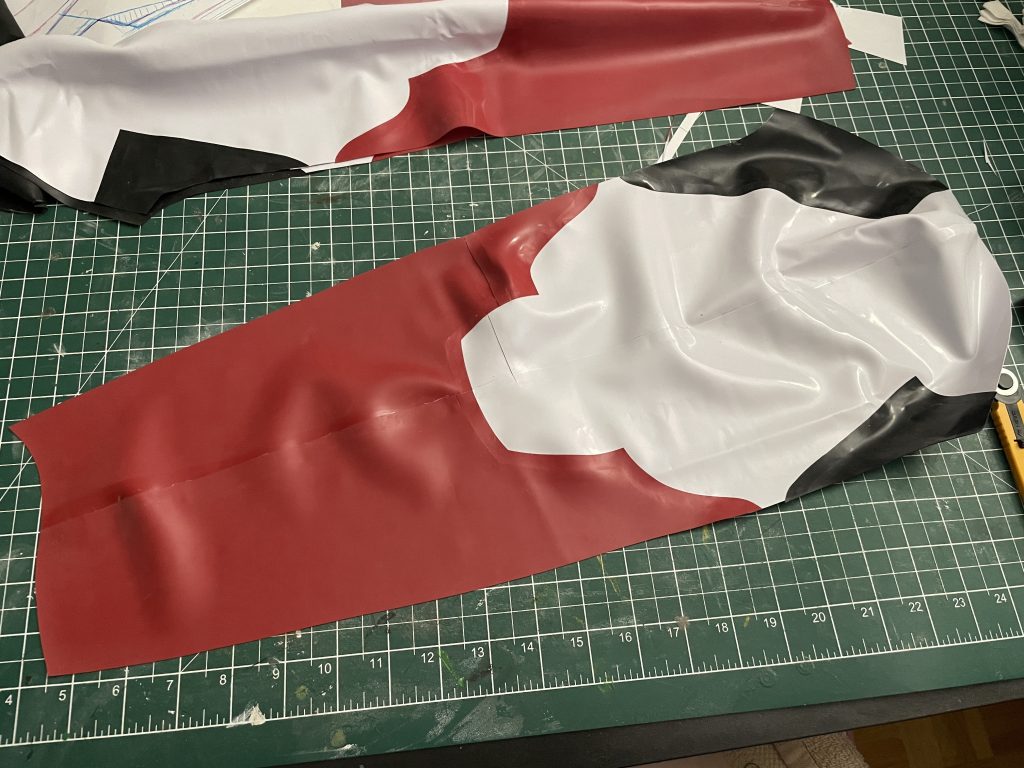
Here the sleeve is with the outside seam done — I don’t do the under-arm sleeve on my latex until I close up the side-seam, usually. It’s much easier to install a sleeve flat than it is curved.
Again, I put this together with the part that was the most important to match first, which is the top of that red piec, then worked down to the wrist, and up to the shoulder separately.
And here are the sleeves:
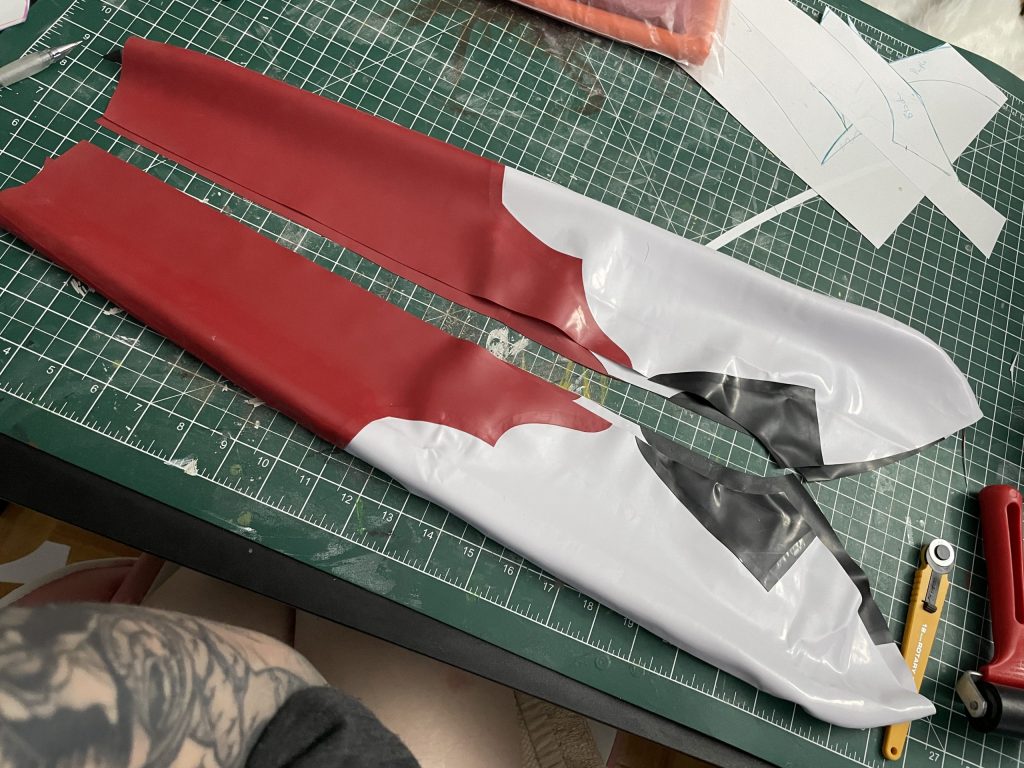
Now, before I can attach the sleeves and then close them up, I have to have the rest of the bodysuit done and ready to be closed at the side seam, so it was time to finish all the rest of the white on the bodysuit.
If you pop back up and look at my reference, some of the white seems to be an unbroken harness sort of piece, that stands out from th rest of the suit. I wanted to try and emulate that, so I did something a little different:
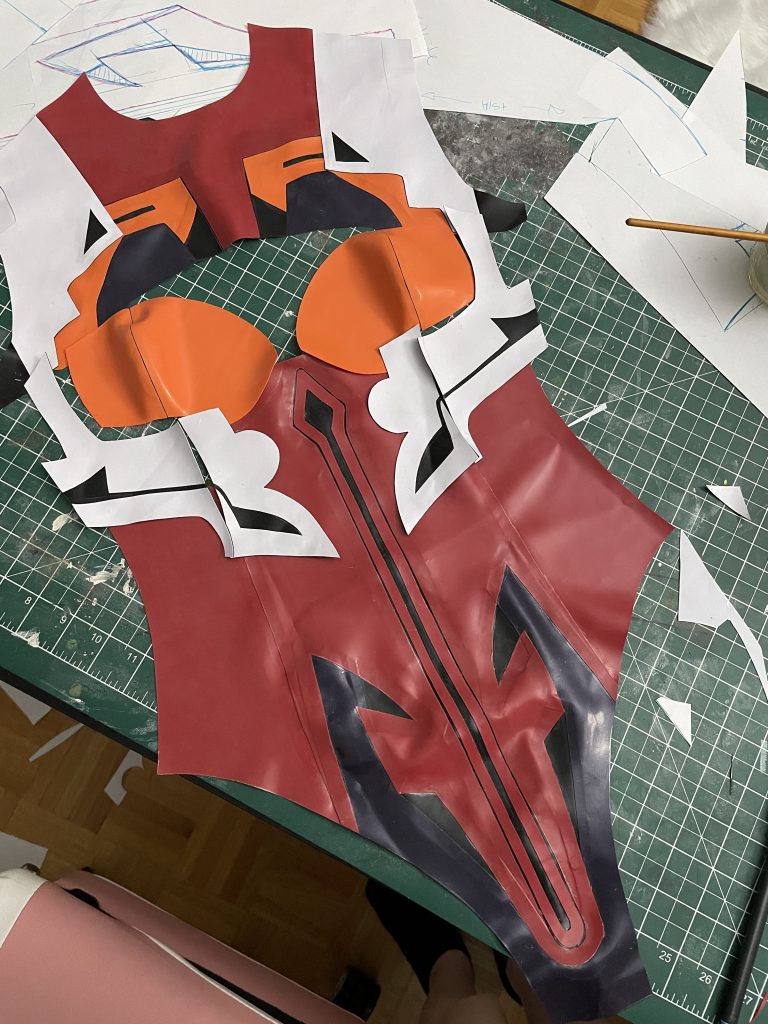
Here it is, all laid out, but not 100% put together yet, so I can explain, a little, what’s going on here.
The white pieces that belong to this faux-harness are all double-thick, because they’ve been laminated to black latex. Then any underlays you see have been cut out of that double-thick latex, to really give them some depth. Above, you can see that the shrug bit is already seamed on top of everything else.
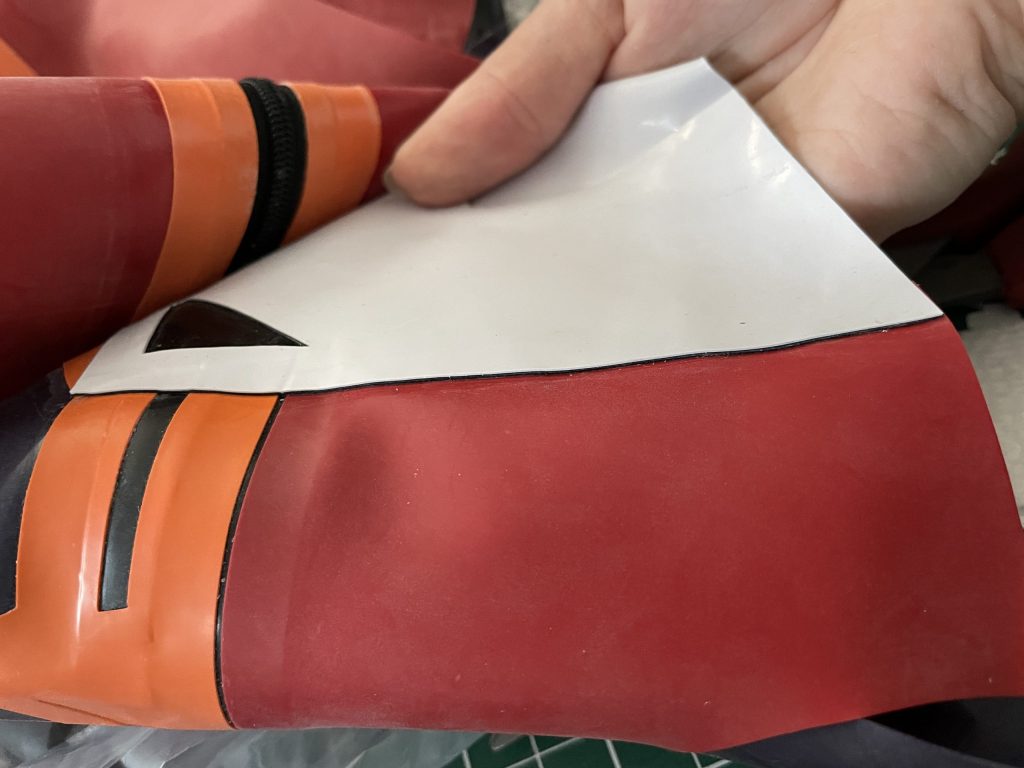
Here’s a look at the edge of that double-thick latex. I liked that it was on white, the little peek of black gave it a little bit of a graphic quality!
But then I had to put together the under-bust pieces, which have a seam in them, on a place where I don’t really want a seam, so I decided to see if I could get rid of that seam, visually.
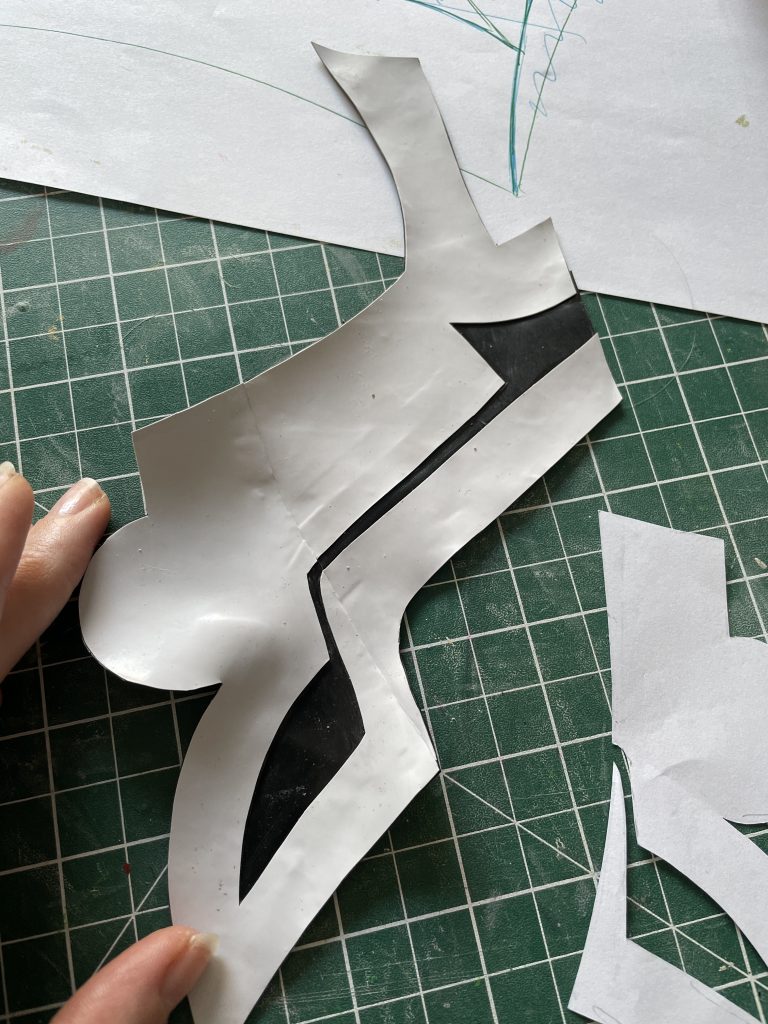
Turns out, I can! This is an “invisible” seam, which is accomplished the same way I do a thin underlay, but without leaving any space, and also applying glue to the edge of the double-thick latex and ensuring that adheres as well. If that sounds complicated, don’t worry, I did take pictures when I put together the side seams.
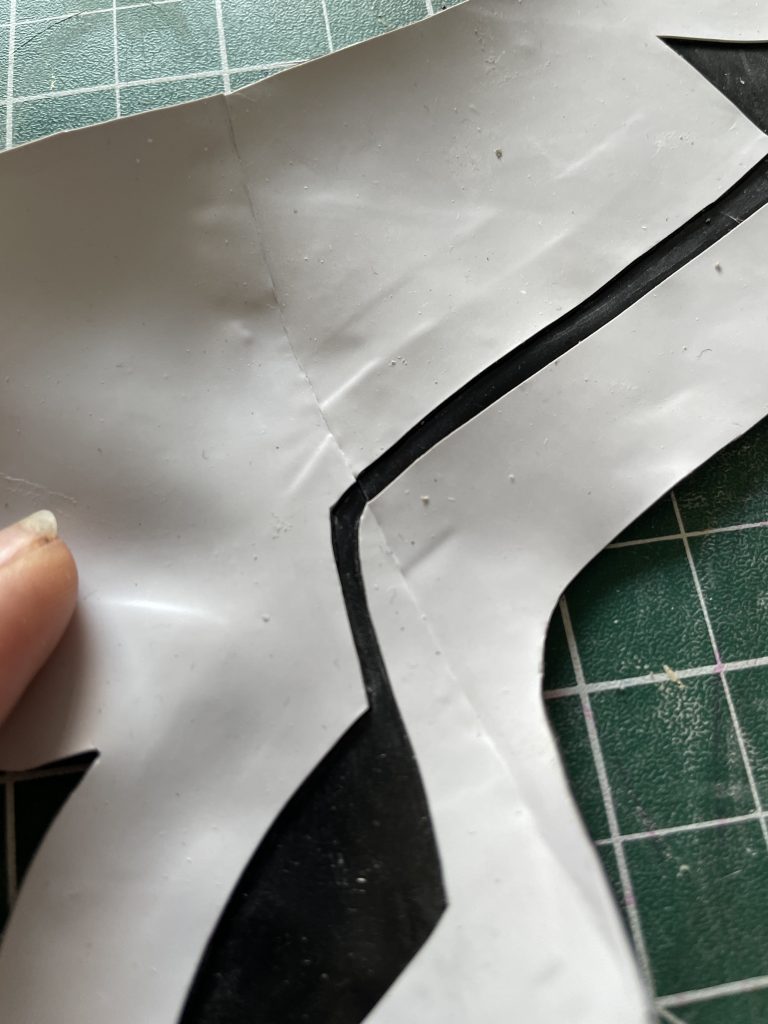
They don’t necessarily stand up to close-close scrutiny, but they disappear pretty quickly at a distance!
I did one more layer of underlay after this, because I wanted a little more texture.
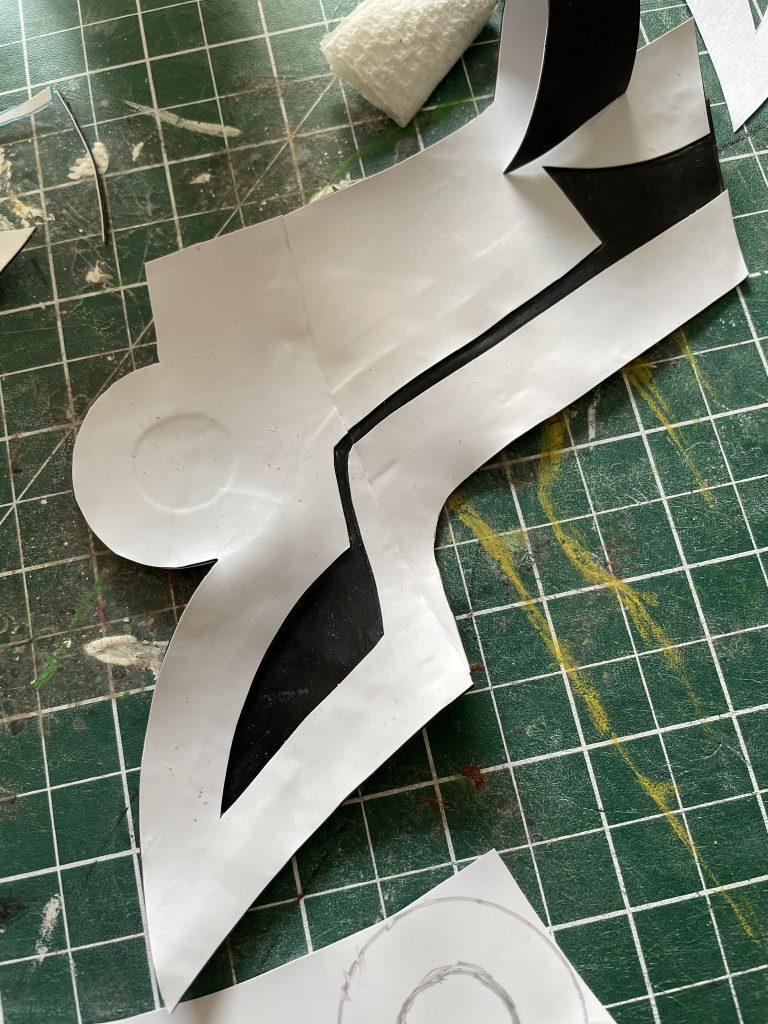
Can you see the little circle indent now? That was accomplished by making a little circle of latex, with another marked inside, cutting both of those out, laminating it to another piece of black, and then attaching it to the back of this white piece, gently pushing the white down into the little cutout for this look.
From there, I needed to put the white down onto the red front pieces, and attach the bra cups:
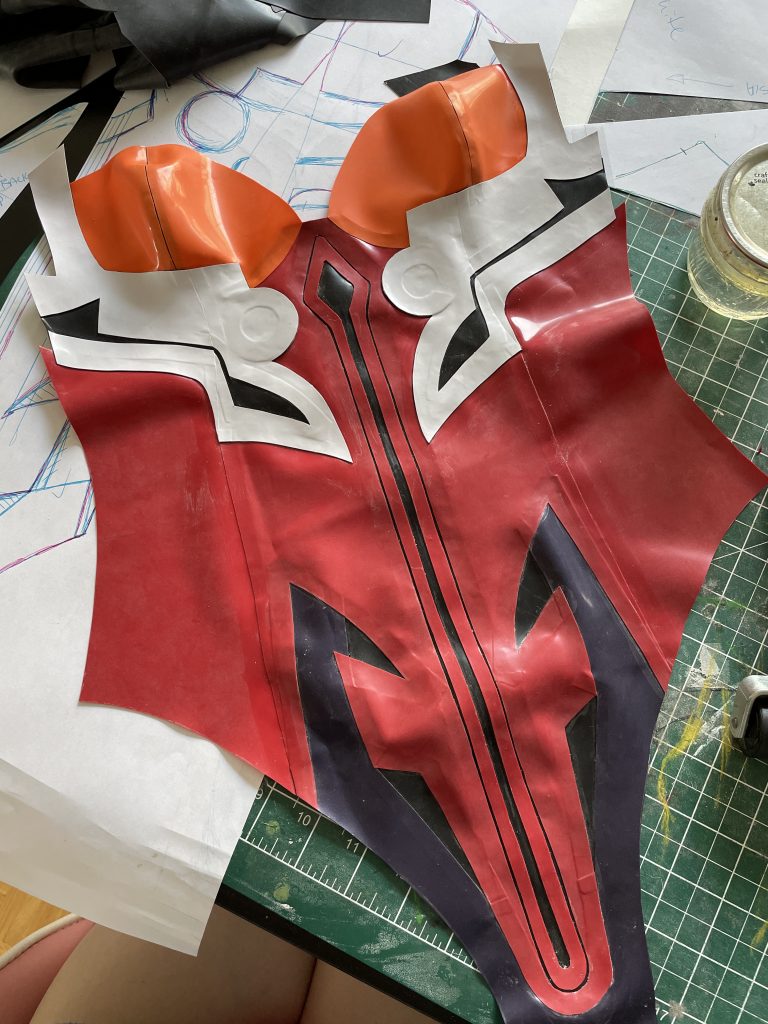
This was a little tricky. What I wound up doing was attaching the white to the red, but leaving some space to get the bra cup underneath it at the point just above the texture underlay where they all meet; then I attached the bra cups to the red, including the area I had left un-adhered from the white. Then I attached the white to the bra cup.
From there, I attached the white pieces on the back, which I also managed not to document. The next step was to do the shoulder seam, which was also done with those “invisible” seams.
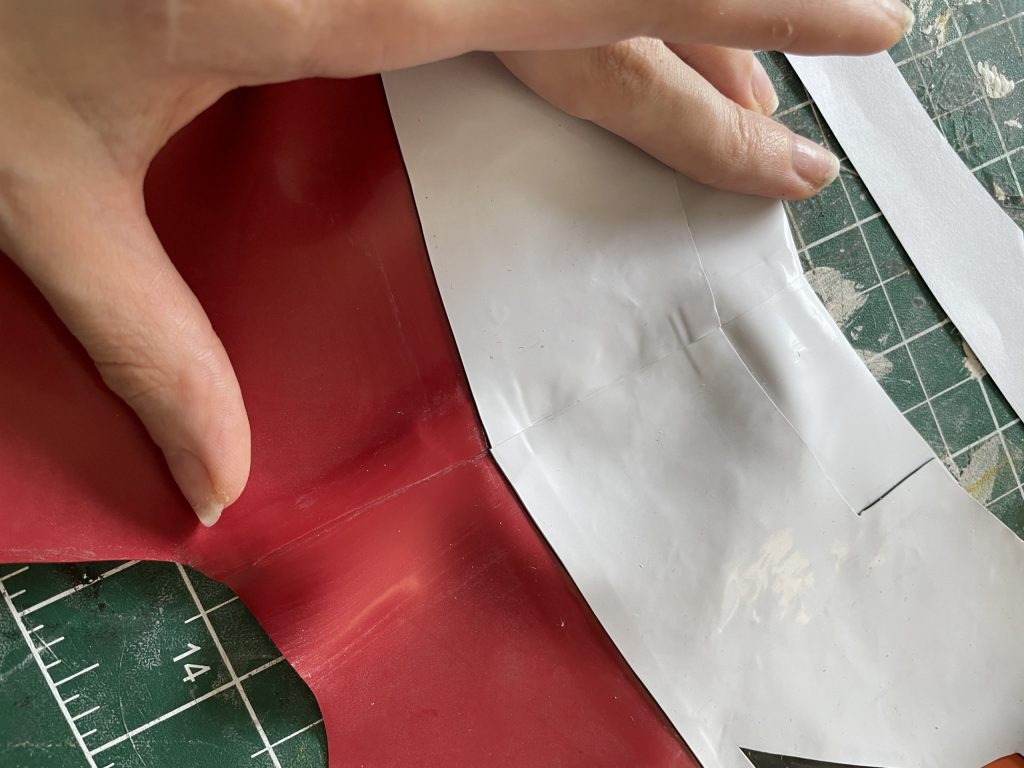
Here’s what that looked like, you can see how the white sticks out from the pieces “under” it, as well as how the seam is less visible.
Have I documented that yet, though? Of course not! I had enough done to get the sleeves on —
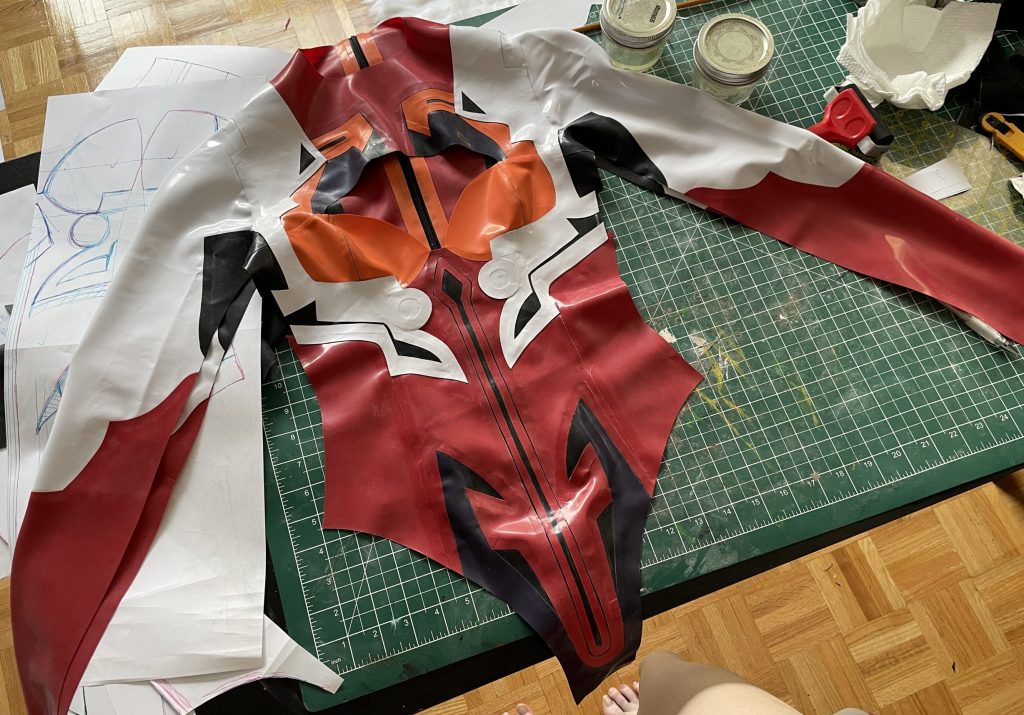
Here we go! Sleeves on, but no collar — I also don’t have the crotch seam together, I find that a very easy seam to do last in the case of a bodysuit.
So, the next bit is the side seam, and I finally documented my invisible seams.
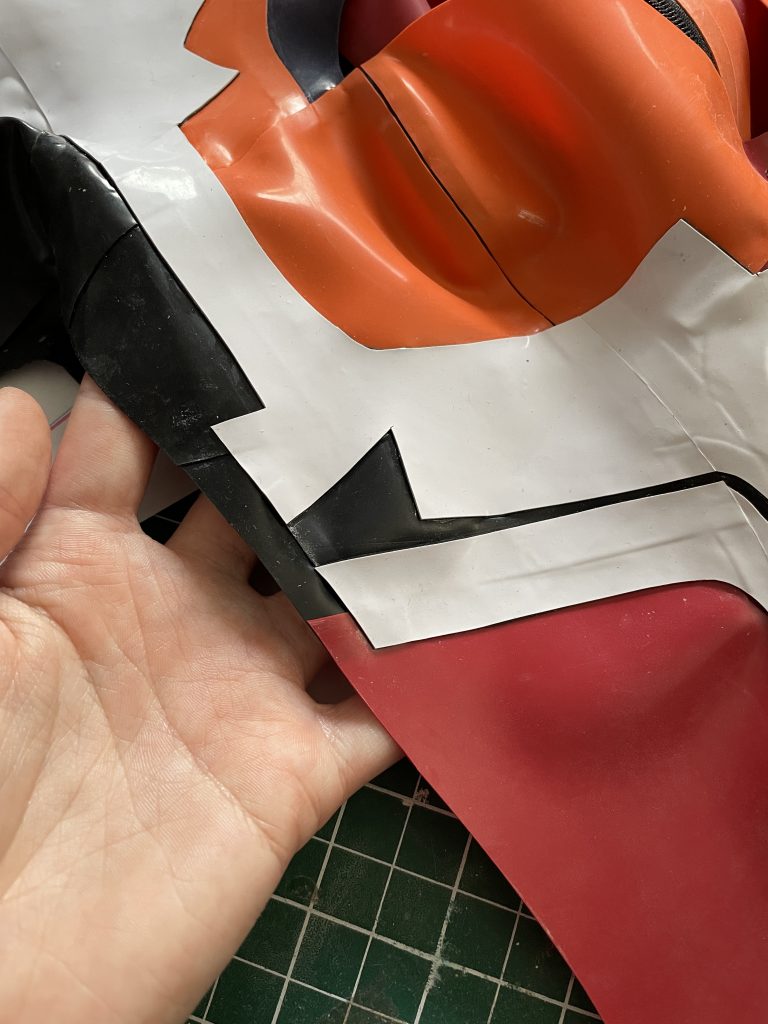
Here’s the “underlay” piece installed. Really, it makes the seam operate exactly like the rest of the seam, you just have to be very aware that you’re getting the pieces close enough for the invisible part that you’ll be able to push them together.
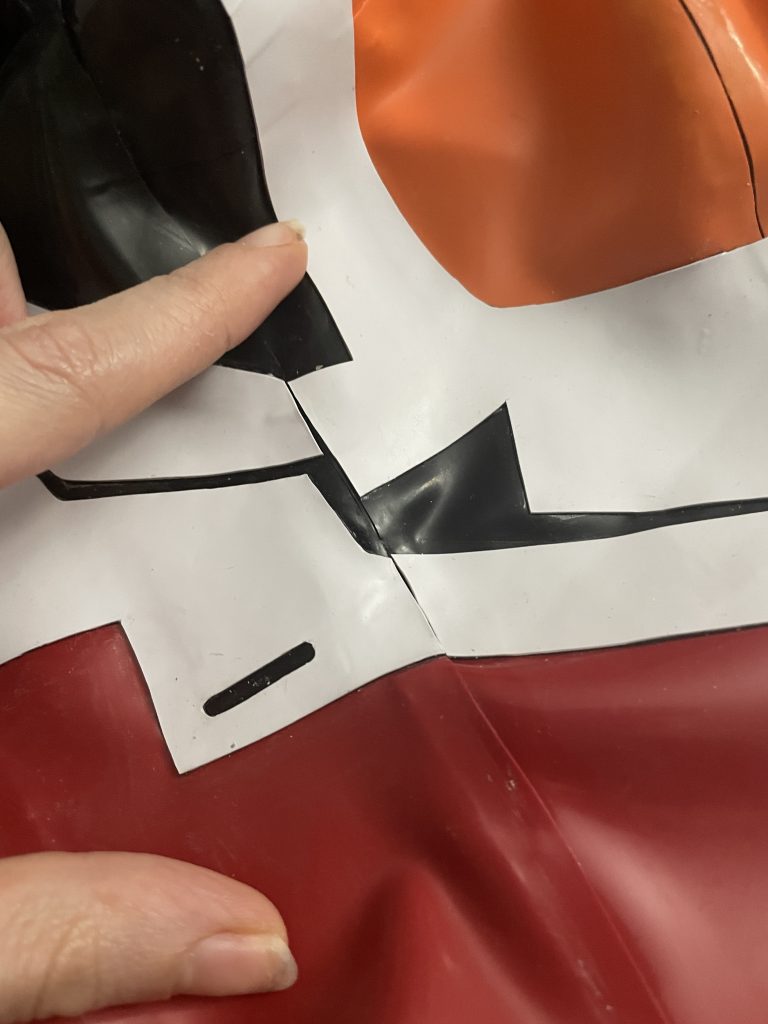
Here’s the seam together, but without the invisible seam halves glued together properly yet. I cleaned these again with a cotton swab, and then applied glue, waited for it to dry, and then just gently pressed these two pieces together.
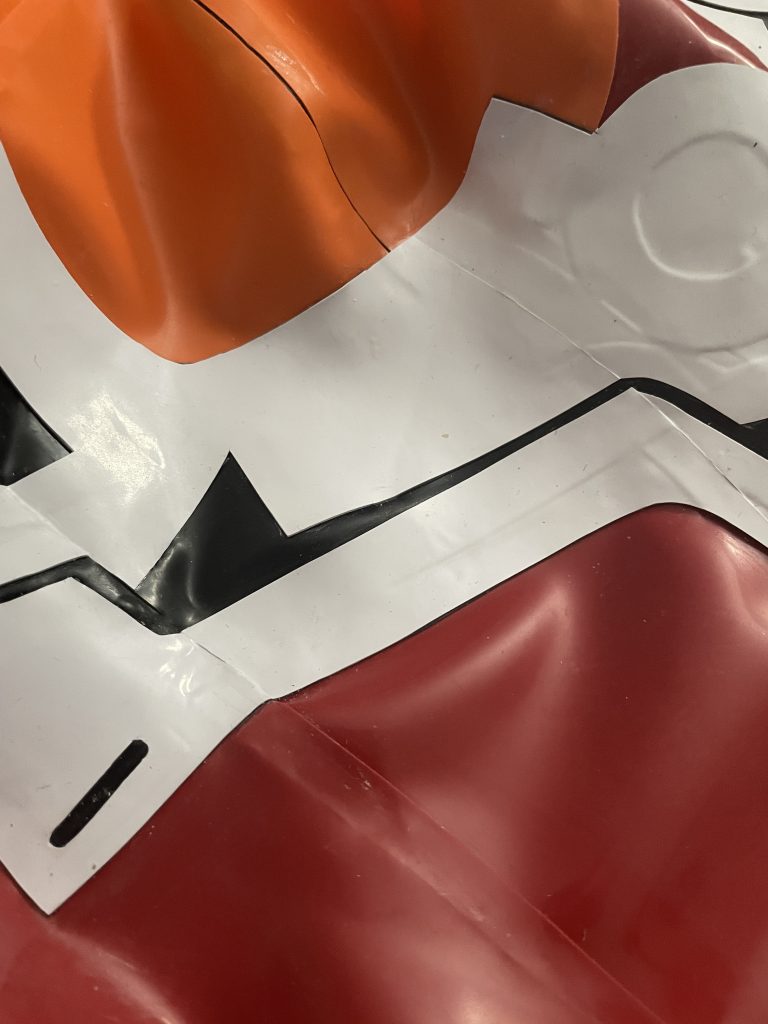
I worked from this invisible seam first to make sure everything matched, then worked down to the hip, up to the armpit, and then down the arm all in one go.
The last little bit to do on this was to put in the blue pieces — which, honestly, are the main thing I’d like to replace, I’d like to cast something with some 3D curve for the little pieces. … Ok, I’d actually like to do that for a LOT of the pieces, but these are achievable in the near future. 😂
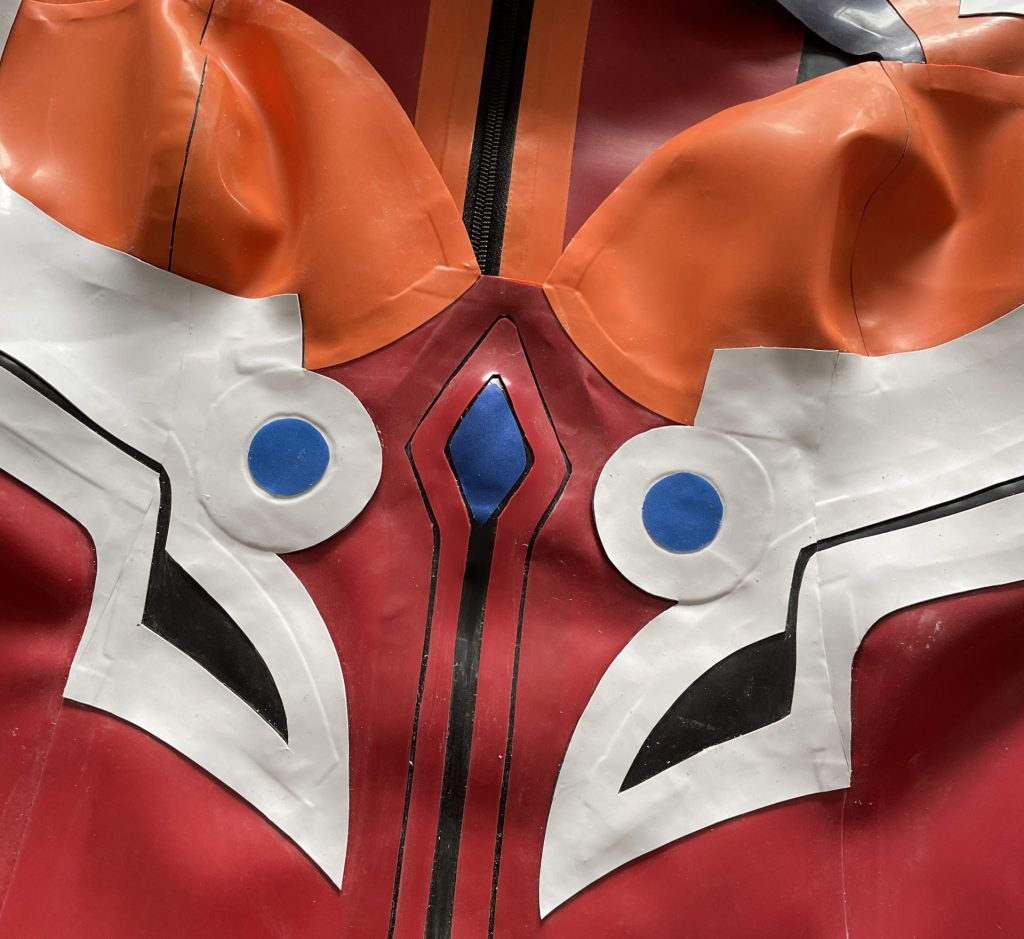
Then I tried it on, was happy with the fit, and went ahead to make the collar:
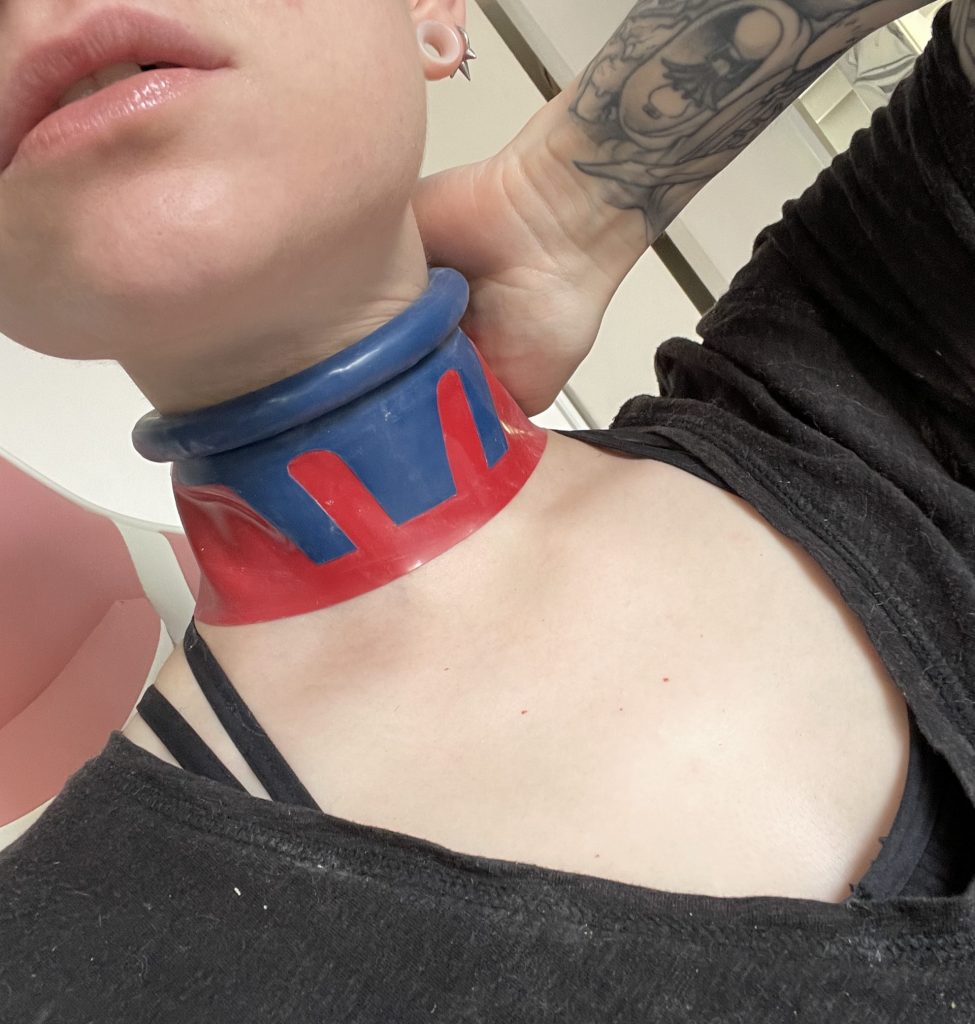
Here’s a look at the collar being loosely held up to my neck before I installed it, because I was busy texting everyone who knew I was building this, being excited that it worked.
This is a simple one piece collar — essentially, you figure out how tall you want your collar to be, and how long, mark that out, curve up the ends, and bam you have a collar. But this also has this thick hem on the top, which might make slightly more sense when you see it from the side:
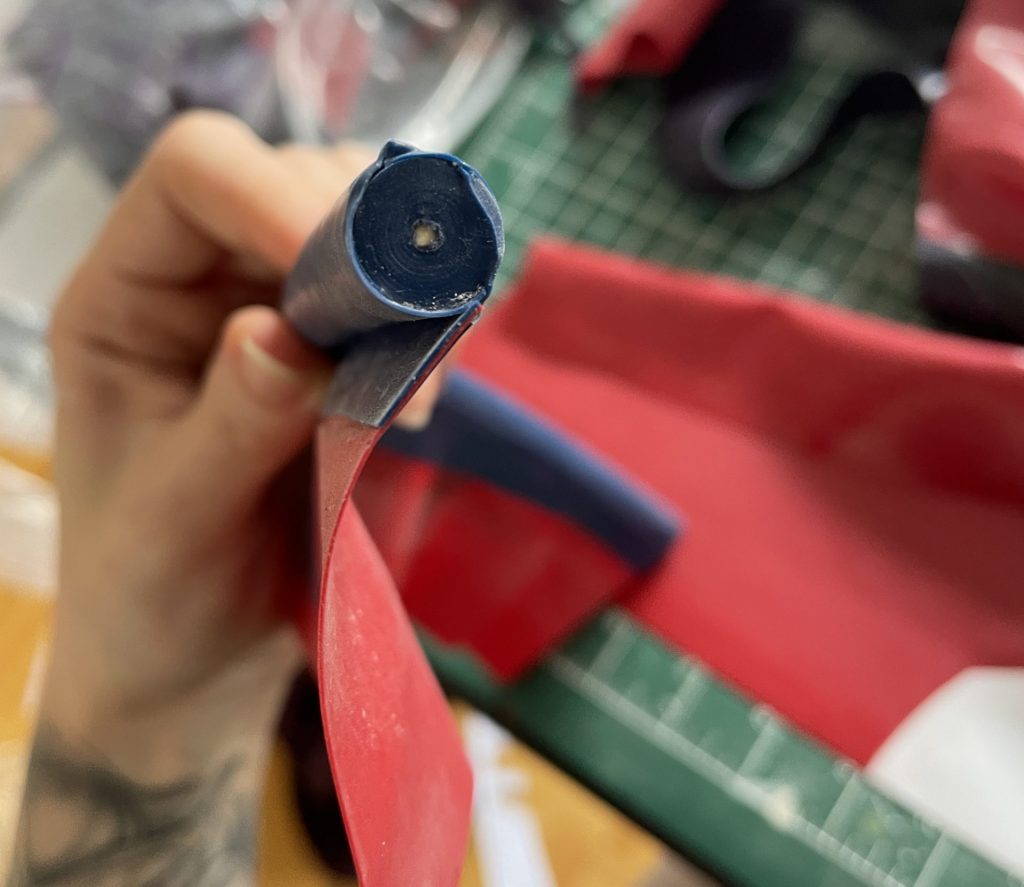
This is latex wrapped around a core of rubberized round elastic. (Rubberized in the same way one would do a zipper; paint the elastic with liquid latex, hang to dry, apply glue, wait to dry, glue to latex as normal. See my [Panther Writeup] for more info on that one.)
Essentially, I had a sheet of latex, which I cleaned on both sides, thoroughly. Then I applied glue to one side and let it dry.
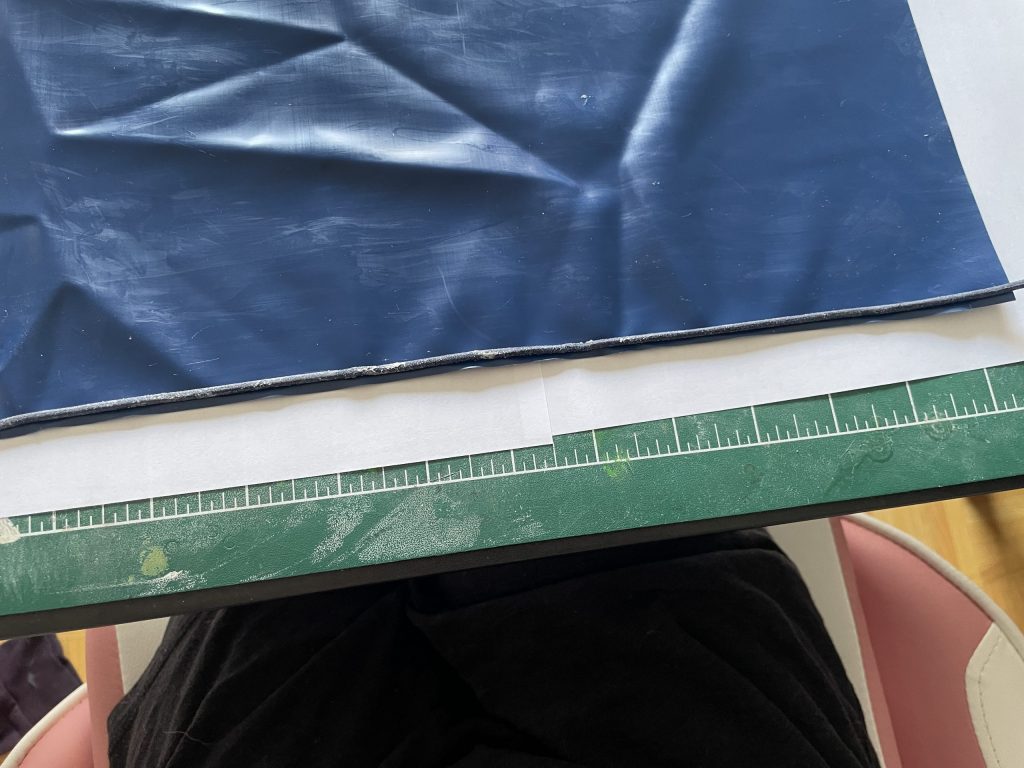
Then I put the elastic down, and started to roll it all up, very carefully, and stopping pretty frequently to lance air bubbles.
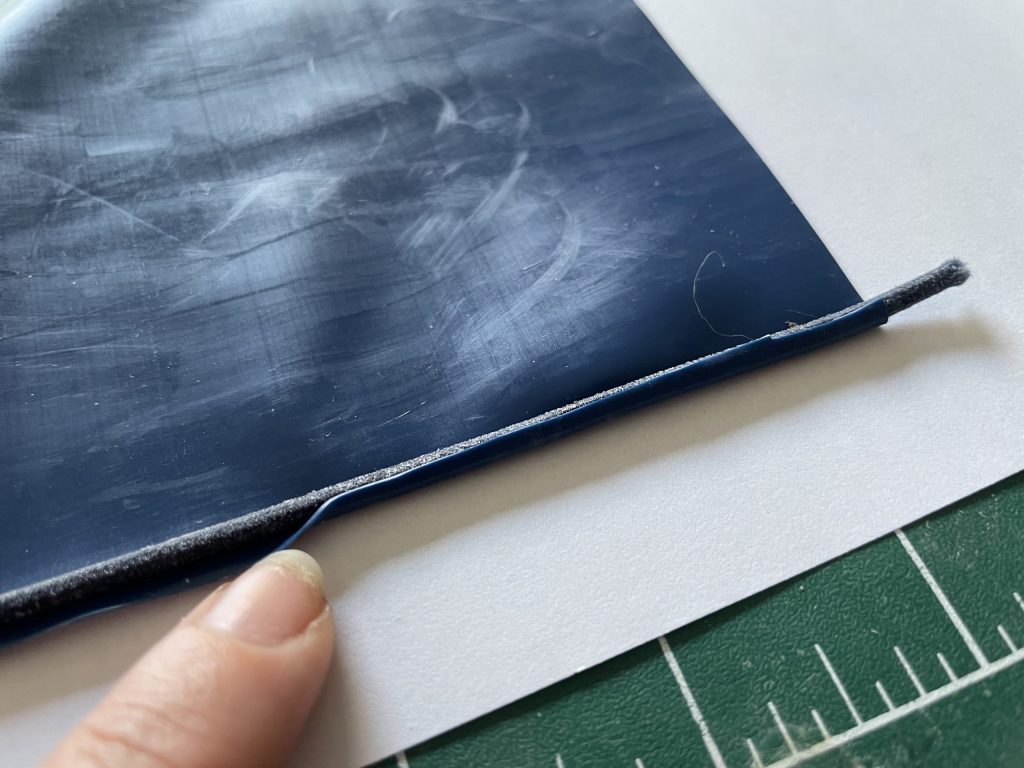
Then I glued the collar into place —
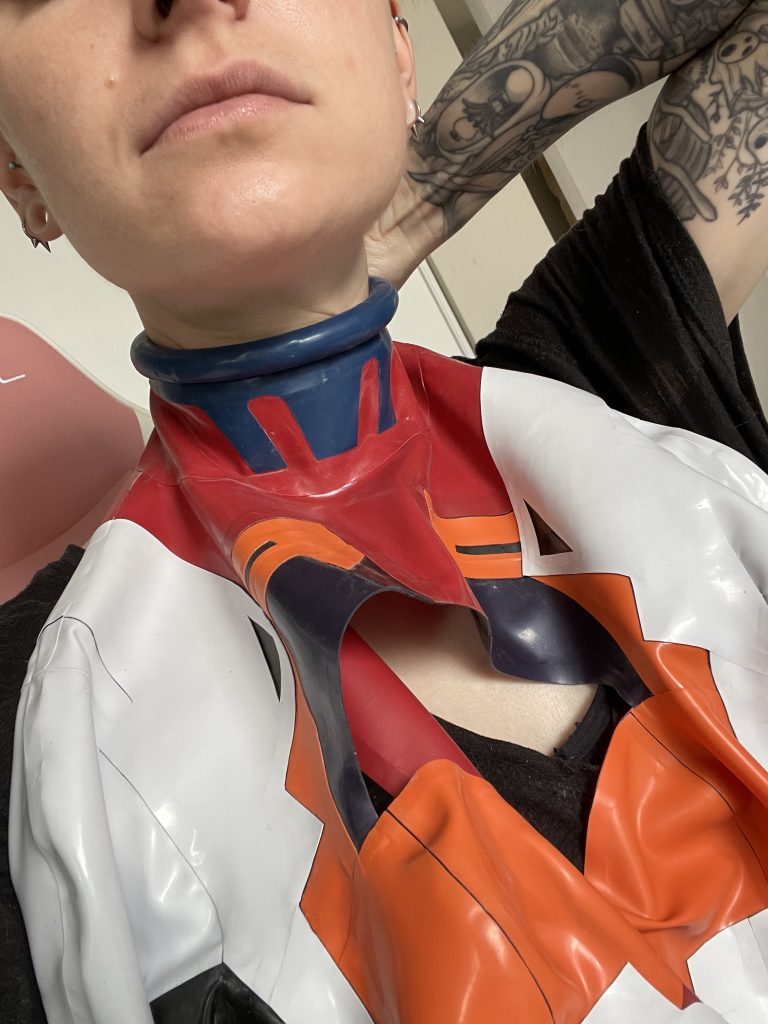
Another picture from my texts because I was simply thrilled.
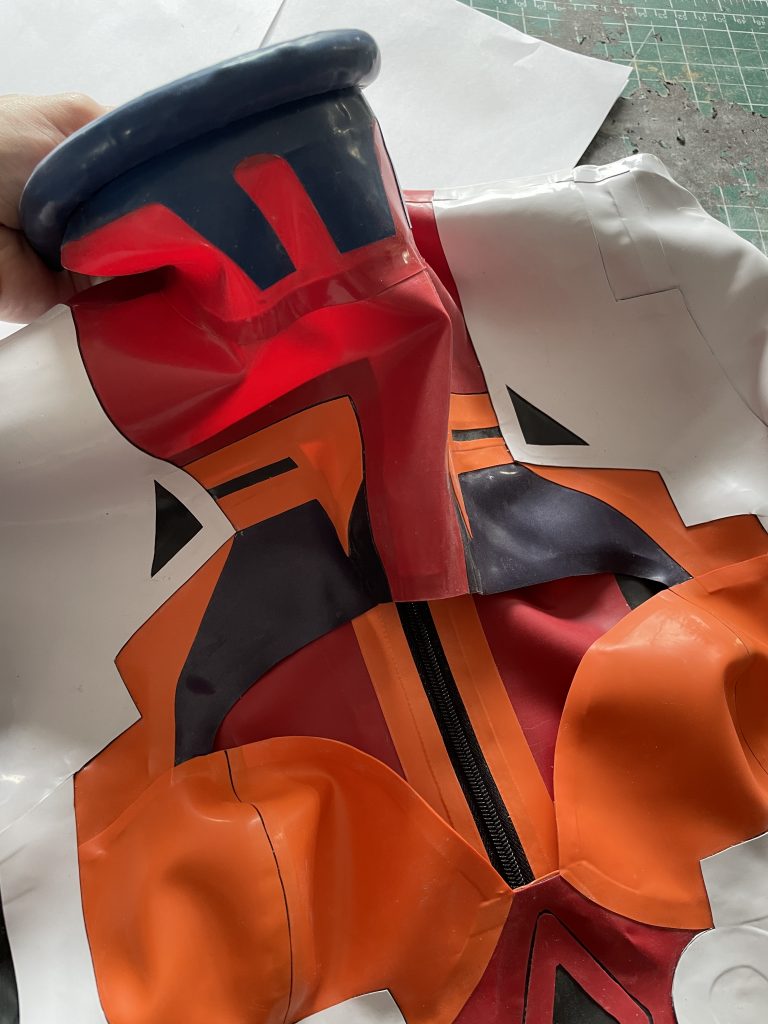
Installing the collar also involved installing the zipper in the back, and finishing the inside of the zipper off with strips of latex to seal it inside.
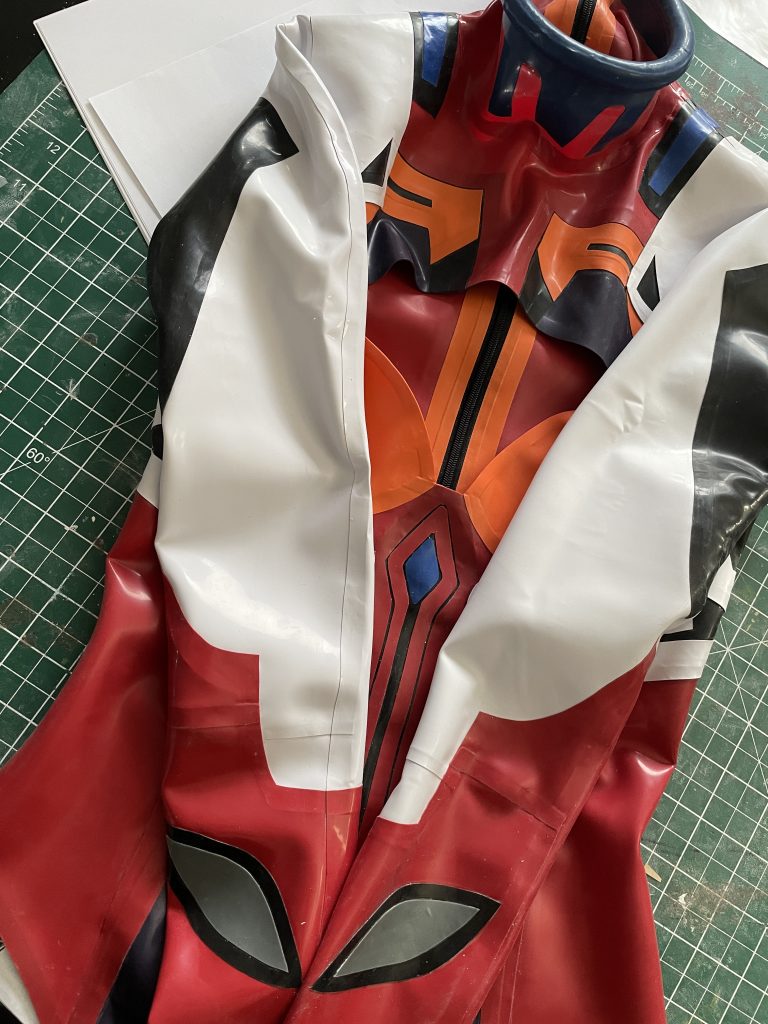
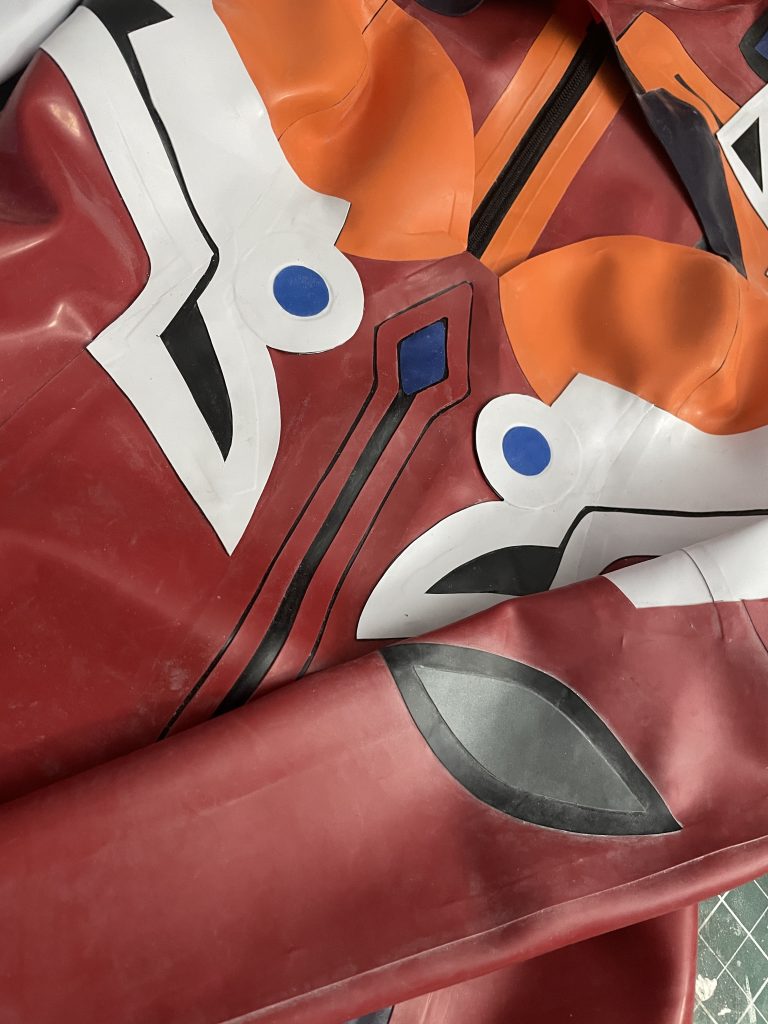
Then the last thing I did was this little overlay on the arm that I almost forgot about, the little overlays on the shoulders next to the collar, and the white bits on the hip — which are, again, double-thick!
I also made gloves — which is, in itself, a whole-ass process, which I have already written about, actually! [Click here for my Glove Tutorial]!
The only difference with these gloves is that I had to glue the red and black that comprised the palm first, then stuck it to solid red to match and cut it out.
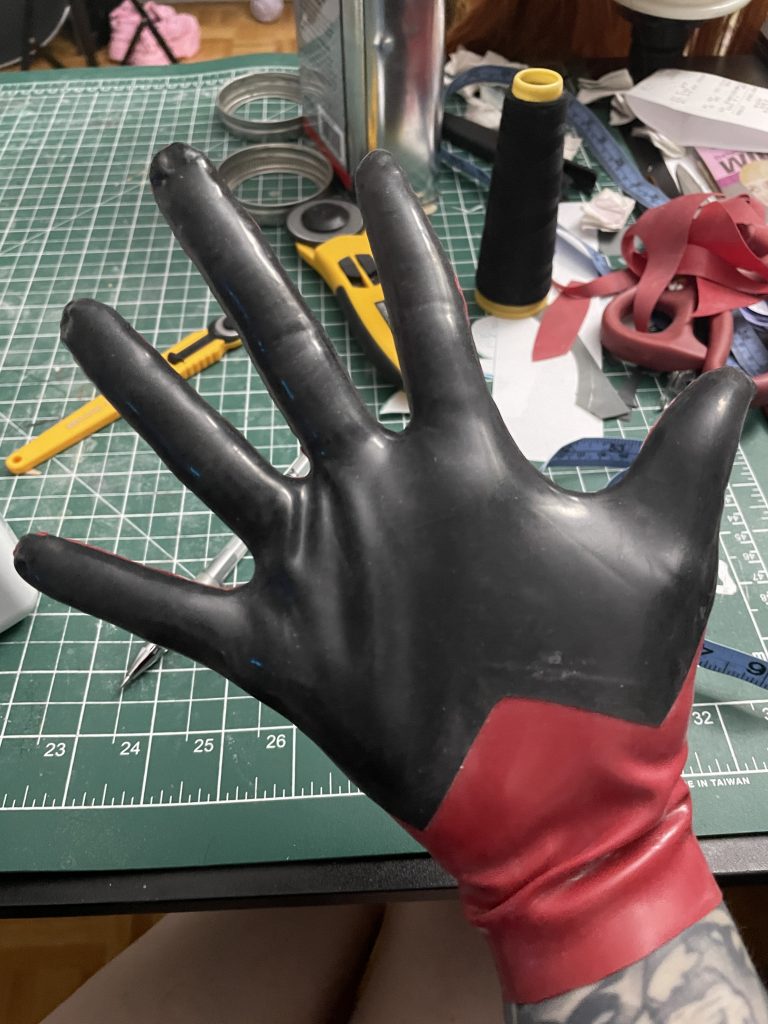
I also added an underlay on the back, and an underlaid black “hem” — because if you look on her bodysuit, she does have a thin black underlay there on the figure.
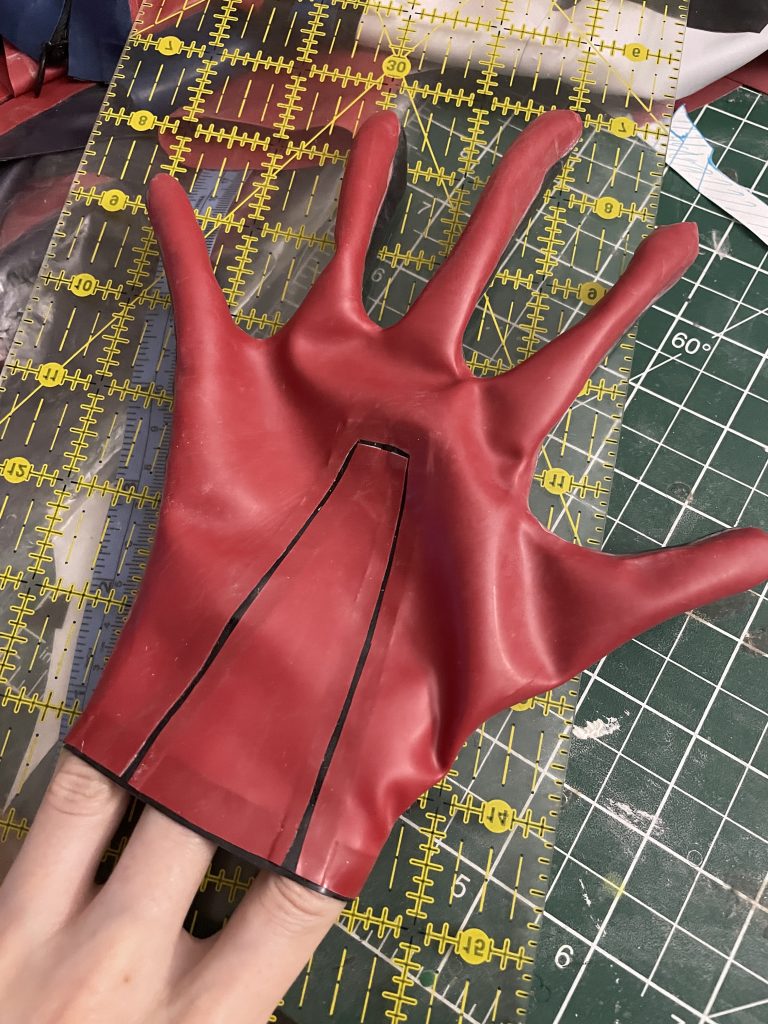
I left the gloves separate, though, because I wanted to be able to dress everything without gloves on, and take them off to do important things like fix my wig, eat, and use my phone.
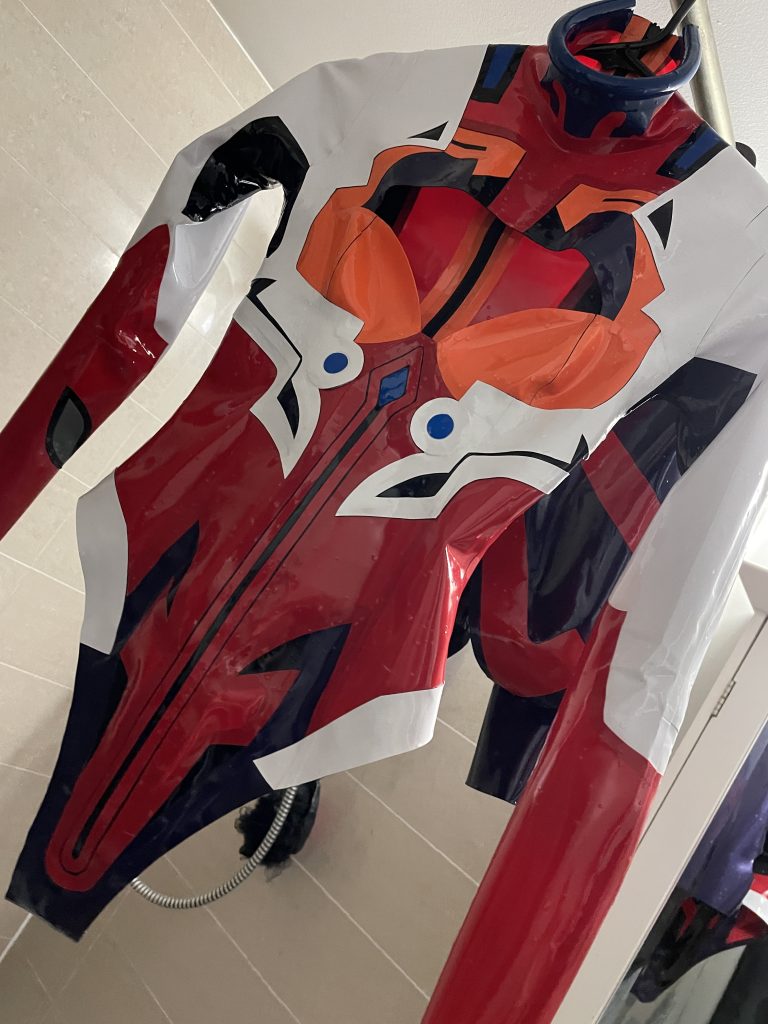
Here she is hanging to dry the night before, and then —
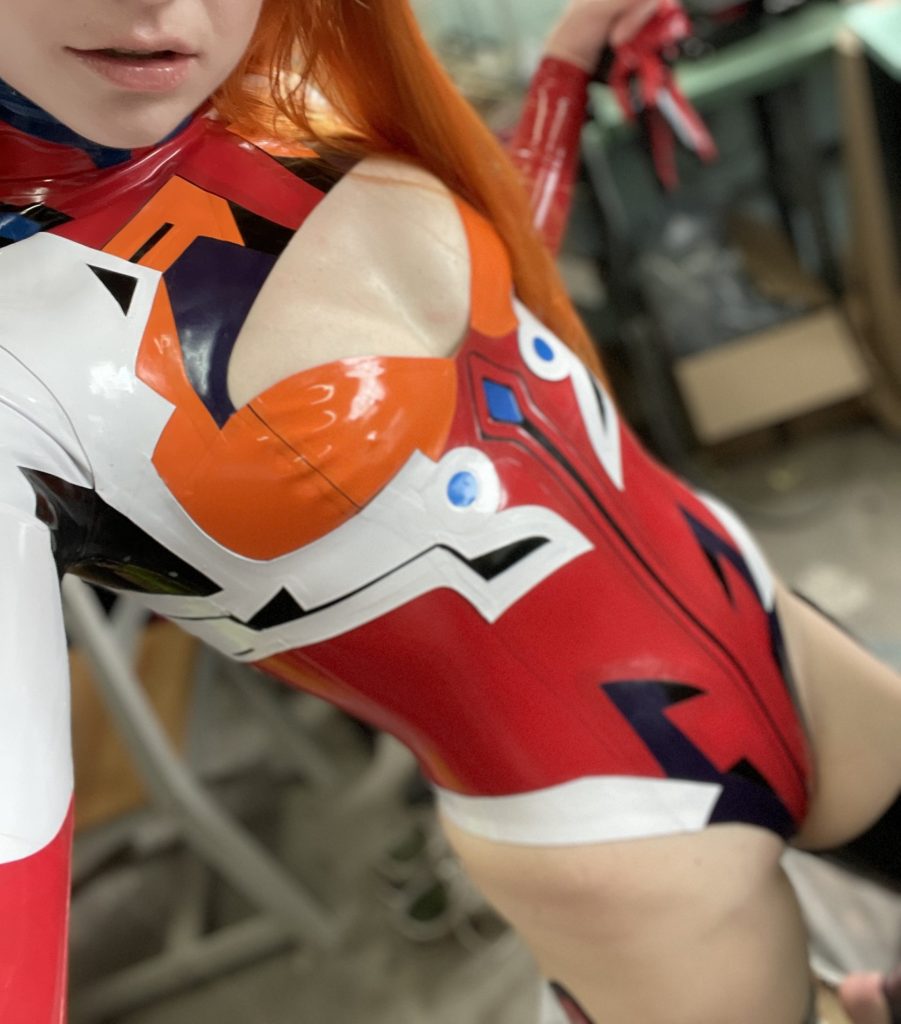
Here she is on for the first time! (I fixed how the bra cup was sitting on me, but only after the selfie, dammit. 😂)
And that’s it for this one! I didn’t 100% anticipate wanting to do a writeup for this one, so there aren’t quite as many photos as I usually take, but there are quite a few! So I hope I managed to explain anything I didn’t have photos of appropriately.
Thanks for reading!


1 Comment
I am truly impressed with the level of engineering you put into this project – thank you for this peek into your brain!