
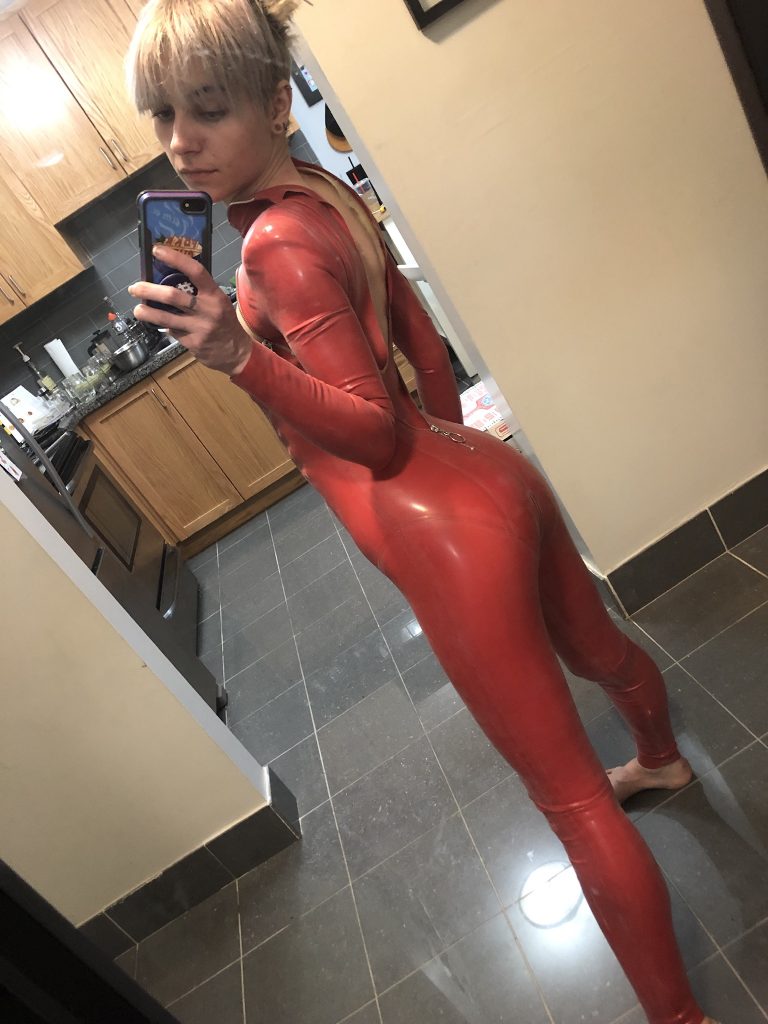
If you’re not familiar with Panther, she’s from Persona 5, which is a very good JRPG that you should definitely play if you’re at all into JRPGs. At least in part because Panther’s the first of three characters (possibly more) that I’m doing from P5.
The TL;DR for the game is that you go into people’s Mind Palace’s (these play as Dungeons) and defeat the monstrous versions of themselves and others that live inside of their warped perceptions, and in doing so cause them to change for the better. It’s bonkers.
Your main characters wear their Persona outfits while in the mind palaces, and Panther is Ann Takamaki’s persona outfit. Which, fun easter egg, reads as her “Red Latex” outfit, in the menu. So the latex is actually cannon in this one!
The Persona outfits only exist in their minds, and this maybe actually makes a lot of sense because Ann’s outfit is INSANE. Let me tell you, whoever designed this has a tenuous understanding of how zippers work at best.
Here’s the Reference:
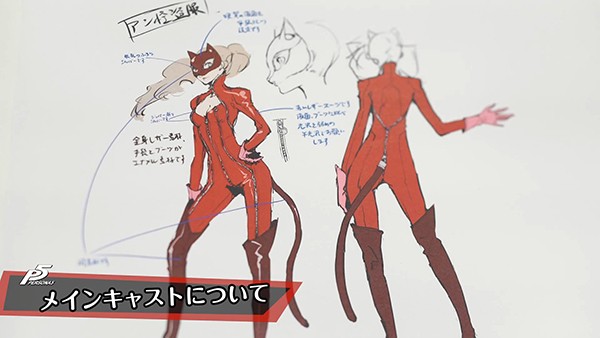
This is one of many references, to be honest, but it is the main one I used.
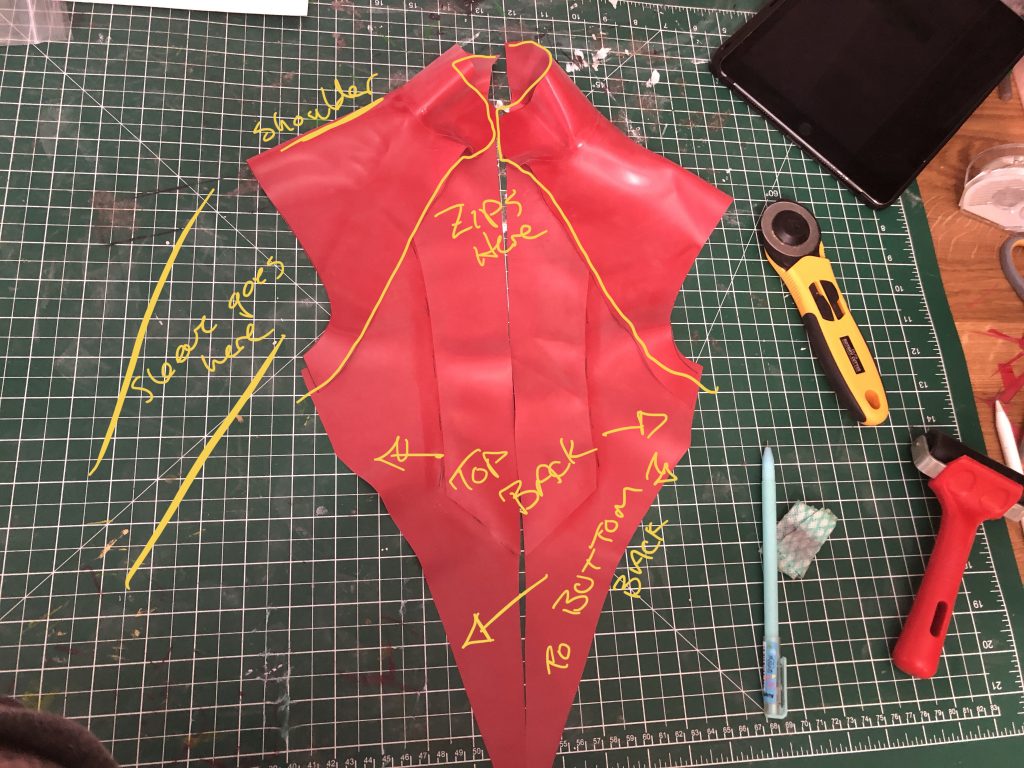
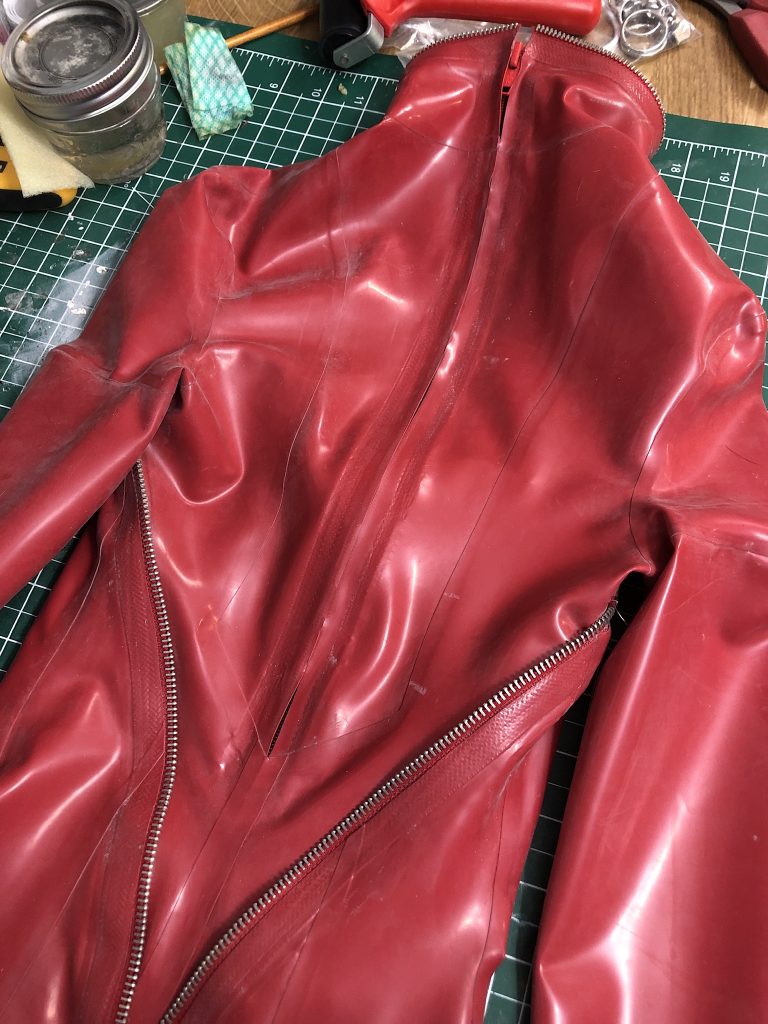
See the Neck Zipper? This is what I started affectionately referring to as Hell Zipper as I was working on it.
It goes around the top of the collar, meets at the throat, then splits again, meets up with another zipper under the arm, and then continues around to the small of the back. Which is a problem, because zippers just … don’t work that way, and stay functional.

Here’s a better look at the front of the neck. I wanted this bit to be as streamlined as possible, so I did it exactly as it shows here; the zipper is separate, the zipper meets and there is a zipper pull, and then the zipper separates again. Which means that the neck zipper is not functional.
This was my main problem with Panther for about a week, before I started pattern drafting her. I had to fix that problem before I could start actually making her.
In the end, I decided the easiest method for me both dressing and pattern drafting was easiest; I swapped a couple seams around and just put a hidden zipper in the back. It’s honestly not ideal, I would have loved to figure out a better way. But I wound up being on a three-week time crunch suddenly, and I went with it.
So! The Pattern!
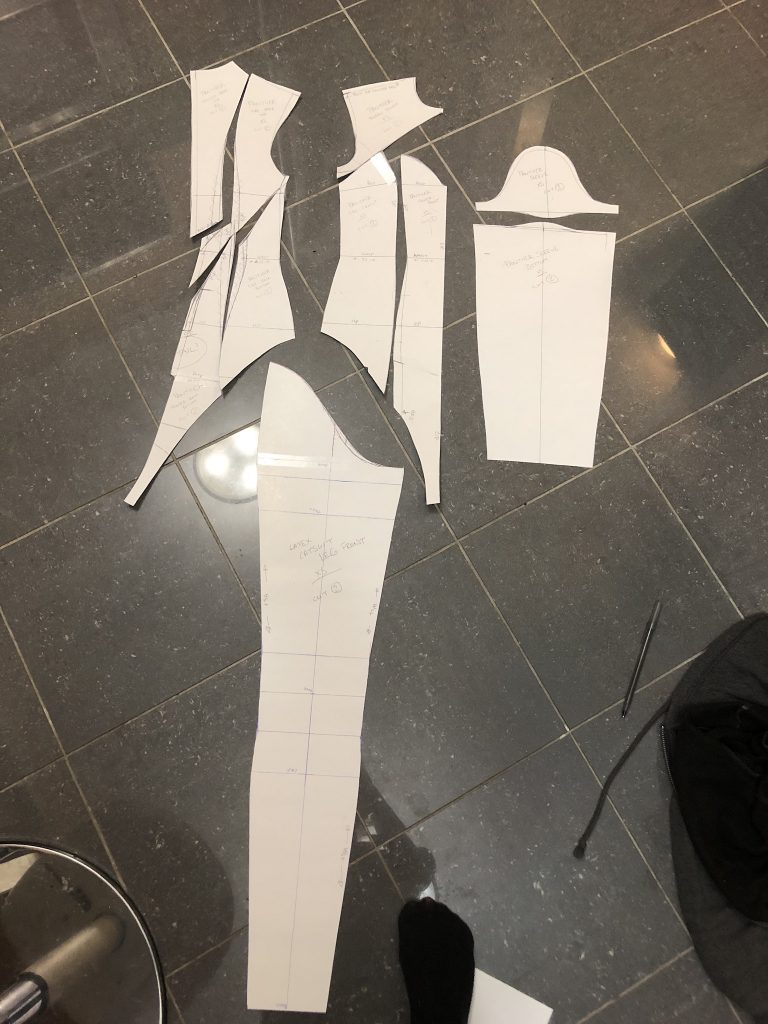
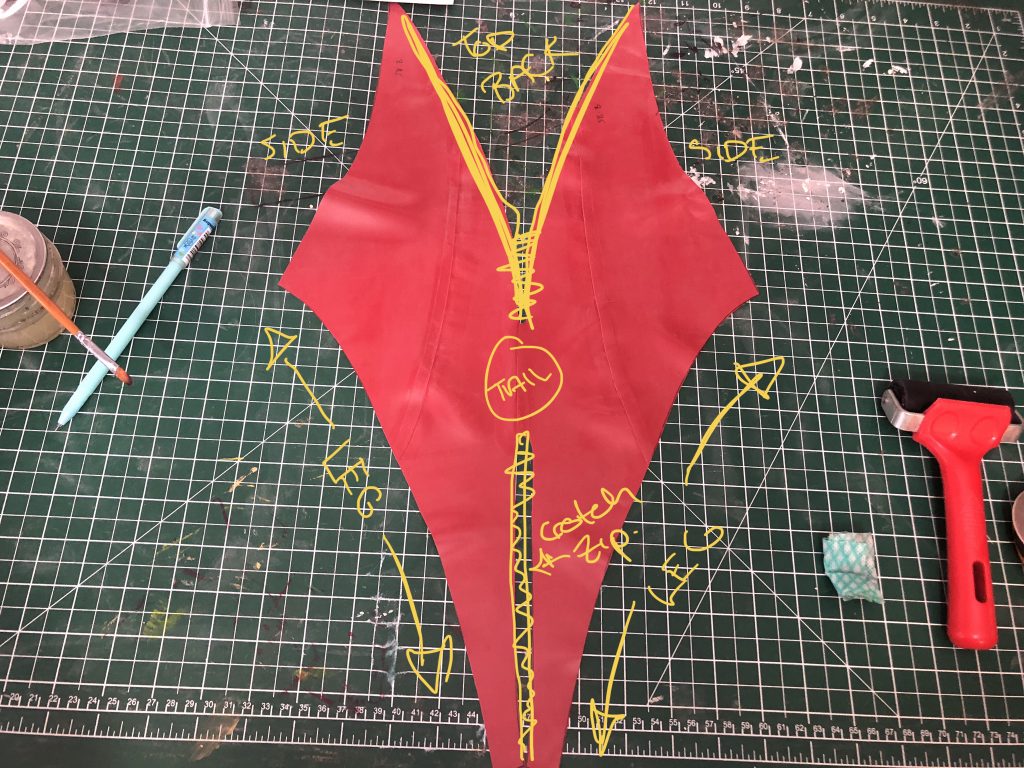
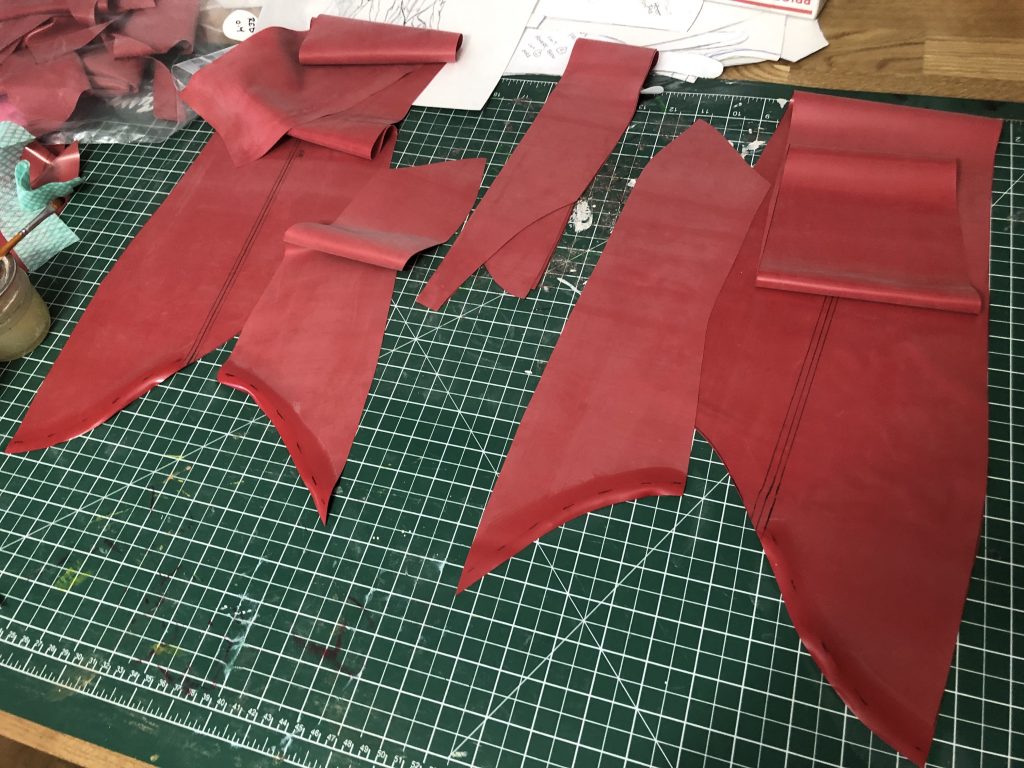
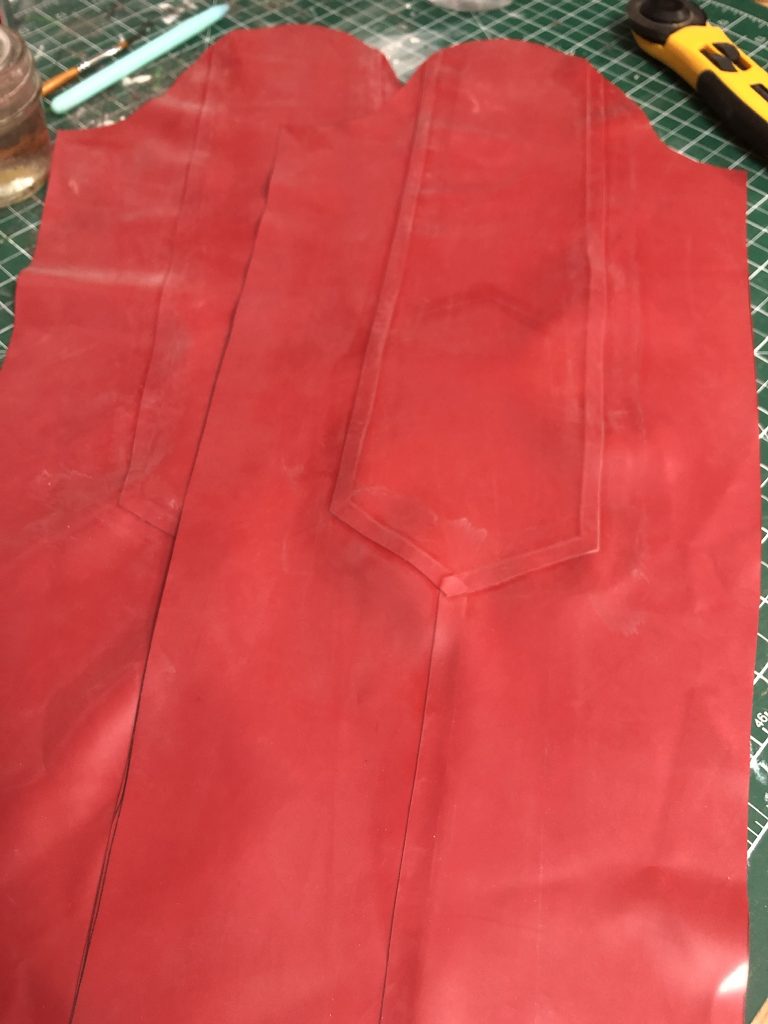
Here’s what it looked like all laid out flat.
The leg pattern was the same front and back, except for the zipper channels that I cut out on the fronts (which was drafted onto the latex pieces), which is why there’s only half of one leg shown.
The back is on the left, and the front is on the right. That’s my original sleeve, but I did wind up re-drafting it to look like this instead:
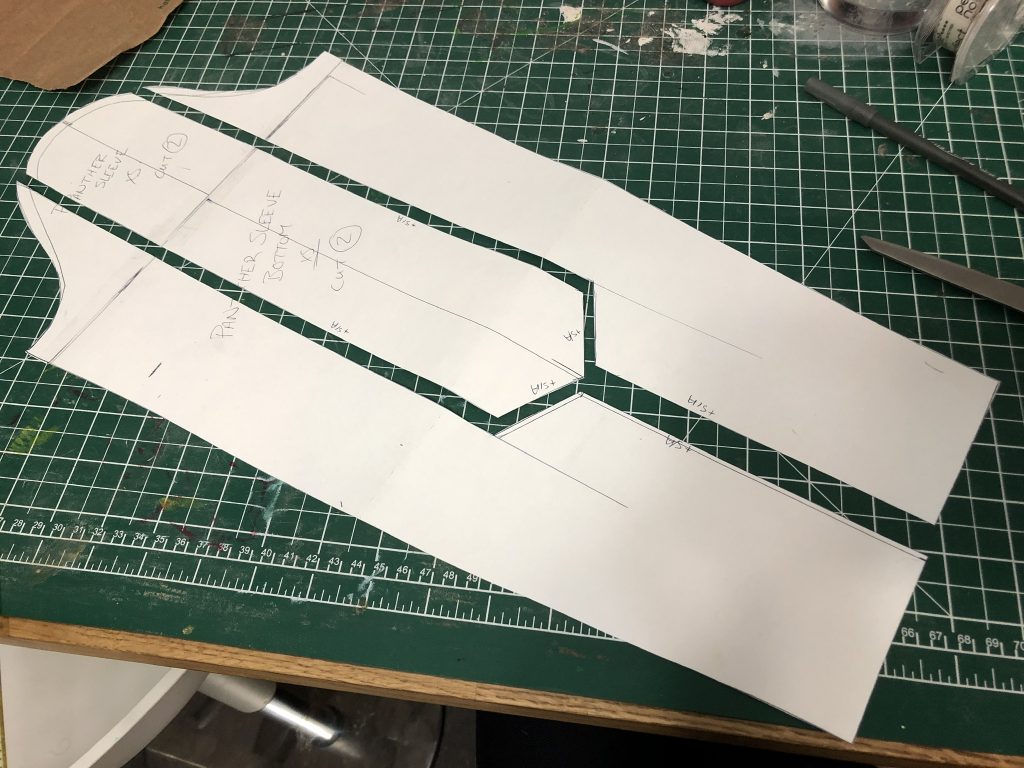
After the first couple of test fittings. The sleeve wrinkle that you see in most of the reference wound up not working very well out of latex because of the natural vaccuum that forms inside of a well-fitting sleeve/pant leg when dressing. I thought about stuffing it with something, and wound up just taking it out entirely. It is something I’d potentially like to revisit trying, though.
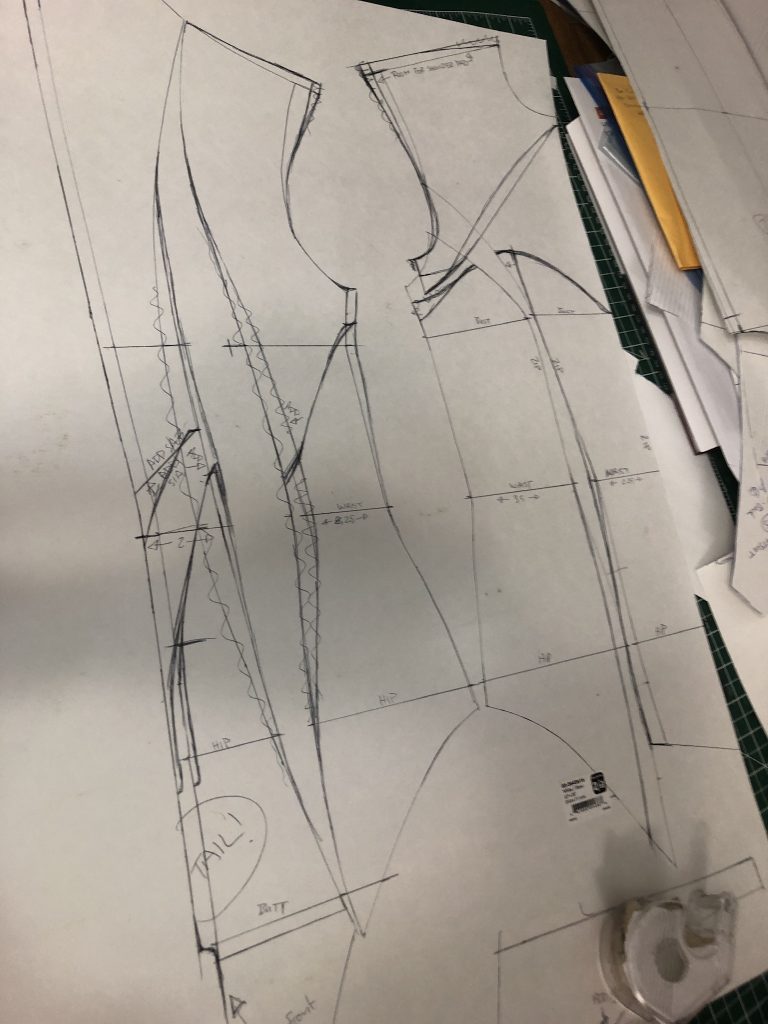
This was a new catsuit pattern for me; I had to re-draft because I’ve lost some (read: most of my) muscle mass between now and the last time I drafted myself a catsuit pattern, 2+ years ago.
If people wind up being interested we can go a little more into drafting from scratch by hand; it’s a bit of a difficult thing to explain without going through it step by step. I was trained to draft by hand through a mix of University and a couple of internships and books.
The TL;DR of how I drafted this is essentially that I took roughly two-dozen body measurements, plotted it all out, connected the dots, and then connected the dots and sliced those into the different panels that I wanted. There’s a lot more complicated stuff in there — for instance, I generally reduce all measurements by at least 10%, but some parts aren’t going to be able to stretch (like the neck) because of the zipper’s I’m installing. It was kind of a nightmare, that we can go into a little more in-depth in the comments if anyone’s really interested in that sort of nitty-gritty detail work.
Panther wound up taking nearly two yards of Latex, for a pretty small catsuit, but that does include me cutting a lot of trim to reinforce zippers and the sleeve redraft.
So! Then I had to tetris the whole thing together.

I put all of the pieces that didn’t need a zipper installed in them first; pictured here is the upper-back. The Center Back seam isn’t put together yet because that’s where the hidden zipper is going to go.
This piece was then attached to the front by the shoulders:
And I attached the Bottom Back pieces together as well …
I also attached the front pieces to the front of the leg …
You can see where I’ve drawn in the channels for the zippers yet, but I haven’t cut them out yet; I did this after I attached the front bodice pieces to make sure they’ll all line up perfectly.
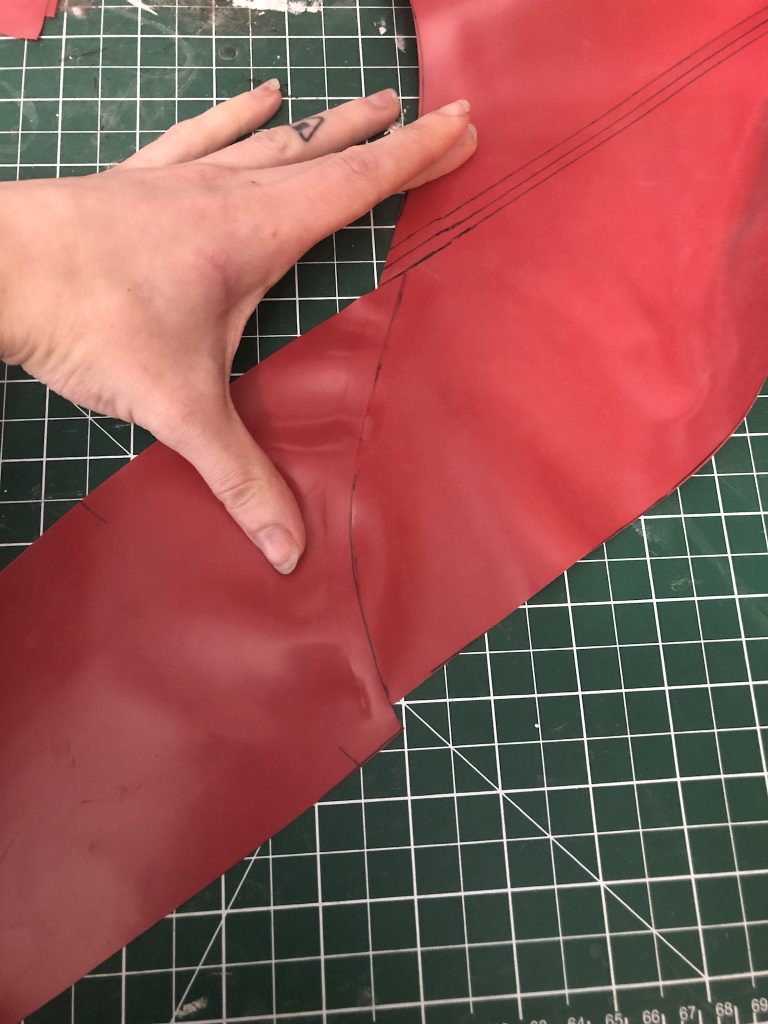
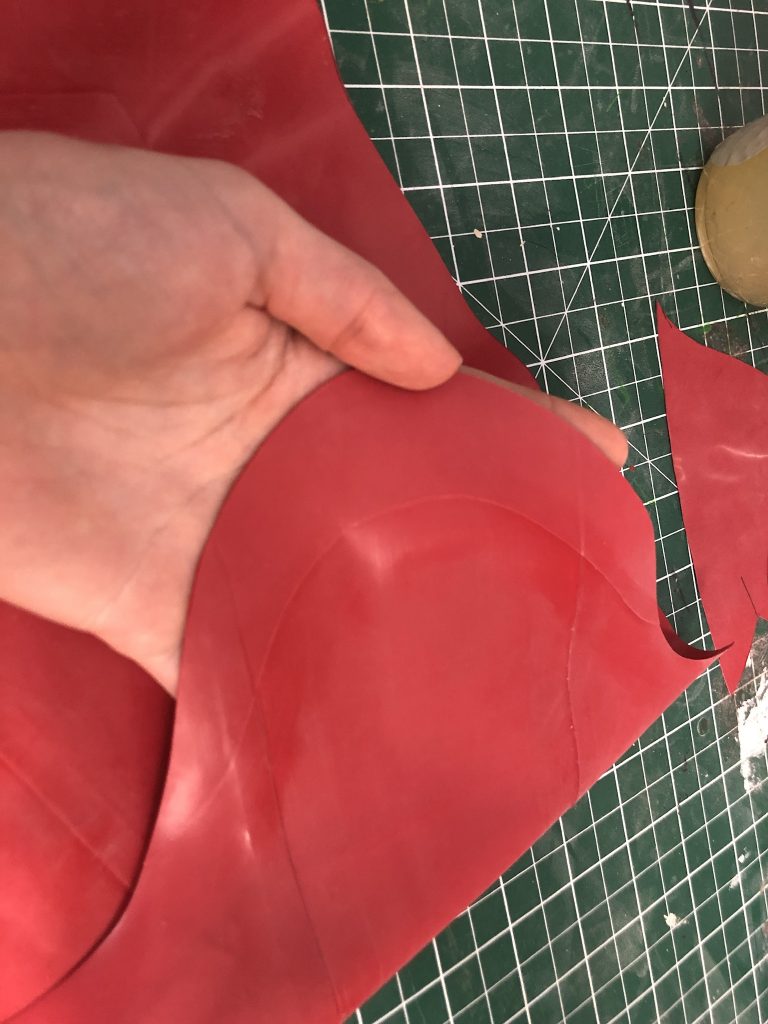
It’s worth noting here that, regardless of how perfectly it’s drafted, latex is a weird squidgy fabric and it doesn’t always go together perfectly. In the case of a few mm, like pictured above, I generally just cut it back to fit.

Just make sure to taper it back down to nothing so that you don’t get weird burbles in your pattern. You want everything to fit smooth.
(That part is the hip of the catsuit, by the way, and I’ve tapered it up to the waist.)
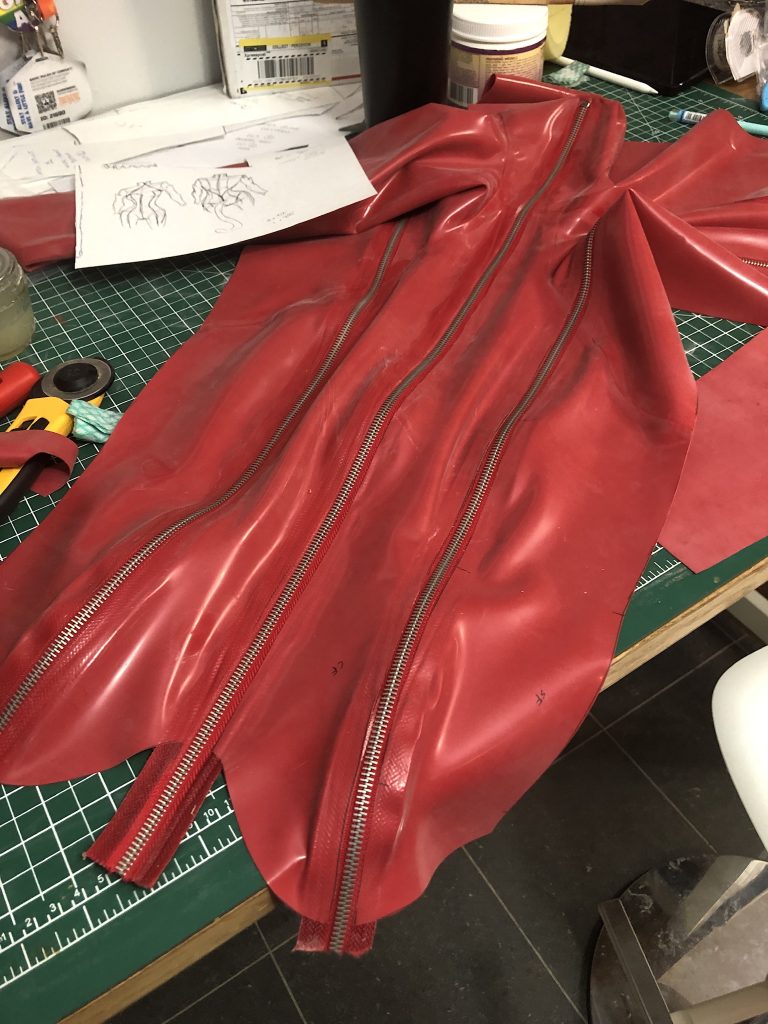
Ok, at this point, everything was as together as it could be and I have to start installing the zippers.
So let’s talk about Zippers in Latex.
Zippers are actually pretty easy to install, and they follow the same principle as anything non-latex you would like to adhere in latex: you need to rubberise it first.
You do that by brushing liquid latex onto the item and once it dries, you can treat your newly rubberised item like a latex item, and adhere It in the usual fashion.
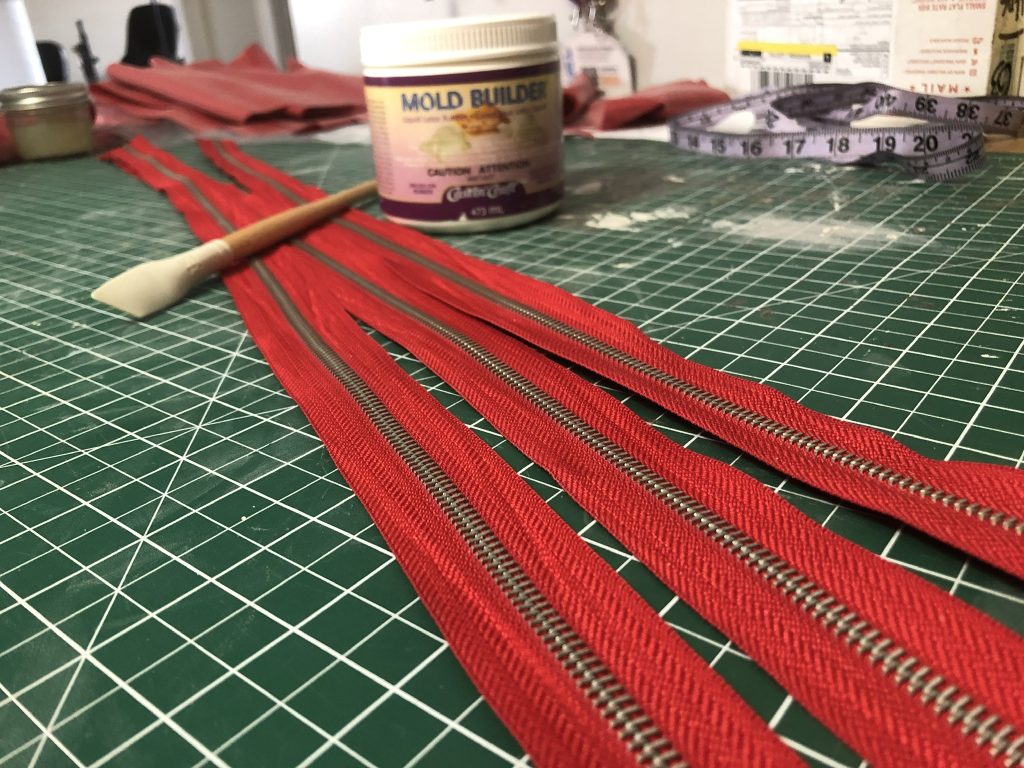
I use everything you see in the picture above: that mould-builder liquid latex just happened to be the cheapest tub of liquid latex I could get my hands on, but any liquid latex will work. And I use a silicone brush, because liquid latex dries, and on the silicone brush you can just peel the dried latex off and it doesn’t ruin your brush.
For Panther specifically, I wanted to use very specific zippers, even though they’re the worst thing I could have possibly used. We’ll go into this at the bottom of the post, but light coloured latex discolours pretty easily and one of the biggest problems is, you might have guessed it, metal.
Pictured: Me with my evil zipper sons.
I ordered ten yards of this zipper and imported it (RIP my cosplay budget). The extra was in case I messed something up really badly, and I could only order in 5 yard increments. (The zipper wound up costing me about $120 CAD.) Good news is I have a bunch left if anyone is looking for zipper for Panther! Haha.
(Author’s note: This is still true in 2020, does anyone need Zippers, please.)
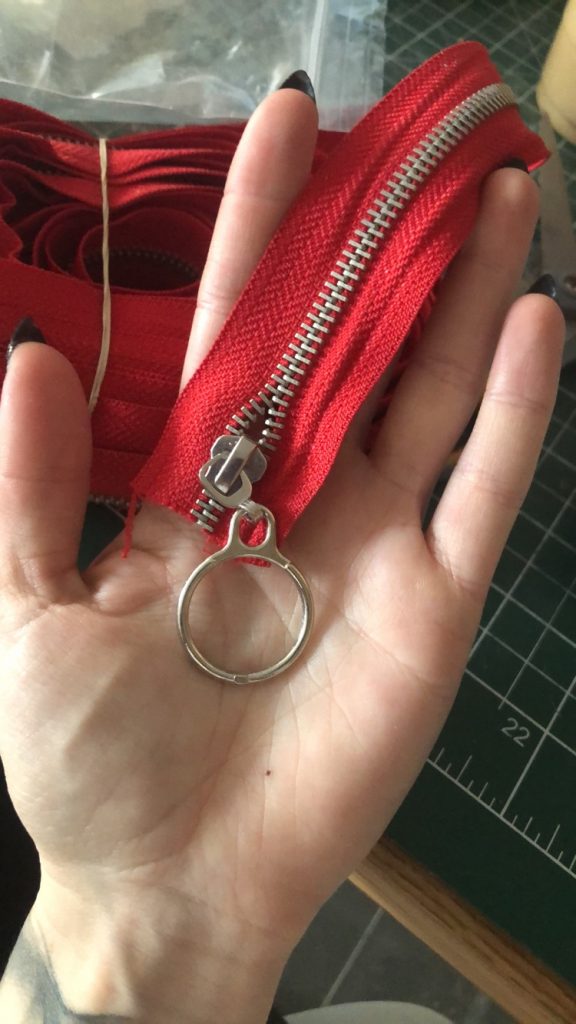
The zipper pulls that I got were perfect too.
Since I got the zipper in one huge roll, I had to then cut and construct my own zippers, so let’s do a brief aside on …
Making your Own Finished Zippers!
This was really necessary with Panther because of all the weird lengths of zipper that she required, and especially because of Hell Zipper, which I honestly wasn’t 100% sure was going to work as I had planned.
First off, measure the length of zipper you need, and mark that off on your roll of zipper.
For Panther’s bodice I needed two 28″ zippers (one for each side-front, these are the ones that run from the bust to the knee) and then one 32″ zipper, which is the one that runs down the center front and around to the center-back for the crotch zip. (I installed this specifically so that I could pee without taking the whole catsuit off.)
I always give an extra inch at the top and bottom of the zipper when I’m marking my lengths. Then just cut the zipper.
This is the easiest part to apply the liquid latex during, so I generally paint the whole length with liquid latex here.
Depending on your zipper colour, the liquid latex might permanently change the colour of your zipper, so it’s important to take that into account. In this case, I only painted the part that was going to be adhered to the latex, because the liquid latex made the zipper so much darker.
Make sure you paint both the front AND back of any zippers you’re trying to install! You’ll see why in a little bit.
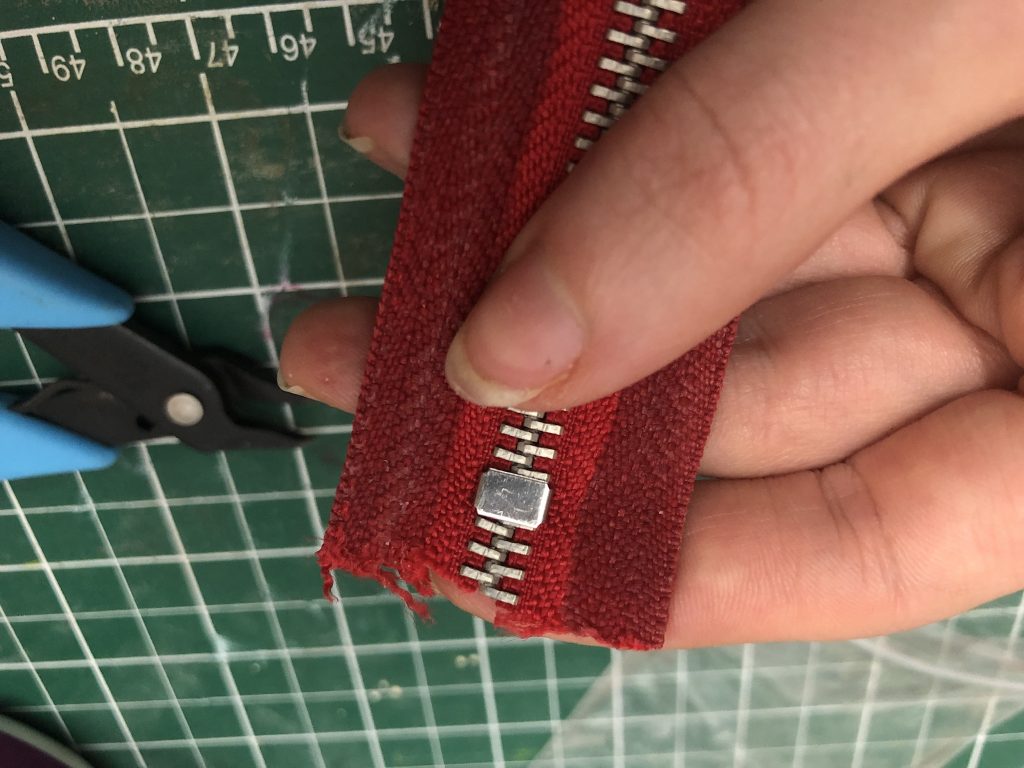
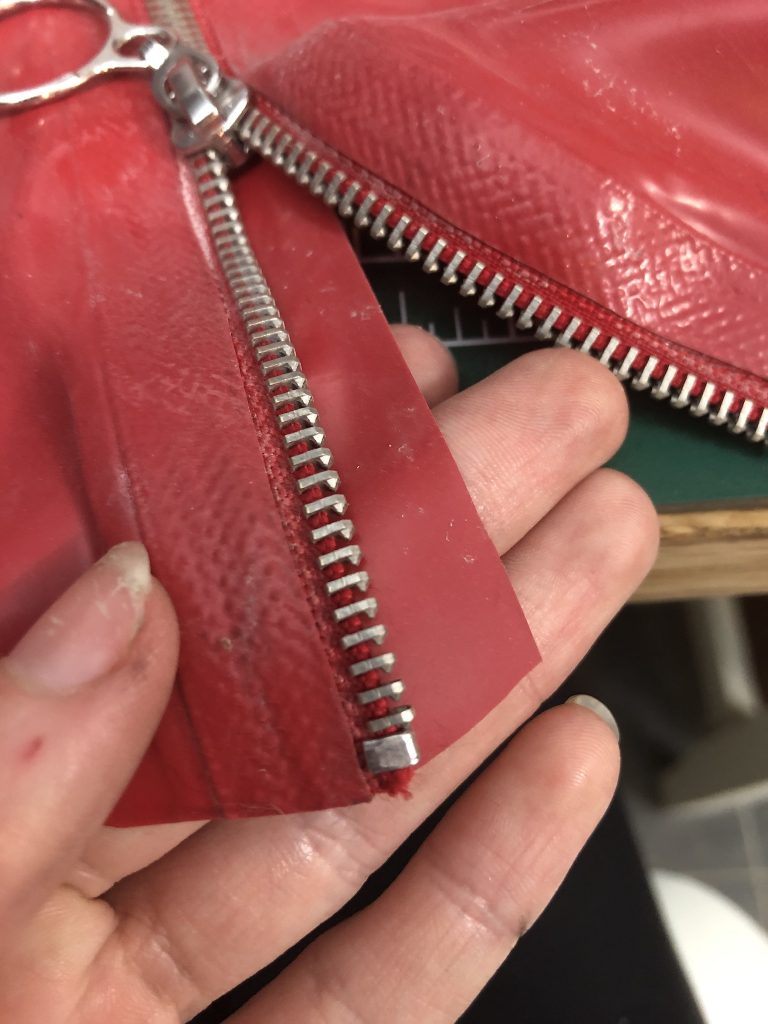
This bit here is a Zipper Stop. It has sharp little teeth on the bottom, and you just poke it through the zipper tape, and then fold the teeth over so that it stays.
Now here’s the bit that’s going to make your zipper SUPER PRO LOOKING.
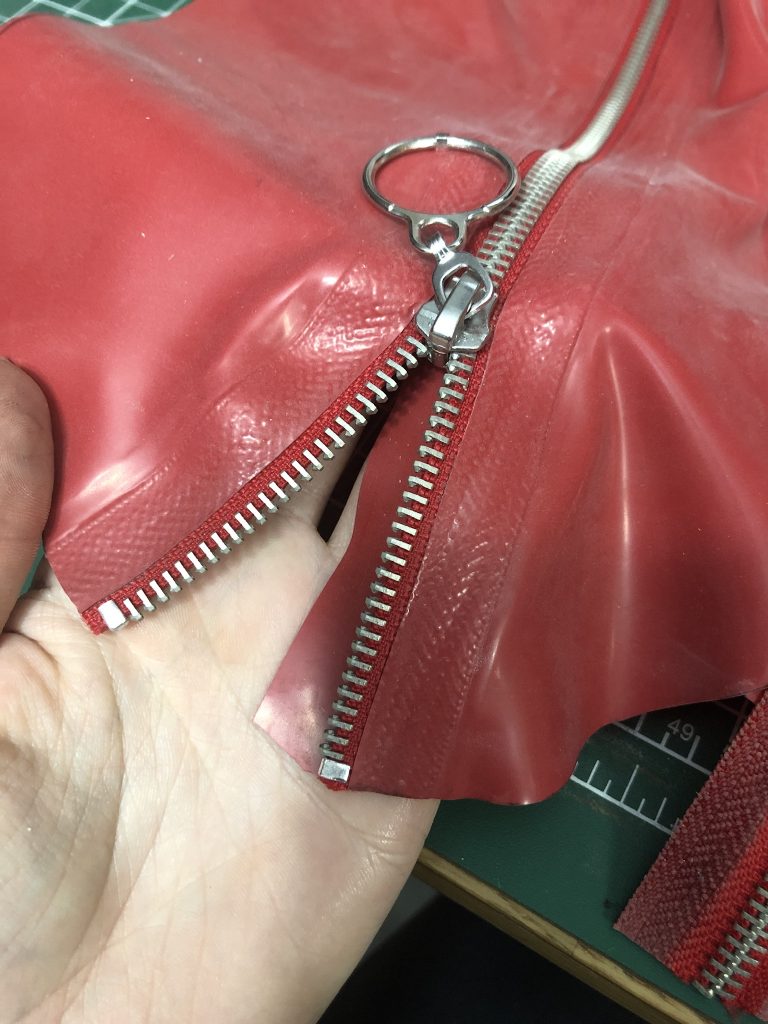
Once the zipper stop is installed, you’re going to break the bottom of the zipper by pulling all the teeth apart. You can just do this by hand, grab each half and give it a tug, the teeth should just pop apart.
Like so.
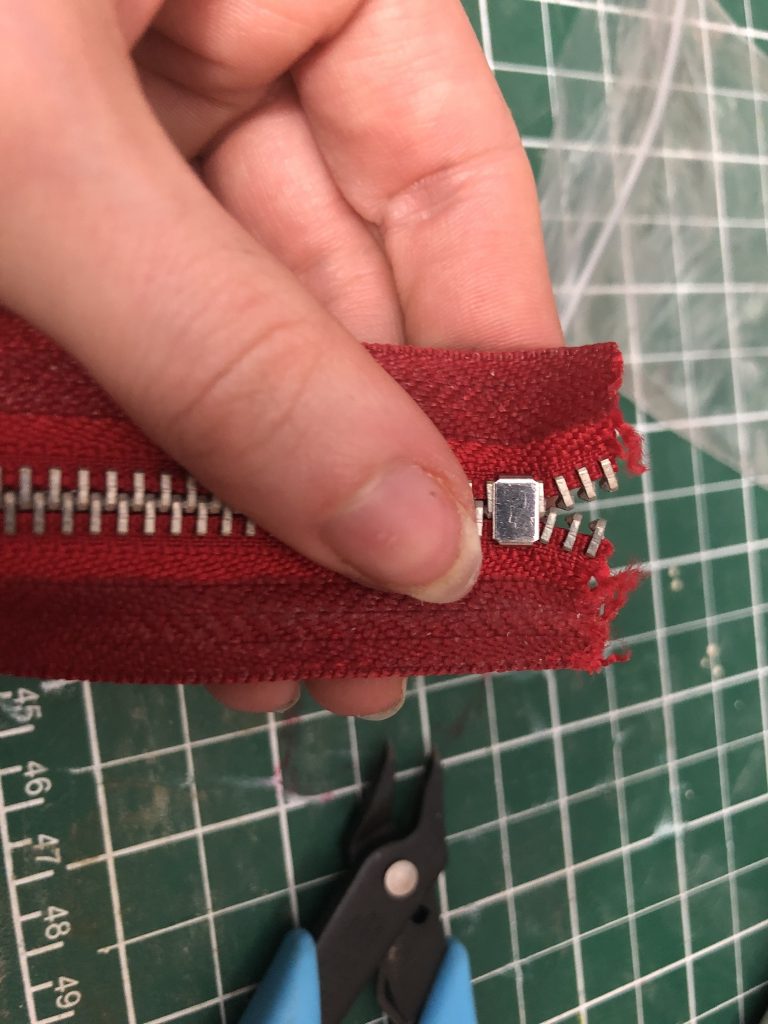
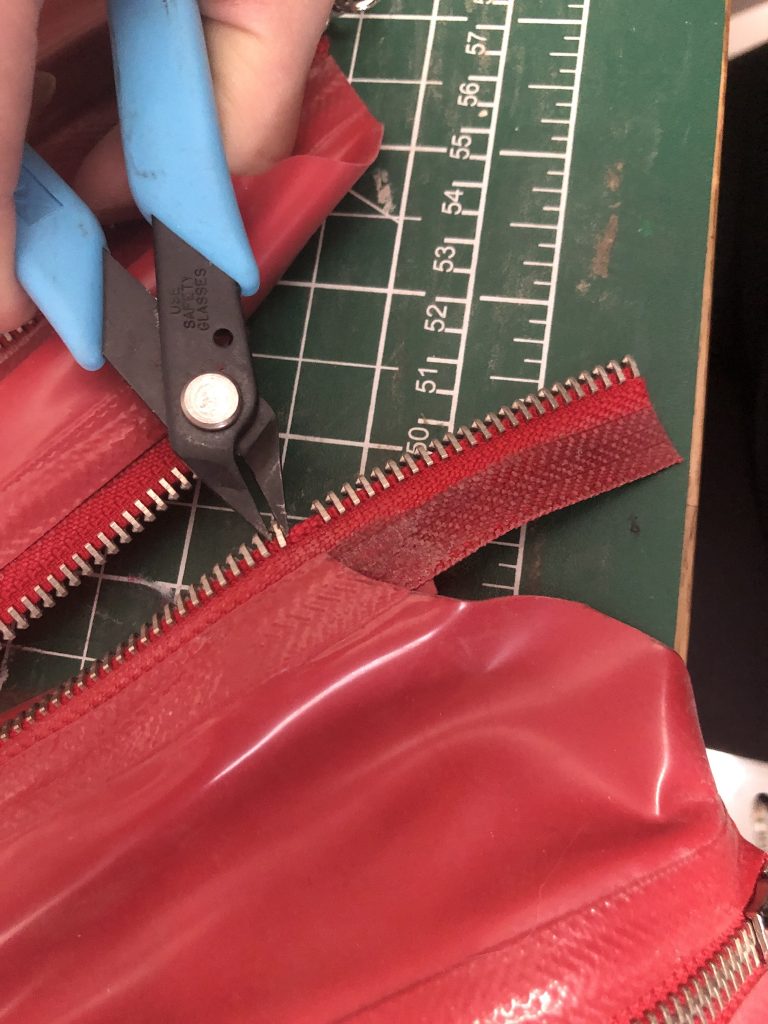
Then you’re going to use a pair of pliers to pull all the extra teeth out.
Pull each tooth out one at a time, and pull as many as you can right up to the zipper stop. Espeially in latex, this is going to make the bottom of your zipper sit so much nicer under the fabric at the bottom of your zipper.
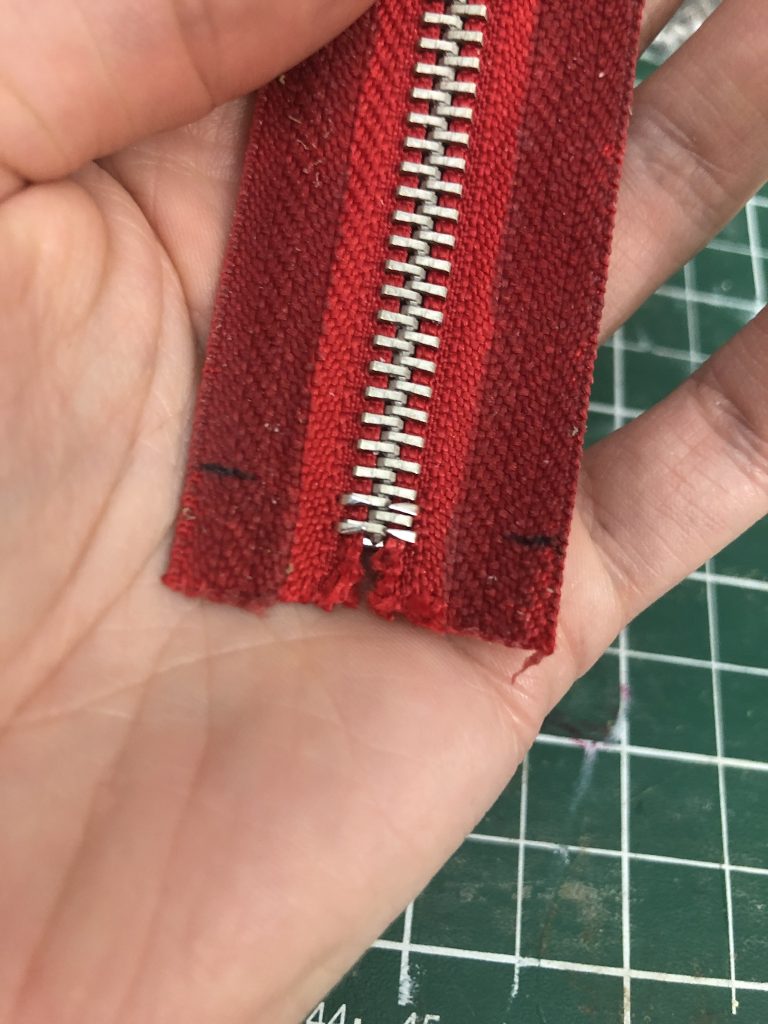
Here it is actually installed!
Obviously this is installed the regular way, apply glue on both sides and press ’em together, then roll the air out.
The trick with zippers is that, obviously, latex stretches and zippers don’t, and if you stretch the latex and not the zipper, the zipper’s going to sit weird. There’s an easy way to fix this, though, even though it’s a little fiddly.
Mark your seam allowance on the latex, and press the zipper down onto the latex instead of the other way around. Because the zipper can’t stretch, you won’t get any extra stretch in the latex.
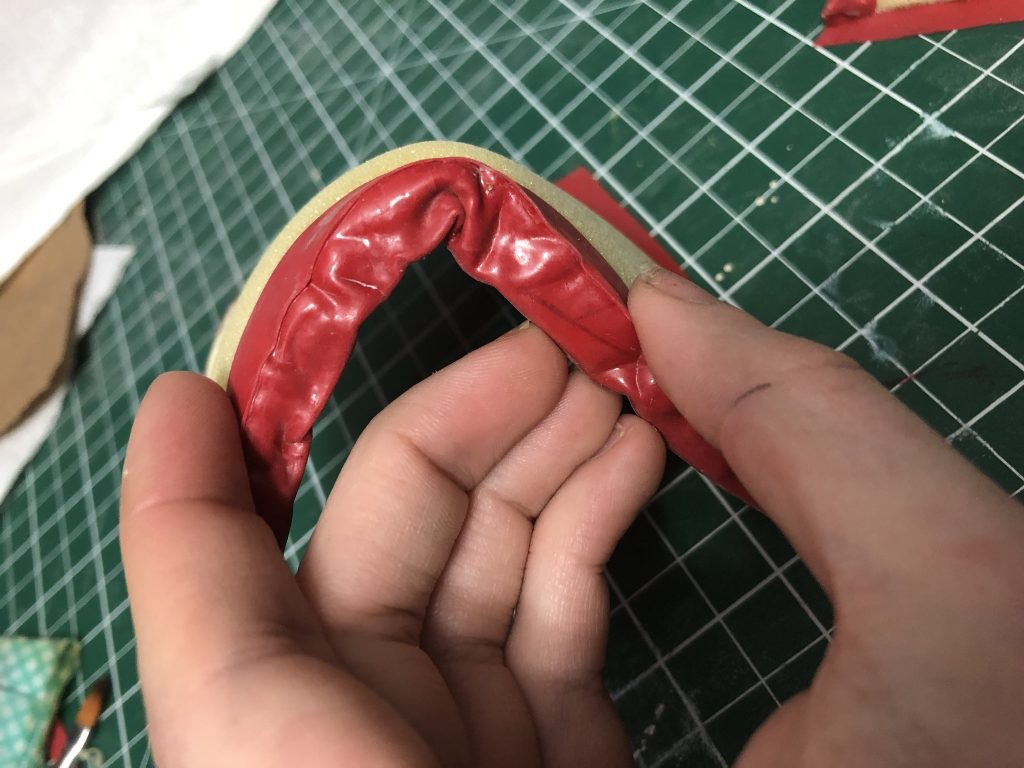
The zipper’s not done yet though; quality latex designers fully encase their zippers, for longevity. (It always bothers me when people don’t trim the backs of zippers, and I see it all the time when I’m repairing stuff. Technically there’s nothing wrong with it, I guess, and certainly you can decide to skip this step, but I’d never not do this on a garment that I was intending to sell.)
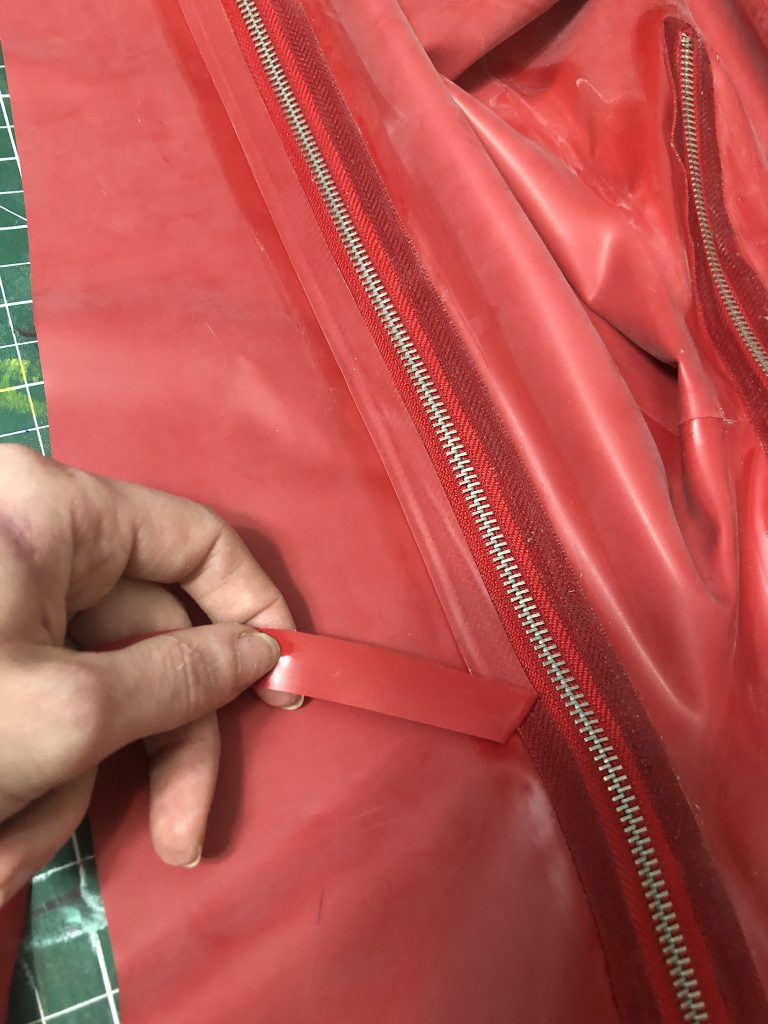
This is how I finish my zippers; on one side I’m encasing the zipper with 1/2″ trim. I stretch this juuuuust a little as I put it on, to just ensure a super smooth seal. (If you do a little too much stretch you can put some worbles in the latex next to the zipper that can be seen from the outside; the amount of stretch is really a “try things until it works” sort of skill.)
Then on the other side of the zipper, I actually install an inch and a half flap.
This flap is very important to me: it keeps the zipper from pinching my skin.
It goes on pretty much the same as the 1/2″ trim, but I only put glue on the first 1/2″, and allow the rest of the piece to just sit free.
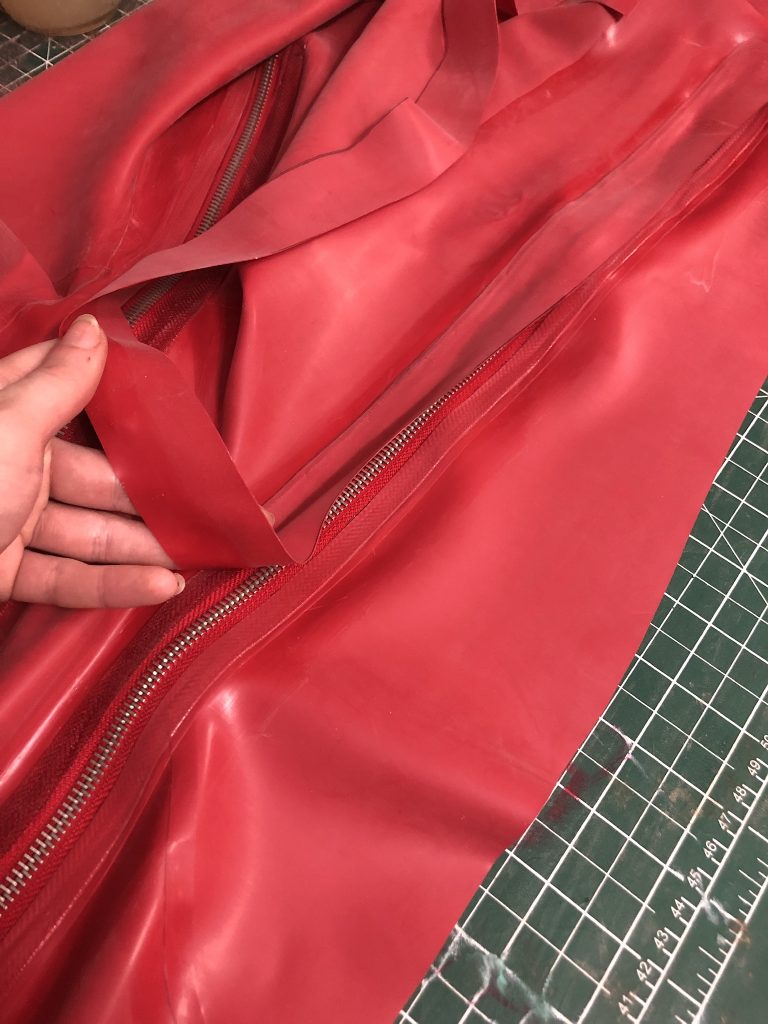
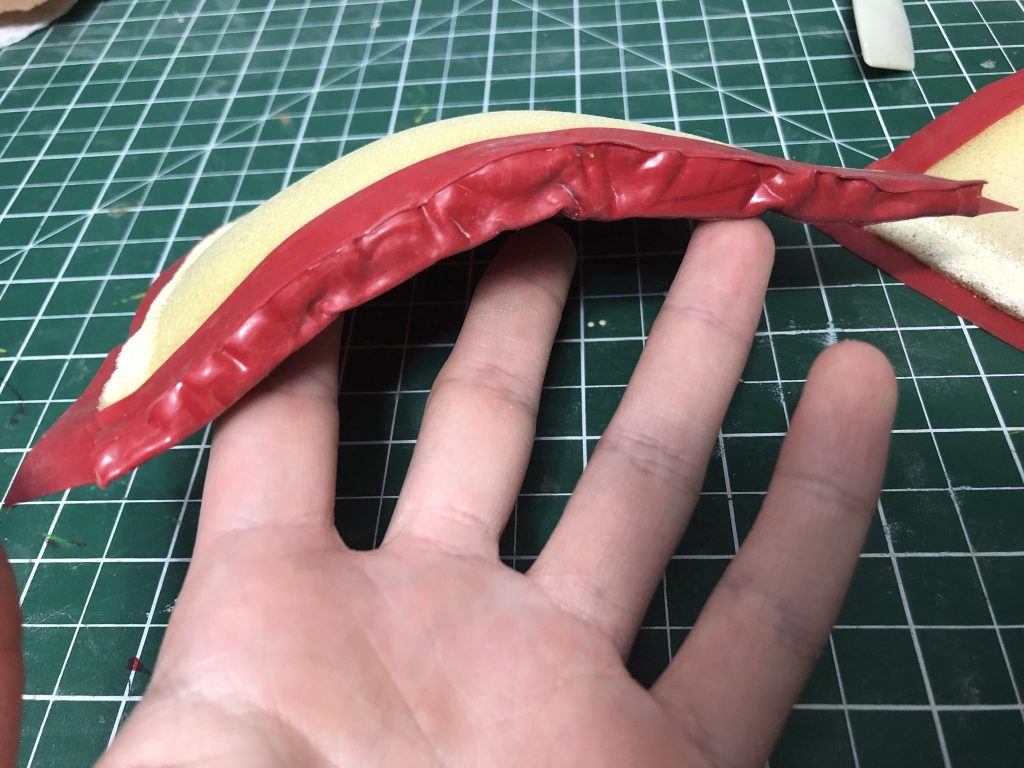
From the outside it looks like this:
You can also see that I’ve installed the zipper pull in that photo, and the top stops, so let’s go into that a little bit.
Installing a zipper pull is a little fiddly, and hard to properly explain without a video, which is a thing I might do. Essentially, you push/pull the zipper pull down as far as it will go on the closed zipper, then you gently pull the top tooth apart — like how you did on the bottom of the zipper, when you were taking teeth out. But you ONLY want the very top tooth to come apart. Once ONE tooth has popped, you pull the zipper pull down, and it will do the rest.
You also need to install zipper stops at the top of the zipper, or else you’ll just pull the zipper pull off entirely when you try to do the zipper up, and have to do that fiddly nonsense with putting the pull back on again while cursing yourself — this has happened to me a bunch, can you tell?
As I said before, I like to make my zippers too long, so that I can install them and then do this …
You need to pull a couple of teeth, so that there’s room to install a stop here as well. Top stops are small, and you just press them on with a pair of pliers.
There we go! Zippers!
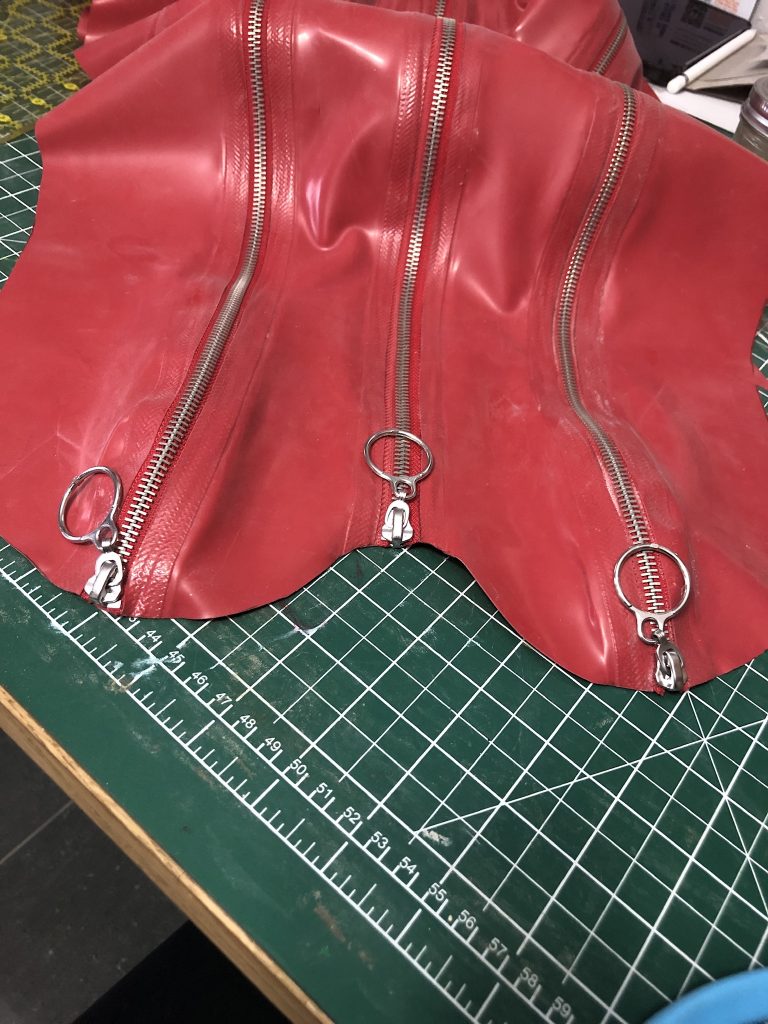
I did all of those steps on all three of the front bodice zippers …
At this point I also had the bottom-back installed, and the legs attached at the inner seam.
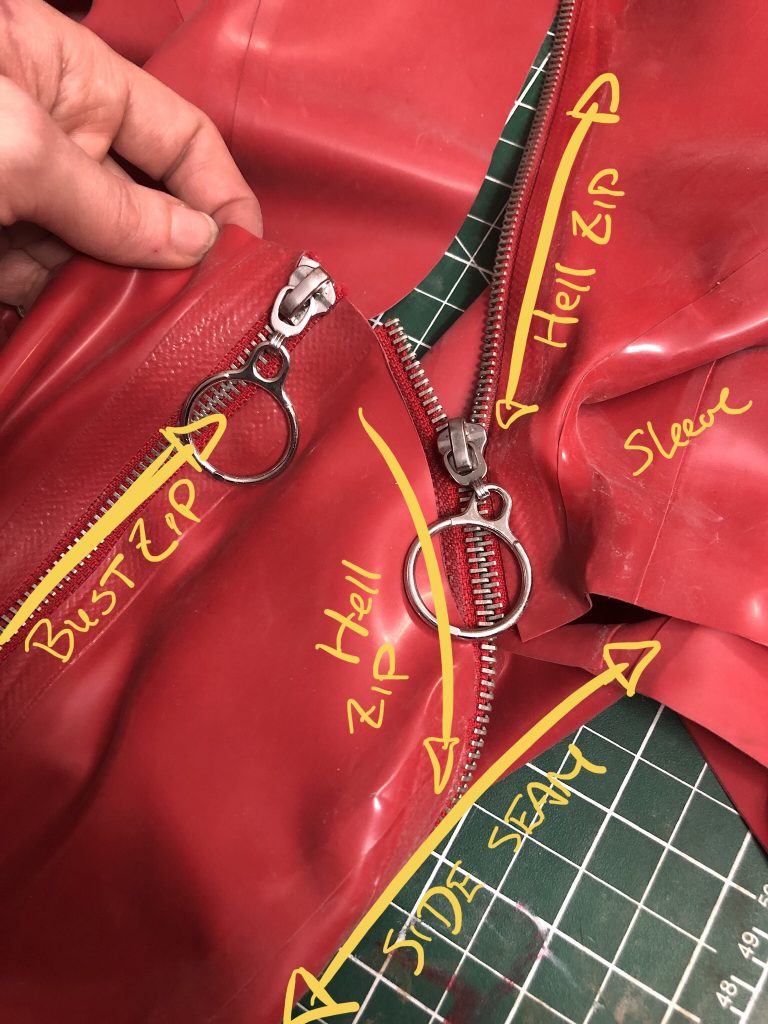
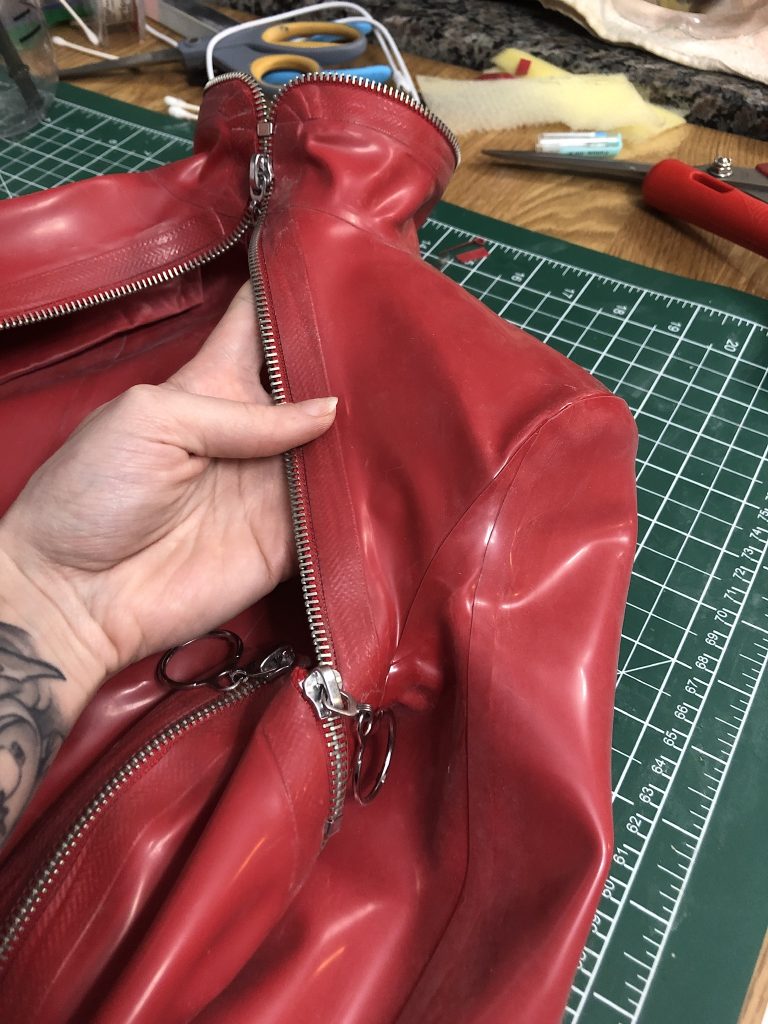
And then I had to start in on Hell Zipper. (TM)
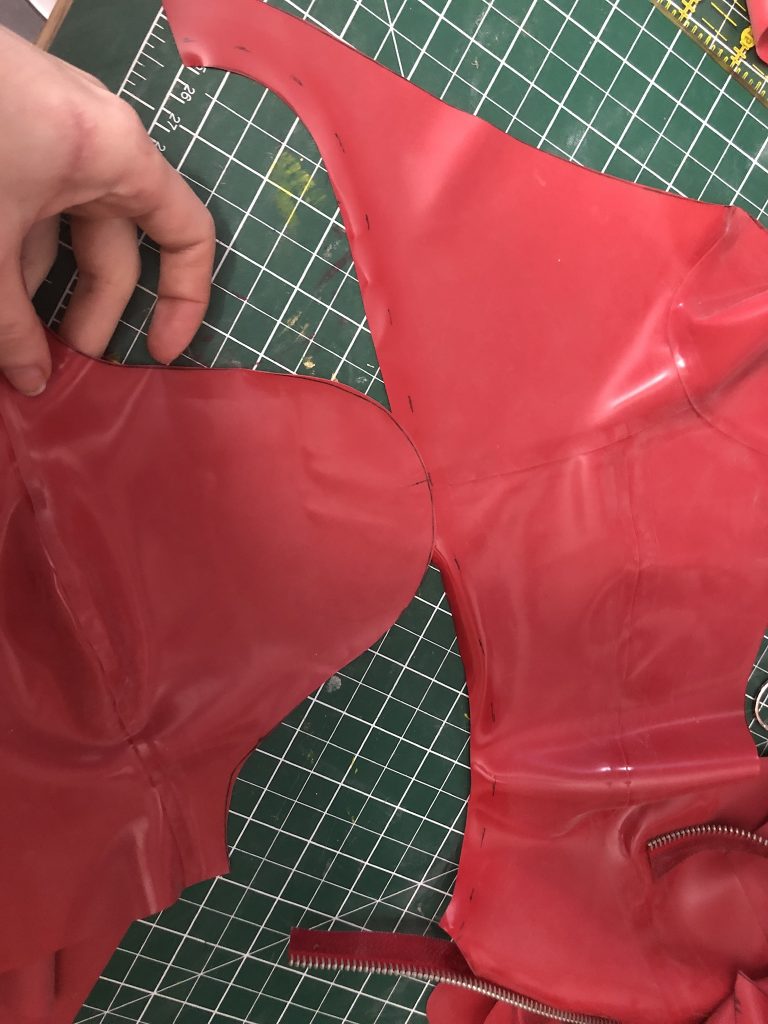
I chopped Hell Zipper into a couple of smaller pieces so that it would be easier to deal with. There’s the back section, which connnects at the side of the bust, and then the front section, which is the part that goes from the side of the bust, up and around the neck.
I started by installing the back, which is attached to the Bottom Back piee we were talking about earlier.
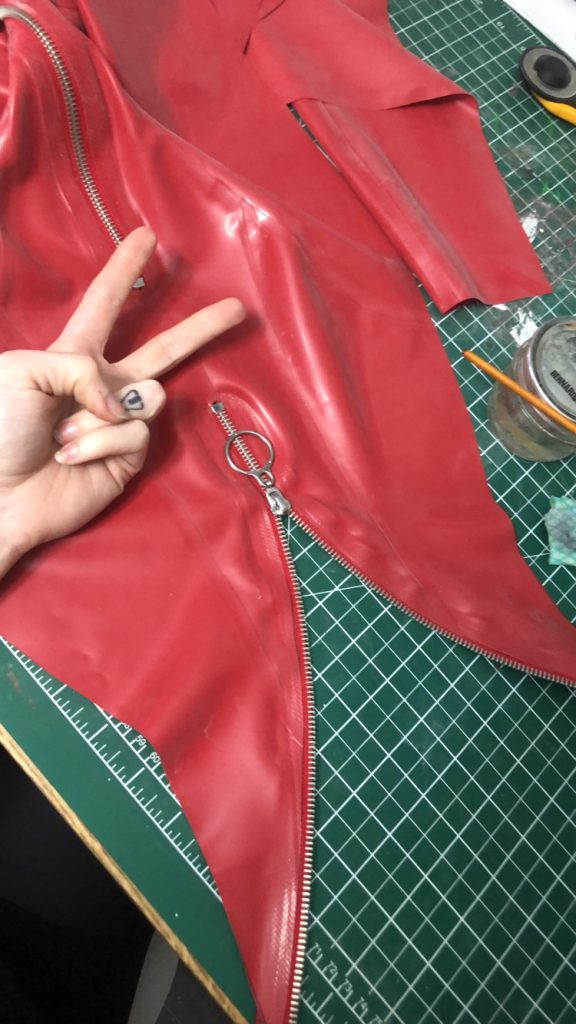
Above my V for Victory here is the bottom of the zipper that starts at the center-front, and below is the back portion of the Hell Zipper.
That zipper pull DOES move, a little bit. It doesn’t really DO anything, but it can move. Haha.
Here’s the inside of this zipper before I installed the Top Back. I always put this extra little cap piece on the bottom of my zippers, and round off all the corners, sine you can see these kinds of details if you look closely from the outside.
Here it is with the top-back installed. It’s glued in more or less on top of the trim reinforcing the zipper, just like a regular seam.
I also installed the sleeves here — my original sleeves, which I would later rip out because I didn’t like them. They go in like this:
I like to install my sleeve overtop of the shoulder seam so that the sleeve reinforces the end of that seam, and makes the whole shoulder area look cleaner.
The best way to get a latex sleeve to match up the best is to put the sleeve on starting in the middle, and then work your way out to each side in turn. The LAST seam I do on a catsuit are the side seams, so leave this open for now.
Let’s talk about how I got the Front of the Hell Zipper in.
I started at the center back of the neck, which remember, is where I’m going to hide another zipper, so that seam’s not together yet.
Then I worked my way down all the way to the armpit, which is where it’s going to meet up with the back Hell Zipper.
But on the way there are CORNERS. And remember, zippers don’t stretch.
So here’s what the inside of those zippers look like. I sliced into the zipper tape with a pair of scissors so that I could pivot it gently, and I made sure to keep the slices inside of what would be hidden underneath the latex I was adhering it to.
Here’s what it looks like from the outside. It actually lays really flat, which is nice.
I put 1/2″ trim on this zipper as well to reinforce it.
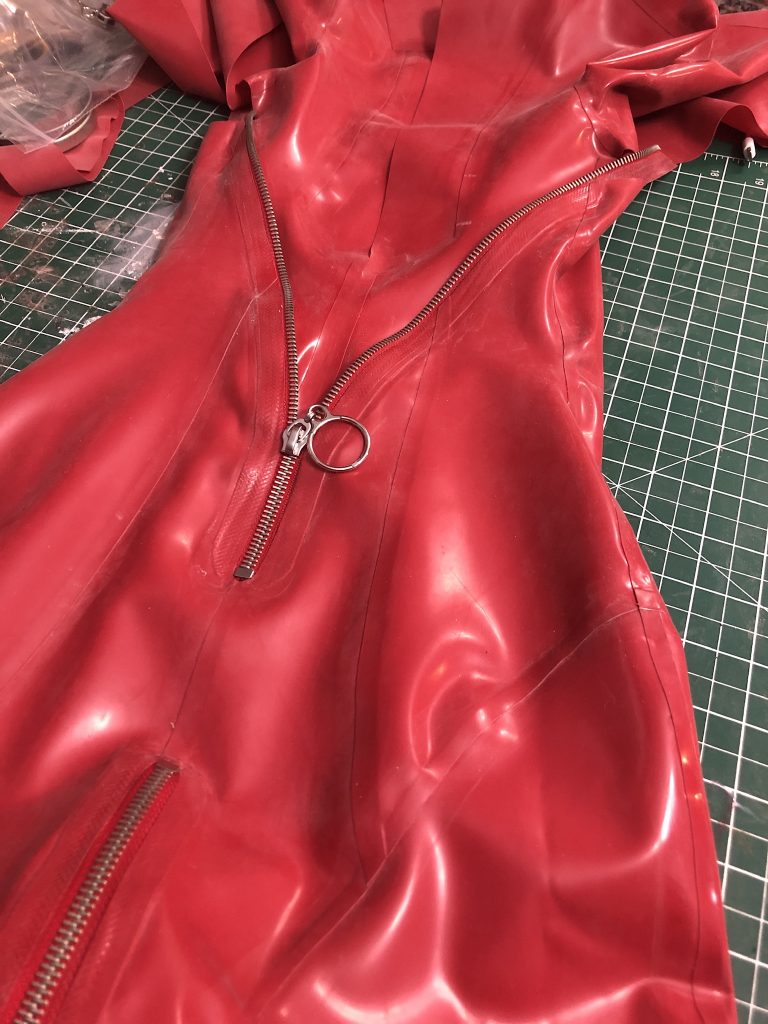
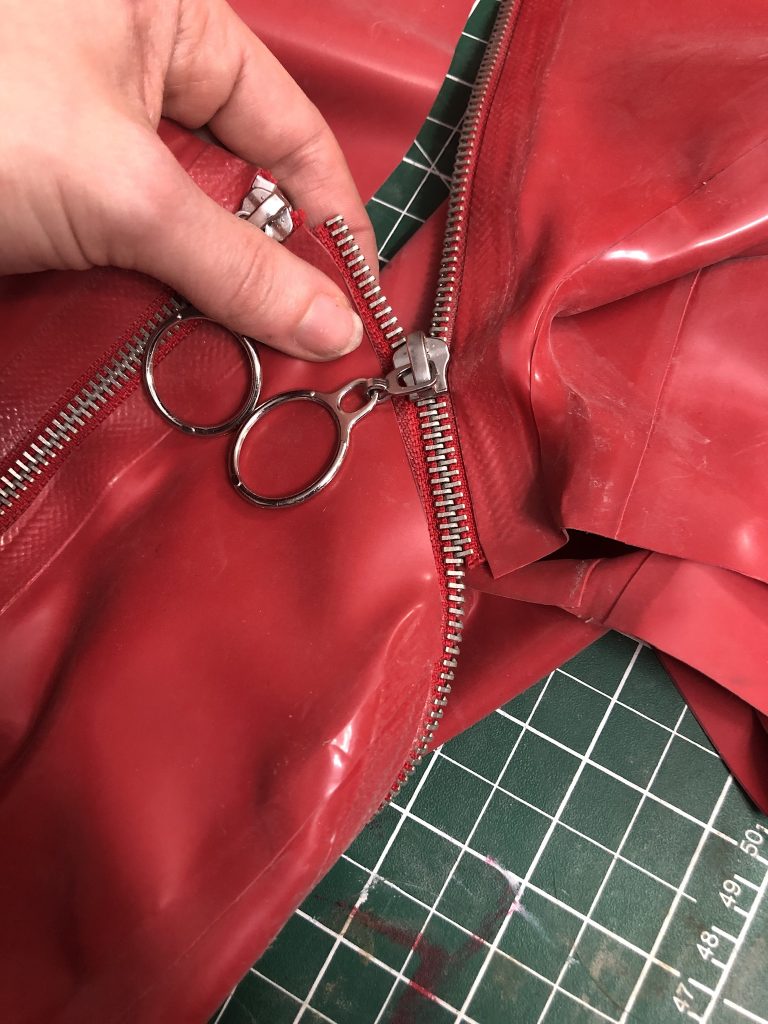
Ok, here’s the fiddliest part, and the part that I was honestly not sure was going to work. Attaching the two parts of the Hell Zipper.
Here’s that same picture but with a bunch of markups to help you realise what you’re looking at:
You can see here that I’ve put the side seam together underneath the hell zipper, but not above it yet; I wanted to get the zipper together before I did that part of the seam. I’ve also glued the back part of the hell zipper to the bust cup.
I threaded the pull onto this the opposite way from how I talked about doing it before, by threading the two separate ends in and having the zipper pull lace them together for me. This might take a couple tries to get your zipper to match up the way you want it.
Now that the pull’s on and I can see how the zipper’s going to sit, I finished the top and bottom of the zipper with the appropriate stops, and put the armpit and down the sleeve together.
This is approx. 1.5″ of functional zipper. It’s only functional because it would have been more work to make it not functional, haha.
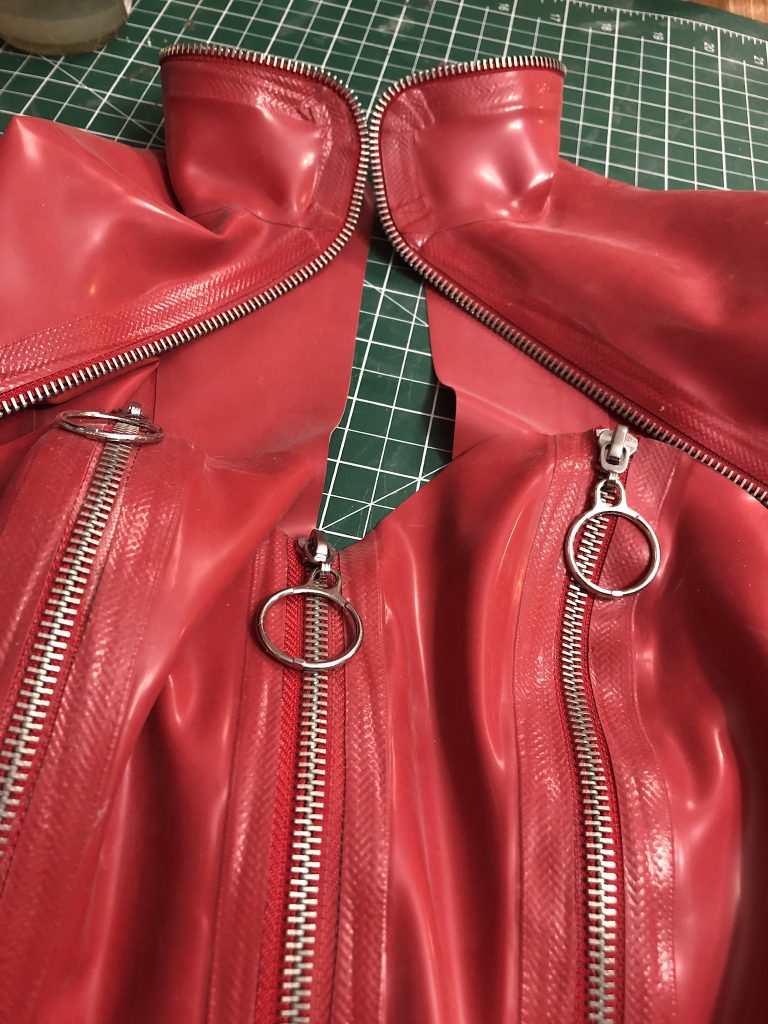
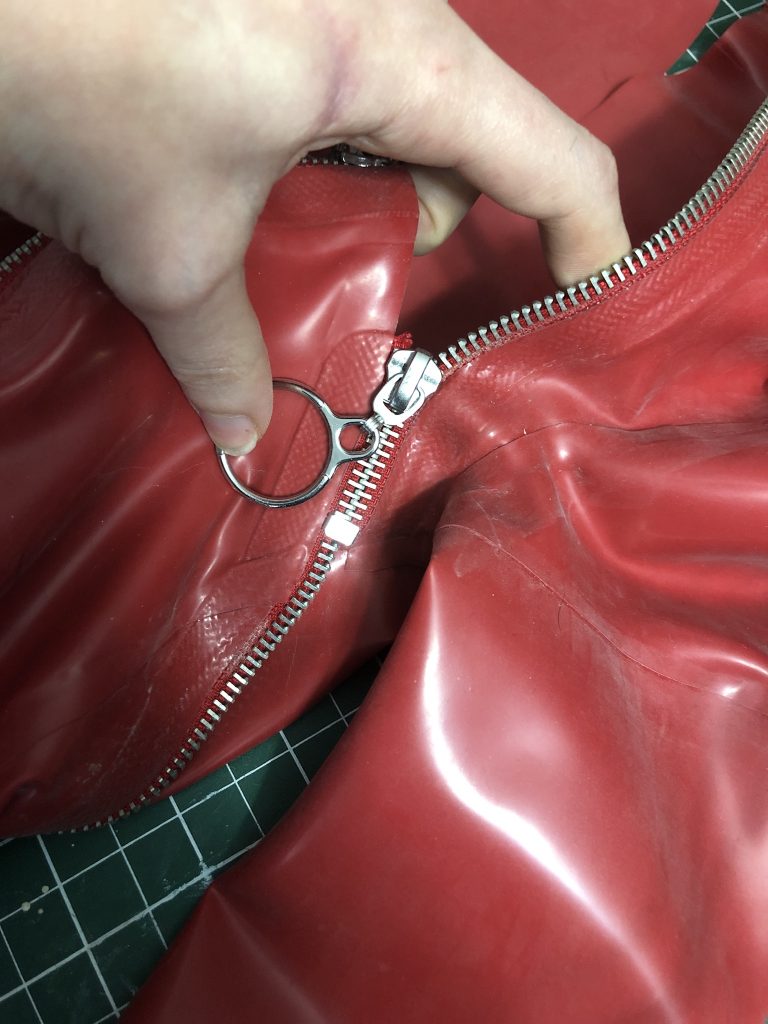
Next I had to put the pull on the neck, which is not going to be a functional pull. (Making a separating zipper is pretty dang labour intensive, so I tend to just buy those pre-made …)
This is me pulling installing the Pull that’s going to live at the neck; the two ends there are actually the Center Back of the collar. I pulled the zipper pull down to the center-front of the neck, and pulled the zipper back apart behind it.
Here’s what the front looked like at this point. The only thing I haven’t done on the neck zipper at this point is attach a permanant stop just above where the zipper pull lives, just to keep the pull in place without me having to fiddle with it.
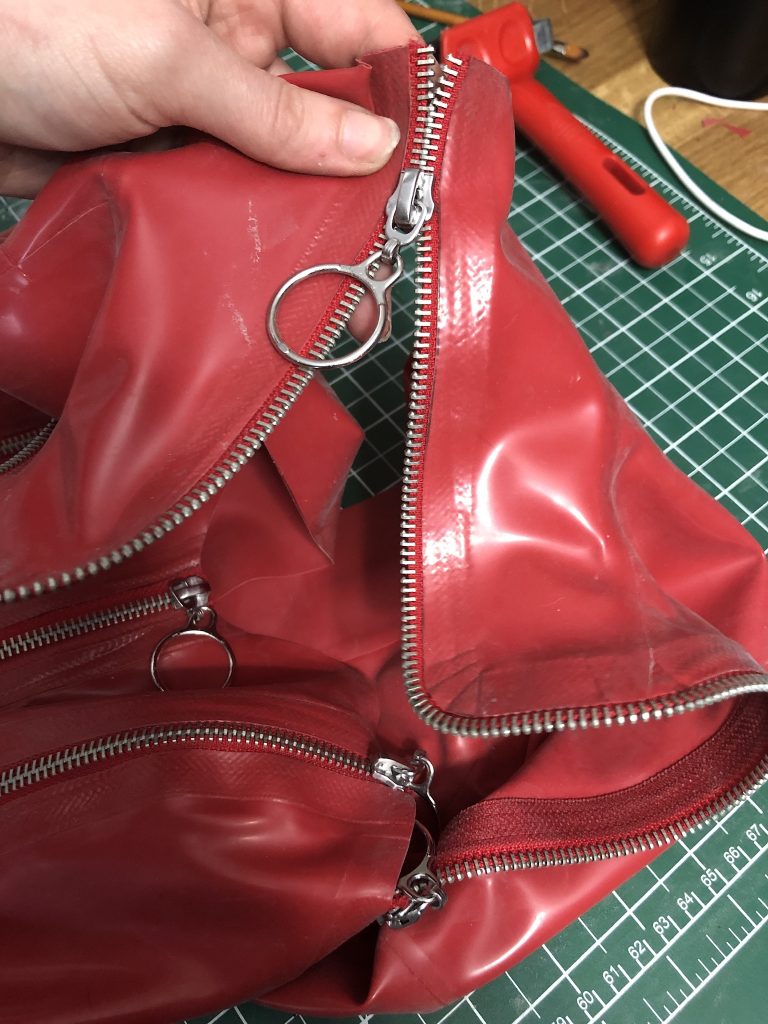
There we go.
This is the point where I did my first fittings.

This is where I decided to just Yeet these sleeves into the sun and redo them.
And there’s no back zipper yet.
The back zipper was the next bit to be installed.
Installing an invisible zipper in latex is the same sort of thing as installing a regular zipper, but you put the glue further back so that there’s a little lip overhanging the zipper, to hide it. I still finished the inside of this the same way as all my other zippers.
In this case, this is actually just a regular coil zipper, because invisible zippers are notoriously finicky and easy to break, and this is a very high-stress area on the catsuit. (I do know that industrial invisible zippers exist, and I’m considering ripping this zipper out to do that instead, once I actually get my hands on one; my local place didn’t have any.)
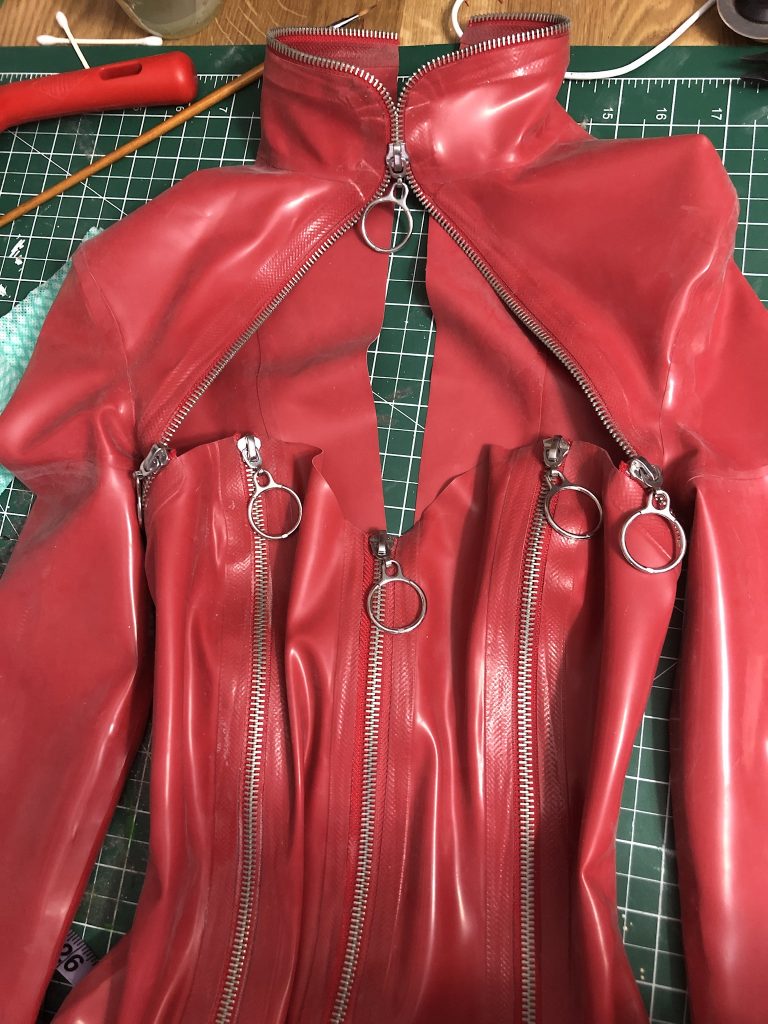
Next, the new sleeves:
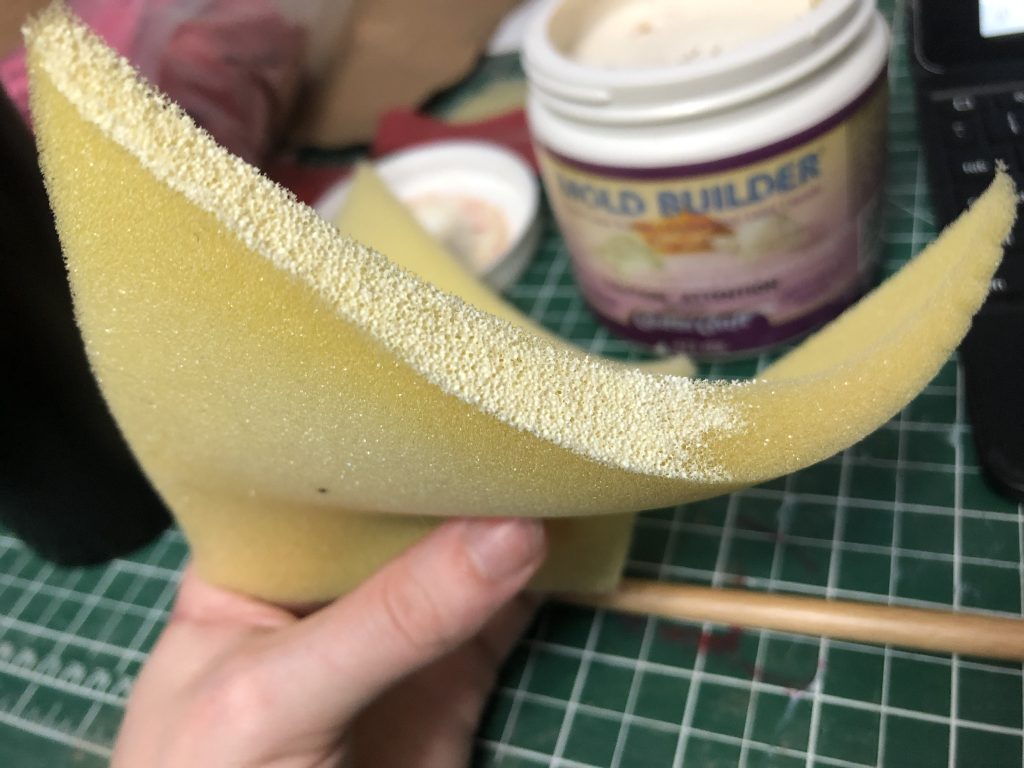
They also have a fun bonus at the top:
This is an extra layer of Latex at the top on the inside because I was having problems with:
The Shoulderpads.
Fuck, y’all. These bother literally only me, I’m sure. No one who looks at this costume is going to see what I see when I look at these shoulderpads.
But before I explain all about them, let me tell you how I installed them.
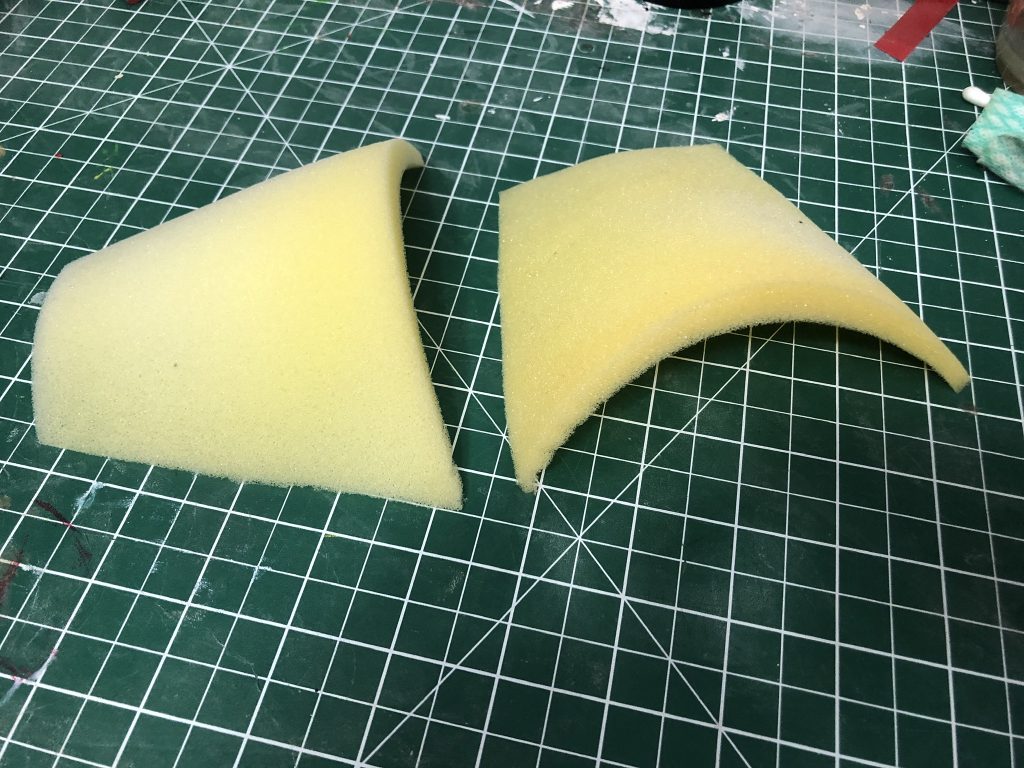
These are cheap foam shoulderpads. (75 cents for the pair.)
I painted them in liquid latex, and then adhered latex to them, so that I could install them in Panther.
Here’s the problem though:
It turns out that once they flex, they sort of crinkle inwards and that just never goes away. Which is not ideal.
But ya girl was on a time crunch, so I installed them anyway, with the added bit at the top of the arm to keep all this hideousness inside.
There it is in; it’s glued in along the middle of the top of the shoulder-pad. I applied glue along the shoulder seam, and along the top of the shoulder pad. The rest of it sort of free-floats in there, so it can be adjusted a little while I’m wearing it.
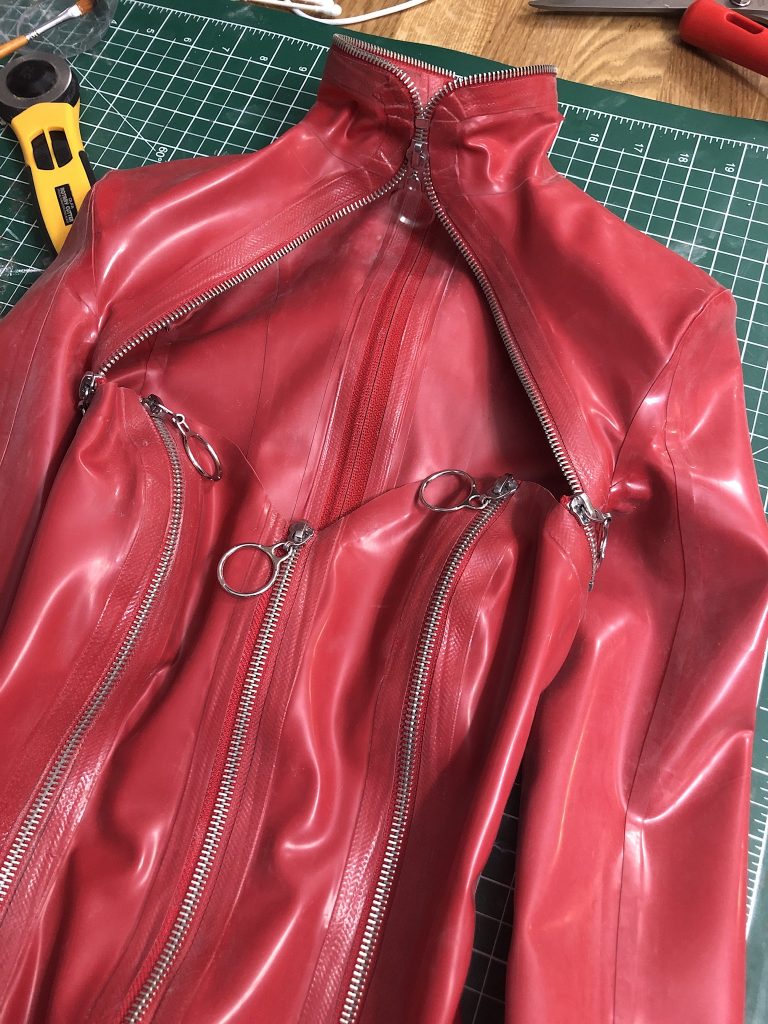
Now, next fit test:

I haven’t 100% adjusted the shoulder pads to where I want them here, so you can kind of see the edges sitting a little off If you’re really looking for them. It’s little nit-picky details like that which bother me about this build.
I also haven’t decided whether I’m going to pull those shoulder pads out and put others in yet. Maybe after the summer con season.
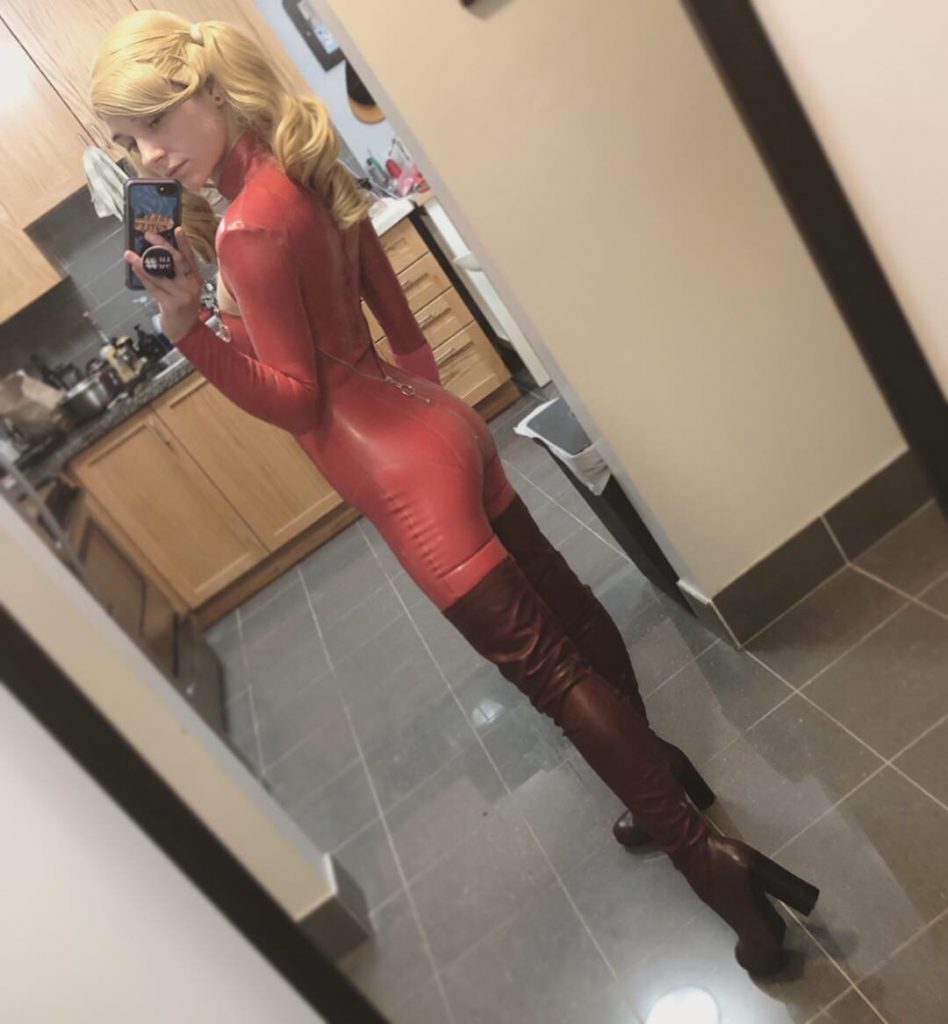
Here’s a little preview of Panther all shined up from when I shot her in Vegas:
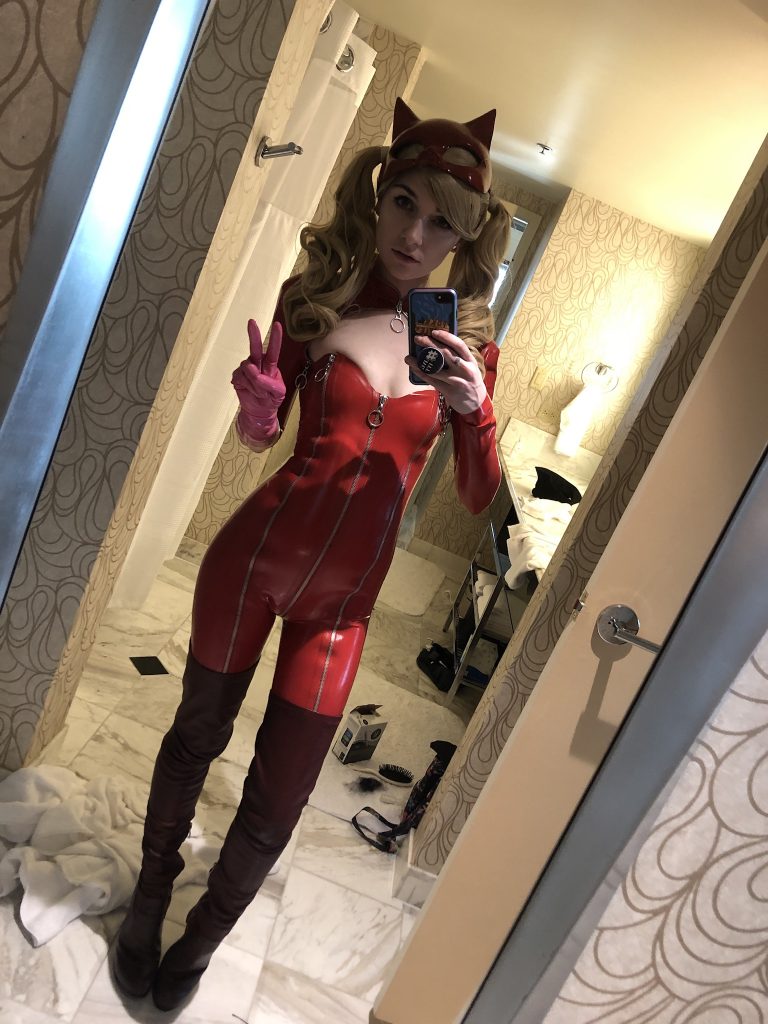
Stay tuned for the tutorial on her tail, which due to time and what colours of latex I had, I hadn’t installed at this point.
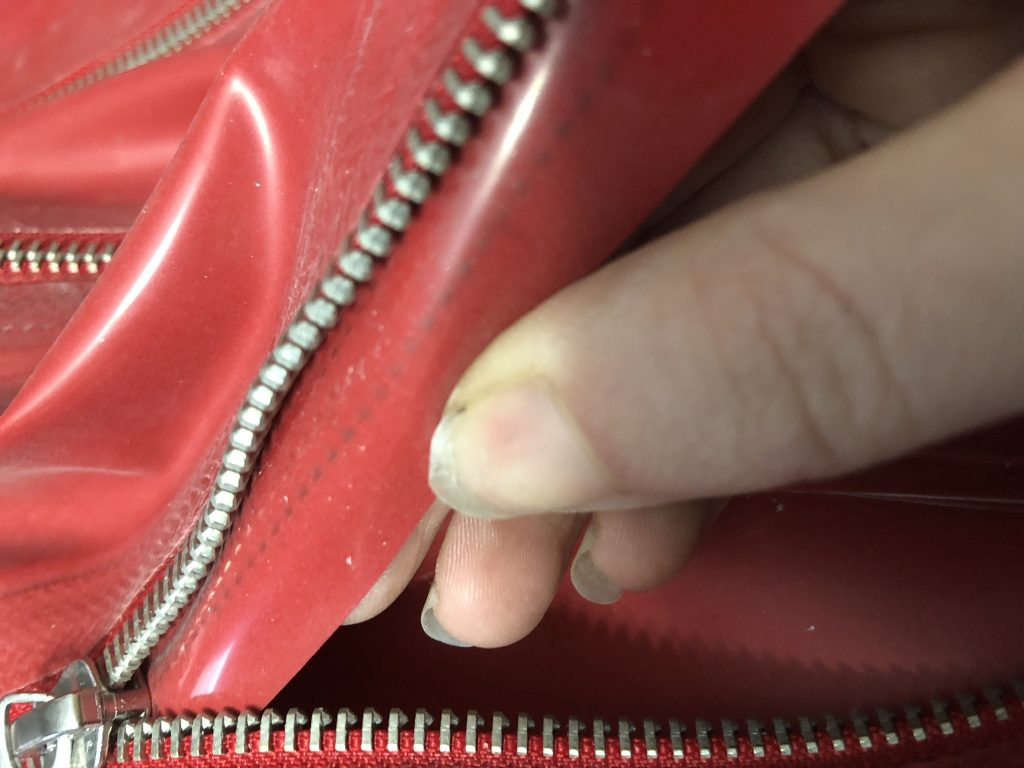
But first, let’s take just a second to talk about why you shouldn’t install metal zippers in latex …
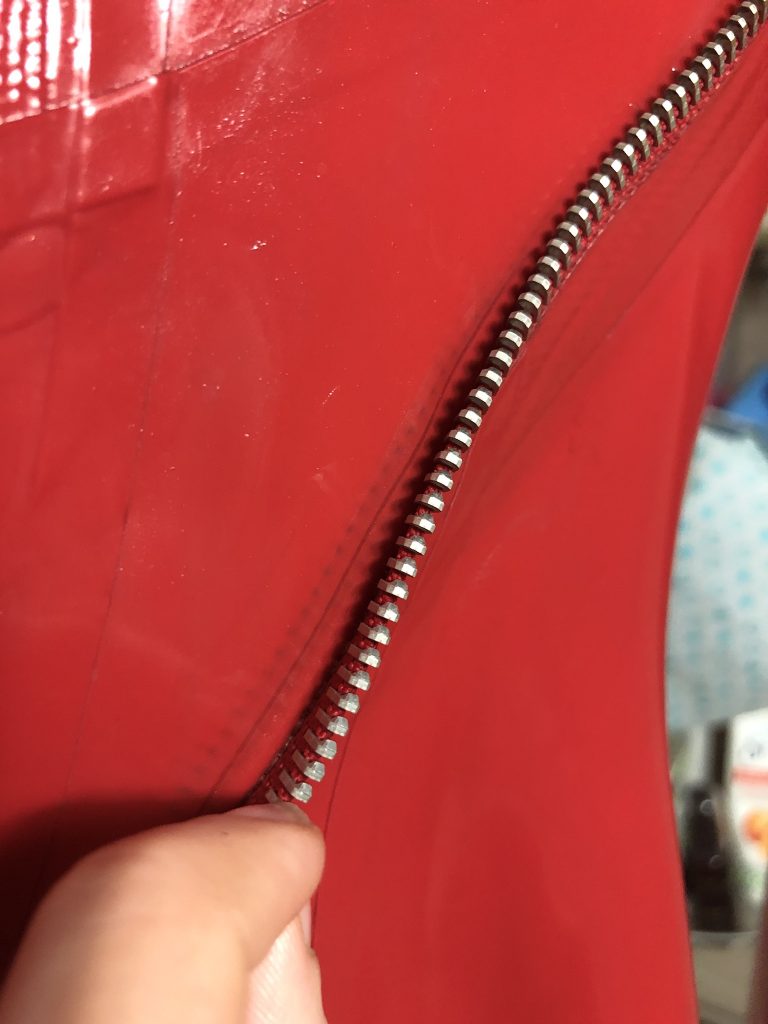
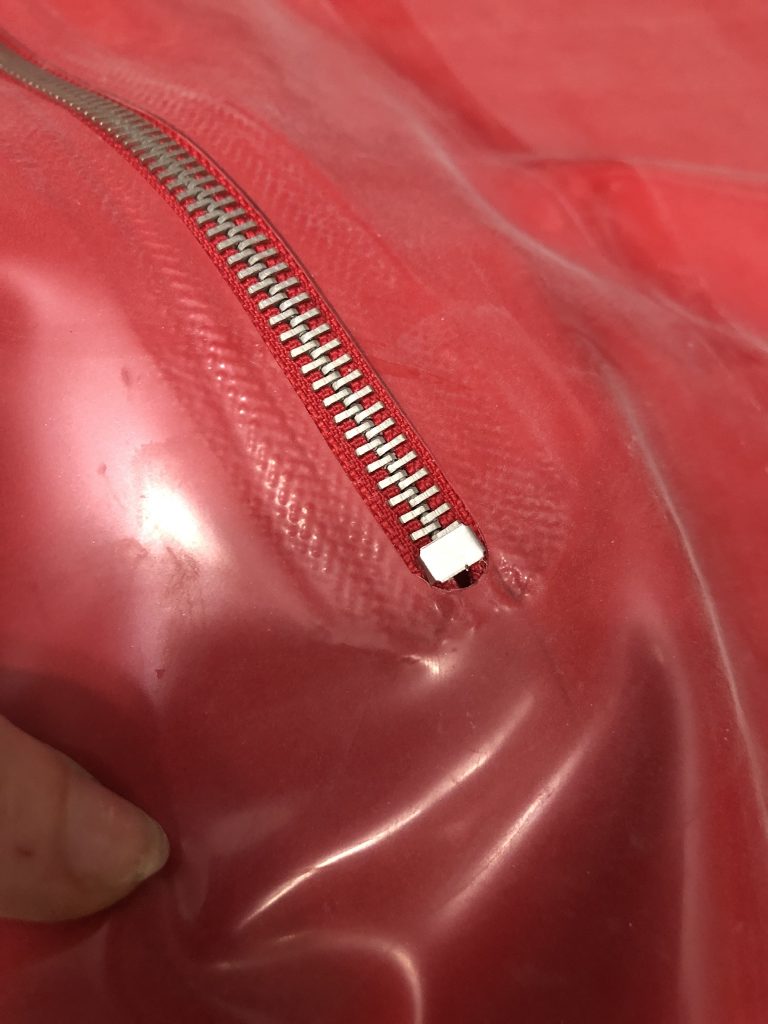
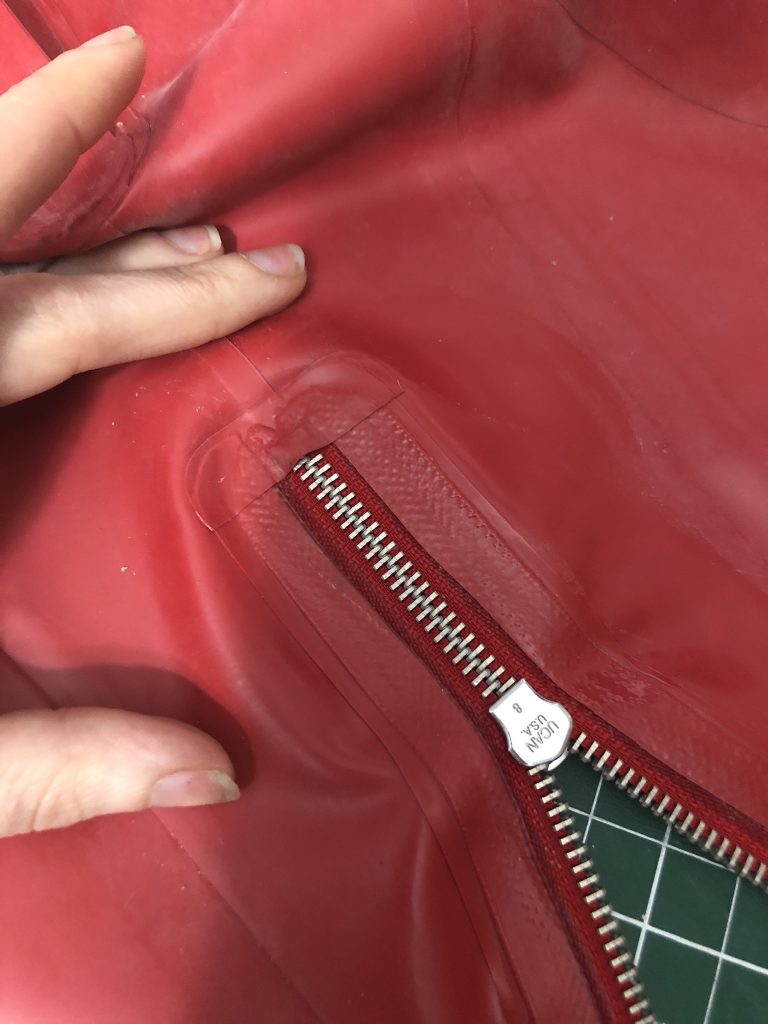
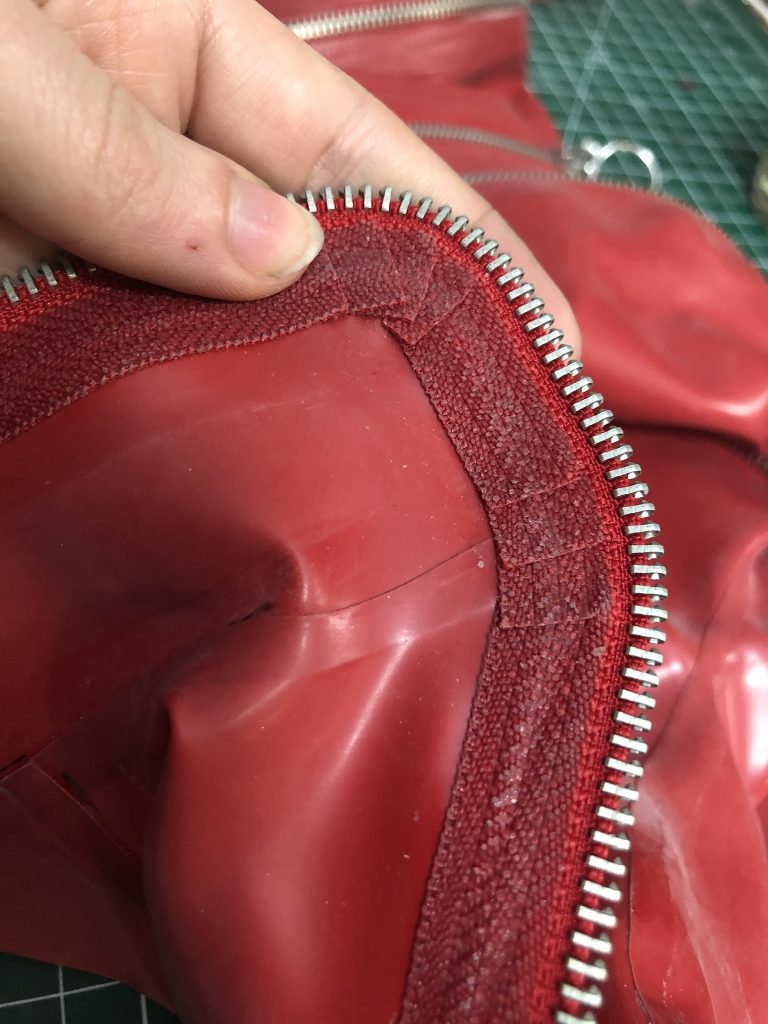
This is me pulling back part of the Hell Zipper on the back. That black that you see is permanant discolouration on the latex from coming into contact with metal.
This happens with all colours of latex on some level, but light and bright colours (red, transparent natural, white and pinks are the worst for this in my experience) are especially susceptible. (By contrast, good luck fucking up black, that shit laughs in the face of discolouration.)
This is also apparent on the inside of the zippers, which is another reason why I wanted to have these flaps behind them; it’s keeping the zippers from discolouring the back of my catsuit.
This probably isn’t going to be a cosplay that really stands the test of time as a result: this discolouration is damage to the latex, and eventually it’s likely that the metal will just eat through the latex to the point where the catsuit is no longer structurally sound.
But until then, I’m going to try and get as much wear out of her as possible!
