
This is a post from October of 2019 Originally! I am aware it’s after halloween in 2020 when I am posting this, don’t worry. My sense of time isn’t THAT off. Yet.
Happy Halloween! But more importantly — HAPPY MY HERO ACADEMIA SEASON FOUR PREMIERE! So while I wait to be inevitably disappointed by the fact that this is going to be a recap episode, let’s talk about making Shigaraki’s Hands!
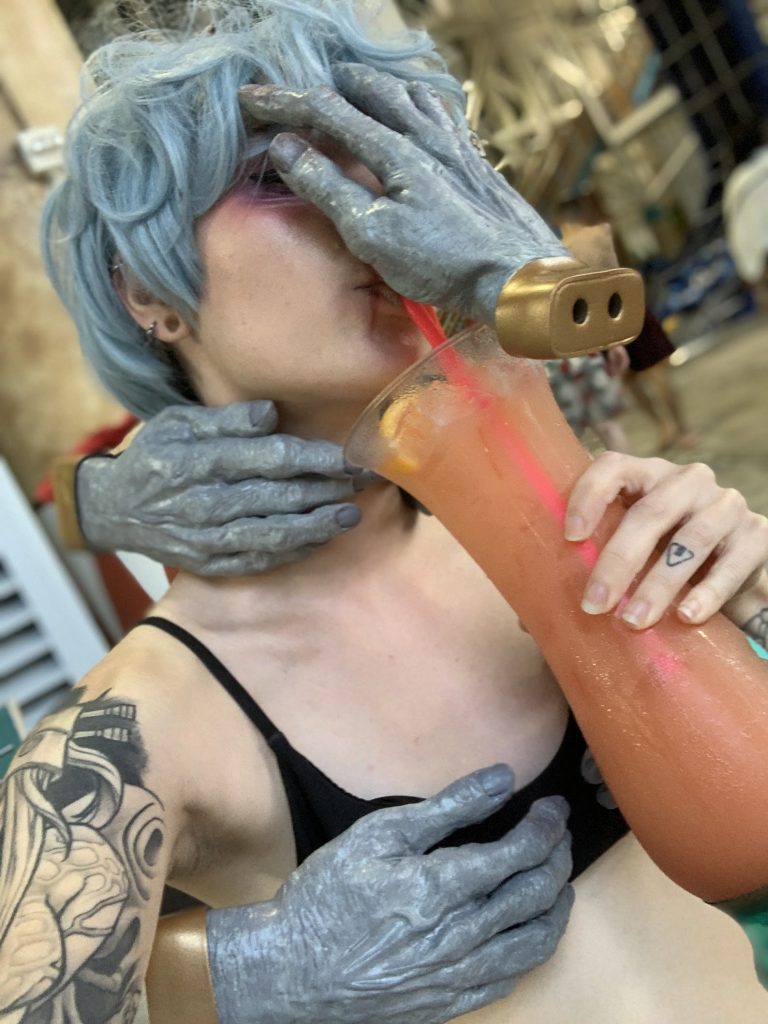
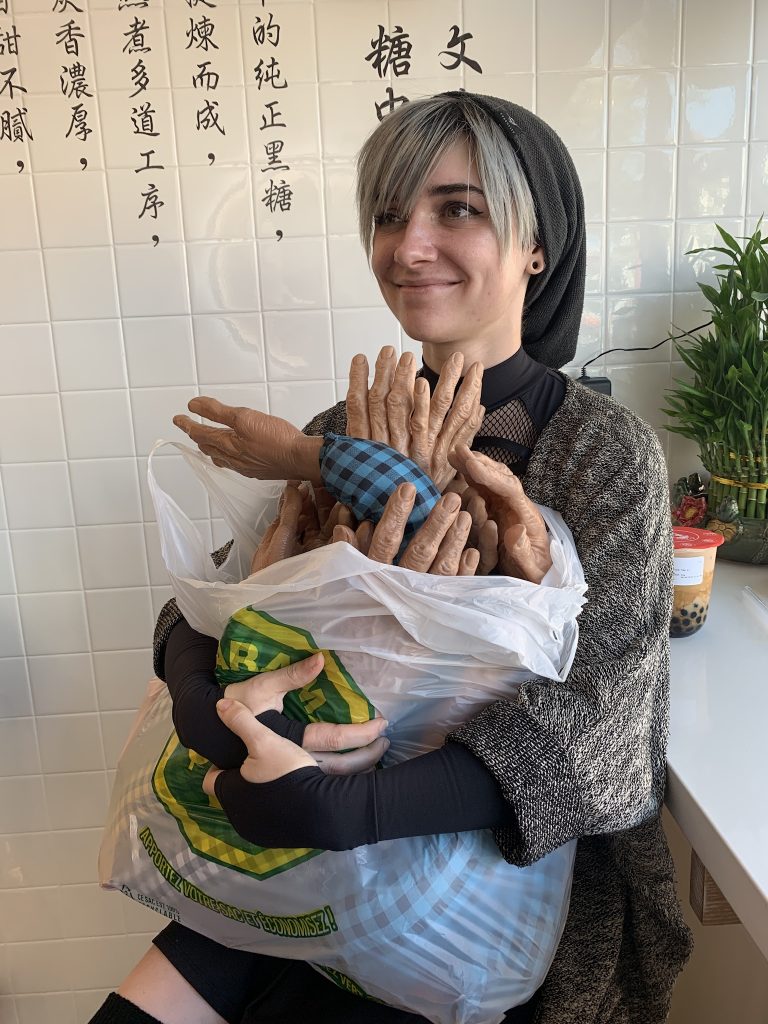
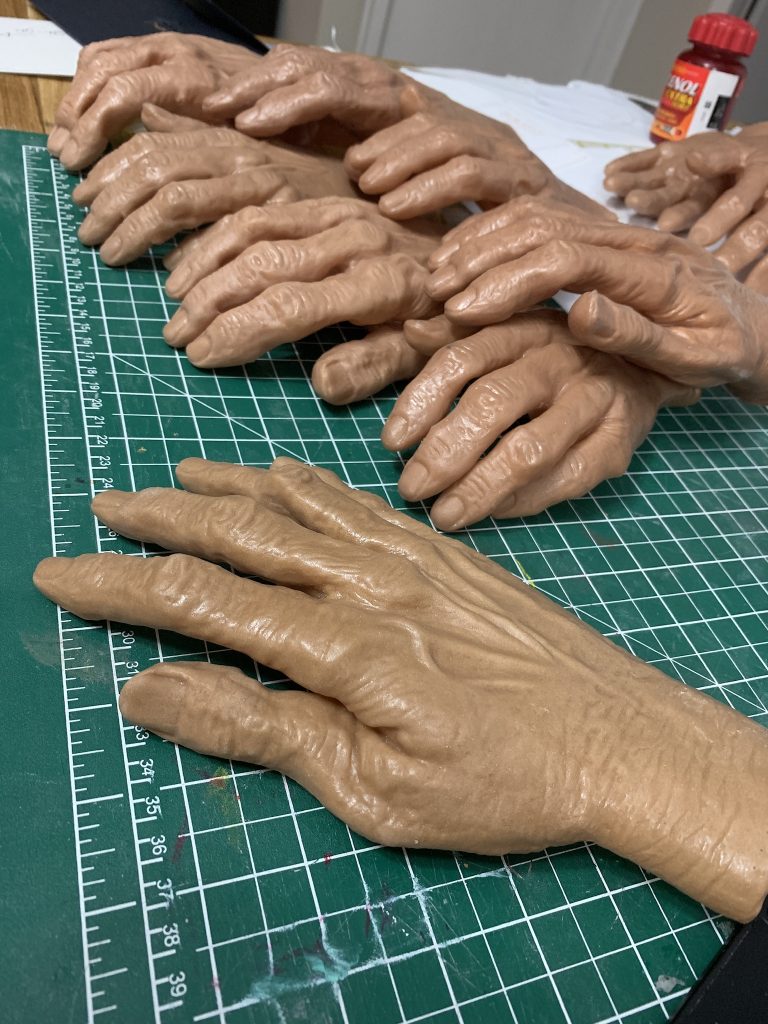
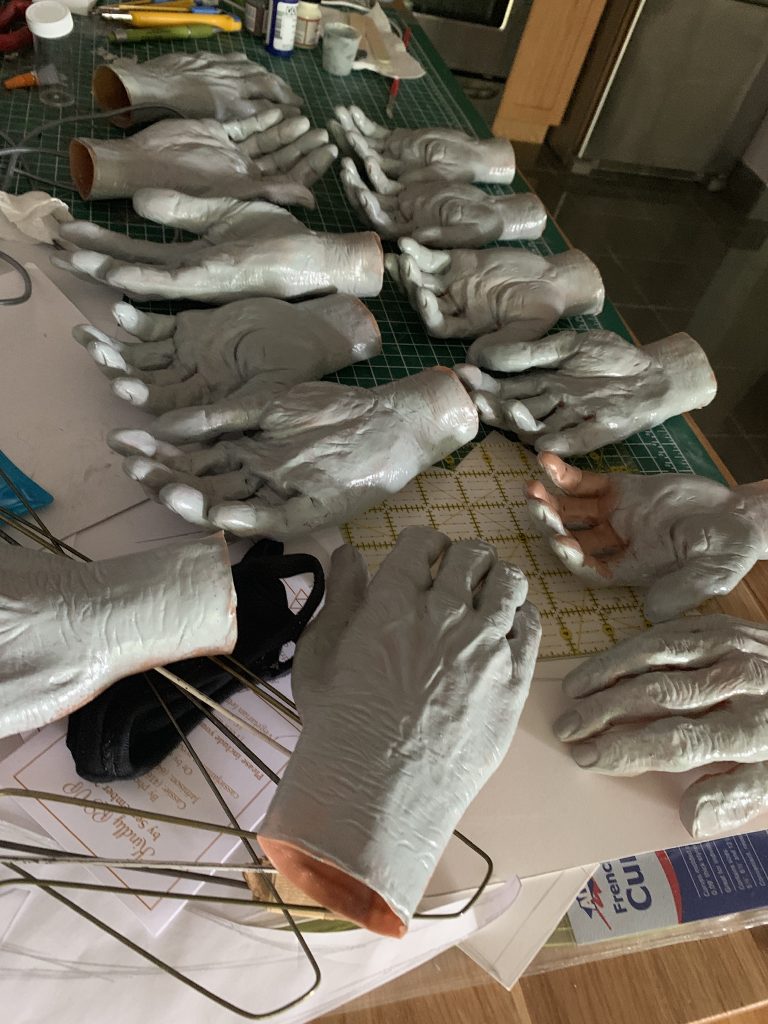
Even though I’ve only shot the sexy pool version of this cosplay (because I’m a problem), I’ve actually finished all fourteen of the hands Shigaraki wears canonically, and now I’m just waiting on the coat I bought for him to get here so that I can properly install everything.
But today, we’re talking about hands, specifically.
Step one: Go to your local dollar store. Purchase a lot of Halloween hand decorations.
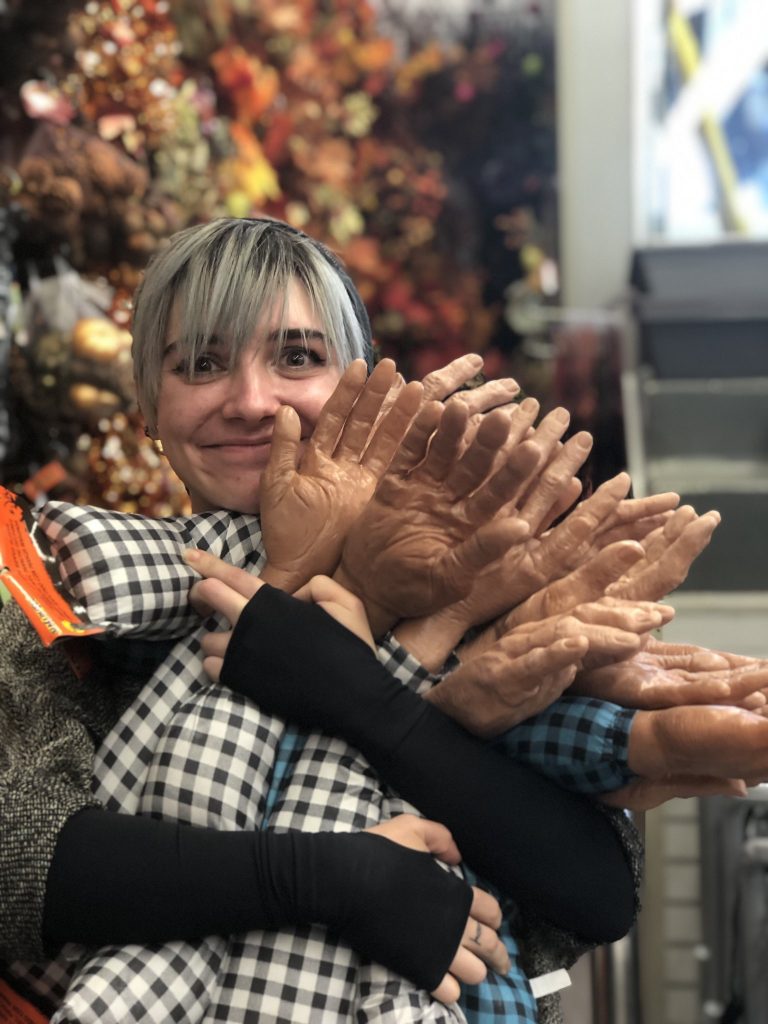
Specifically I bought these, because they’re rubbery and disgusting feeling and ALSO because they come in pairs. This is really important — because of how Shigaraki wears all of his hands, I needed matched pairs. Which means I rifled through hands in their Halloween display like a crazy person for approximately ten minutes.
All of Shigaraki’s hands came to a total of about $50. (Not including the new hand that I purchased for the Father Hand, bu we’ll talk about that way at the bottom.)
Alright, so you have all your hands.
Now we have to make them look disgusting.
First step was to take them off of the arms. The arms in this case were just sewn down, so I cut all of the stitching with a seam ripper and just popped the hands out of the stuffed sleeves.
Hands!
Now, these hands are all really flat, and if you look at any reference of Shigaraki, all of his hands apparently stay on by grip. (Man, fuck building things from Anime, why do I do this? Haha.) I knew I wasn’t going to be able to get flat hands THAT grippy, but I wanted them to at least be making a sort of gentle cupping motion.
And so, I set about gently flaying and then reassembling all of the hands.
Like this:
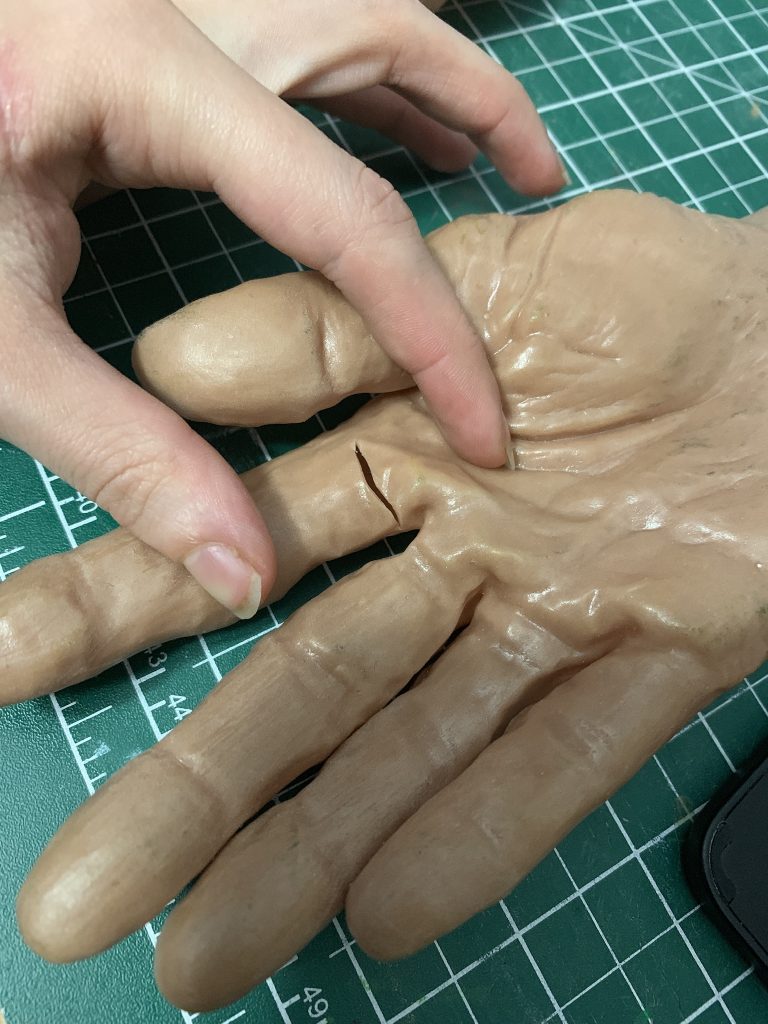
I cut small incisions into the inside of all of the knuckles, and then super-glued them back together, but bent.
Like so.

The trick On this is to be REALLY SPARING with your superglue! If you put too much on, it takes forever to cure — and I found on these hands, that sometimes too much superglue would prevent it from sticking entirely.
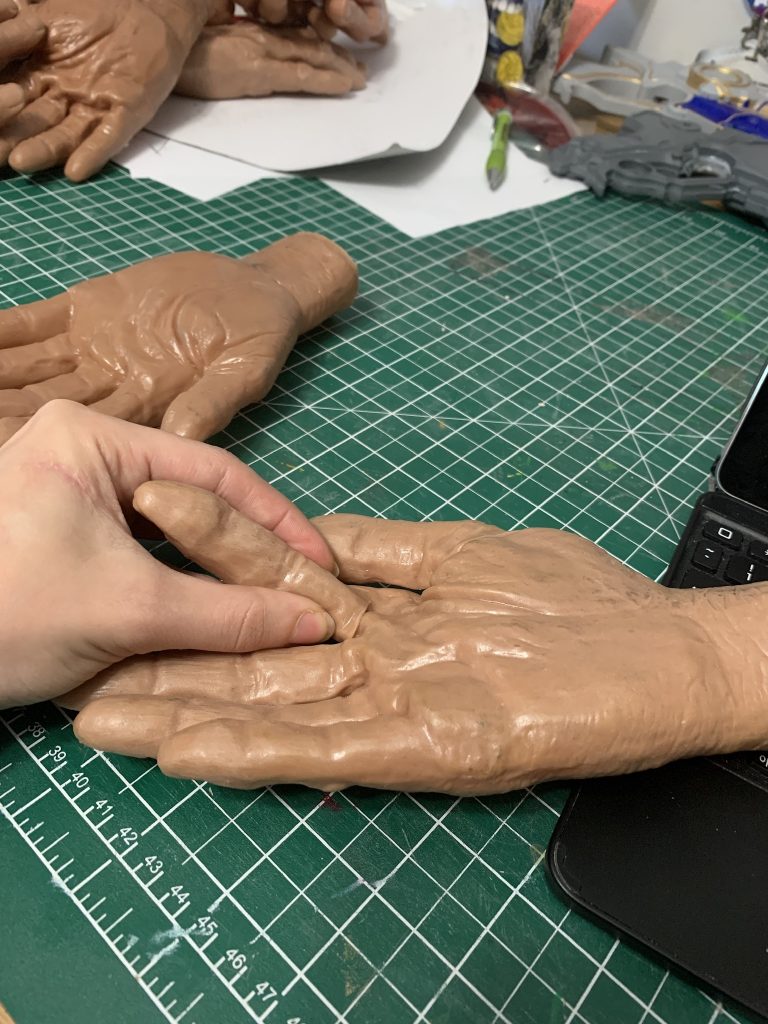
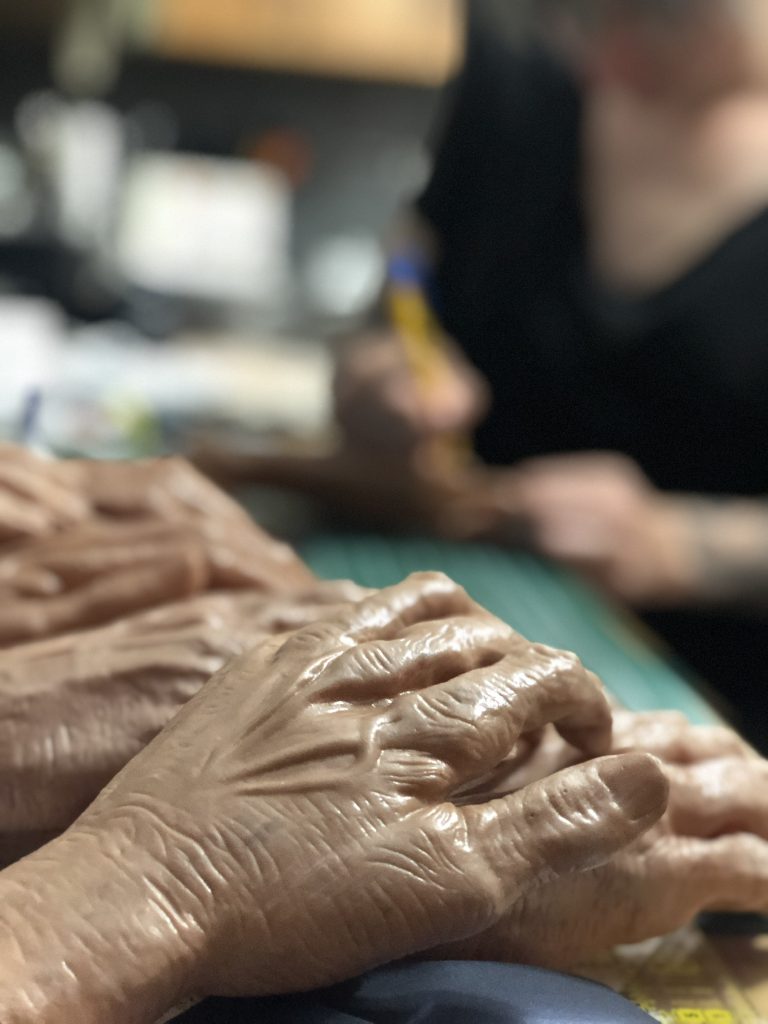
Here’s what the inside of one of the hands looked like once all of the fingers were glued into their new position.
Two of the fixed hands with one of the flat ones still.
The only hand that didn’t need to be made grippy was my original Father hand, which is the one in front there.
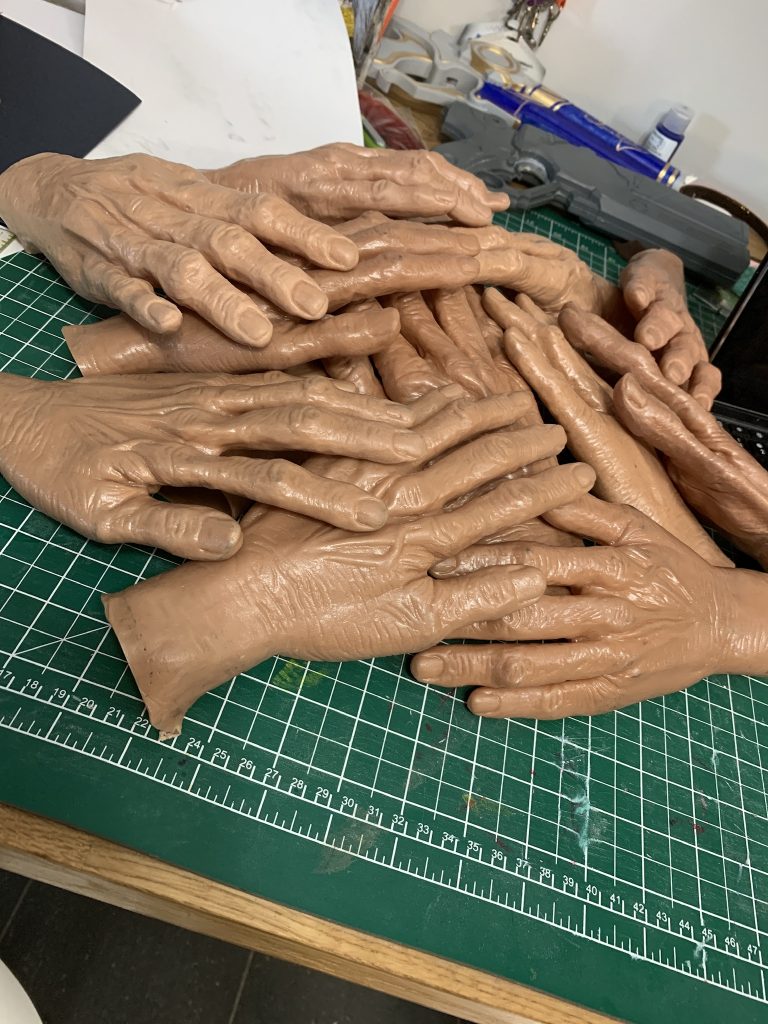
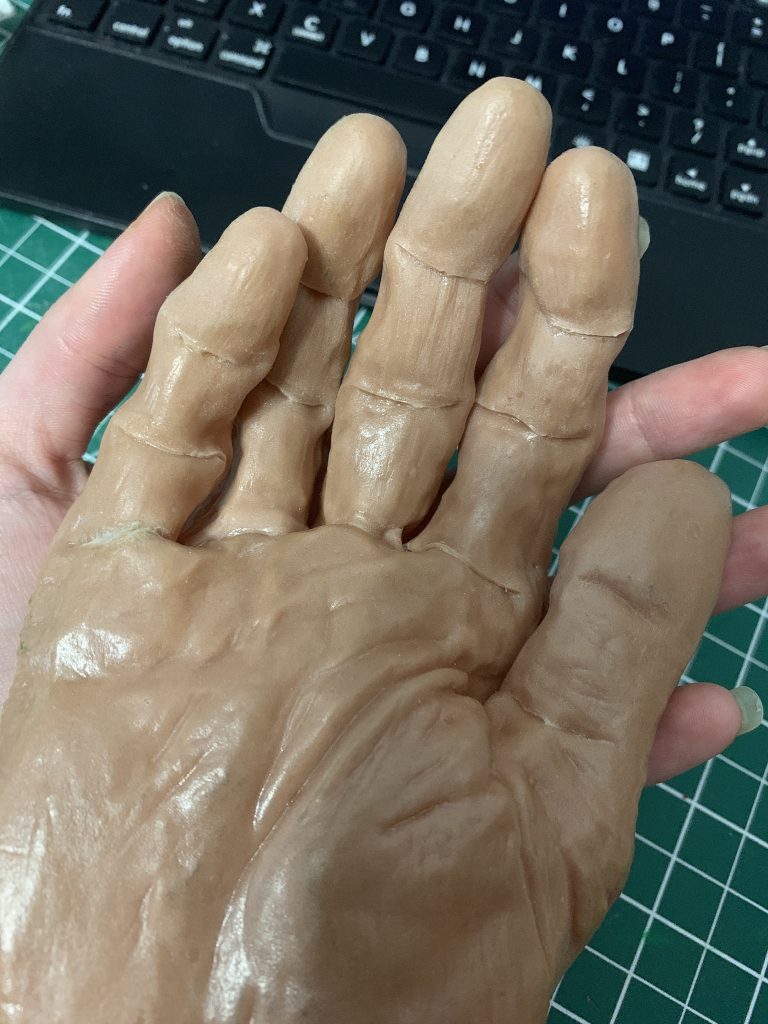
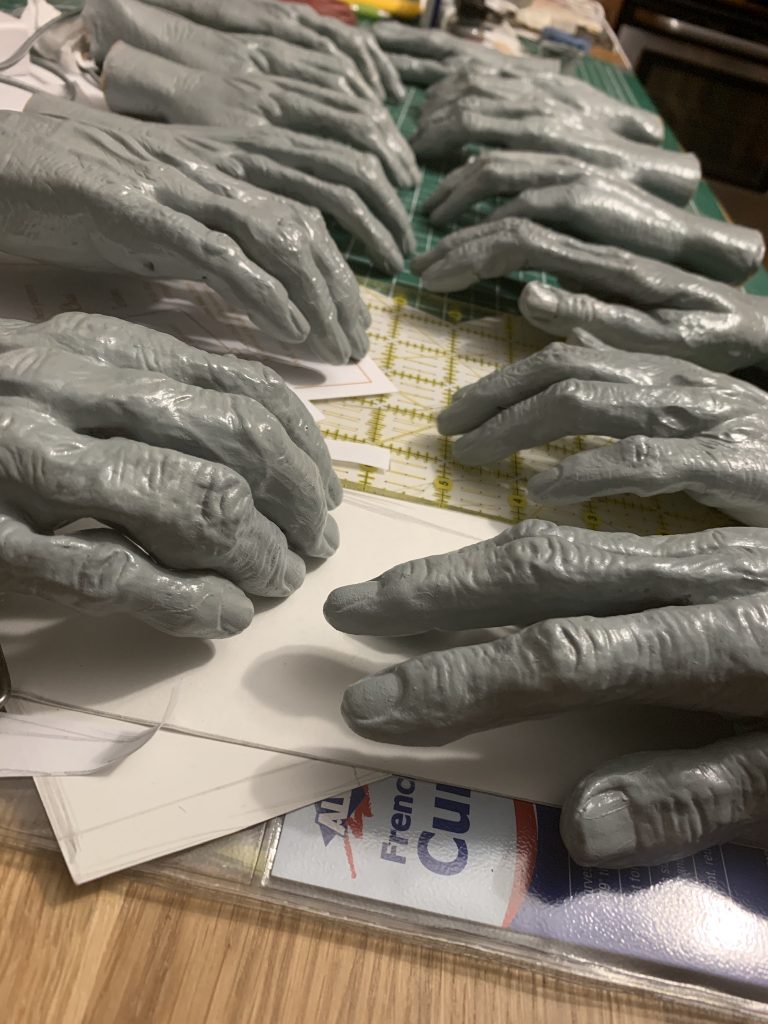
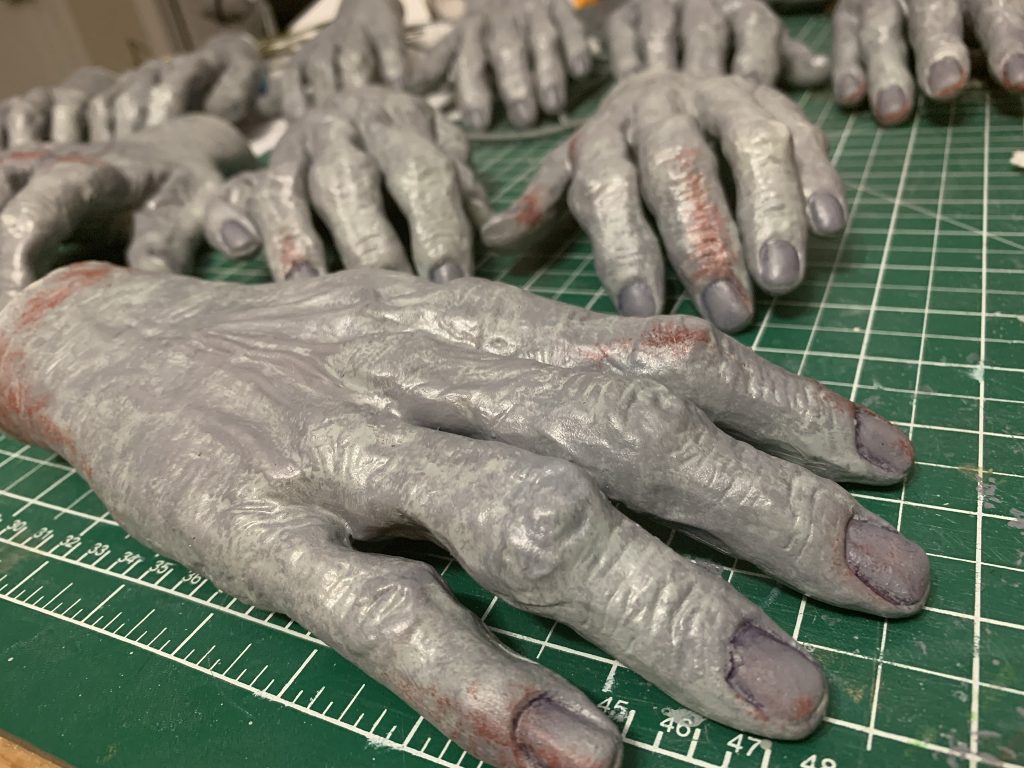
But all of these hands are still looking too dang healthy.
So let’s paint them!
Since I chose rubbery hands, though, my paint options are limited. Regular Acrylic Is pretty flexible, but I really wanted these hands to be able to take a beating.
And so introducing — Acrylic Leather Paint!
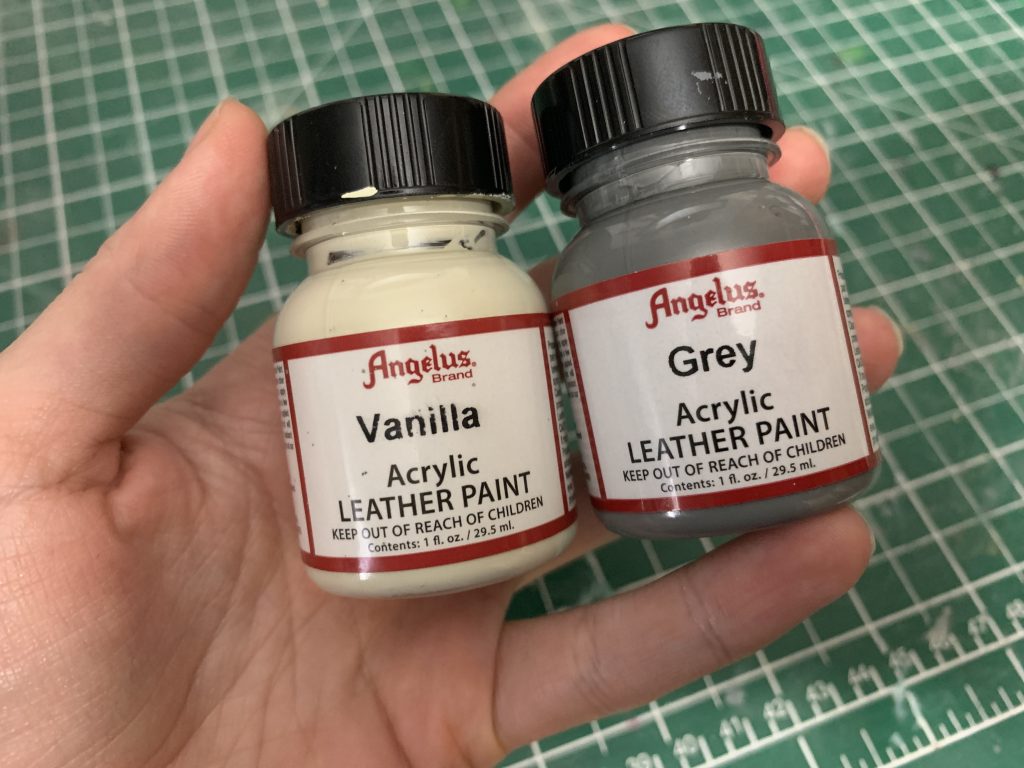
I used these two colours of Angelus Leather paints (and a couple acrylics I had laying around) since when I was buying this paint school had just started and for some reason that meant that Leather Paint was sold out at all of the local art stores. (And Canadian Amazon didn’t have any except for literally 3x the price and not on Prime.)
Specifically, my paint mix looked like this:
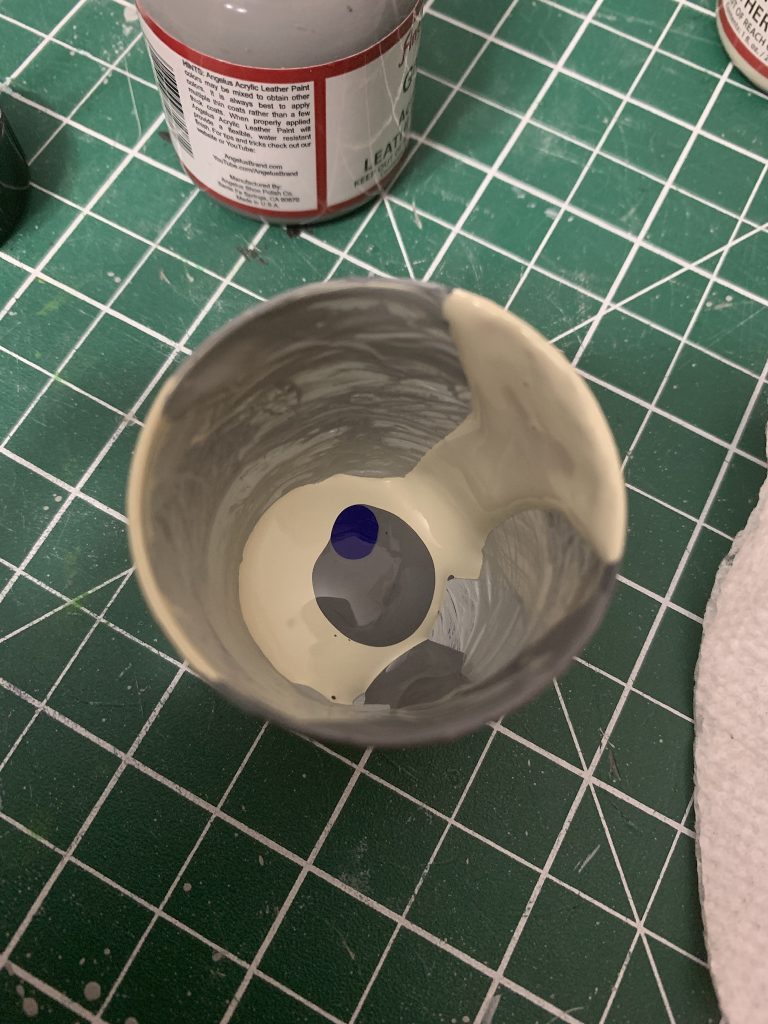
That’s roughly double the vanilla to the grey, and one drop of Royal Blue Acrylic.
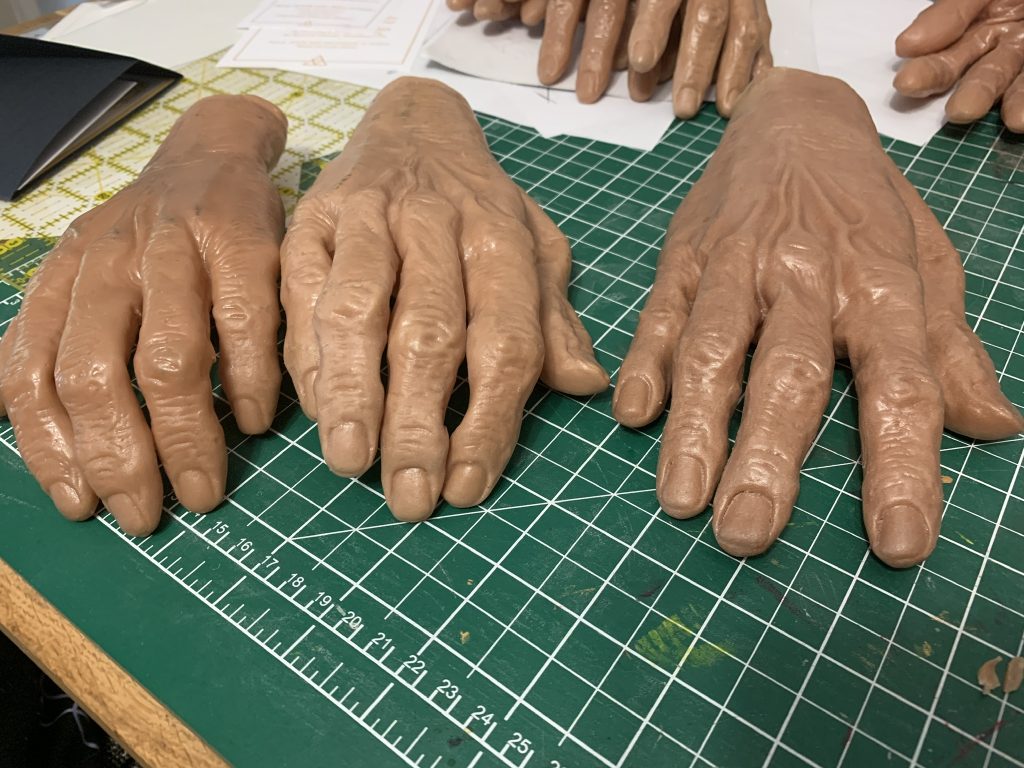
I base-coated all of the hands with this mix; with leather paint, it’s best to do multiple thinner coats as opposed to one thick coat, so my base-coating took two coats. I let this dry overnight, just in case, but honestly I think about an hour of dry time between coats was probably enough.
Base Coating.
Once the base coat was on I wanted to take it further to REALLY make the hands look disgusting. Which meant …
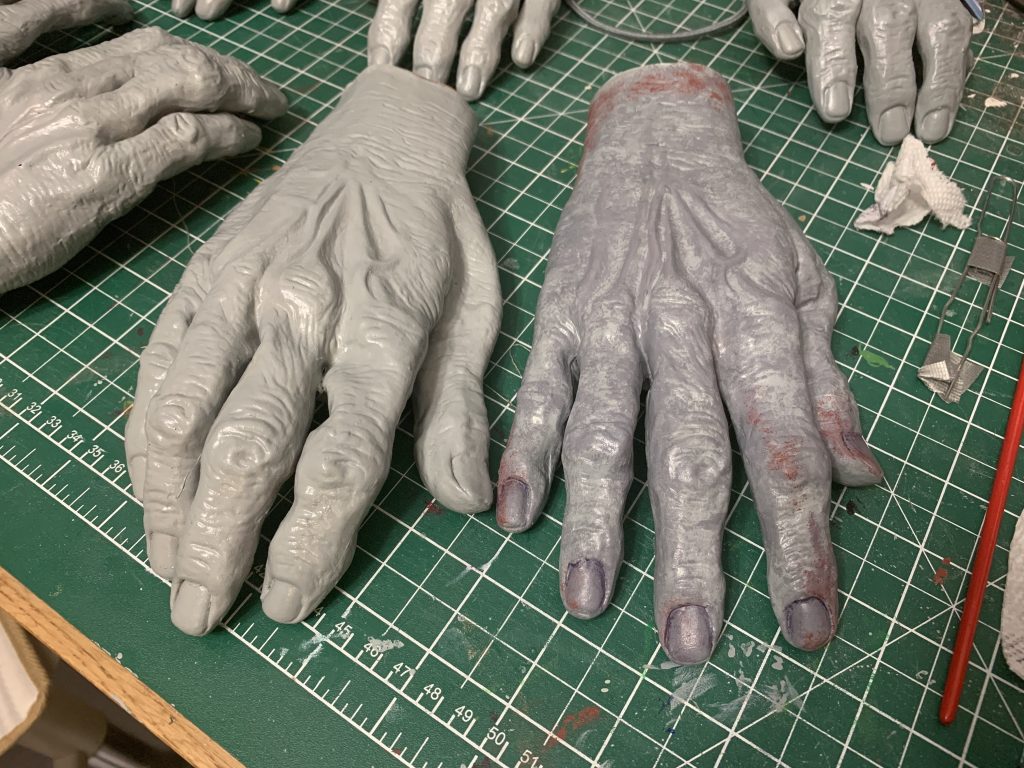
Weathering! I didn’t do an in-depth tutorial on how I weathered these because I’m still not 100% sure I’m happy with how it went down. But here’s what I did …
First I mixed a darker colour mix with the leather paint, which was approx 60/40 Vanilla/Grey, and then had two drops each of blue and red acrylic.
Then I dry-brush stippled it on top of the existing colour — that is to say, I dipped a dry paint brush in the paint, gently wiped any excess off on a paper towel, and then tap the brush onto the hand to make this mottled look.
The “blood” is just red acrylic that was also stippled on.
Then the nails are watered-down blue acrylic with just a touch of red (I think approx. 3:1 blue:red ratio). I applied the paint around the edge of the nail bed, and then watered it down more for the rest of the nail (with just a wet paintbrush), and then blotted the whole thing with a paper towel.
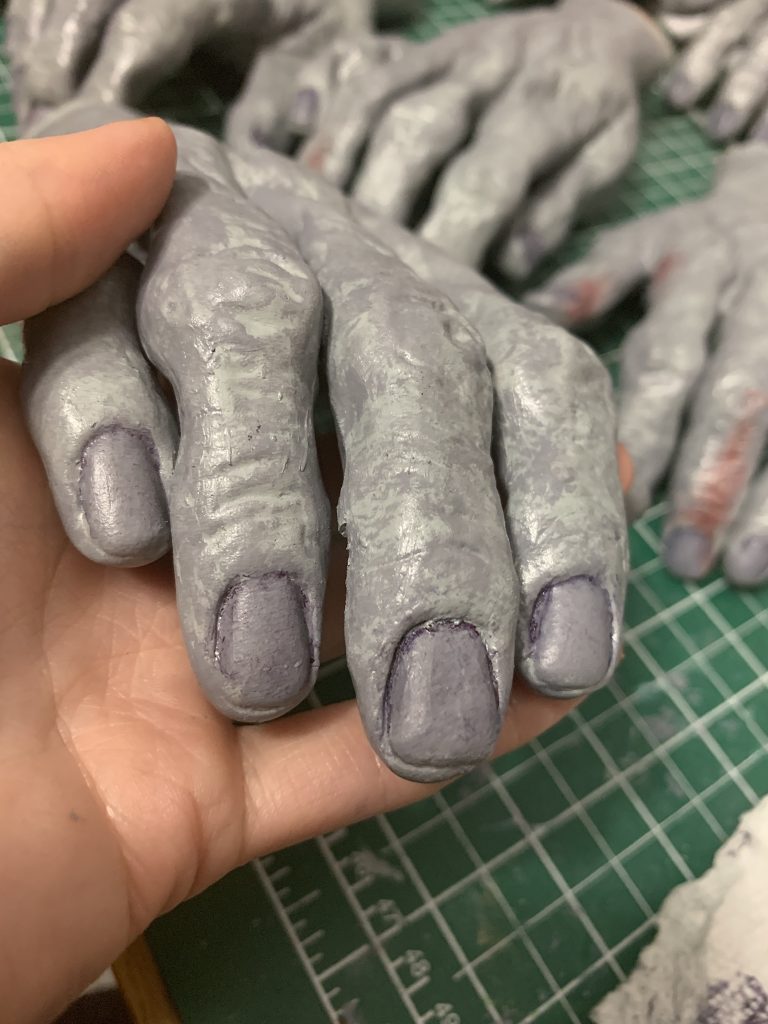
Then I repeated this for all fourteen hands, haha.
So, the hands were all done — the last thing to do was to add the caps onto the end. I did a lot of research into what other people do for the caps, and honestly? I didn’t like any of them. Most of them were a little too boxy for my picky ass, so I had to bring out the ol’ thinking cap, and this is what I settled on doing:
I used a couple different kinds of foam, plastidip spray, and automotive gold paint for these.
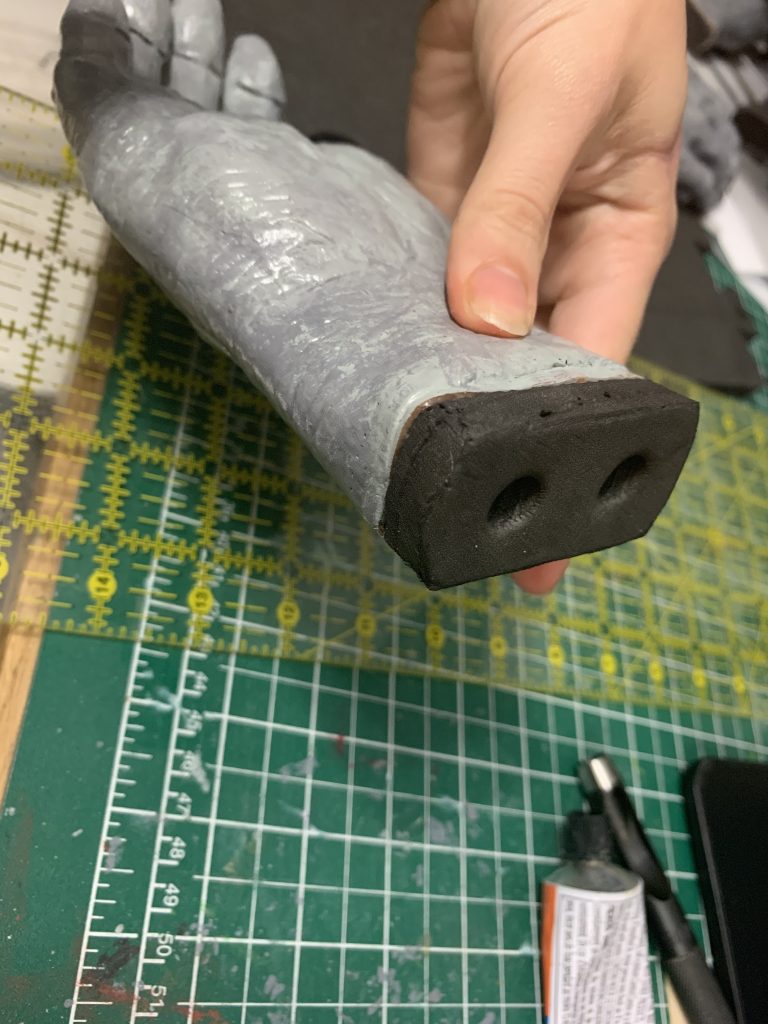
First thing’s first: I stuffed all of the hands with polyfill, which is essentially quilt batting, just to give them a little bit more strength. Luckily I had a lot of that: it came from the arms that had originally been attached to the hands. Score!
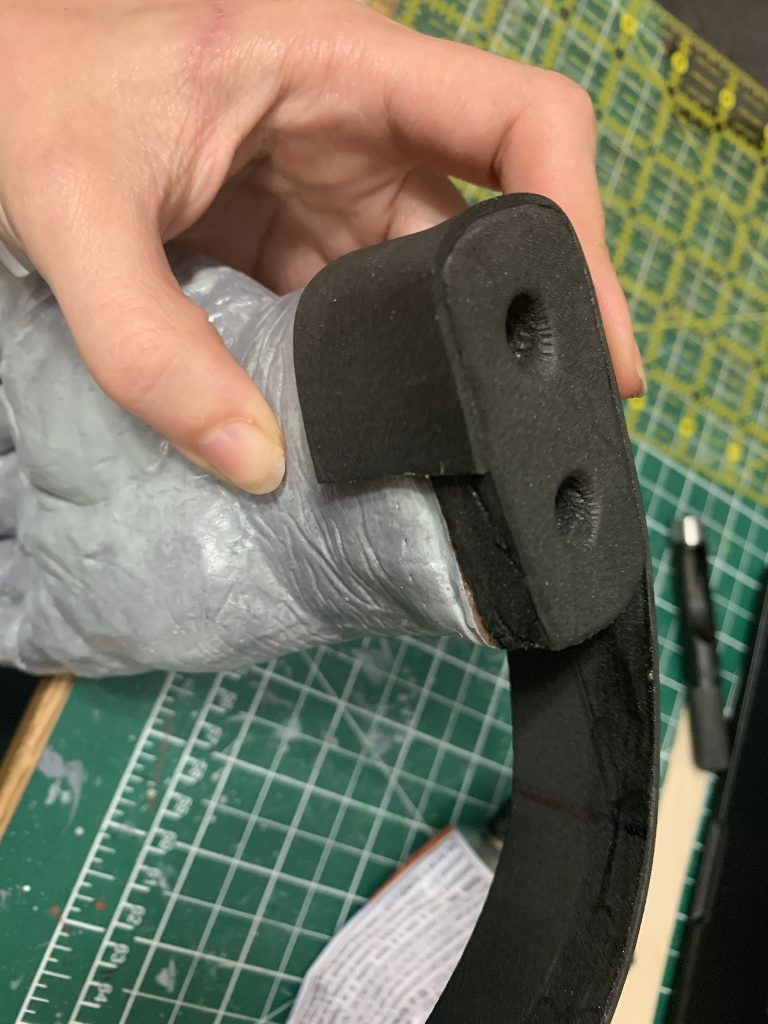
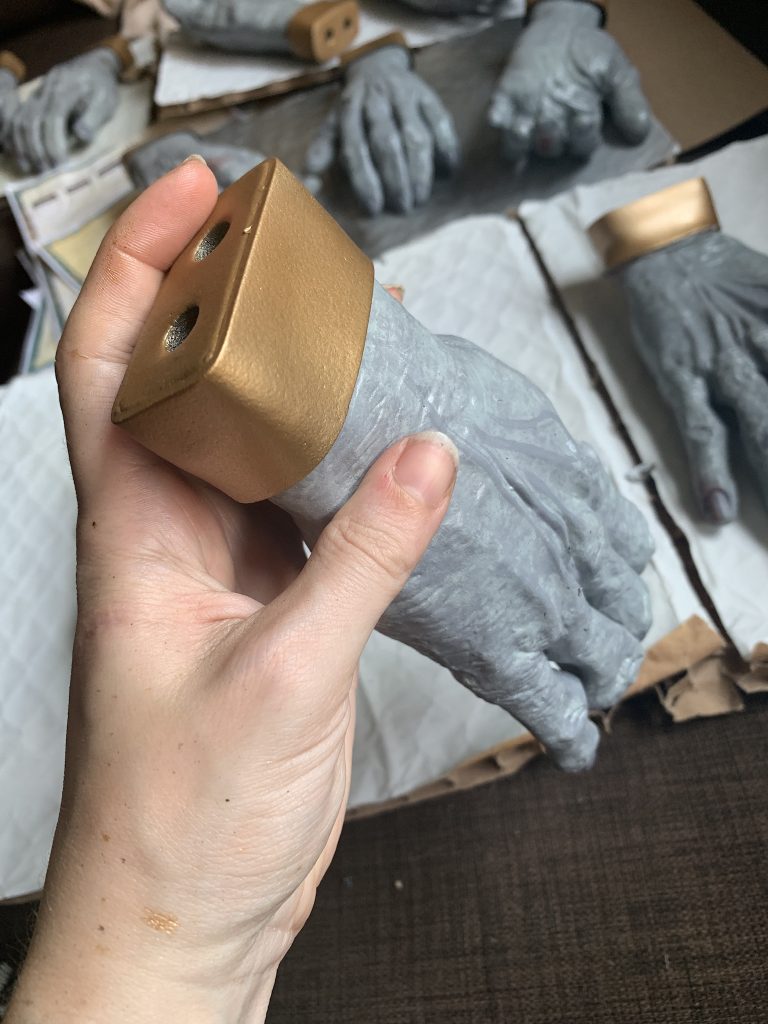
Then I had to make an end-cap for the hand, to keep the polyfil in.
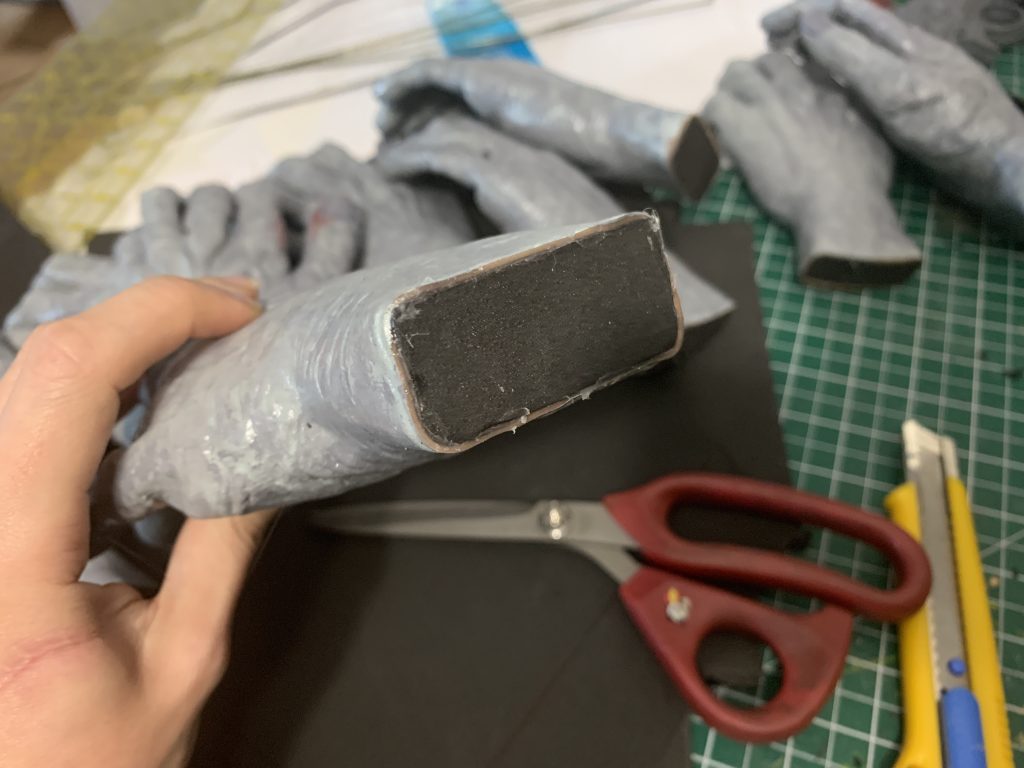
You can see, this also had the added bonus of forcing the wrist shape into that square, boxy shape that I needed for the bases of the hands.
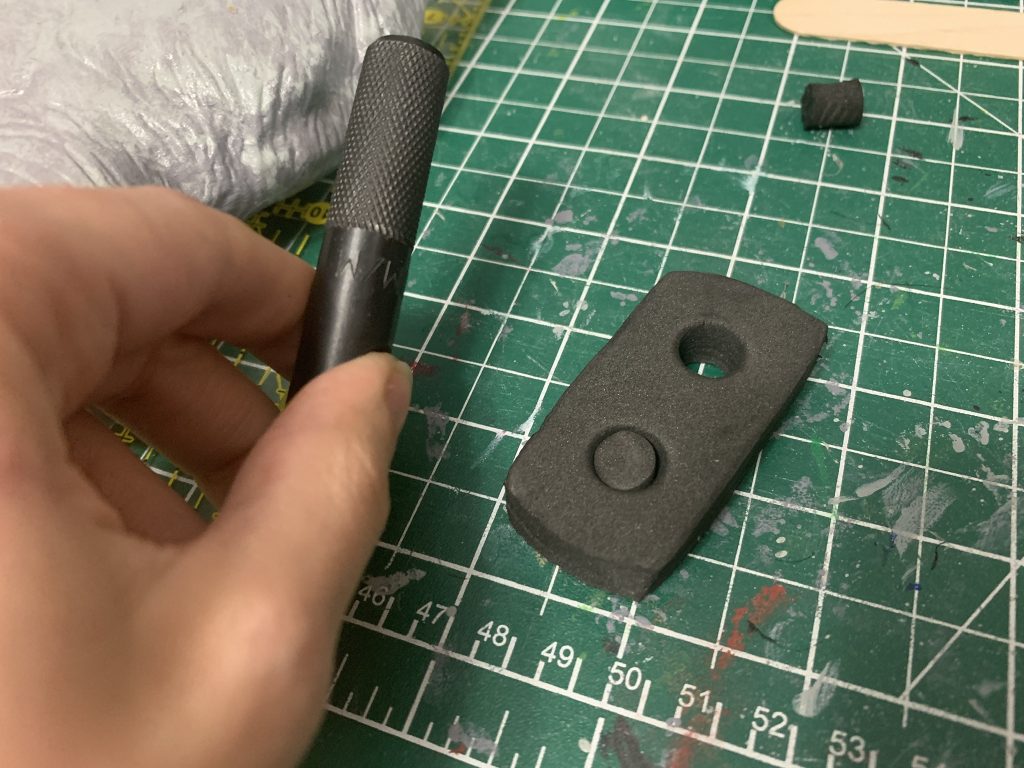
The plug is made from thick foam (in this case, walmart floor mats), cut out with an exacto knife and hot glued into place.
Once all the hands were capped, I had to make another cap for that cap —
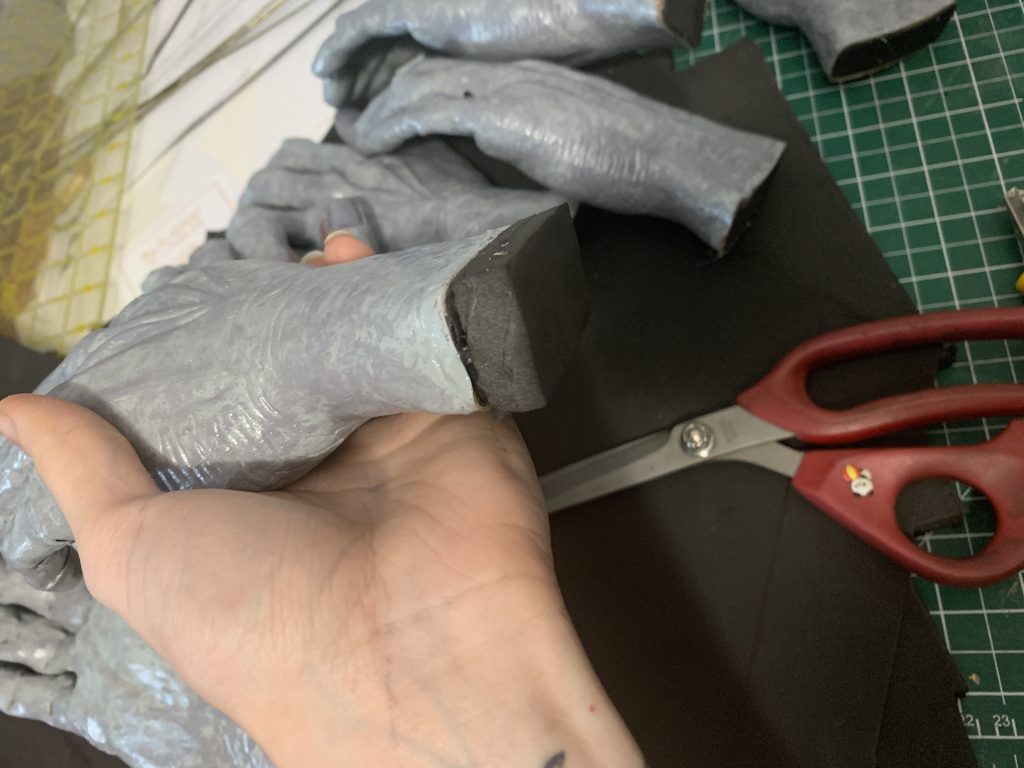
Here it is, mocked up. That’s another layer of foam floor-mat, hot-glued to the first one. (I wound up adhering these more securely with contact cement, ultimately.) I traced each of the hands onto the floor mat, and cut each individual cap one at a time, to make sure it would fit, and be approx the actual shape of the wrist it was covering. (This is because some of the hands were slightly different shapes and sizes, so I couldn’t just pattern one and call it a day and trust it would match up to the wrist every time.)

All of Shigaraki’s hands have two little ports in them, though — some of which are actually used, some of which are ornamental. I did this by just punching through the foam with a leather punch —
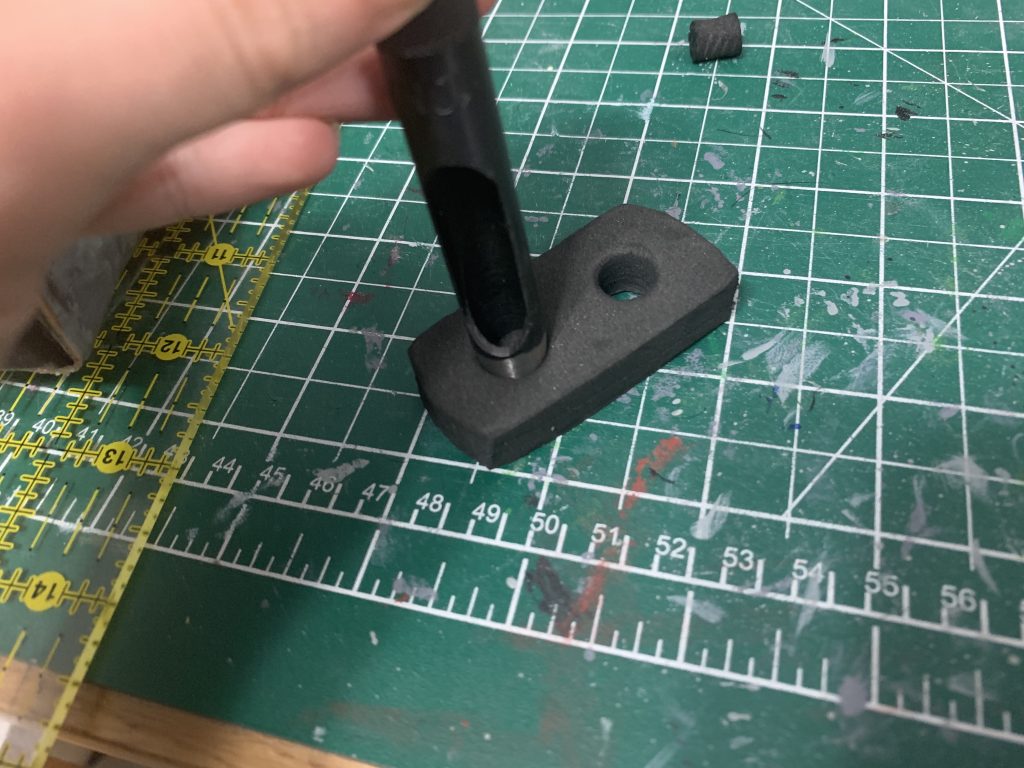
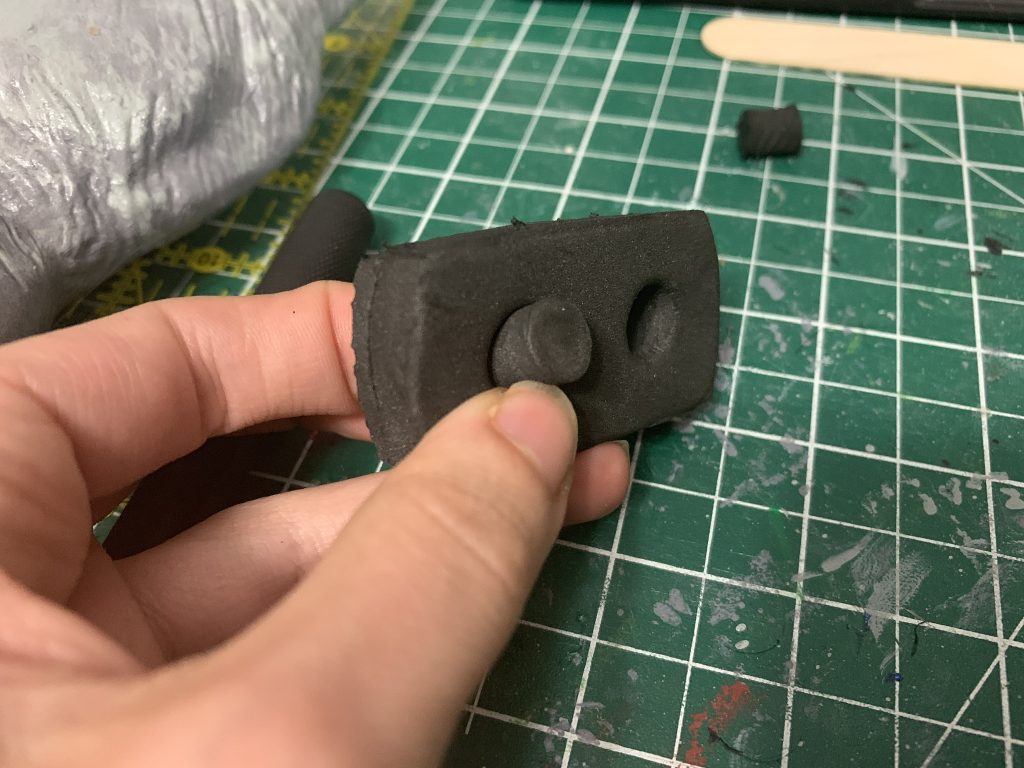
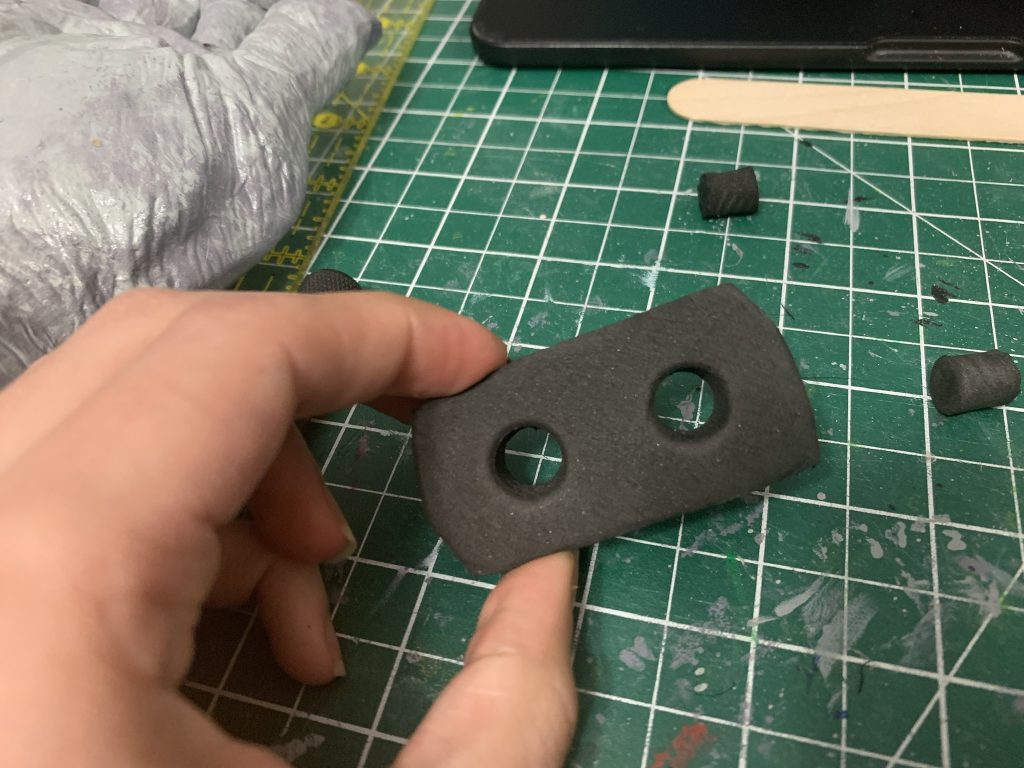
This is the cleanest way to get holes in foam — and bonus, you can also use it to make foam circles for rivets in your foam armour!
And firmly cemented into place.
You might notice that the edge of my cuts on the foam aren’t great — I didn’t swap out my blade with a sharper one because I knew I was never going to see any of those edges. And that’s because …
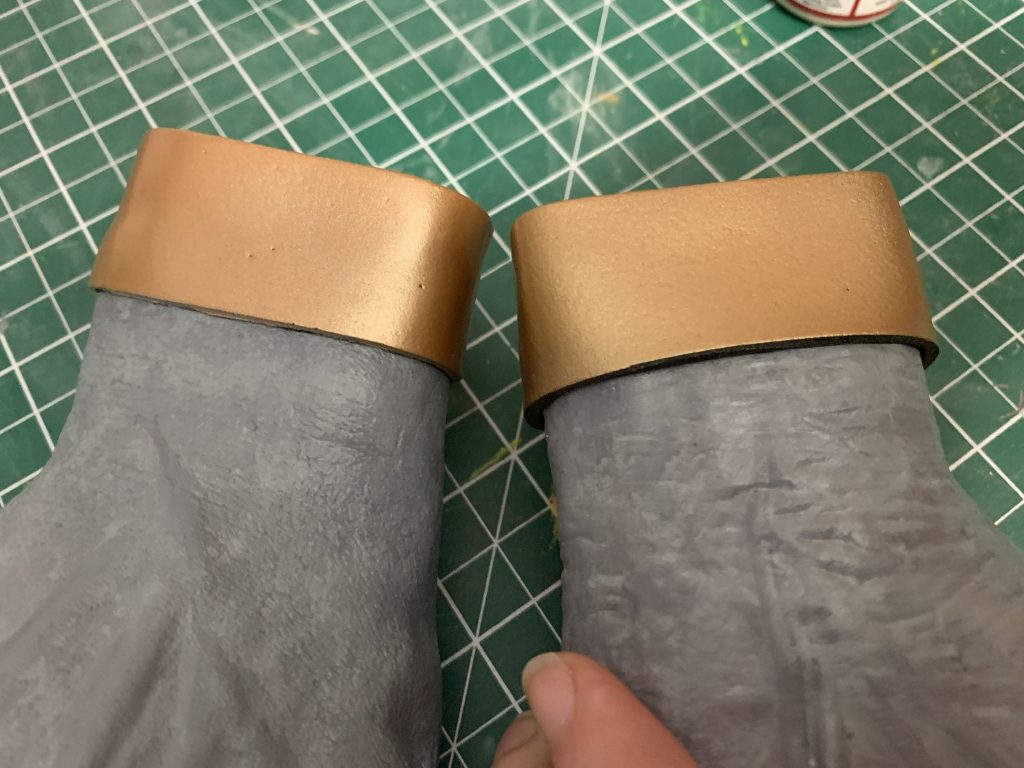
The next step was to take a two inch strip of thin craft foam and adhere it all around the edge of the cap, so that you can’t see any of the gross edge of my cut, or where the rubber hand ends. This is just dry-mounted into place with contact cement.
To make sure each piece seamed together perfectly, I didn’t cut the foam strip to size until it was mostly in place. 
To keep the contact cement from sticking to itself, I just butted a popsicle stick up against the beginning of the strip …
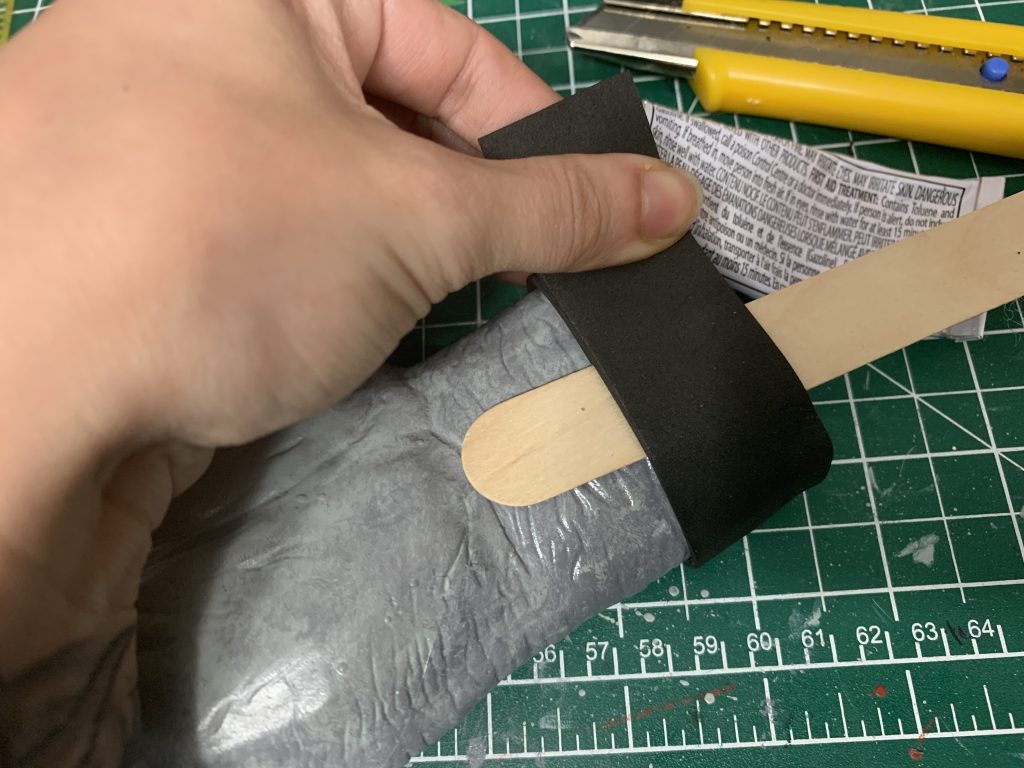
Then used the popsicle stick as a guide for where to cut my foam, so that the pieces would but up perfectly. Don’t forget to also put rubber cement on both sides of that seam, so it also adheres!
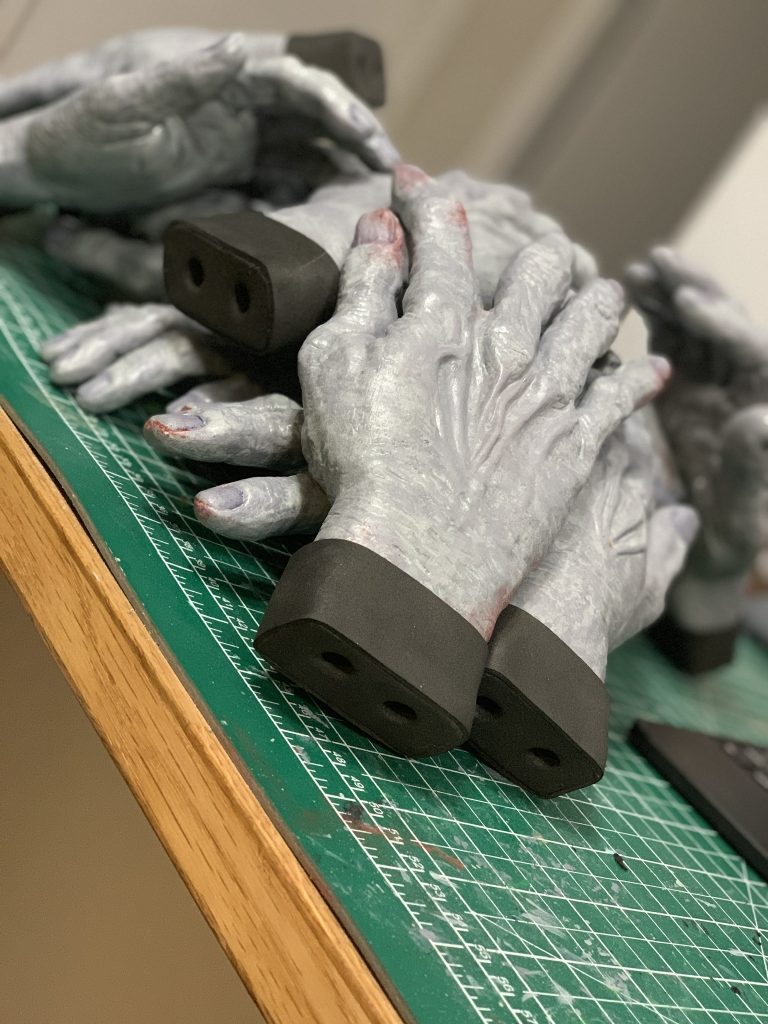
Aaaaand hands, with all of their individual little end caps!
Honestly it was around this point were I suddenly started to realise that fourteen hands is a lot. It was something about putting the end cap on them that made them transform in my brain from A Pile of Hands to Fourteen Individual Props that I Have Created.
Now the last thing was to paint the end caps.
Since there are so many of them, spraying was really the only way to get these done in an even sort of timely fashion.
First, I had to mask off all of the painting I’d actually done. Thanks painter’s tape!
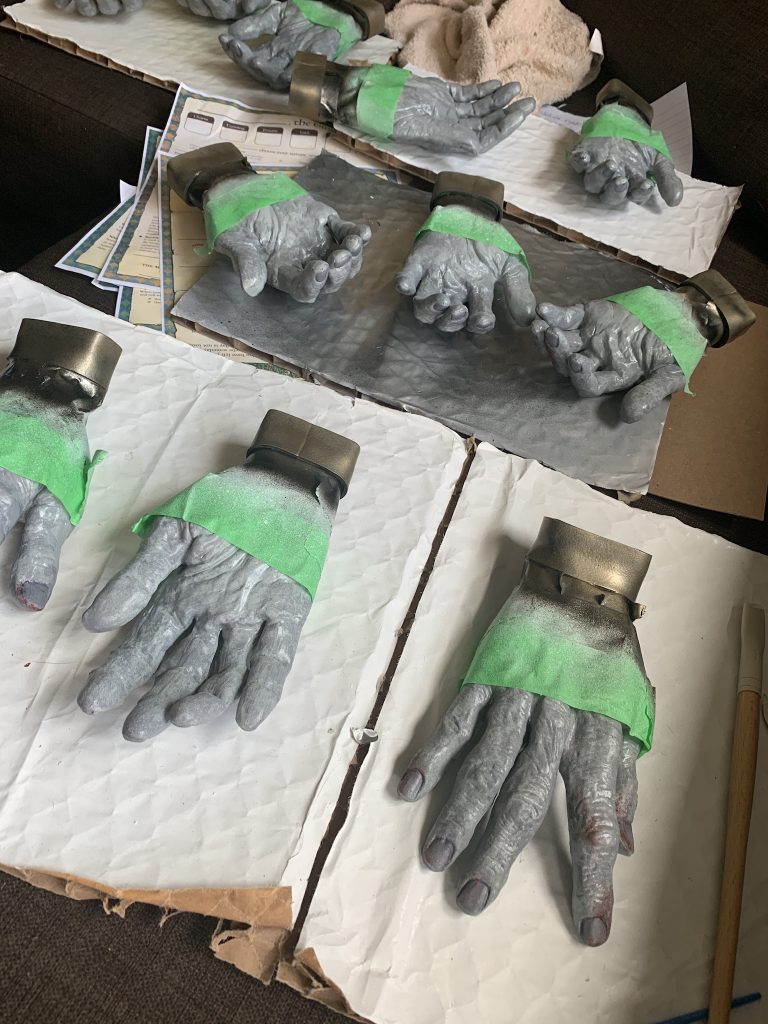
This keeps any paint overspray from getting onto the hand, it all comes right off with the paint when you’re done!
I’ve definitely gone over sealing foam before, but I’m going to give it another quick write-up here, because I’ve learned a few things between now and then.
For all of these hands, I gently heat-sealed them (hit the foam on low with a heat gun until the pores in the foam started to shrink; you’ll be able to see the foam’s texture change as it happens), and then I did three layers of Plastidip. Plastidip is a rubber spray that’s generally used for making things grippy, and it’s a good primer to use on foam if you’re worried about the foam pieces flexing, as it remains flexible when dry.
Personally, I think three layers of Plastidip (two fairly light ones and then one heavy one) is the absolute minimum amount of layers I’d do on foam, and honestly I probably could have done another one.
The other option is a high-fill automotive primer, which is what I use on essentially every other prop I’ve ever made. The downside to this is that automotive primer does NOT flex, but it does make a smoother surface, ultimately, and is sandable. I found it made for a more metal-like finish, ultimately, but the Plastidip I’m less worried, ultimately, about messing up.
The Plastidip also takes significantly longer — 30 minutes between coats as opposed to 5-10 for the primer.
On the right is the automotive primer, and on the left is the Plastidip, finished with three coats of the same paint.
I’m getting a little ahead of myself, though — once the Plastidip was on, it was time to paint! I used Sunset Gold automotive match paint. I just about always use automotive paint if I’m looking for a metallic finish. Pro tip: to really make your metallics pop, use a dark base coat (plastidip comes in black) or do one intermediary black paint coat between your primer and your first metallic layer.
Here the hands are after I gently pulled all the masking.
So there was only a couple of things left to do — but I think I’m going to cover how exactly I adhered the hands (to me and to each other in a couple cases) in another quick post, because this feels like it’s getting really long! (TL;DR Magnets. I glued magnets to the fingers and then put the other ones inside of my bikini, haha. I did more permanent adhesion on Shiggy’s coat.)

