So, anyone who’s familiar with latex, or perhaps just with my last few posts about latex, you’ll know that latex isn’t sewn together — it’s glued. But there are methods to sew latex, and you’ve probably seen times when it’s been used, because I used this a lot on my 2B.
It’s not exactly a method that I use for things all the time, and I can’t pretend I do. It’s definitely a hugely niche thing. But as far as I know, I basically pioneered it, so I’m super proud, dammit. 😂 That, and my methods of upholstering latex to foam — which I have to post about soon, I used it for the Honeybee Stingers!
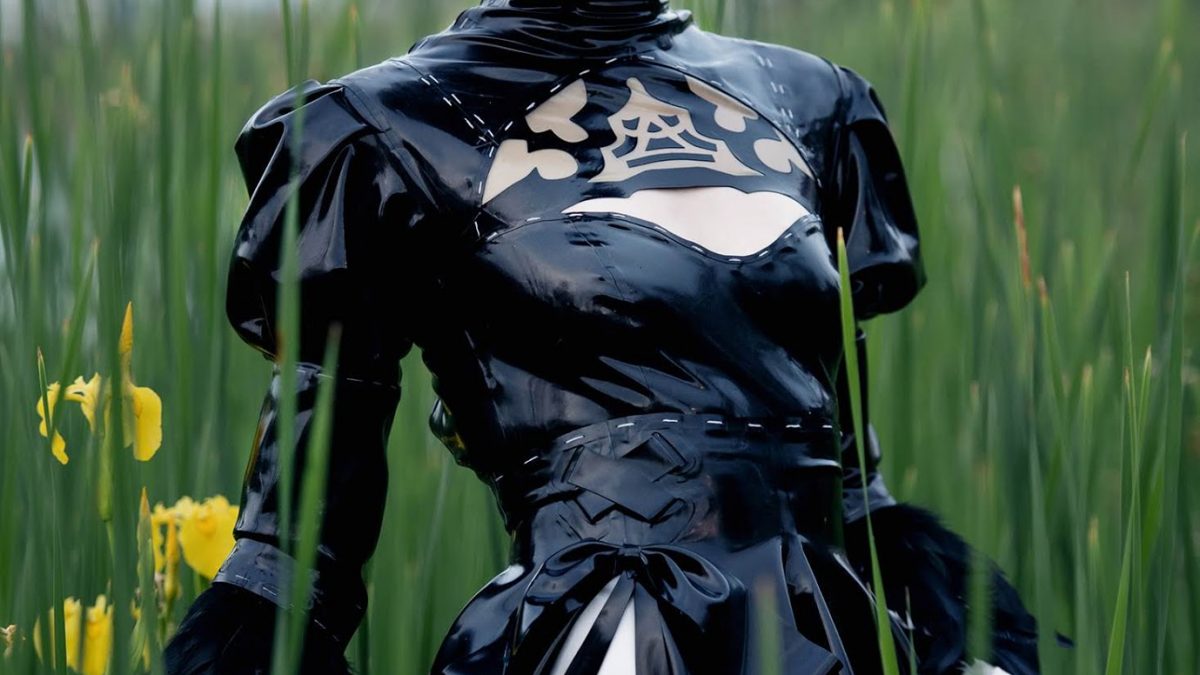
Some of my 2b reference makes it very obvious that some of the white on her outfit is large, individual stitches —

(This screen grab is from her in Soul Caliber, but it makes my point.)
And I didn’t want to individually stick on tiny pieces of white latex onto all of that — for one, making them all match would drive me completely insane. For another, they still wouldn’t look enough like stitches for me.
So I decided to do real stitches.
The principle behind what I did is just a marrying of a couple of things that you have to know when you’re working with latex:
- First, that latex rips most often when it stretches and there is a hole in the area that’s stretching
- And second, that you can stop latex from stretching by adhering something to it that does not stretch
So given all of that, I reinforced each stitch individually, and tied off each and every stitch individually. 😂 It was a ton of work, but it works and it did what I want it to! So I am very proud.
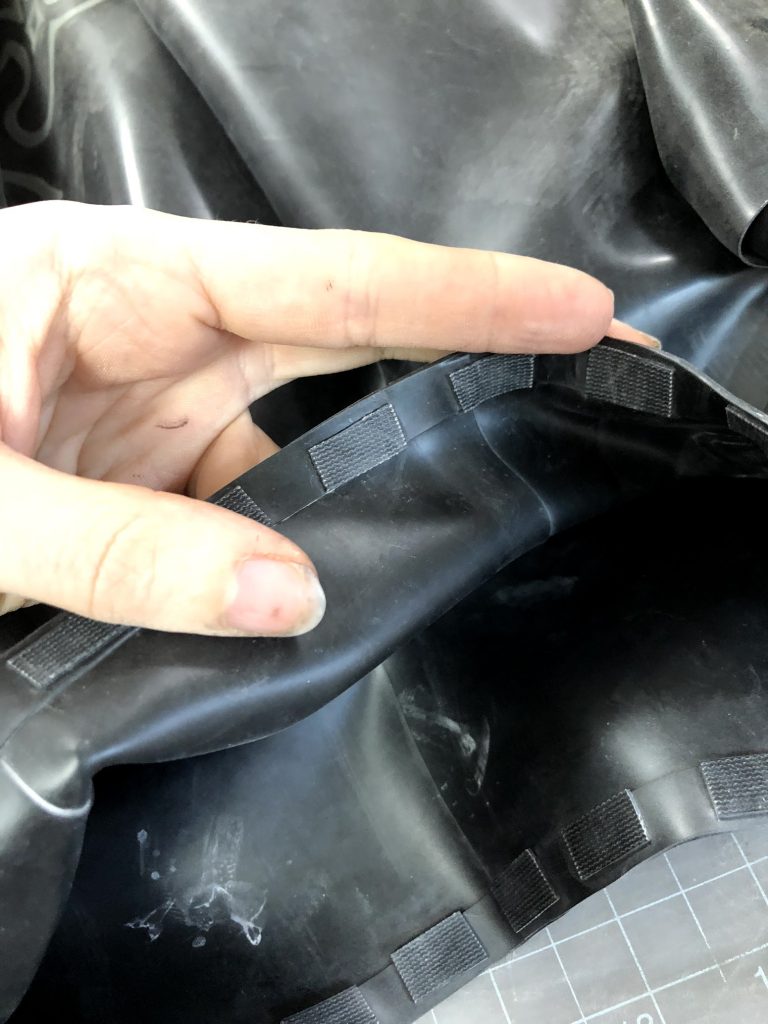
In this case, I was very lucky to have some latex that was custom-poured with canvas inside of it, which made adhering it to the other latex incredibly easy. However, you can achieve the same effect with any rubberized fabric, which you make yourself by painting literally any fabric with liquid latex. (And in that case I would rubberize both sides, and put another latex patch over it, just to make sure it’s entirely contained in latex. It’s good for the longevity of the garment, and it just looks so professional!)
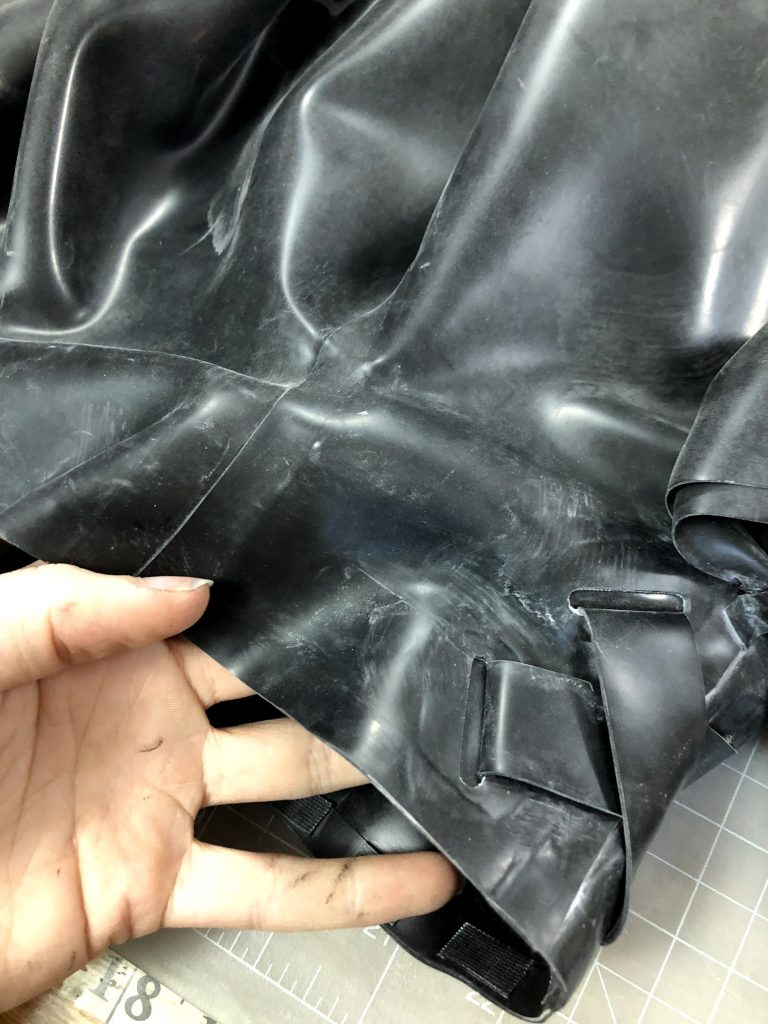
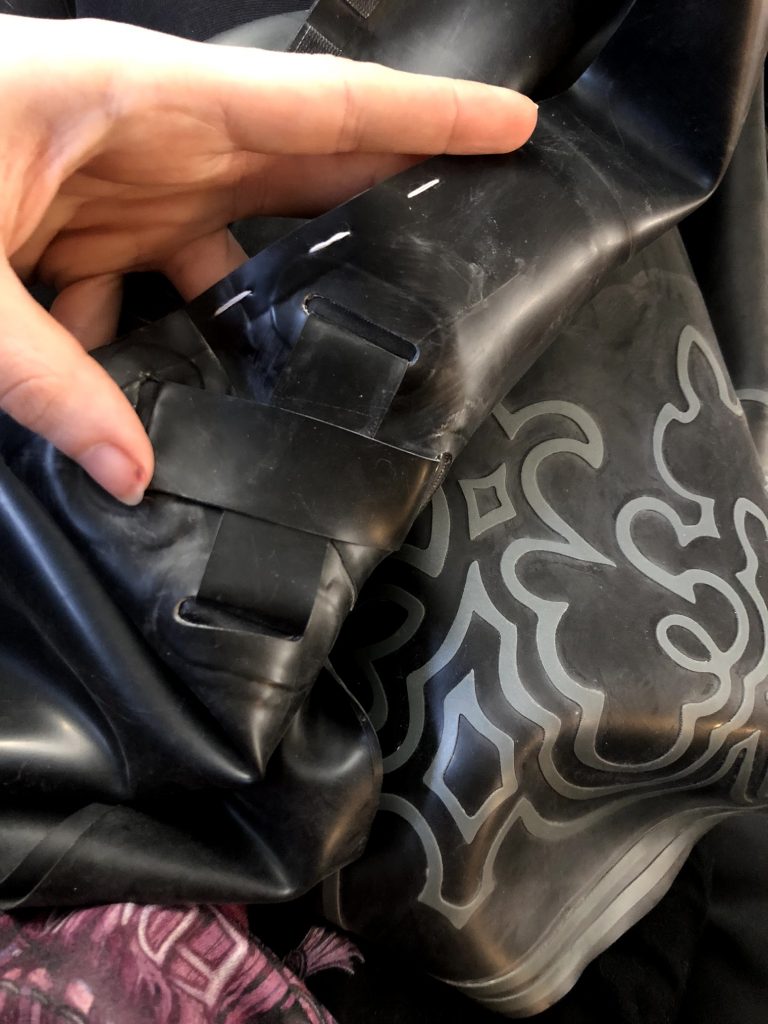
Here’s the outside! So that you can see that the reinforcement is completely invisible from the outside.
So then, we need to sew it! Which you do in the usual method; I just hand-sewed it in.
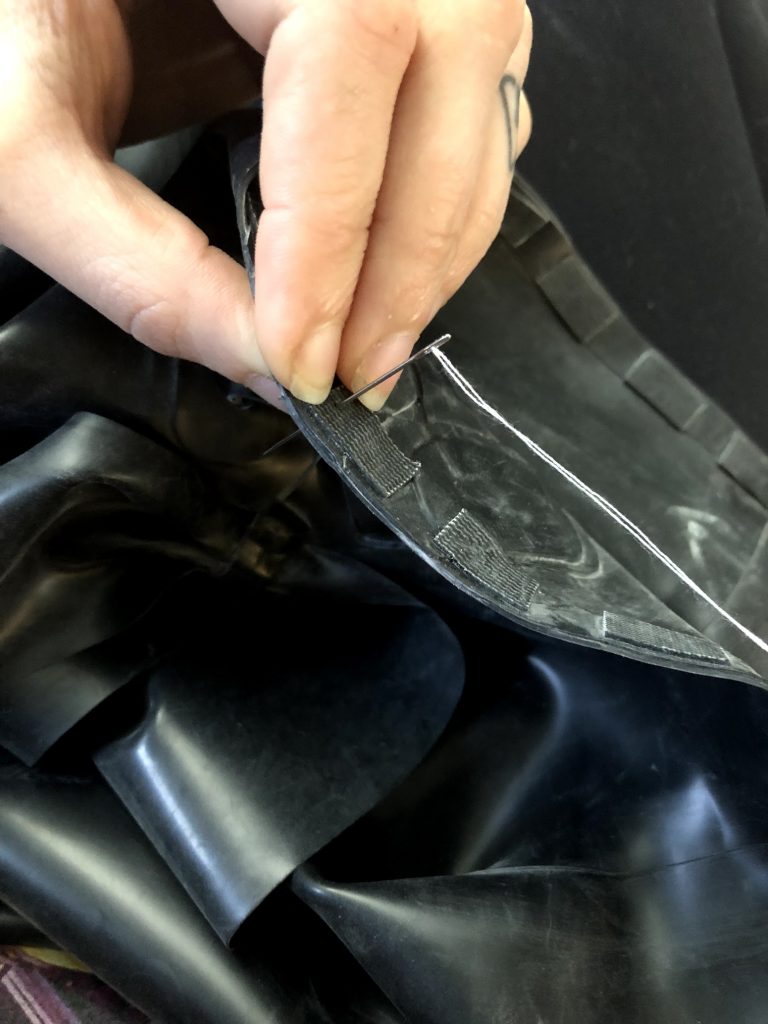
I just made sure each stitch was contained inside the non-stretch section, and since all of the pieces were evenly-spaced already, it was a good mindless activity to make them all match, haha.
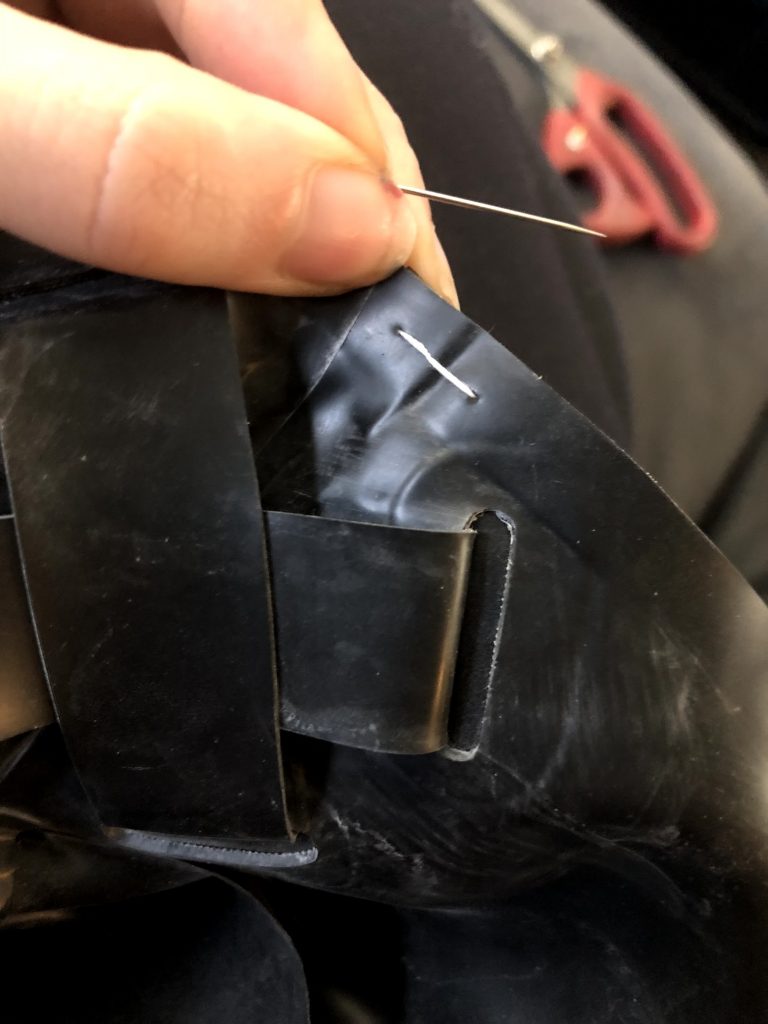
I did two stitches here, just to make sure it was thick enough to be seen!

And there’s what the back looks like! You need to tie off each stitch individually, because the latex between the non-stretch patches still needs to stretch, and your thread will snap.
Stitchin’! 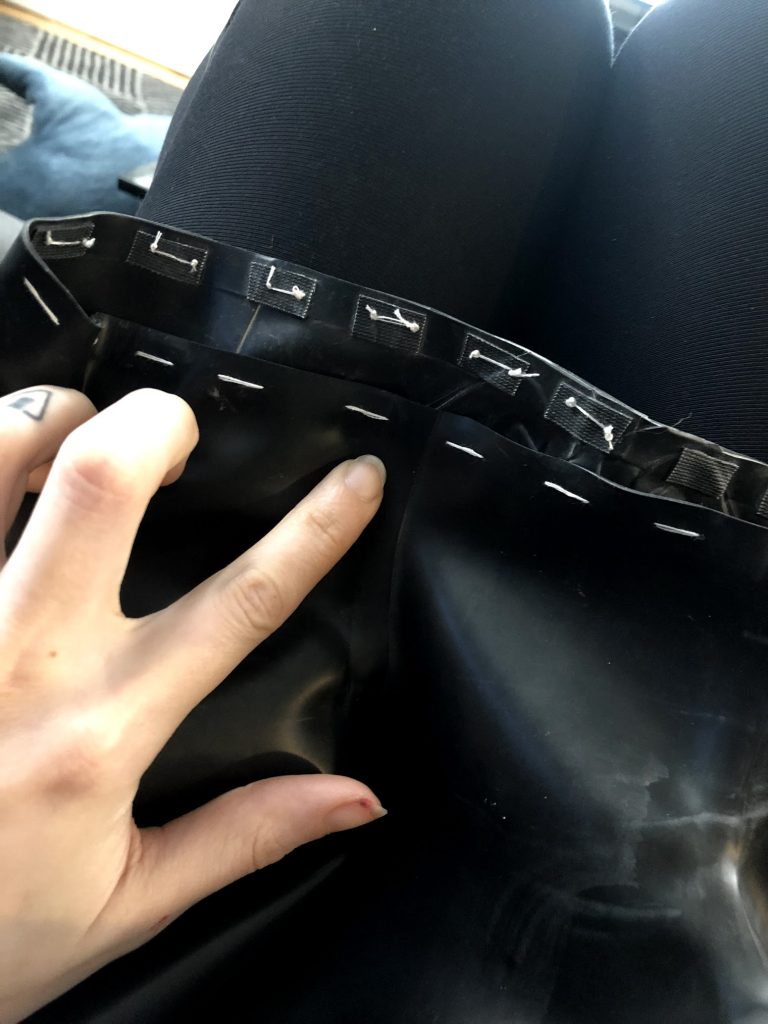
And there they are, almost all done!
This isn’t something I’ve had to do on another cosplay — yet! But I’m always looking for another costume that I can flex this particular skill on.
