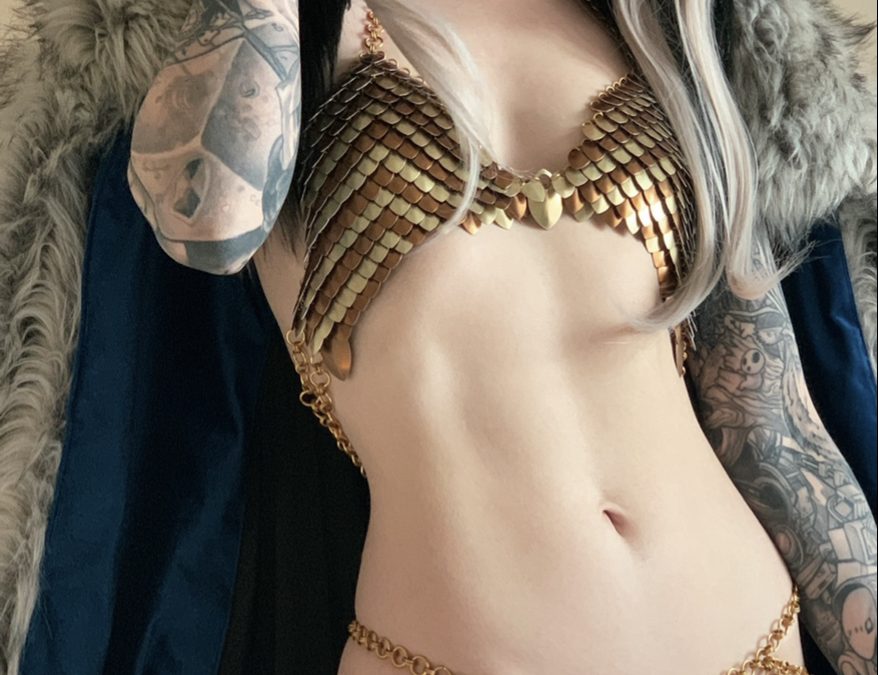
People asked about Scale stuff since I shot it on Edelgard, and I thought, hey, that’s a good idea!
I used to do scales more seriously back when I was in movie costuming, I even supplied scale stuff for a couple of shows that filmed locally. (Do I remember what they were now? No. 😂 So I guess they weren’t THAT exciting.) I mostly moved on from it after some Life Things happened, but I was happy to be able to do stuff with them again for Edelgard!
(And part of me kind of wants to get a bunch of black scales and do a whole armour suit for Dimitri, oh no.)
So let’s talk scalemaille! (Also written as Scale Mail, but … I like Maille. Mail is the delivery of parcels and letters to your abode. Maille is armour. IMO.)
What You’ll Need:
Perhaps this is slightly obvious, but you’re going to need scales and rings! Scales come in a few different sizes, and rings come in legitimately hundreds of sizes, so it’s best to try and source them from a location that will tell you which ones will go together the best, in my opinion — you can absolutely purchase the wrong sizes and have things not work.
That said, I tend to purchase from The Ring Lord, which is a Canadian company, so depending on where you’re based you may want to look elsewhere.
For this tutorial, and for most of my garments, I use anodized aluminum scales and rings, for a couple of reasons:
- First, anodized aluminum doesn’t rust if it gets wet
- Second, it’s relatively lightweight, which I like because I’m a very small human
- Third, it doesn’t leave any marks or discolouration on my skin or other garments — something that non-anodized aluminum tends to do (it tends to rub a silver tint onto skin, I find)
- Fourth, it’s relatively cheap to buy.
Obviously, you can use whatever kind of metal you like, but I heartily recommend anodized aluminum for most things.
You’ll also need pliers. You can use pretty much any set of pliers with small tips, but after I went through a couple of pairs I nutted up and purchased these:
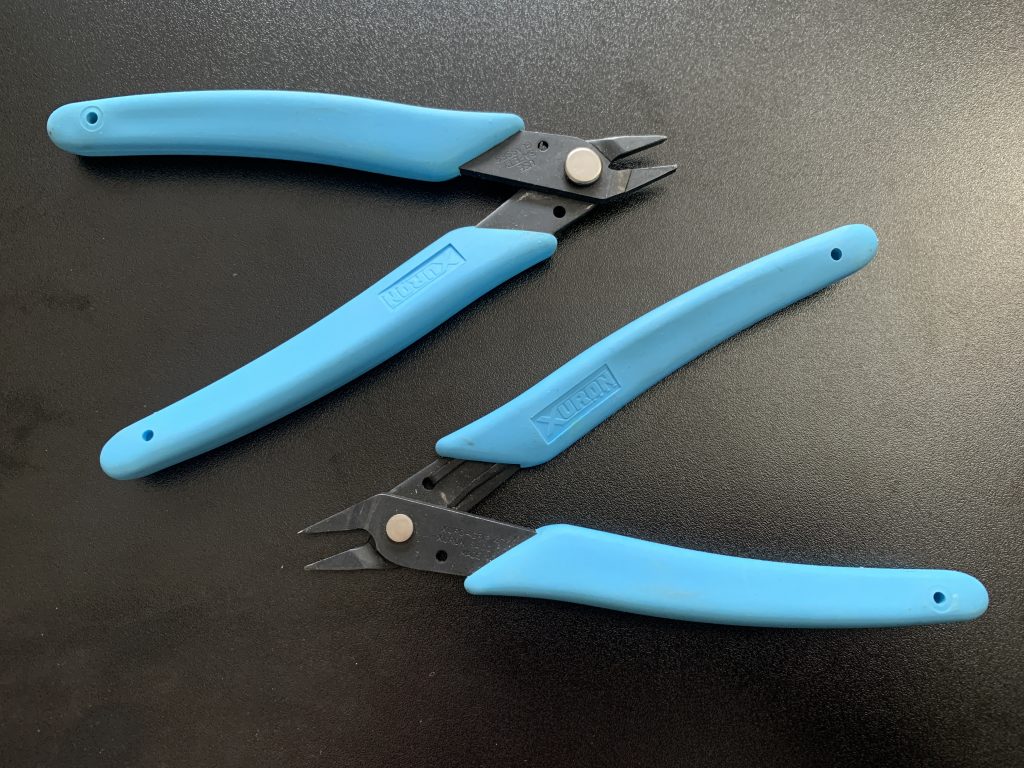
These are Xuron Short Flat Nosed Pliers — I also have a pair of Xuron chisel tipped pliers, but I found I liked these more. They’re not terribly expensive, and the part that keeps them open is hella durable, and easily replaceable, if it breaks — which, if you make a lot of chainmaille, they absolutely will.
(Note that if you decide to work with particularly thick rings or heavier metals, you might need stronger pliers, but these ones work really well for me.)
You’ll need two of whatever kind of pliers you buy — one for each hand!
Okay — Let’s get to Work!
Essentially, what you’ll be doing is opening rings, slotting them through the holes in the scales, and then closing them again once you’ve gotten them into the right place.
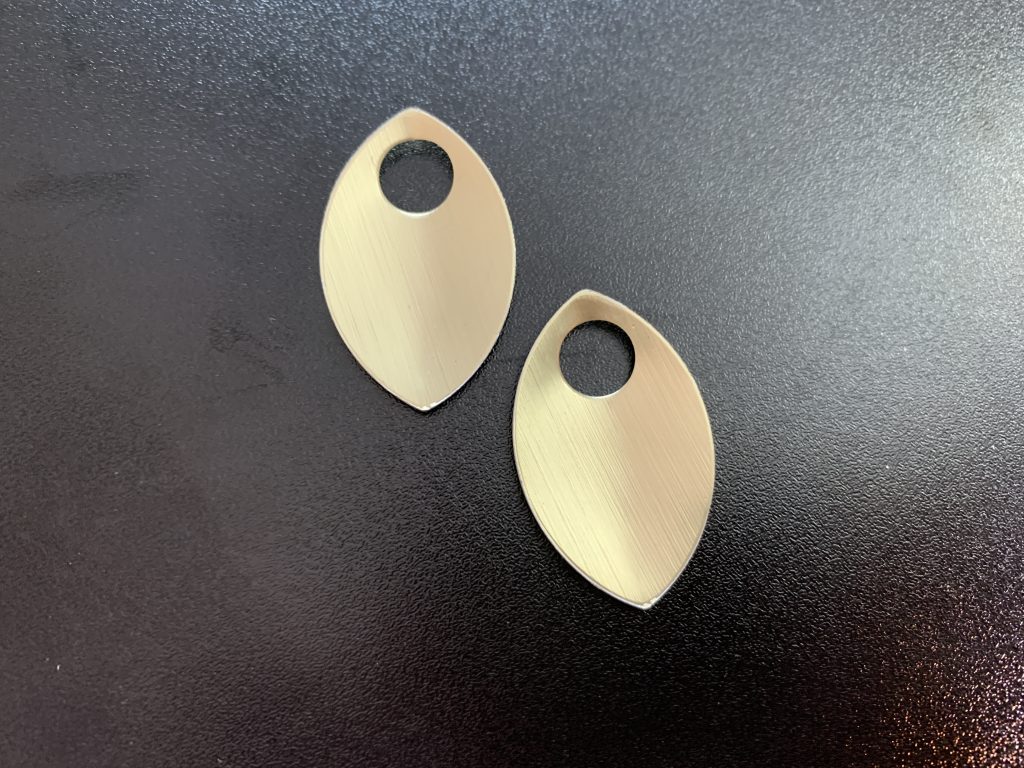
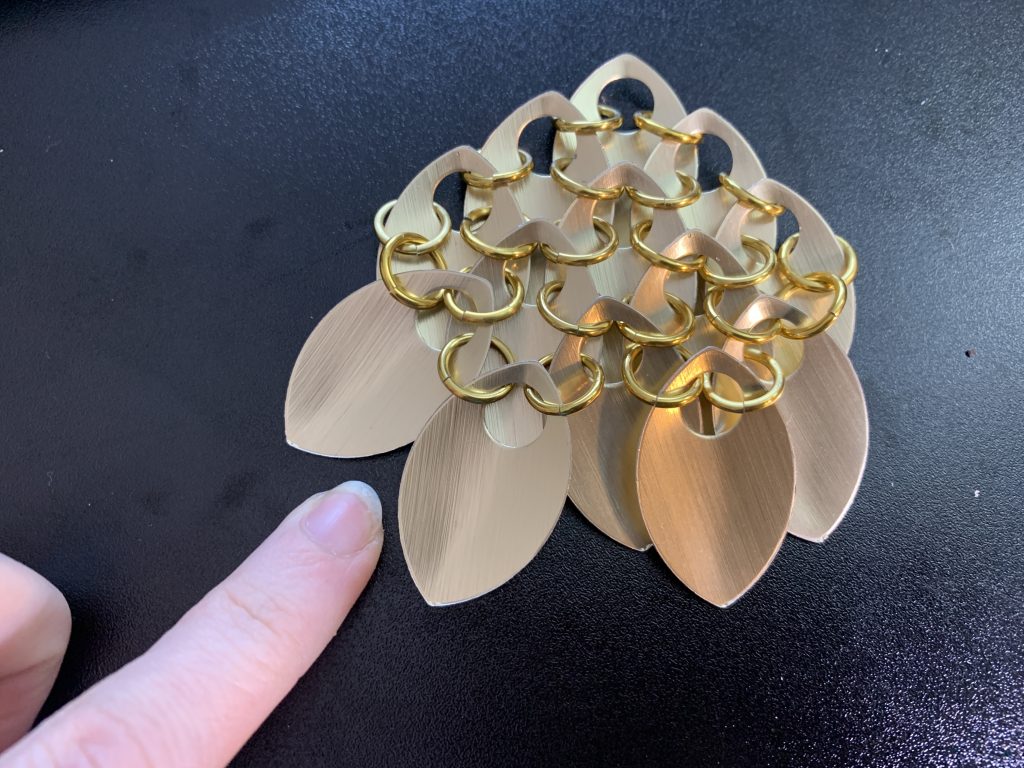
For this tutorial, I’m using Large Scales in Gold from The Ring Lord, and 16g 5/16″ rings, also in Gold Anodized Aluminum. Specifically, I’m using saw-cut rings, which I prefer to machine-cut rings — the difference is that machine-cut rings tend to not fit together perfectly, because of the machine used to cut them, but they tend to be a little more expensive than machine-cut, so really, it’s a personal preference thing.
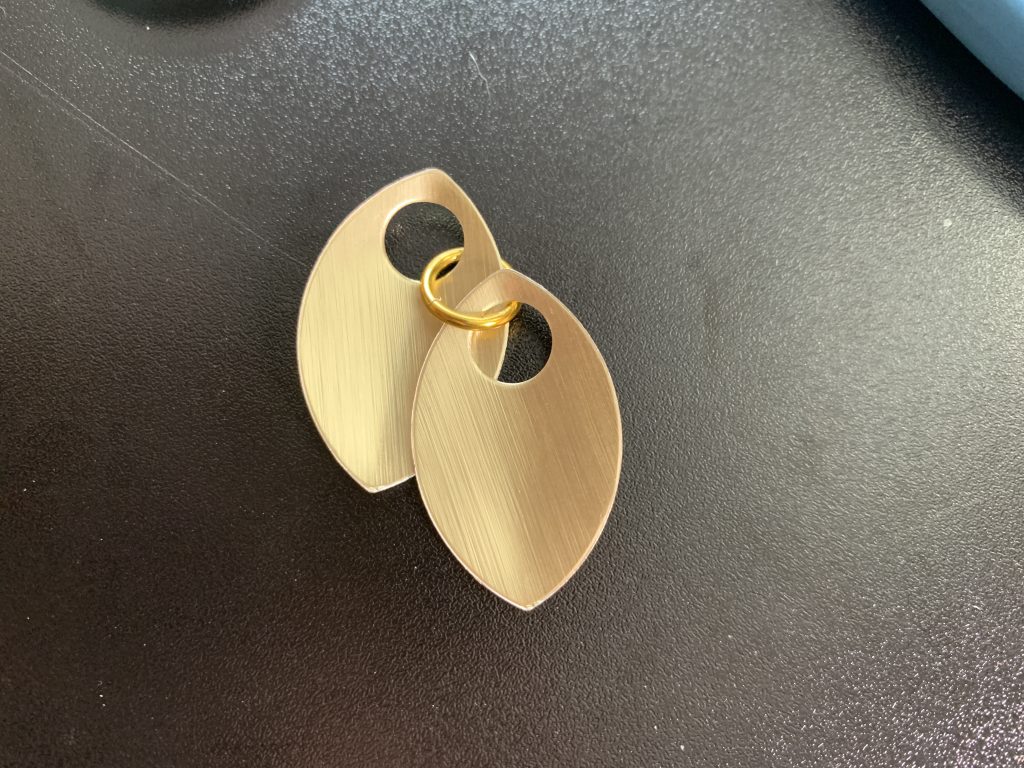
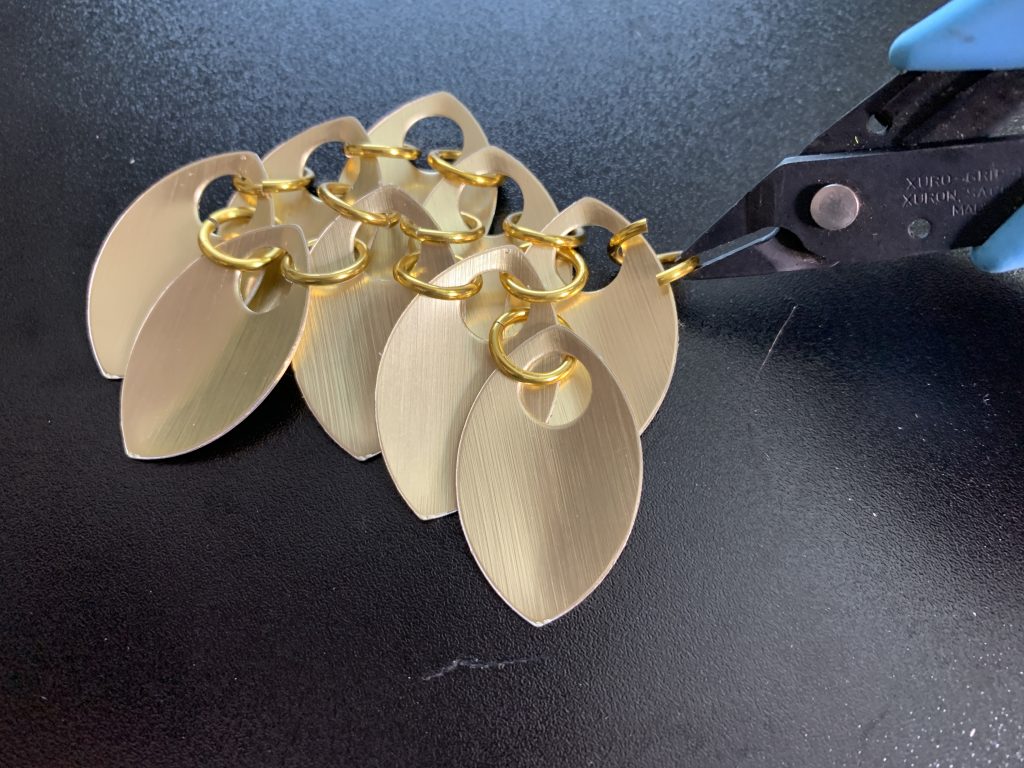
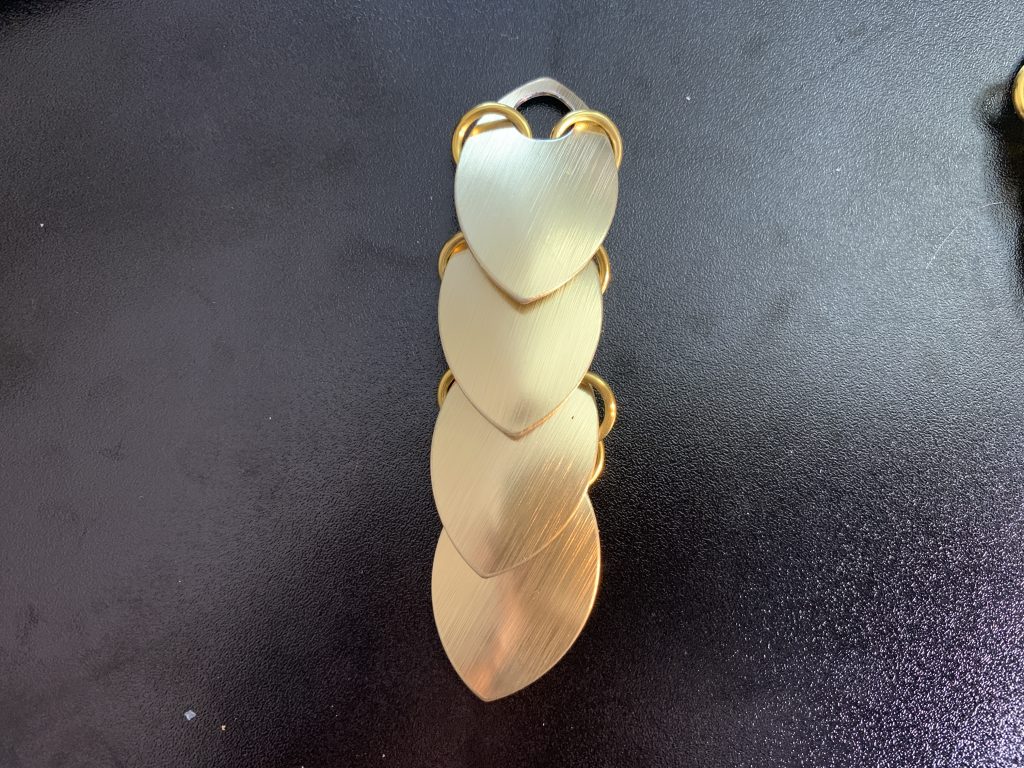
We’re going to start with two scales, and a ring:
Place your sales flat on your work surface, concave-side up — this is the “inside” of the scale. You’ll be working from the back, because that’s where all the rings live, you should only ever really see rings along the tops, and down the sides of your scale pieces.
Next, you need to thread the ring through, and attach both scales — it will look like this:
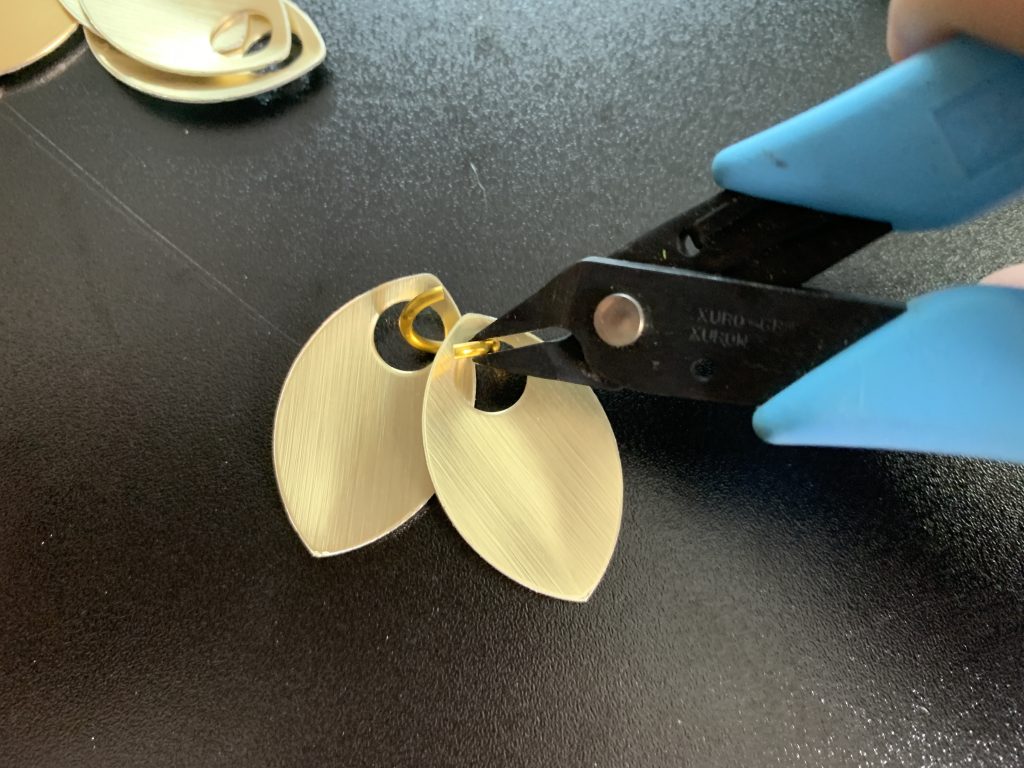
I was using one hand to photograph, so you’ll never see both pliers at work, but I tend to only use the pliers instead of my fingers when I’m working, including to pick up rings or scales.
You can do this pretty much however you want, but what I do is I thread the ring through the bottom-right scale, then hold the top one in place with my pliers while I sneak the ring under it, and into the hole there. The bottom scale should be overtop of the top scale. Then I close the ring.
I try to do all of this without ever really picking up anything from the table, and as your shape gets more complicated, it’ll save you a lot of time to just leave the huge sheet of scales you’re working on flat on your work surface. Because the scales are convex on the front, you can sort of rock them around, so if you press on the bottom of it, the top will come off the table, allowing you to sneak a ring underneath.
If you do have to pick up your scale shape, just re-arrange your scales to the correct orientation — the top scales beneath the lower ones as long as you’re looking at the “back” of your piece — when you set it back down, before you attach more rings.
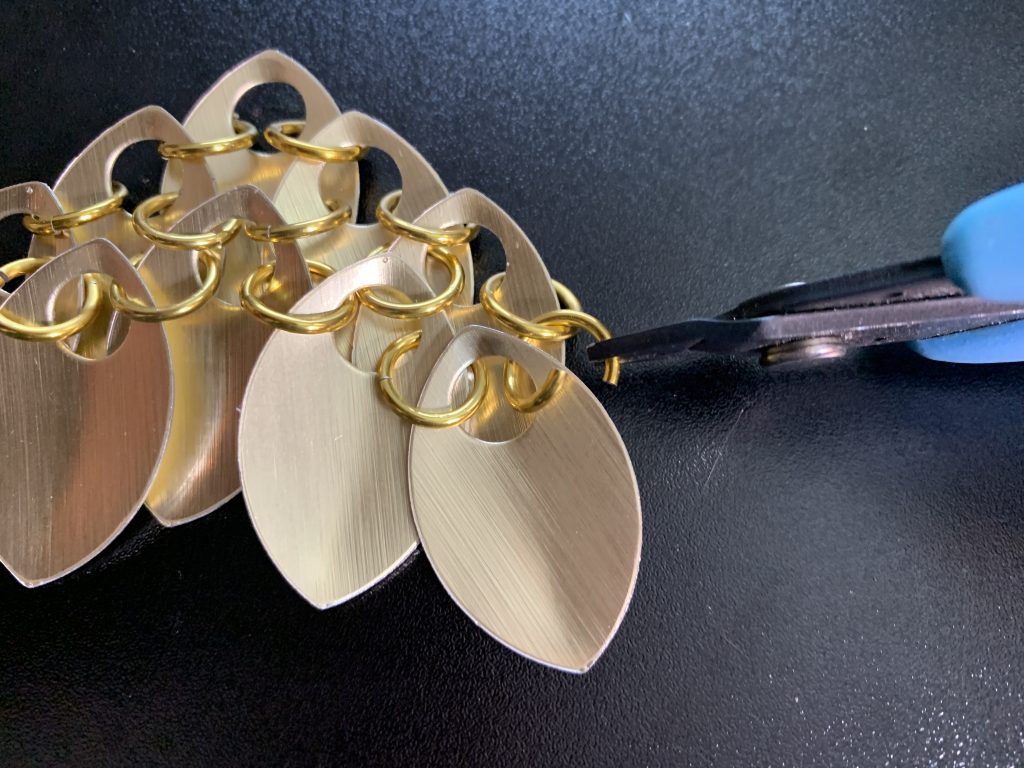
Do the same on the other side:
And re-arrange your scales if you have to so that they look like this!
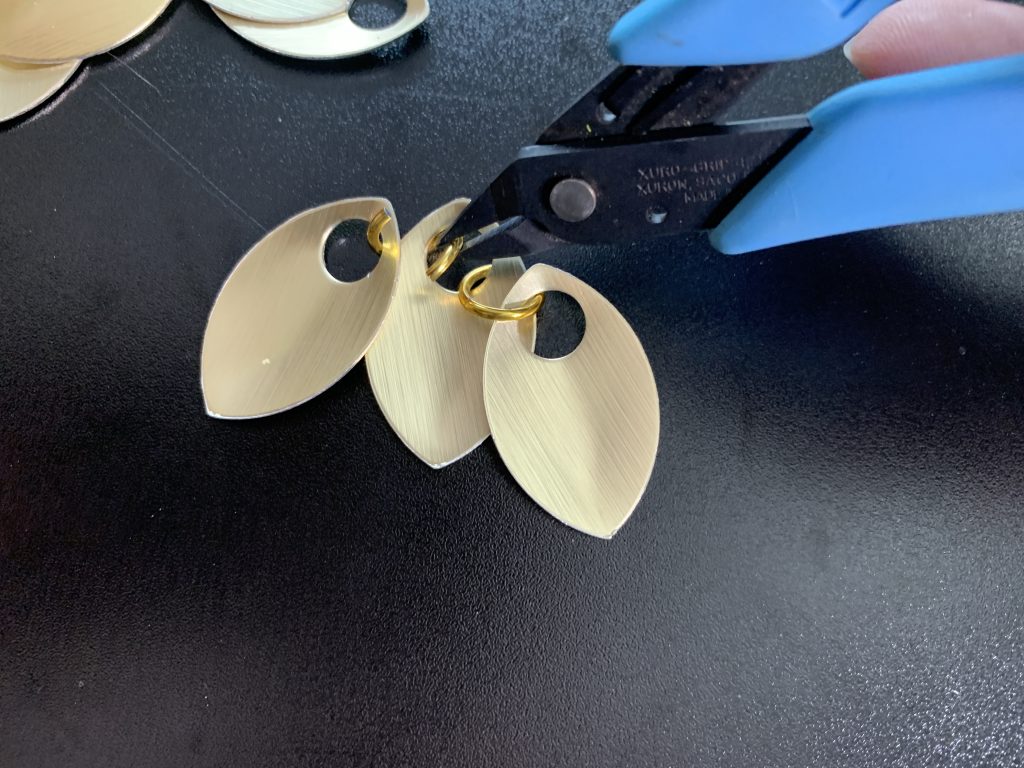
Now we’re going to add another in the middle; this will make a diamond “unit”, which will lock the two scales we just put on into place.
Some people do this by threading the ring through one of the existing scales, and then popping the new scale on, which might work for you better, but I tend to thread the ring through the new scale with my right hand plier, then drag the scale up by holding that ring, sneak the ring through one of the existing scales, and only then grab it with my left-hand plier to assist in closing the ring. The left-hand plier also holds existing scales in place if they start moving around.
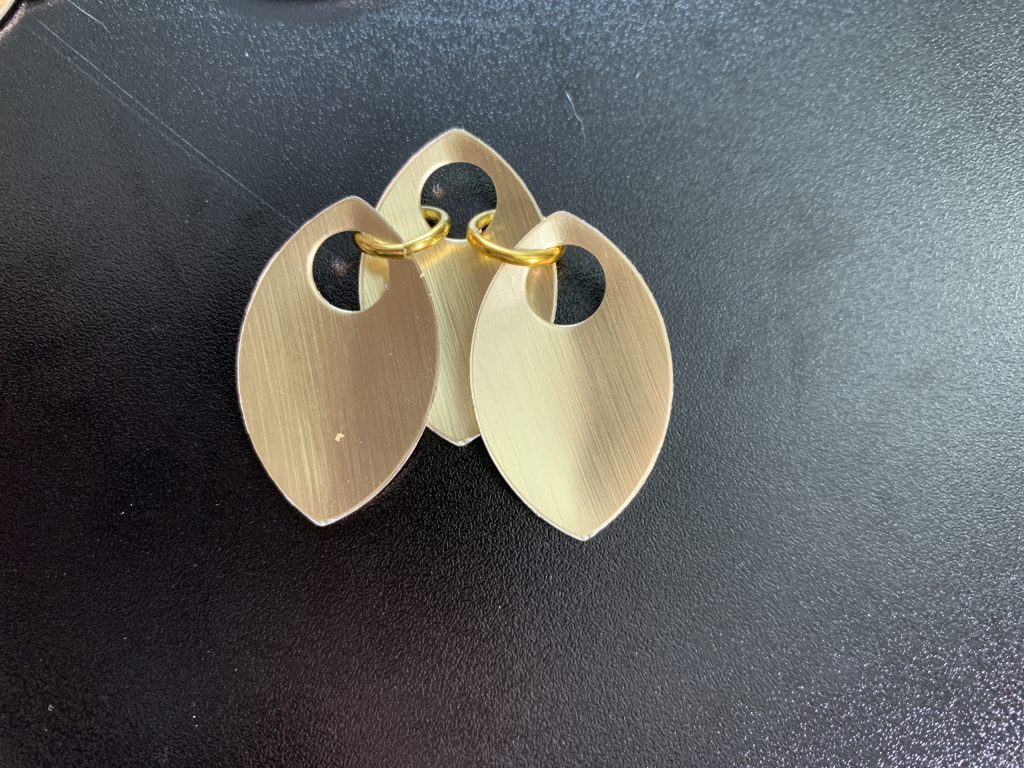
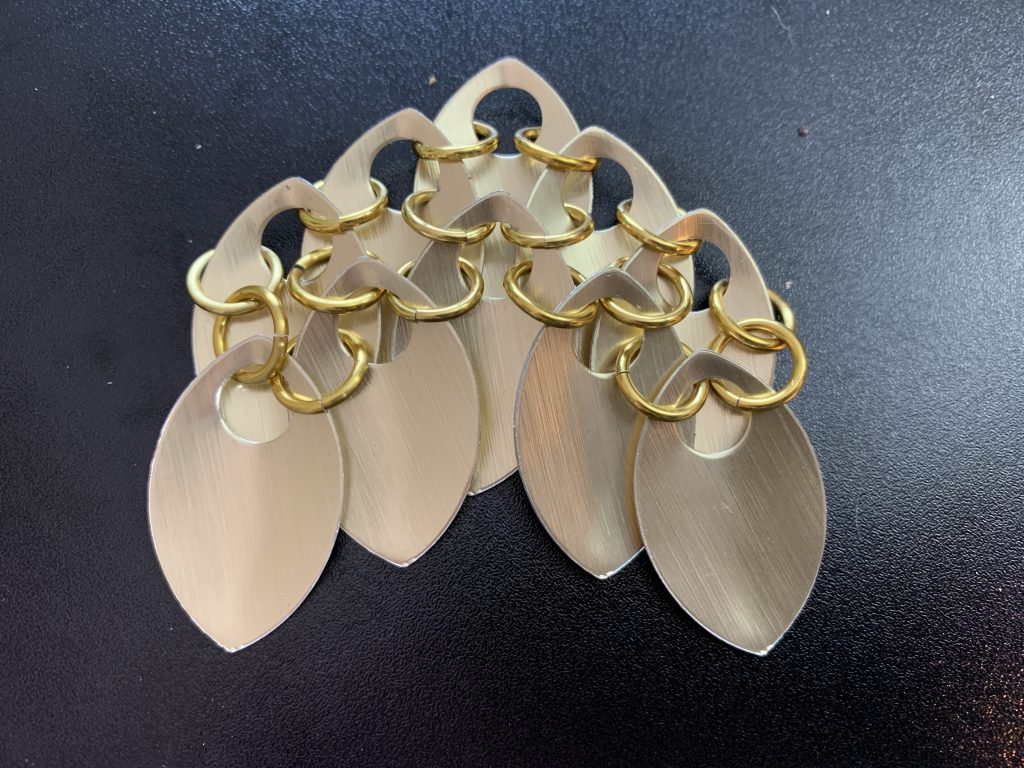
Close that ring and then add in the other, and your shape should look like this:
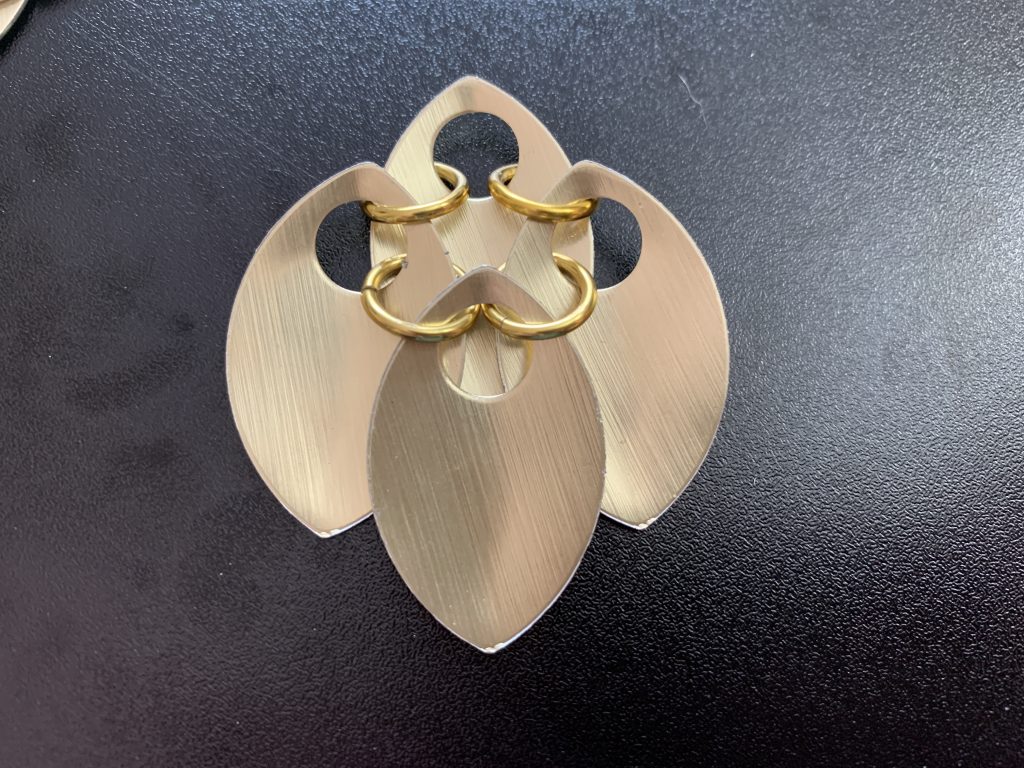
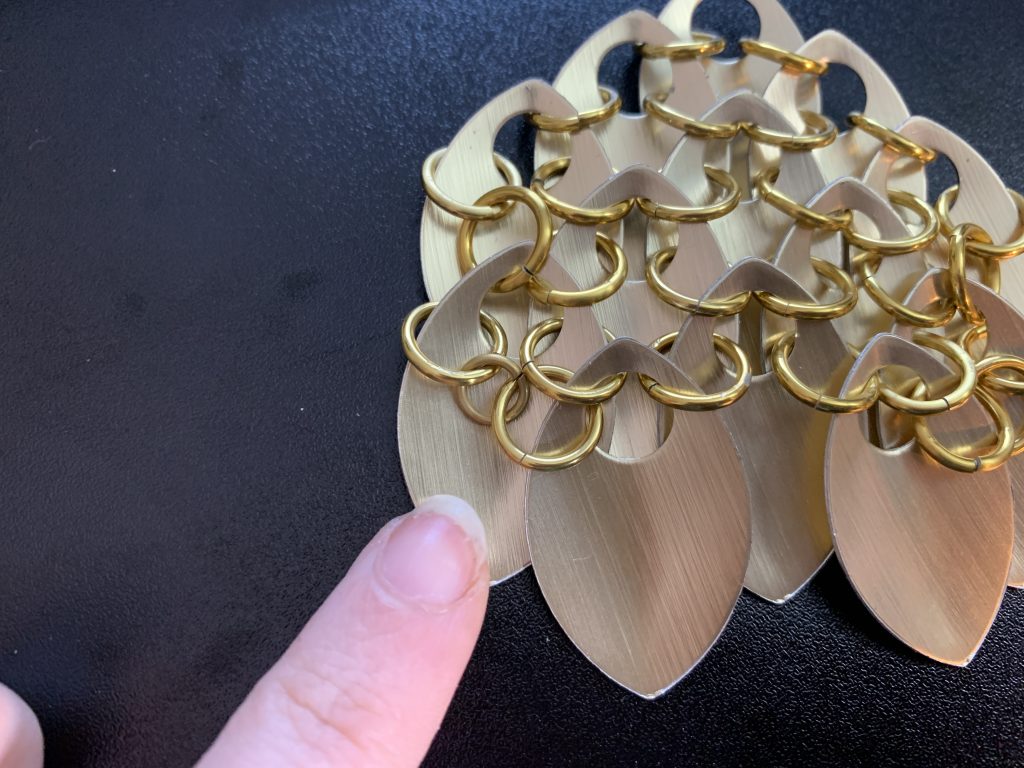
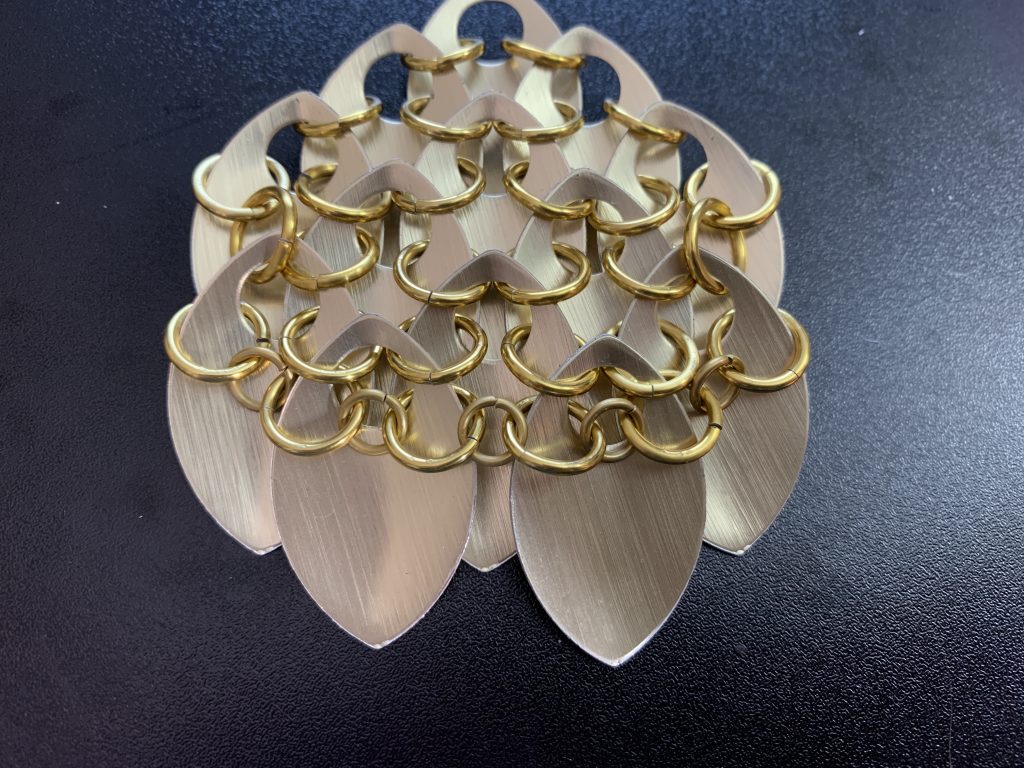
This is a “unit” of scale, you can pick your piece up now and it should more or less retain its shape. Most people build in these diamond “units”, just building diamond on diamond on diamond until they get the shape they want.
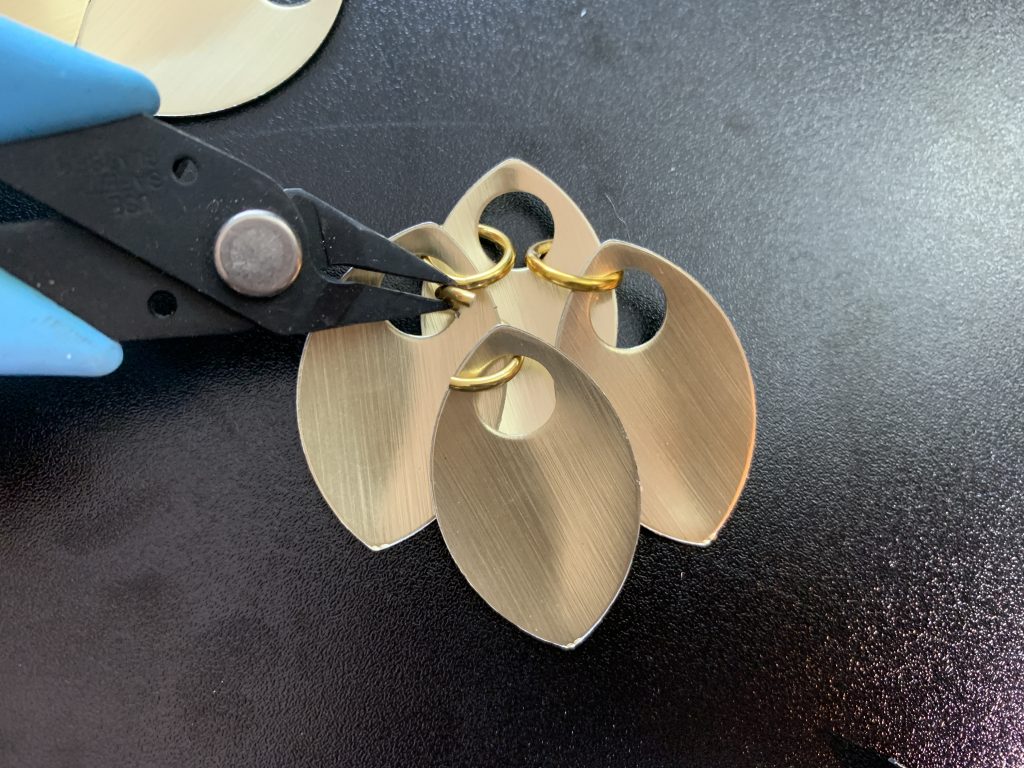
I want this shape to keep getting bigger, so I’m going to add two more new outer scales with a single ring each:
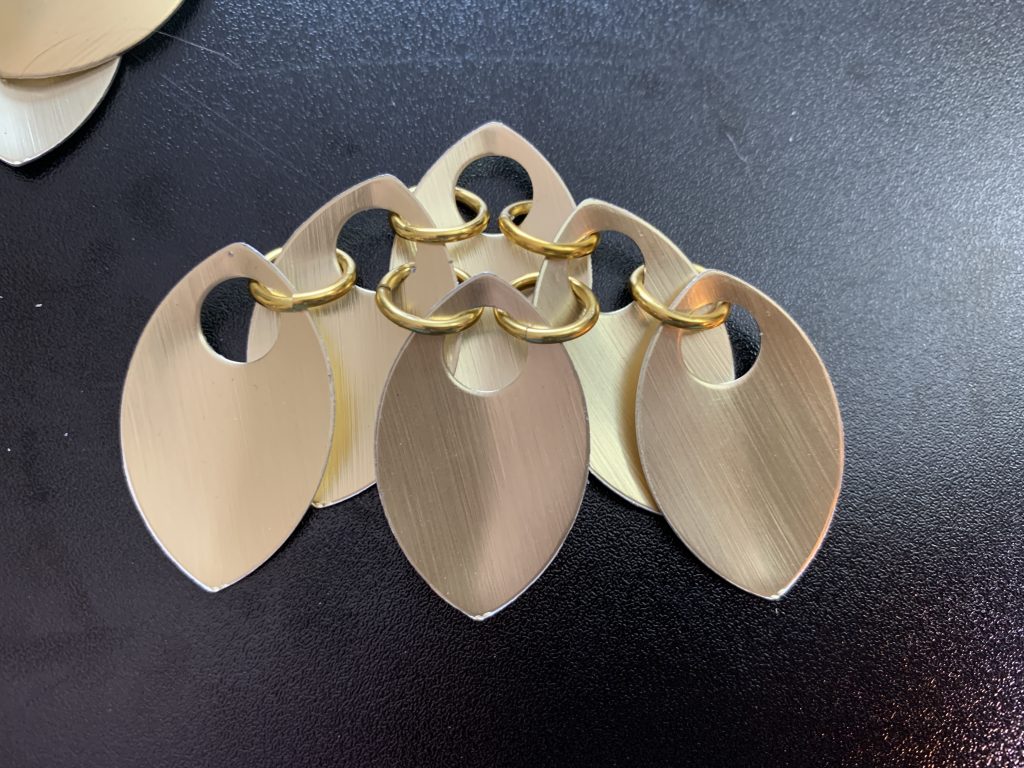
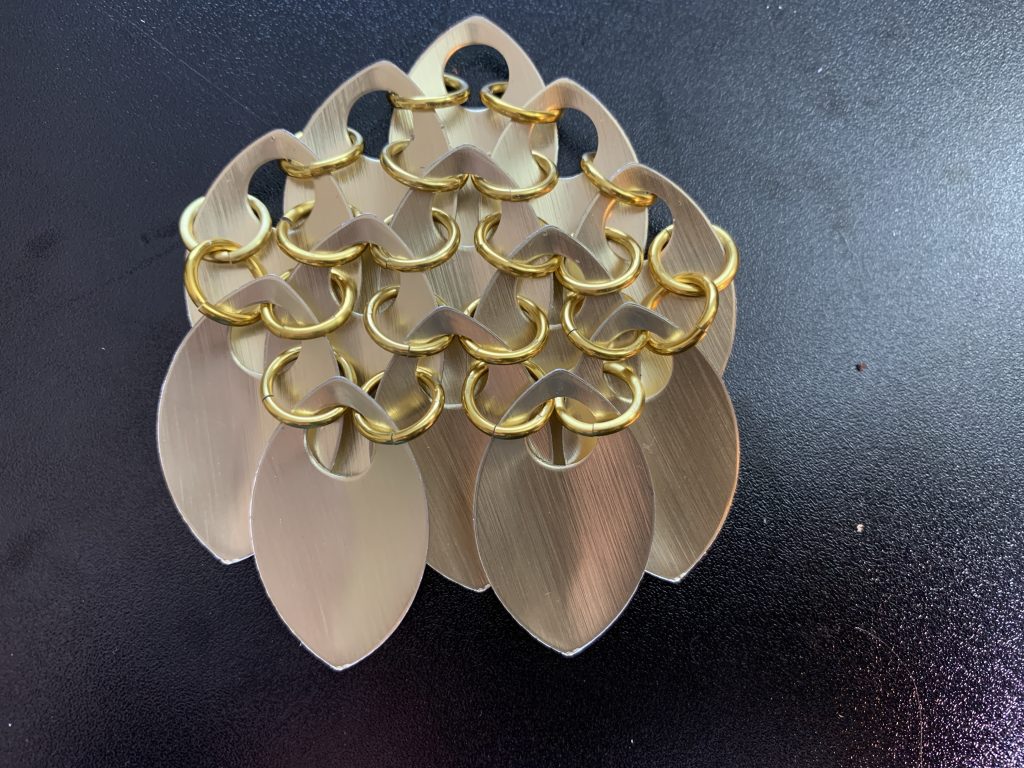
To reinforce those outer ones, we’re going to add two more scales, to make two new diamond units:
Like so.
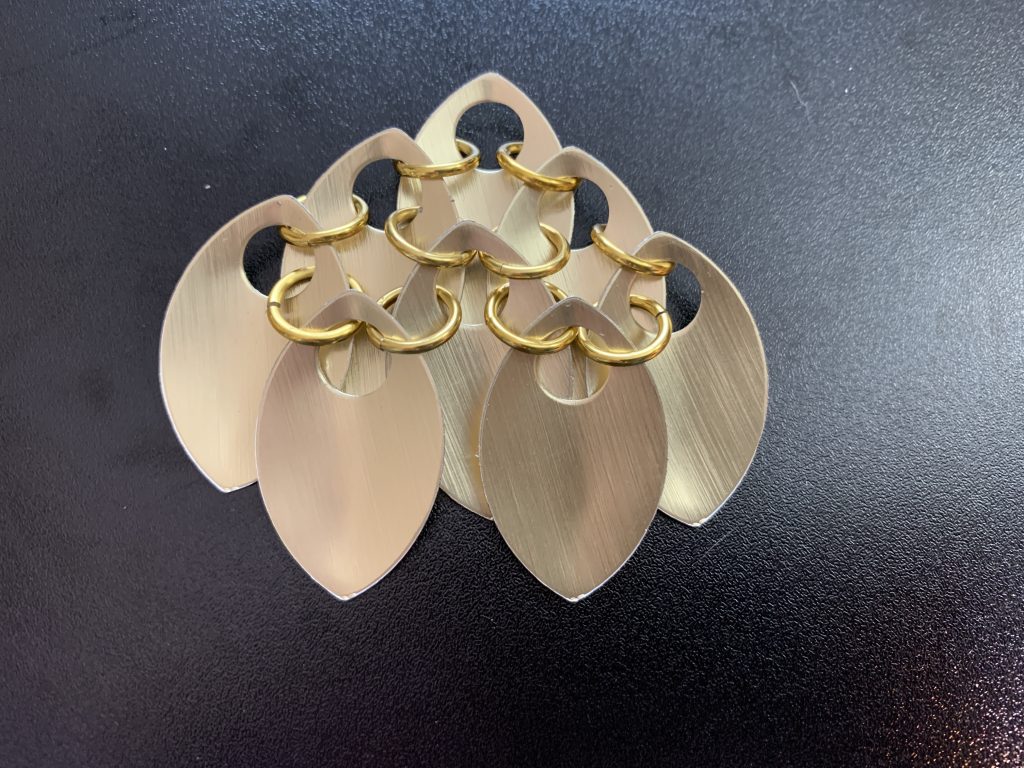
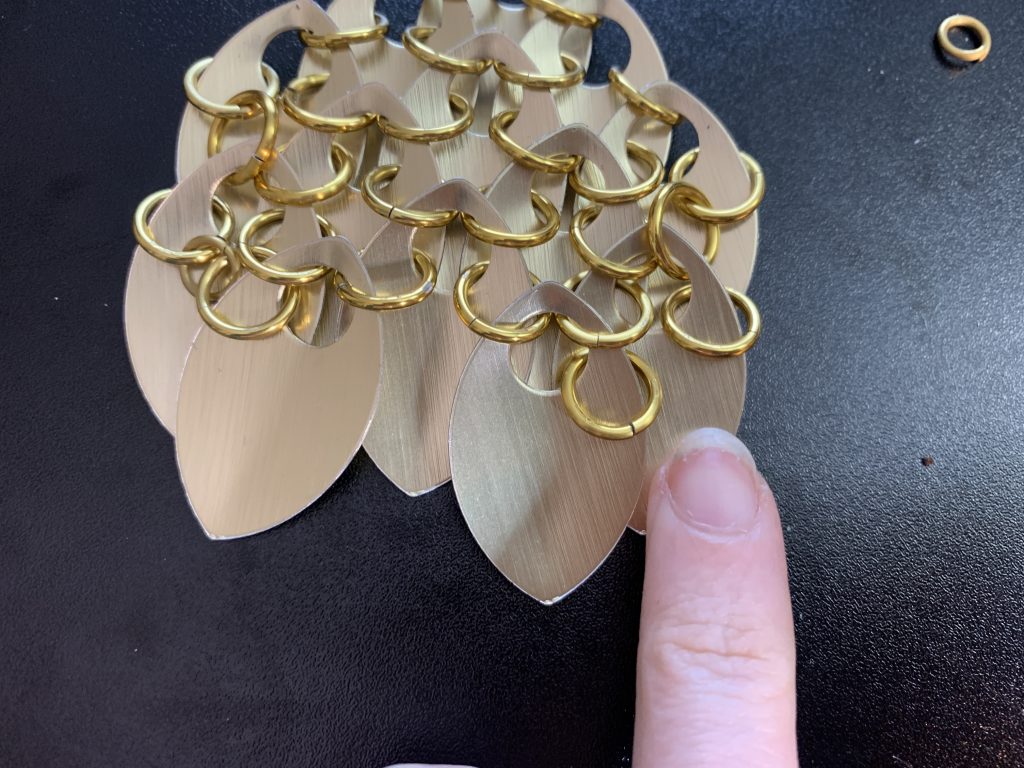
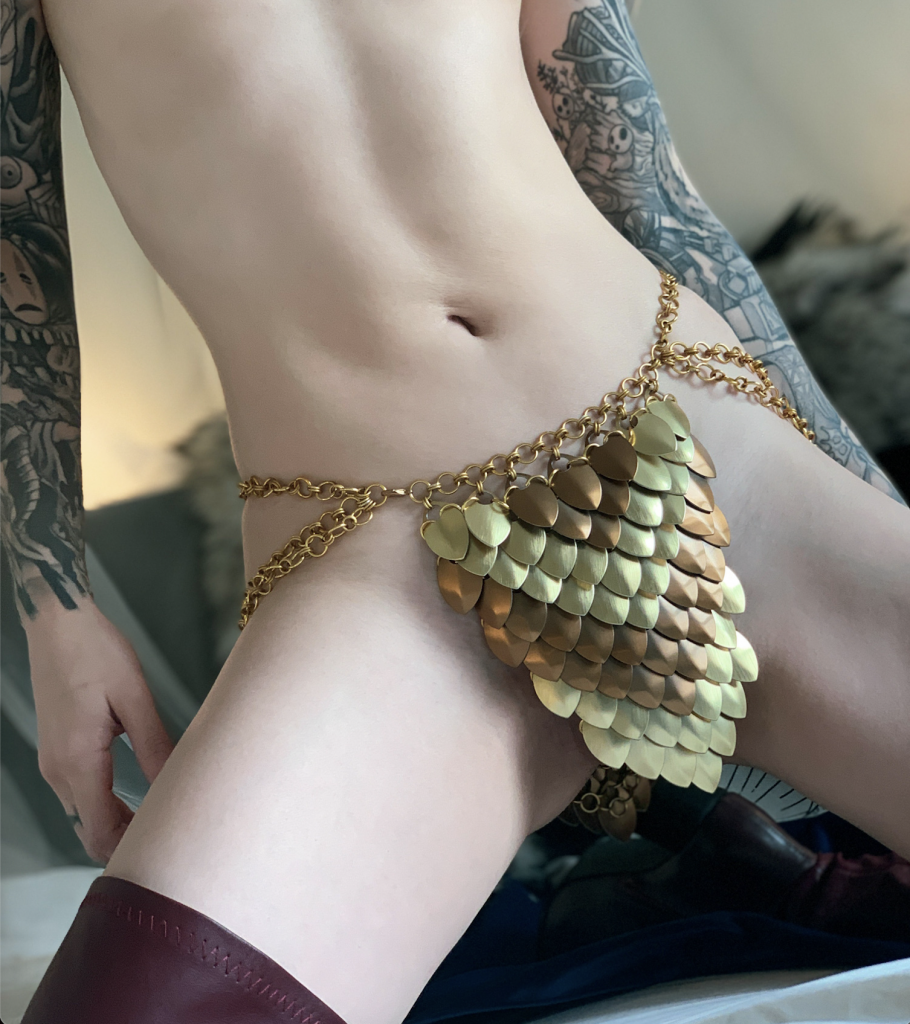
This is how I did the tops of the bra cups on Edelgard’s bikini; but you might also notice that I had straight sides. So let’s pretend I’m building a microbikini, here, and this is the maximum width that I want on the piece — let’s start on building the next row:
Here I’ve threaded a single ring through, and I’m bringing the scale up to one of the last two that I installed, and closing that ring, so that it looks like this:
Then, on the scale immediately above that, I’m adding an outer ring, and closing that.
I’m then going to add that same ring to the scale I just added on, and thread it through the top ring that we just closed, like this:
Which will look like this when closed:
You can see I’ve also done the other side, there. Essentially, we’ve removed the need for an additional support scale in our diamond, by using two interlocked rings instead.
I then filled in the middle, and added another row, as well:
And let’s say this is the basic shape of our bra cup. But you’re not quite done, yet — without some further reinforcement, the bottom scales will be able to move like this:
Which bothers me so much when I see it on scale work, so I’m going to show you how to reinforce it so that the scales will be, more or less, stuck in place. I do this along every tapered edge, and flat bottom.
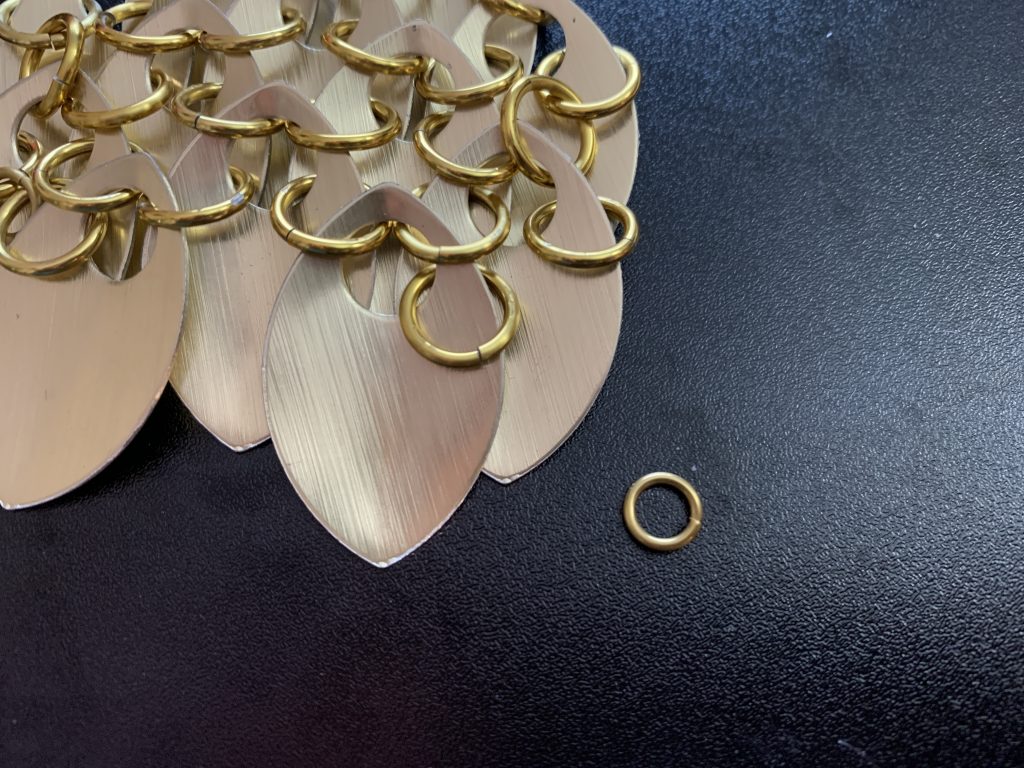
For this, though, I’m going to introduce another ring size —
This is an 18g 3/16″ ring — which is also the size that I use for small scales. I think it’s worth buying at least a bag of these, to use for reinforcement, even if you’ve decided not to use small scales.
(You can absolutely use the 16g 5/16″ rings for this as well, it will do the same thing, just won’t hold your scales as tightly in place. Likewise, with small scales, I actually use the 3/16th” rings for this reinforcement, I didn’t buy smaller rings until later when I decided to try micro-mailling, which is a whole ‘nother animal.)
Here it is step by step:
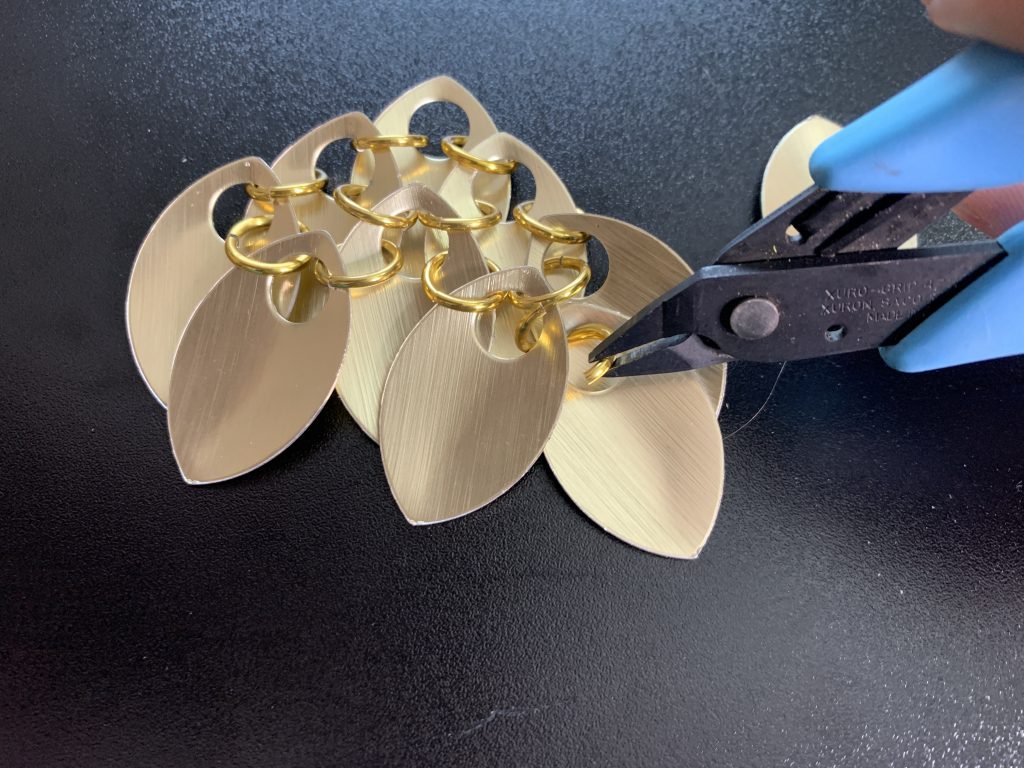
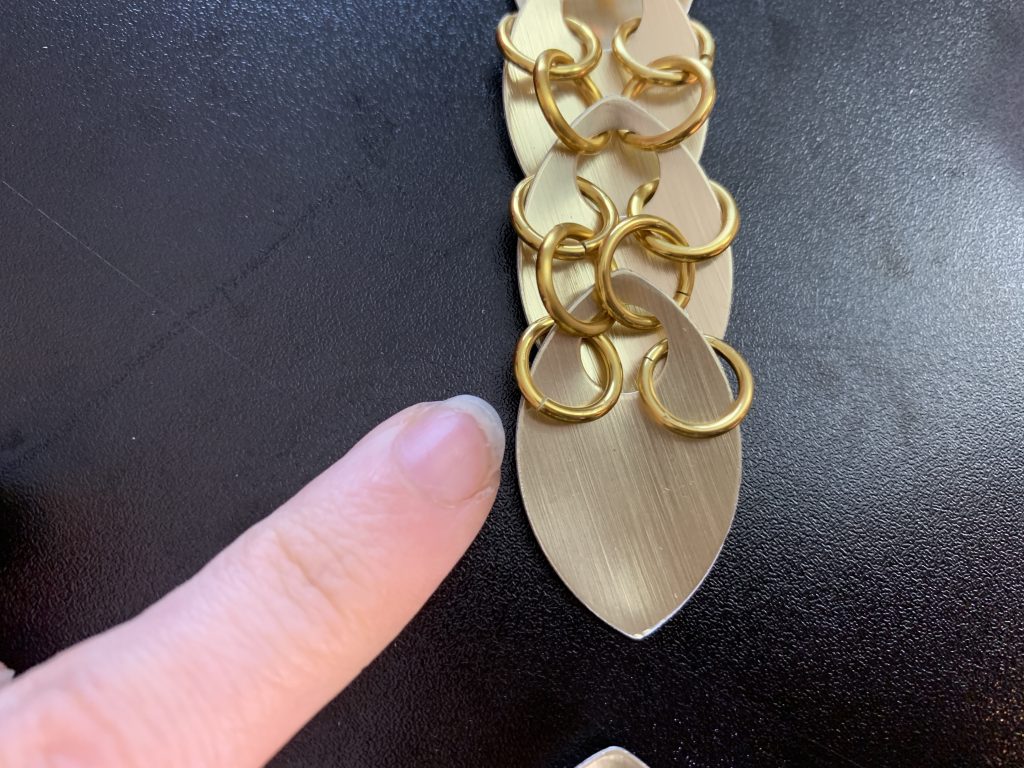
We’re going to put two rings onto the two existing scales of this edge and close them.
Then open one 18g 3/16″ ring.
Then use it to connect those two rings, and close it.
In the above image, you’ll also note that I’ve made a chain of rings along the bottom of the piece; this will help hold all of those pieces in place, instead of moving around and fanning out, in the case of getting caught on clothes beneath, or swinging around with gravity as you move. I do this along the edges of all of my scale pieces, to keep everything laying as flat as possible.
Essentially — that’s it. You can use these principles to make just about any shape.
You don’t have to start from a single top point, either — this single top point was a good starting place for my bra cups, but not so much for the loincloth:
In this case, you can see that what I did was make a flat row along the top, and then built downwards in diamonds from there — you can even start with one diamond, and then connect it to another diamond unit that you’ve already built with one new top scale in between. I think everyone builds scales a little differently, and once you figure out your preferred method, then you can just use that.
If you look close, you can also see my reinforcement on the scales in the back — which is done, on this piece, with all 16g 5/16th rings. This could have been because I was out of the smaller rings at the time, I don’t remember. Any reinforcement is better than none!
You might also notice the chains that everything is connected to — these are, again, build using those same two ring sizes!
I do want to cover one more thing, though — you can also build “chains” out of scales, if you wanted to do lines of single scales instead of visible chains. That looks like this:
That’s done using more or less the same method as building the flat sides:

You’re still having four rings on every scale, but they’re connected to the rings of the scale above it or below it, as opposed to the next scale. The rings look a little messy while flat on the table, but gravity will sort that out, usually, when they’re on the body.
I also wanted to show how to connect this to the top of the bikini piece I just made:
We’ll start by putting two rings onto the bottom scale of the strap piece.
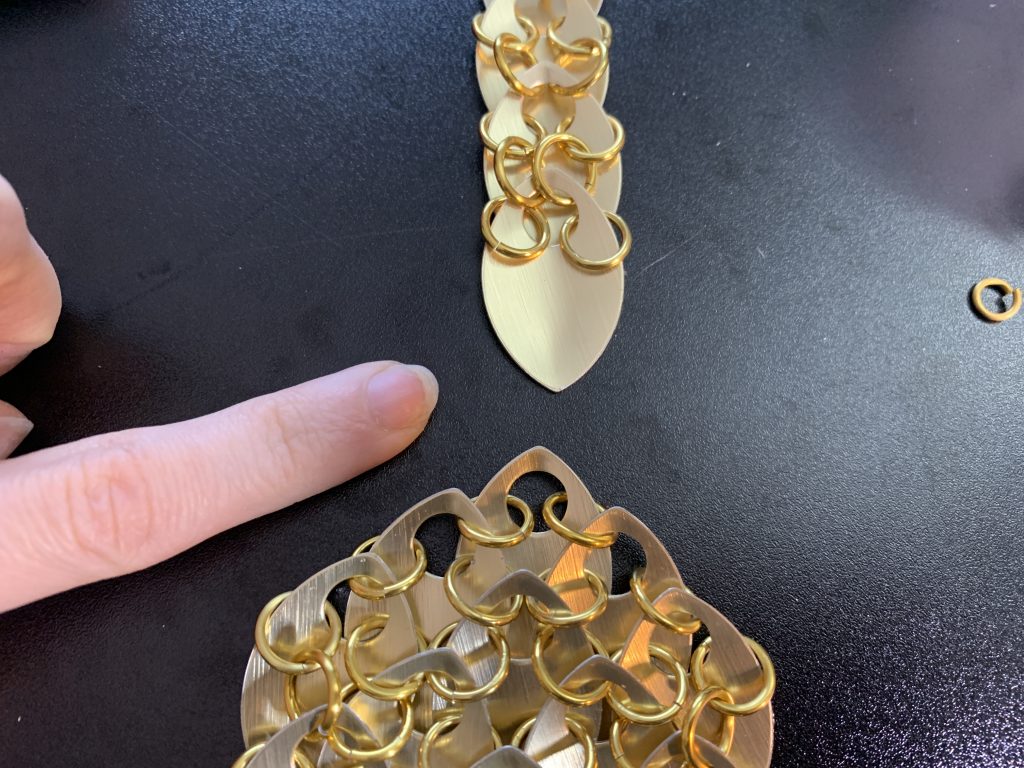
Now we’re going to attach the top of the cup piece, in the same way all the scales above it are attached to each other, by threading two rings through the scale, and into the rings we just closed.
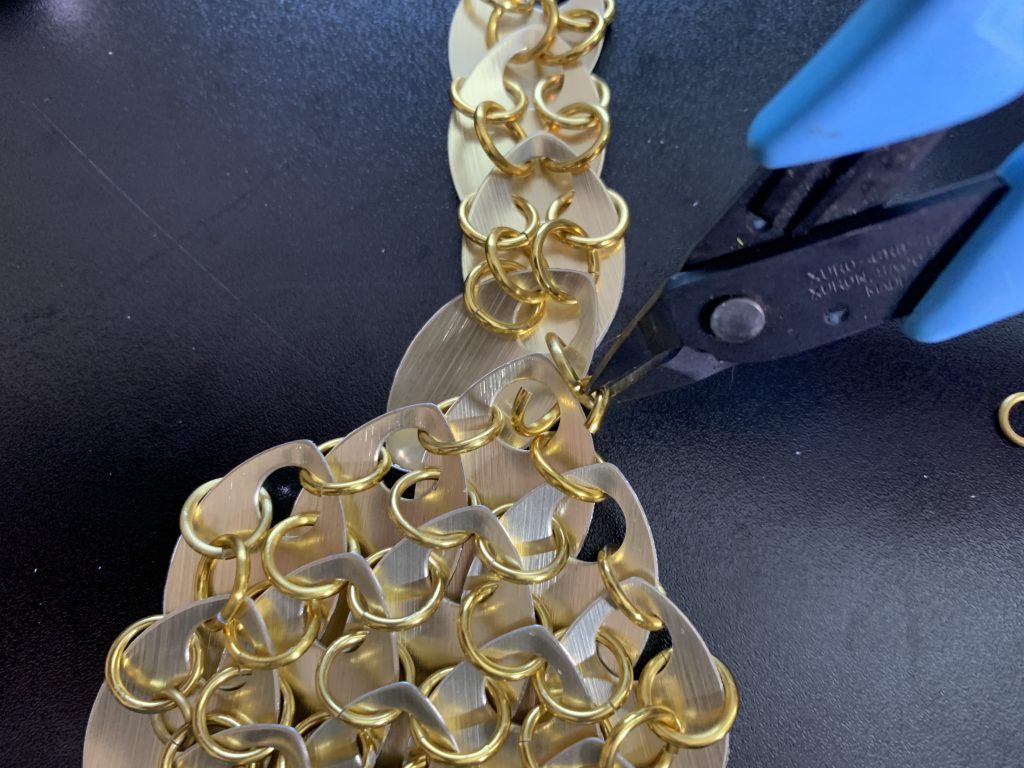
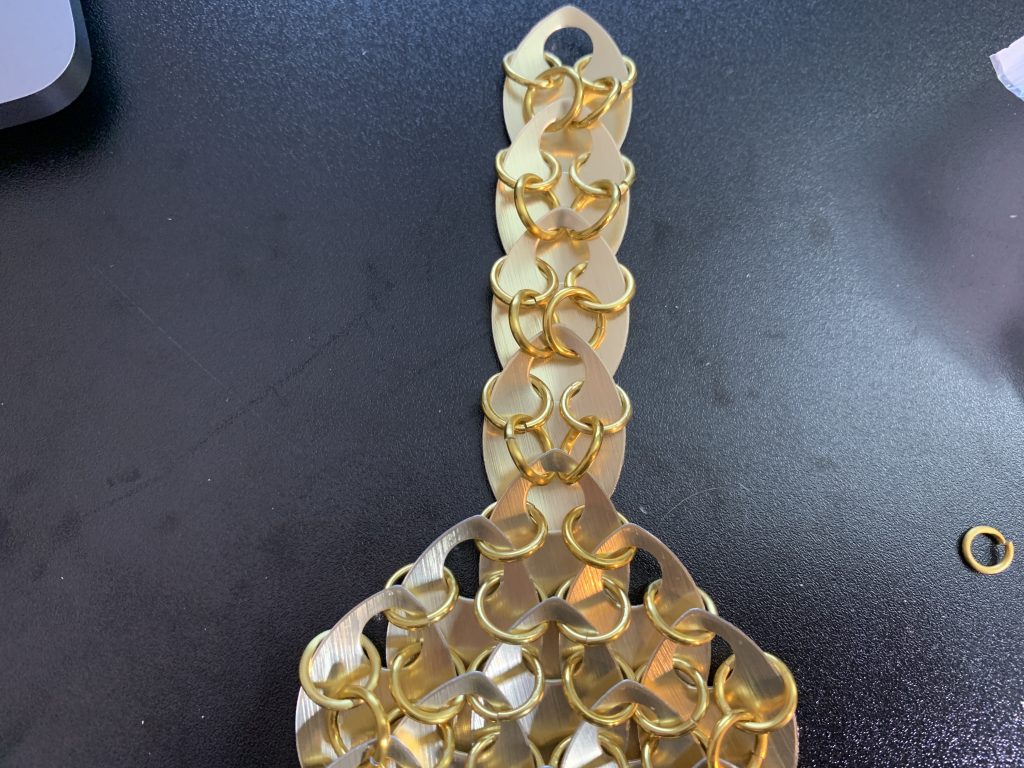
There’s what it should look like when done from the back …
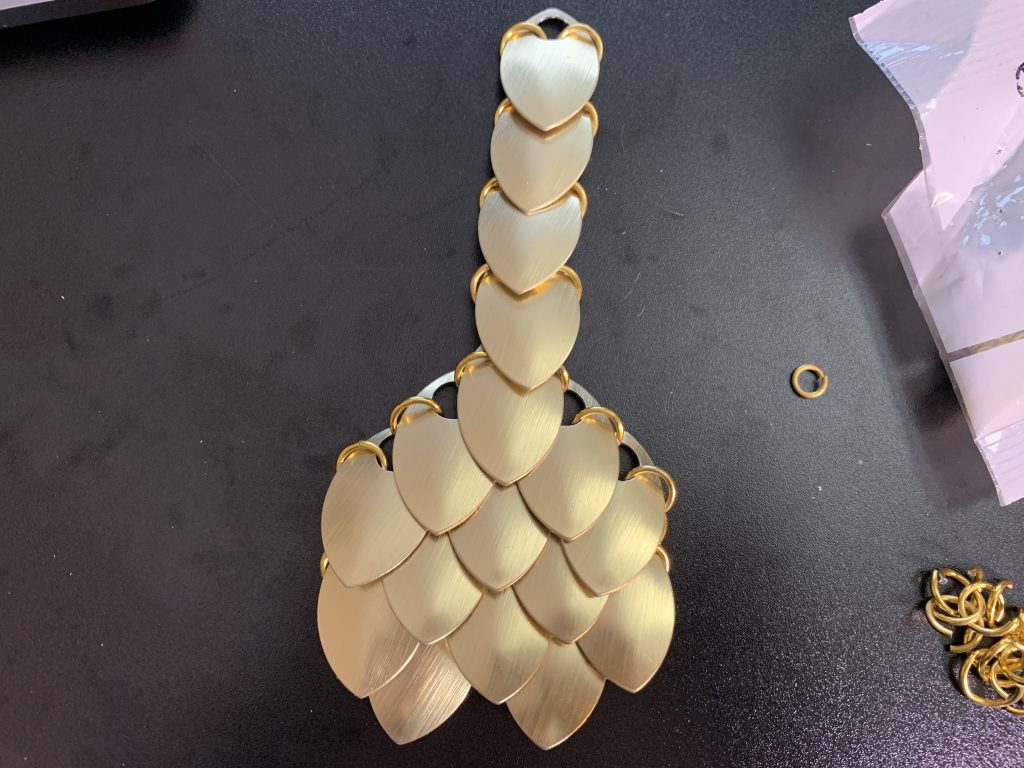
And from the front!
And Honestly … that’s most of it!
From there, you should be able to use these techniques to make pretty much any shape you can think of! Let me know if you decide to give it a try and if you have any questions — either here, or on Discord.
