So! Your latex broke.
It happens, fam.
For people who don’t wear latex, ripping or tearing latex garments is actually pretty common. I was a dang latex designer for a million years (ok, five or so years full-time, I have almost a decade of experience with it now) and I still have been known to put my finger clean through a garment while putting it on.
So if and when this happens to you, don’t panic.
There are a couple of different ways that latex can blow out; either it just splits, and you don’t loose any actual fabric from the seam, or you have a blowout where you loose actual fabric.
You can put them back together by and large the same way: when I was working in the industry we called this the Invisible Bandaid technique. It’s less invisible when you loose actual fabric from the rip, though; then you’ll see the patch.
Let’s start with a rip.
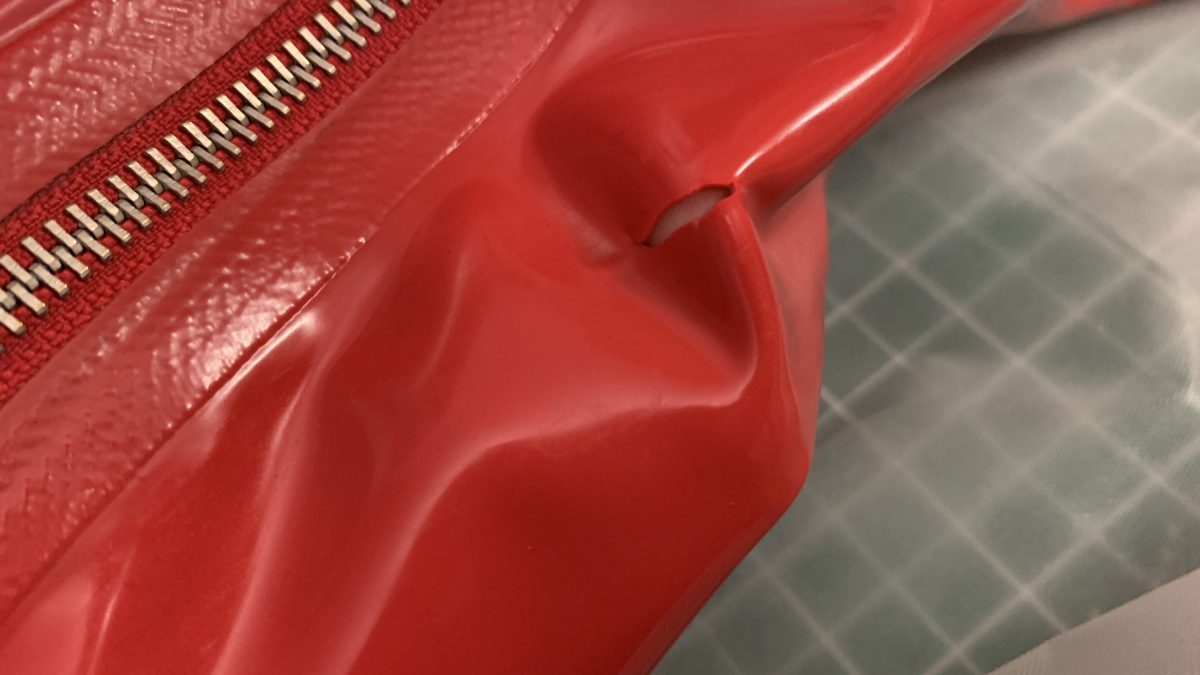
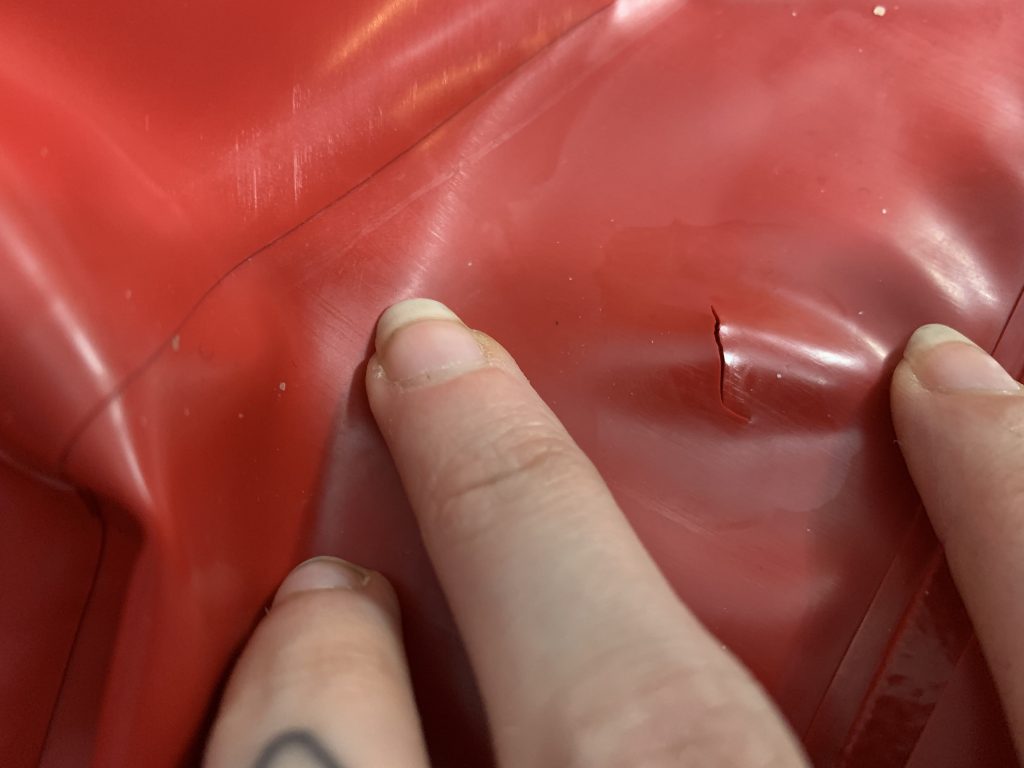
Hi Panther!
My dumbass put my thumb through one of the side panels while I was getting into her in Vegas. RIP.
This kind of rip is perfect for an invisible bandaid, since there’s no actual latex missing.
Here you can just barely see the rip, once I pushed it closed again.
We’re going to use all of the same items we would for making latex clothing from Latex101, but here’s a refresher just in case:
- Rubber Cement (thinned 50/50 with Rubber Cement thinner, should have the consistency of an egg white)
- Rubber Cement Thinner
- A thin Cloth/Paper Towel
- Glue Brush
- Roller or something hard with which to roll the seam (beer bottles work well)
- Extra Latex for patching
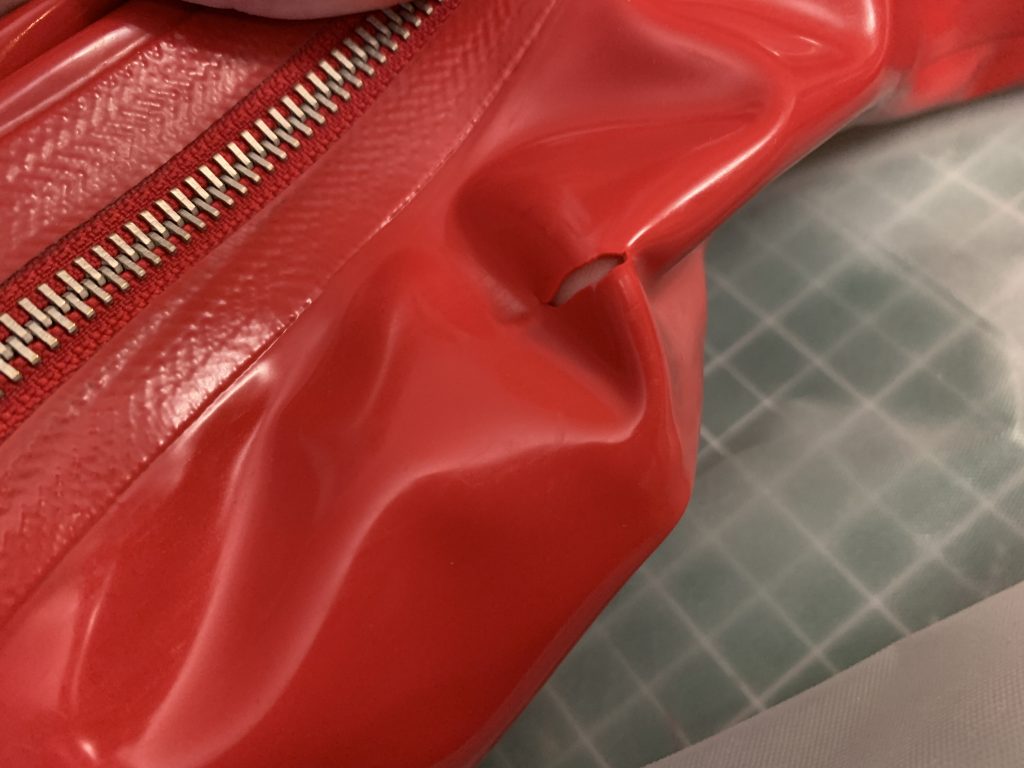
Start by cleaning the area around the rip like you would for a seam, on the inside of the garment. (Rub it down with the cloth soaked in rubber cement thinner.)
If your garment was shined, you’ll need to clean the shiner off this part as well — I’ve found that vivishine can just be wiped off with rubber cement thinner, but if you’re shining with silicone oil or with silicone lubricant, you might be better off washing the garment, letting it dry, powdering it, and then doing the repair.
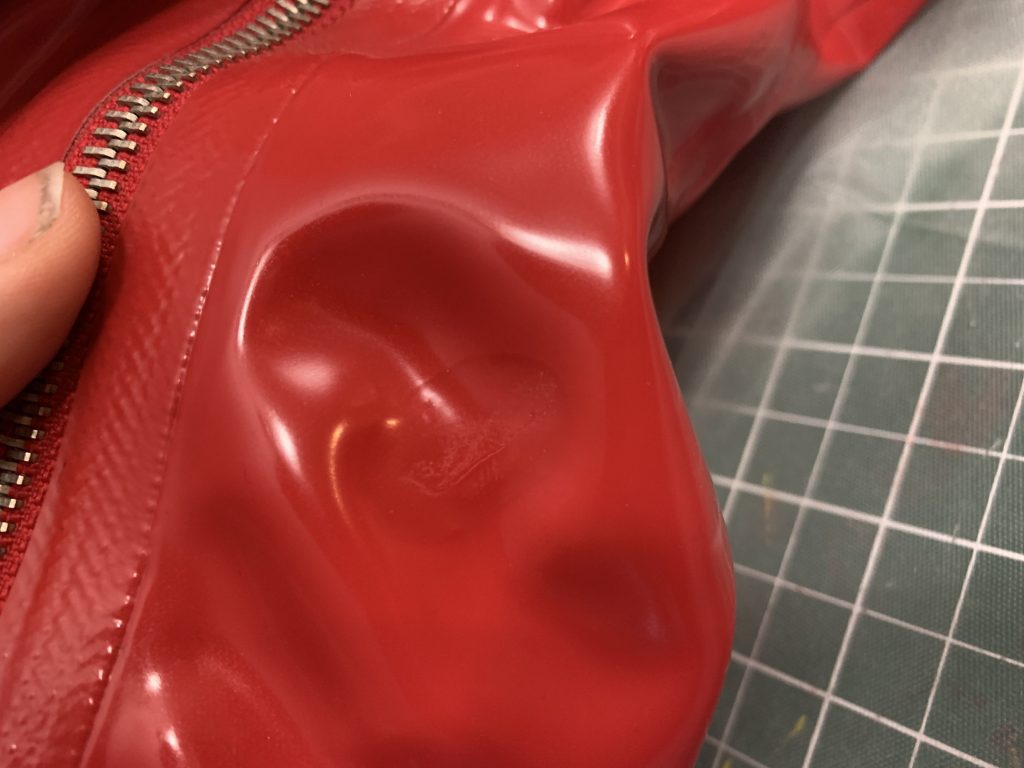
Then apply glue all around the area, and especially on the edges of the rip. This will probably make the rip all curl in on itself, as such:
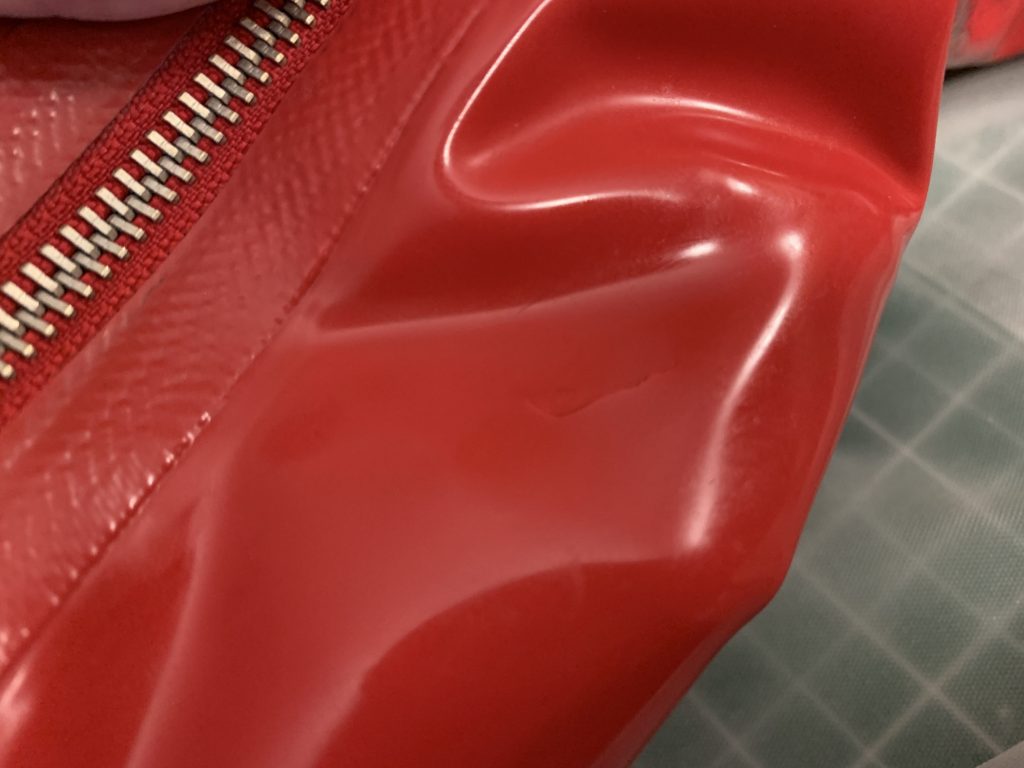
Let this dry really thoroughly. I’m talking go away and do something for five minutes kind of drying.
You want there to be no curl left in it at all.
Now what you’re going to do is very gently press the edges of the rip back together with your fingers.

You want the rip to begin adhere back to itself, even before you put the bandaid on the back of it.This will help ensure that the rip is, in fact, invisible.
Now we’re going to prepare the actual bandaid part, which is what will be forcing this newly-adhered latex to stay like this.
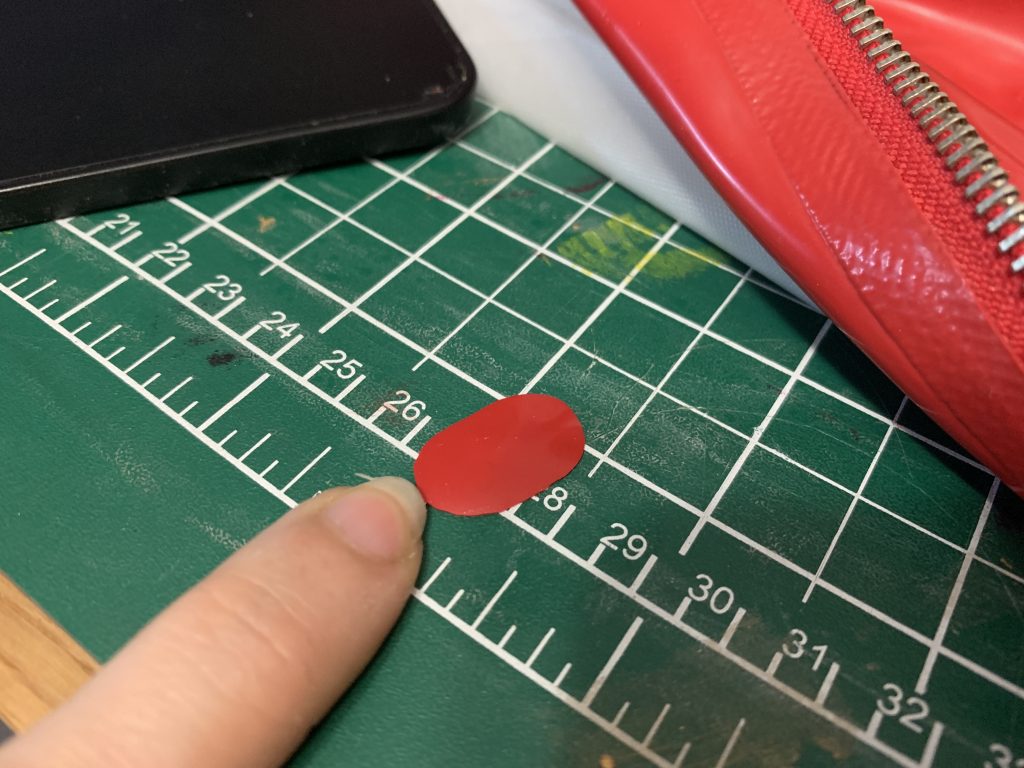
You want your patch to be a little wider, and longer than the rip. I also personally round all of my edges like this, because sometimes you can see the shape of the patch through the garment, and it really makes it look more professional than hard edges, IMHO.
I also try to colour-match my patches to whatever I’m patching; occasionally, when the garment is worn, the edges of the rip might stretch apart, and you’ll see the colour of the patch. (Most of the time this doesn’t happen if everything’s been adhered correctly, but it depends on the stretch in the piece and a lot of things. Better to just play it safe.)
Clean and apply glue to the bandaid, then carefully apply it over your rip, and roll it down once you’re happy with placement. (Not that if you pull the bandaid off because you’re not happy with the placement, or there are air bubbles, or any other problem, you will likely have to clean the rip and re-adhere it to itself again, so take your time.)

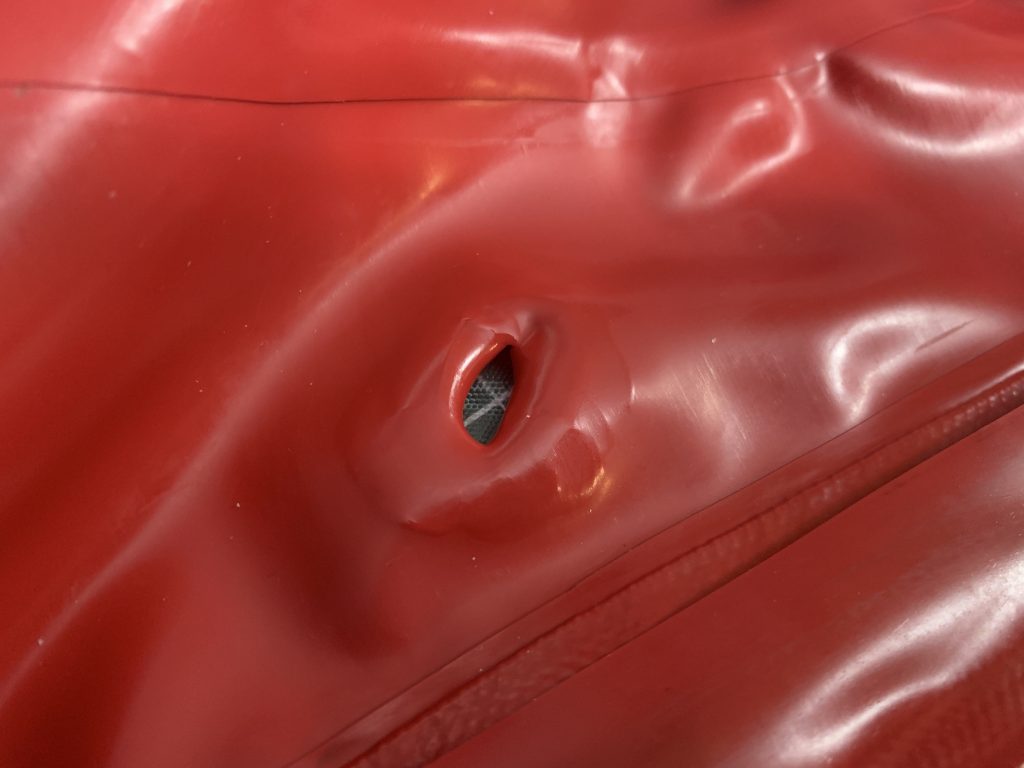
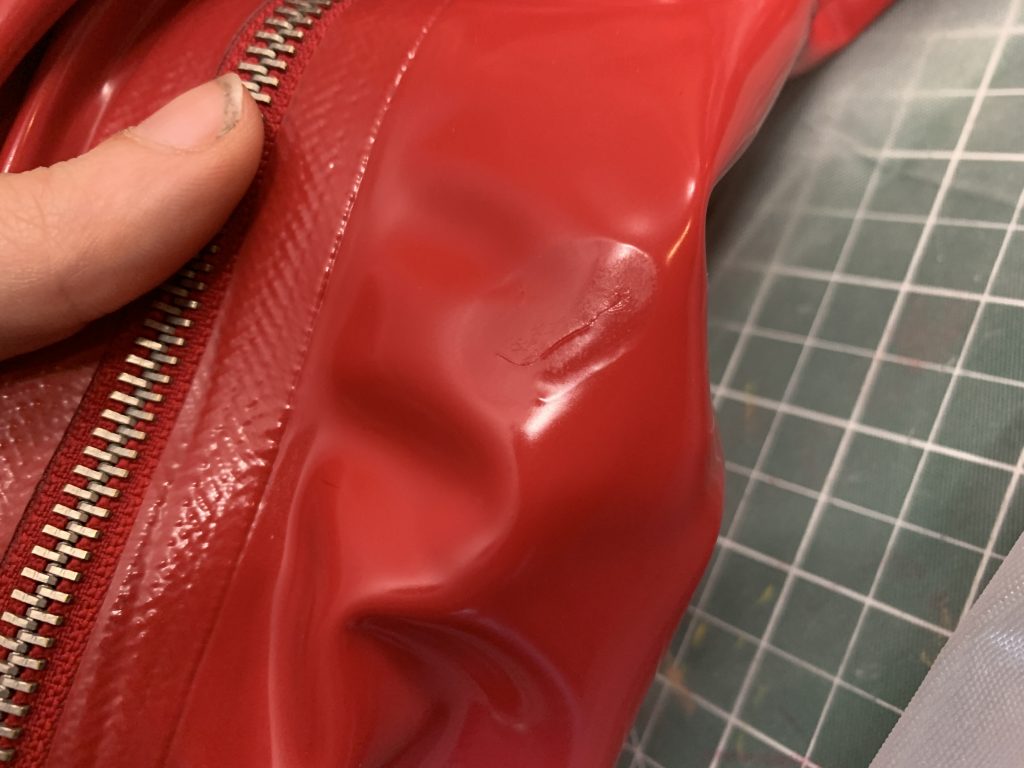
Here it is from the outside …
This is before I re-shined it, so the texture’s a little funny in that spot, but it gets the point across.
So there we go!
If you’re missing fabric from your rip, it’s honestly mostly the same steps, just without the pressing the latex back together bit. You might also want to patch from the outside in that case, so that you don’t see any jagged edges, you just see the smooth new edges of your patch!

As always, let me know if you have any specific questions about this whole process, and happy crafting!
