
ALRIGHT. So, let’s do this drafting from scratch thing!
I’m honestly a little nervous about starting this series of tutorials. I’m classically trained in drafting through school, and I had to do 400 internship hours with actual clothing designers during my program, AND I did this professionally for six years, and somehow I’m still nervous about this being “correct”, haha.
But we’re doing it anyway!
We’re going to start with something simple, drafting thigh-highs from scratch.
You’re going to need:
– Legs to take measurements from (store bought is fine if you don’t want to use your own)
– A pencil/pen
– Measuring Tape
– Ruler
– Paper or Cardstock to draft on
There are a couple different ways to actually make patterns — flat drafting, which we’re doing here, and draping, which I’m (hopefully) going to cover in the future. For things like latex, most people flat draft because the patters will need math-y adjustments to fit correctly. (Remember, for latex we draft ~10% smaller than the actual body measurements — I also draft similarly for stretch fabrics like 4-way stretch vinyl/ultrapreme and spandex/lycra.)
Flat drafting is essentially taking your body measurements, and then transferring them into flat shapes on paper.
So imagine it like taking the skin off of your leg, and laying it flat. That’s what your pattern will look like.
Properly horrified? Good, let’s get started.
Here’s what we’re drafting:
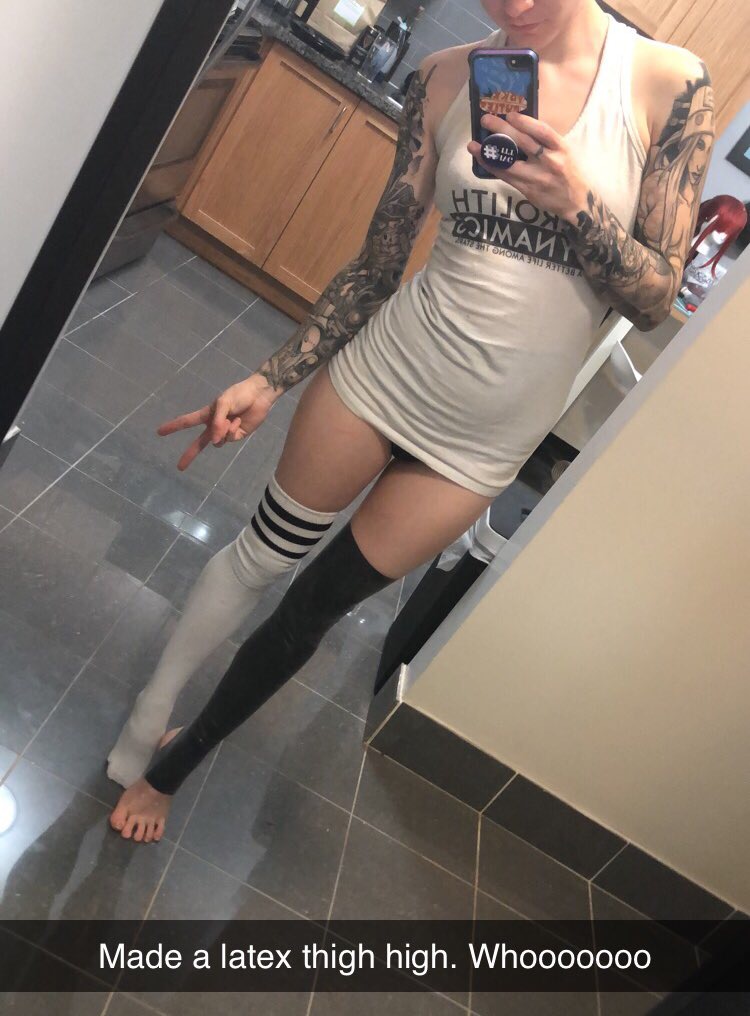
This is a thigh-high with a stirrup bottom; much easier to put together (and wear, IMO) than a full-foot stocking. (But we can totally draft full-foot stockings in the future if people are down for that.)
So now that we know what we’re doing, let’s start drafting!
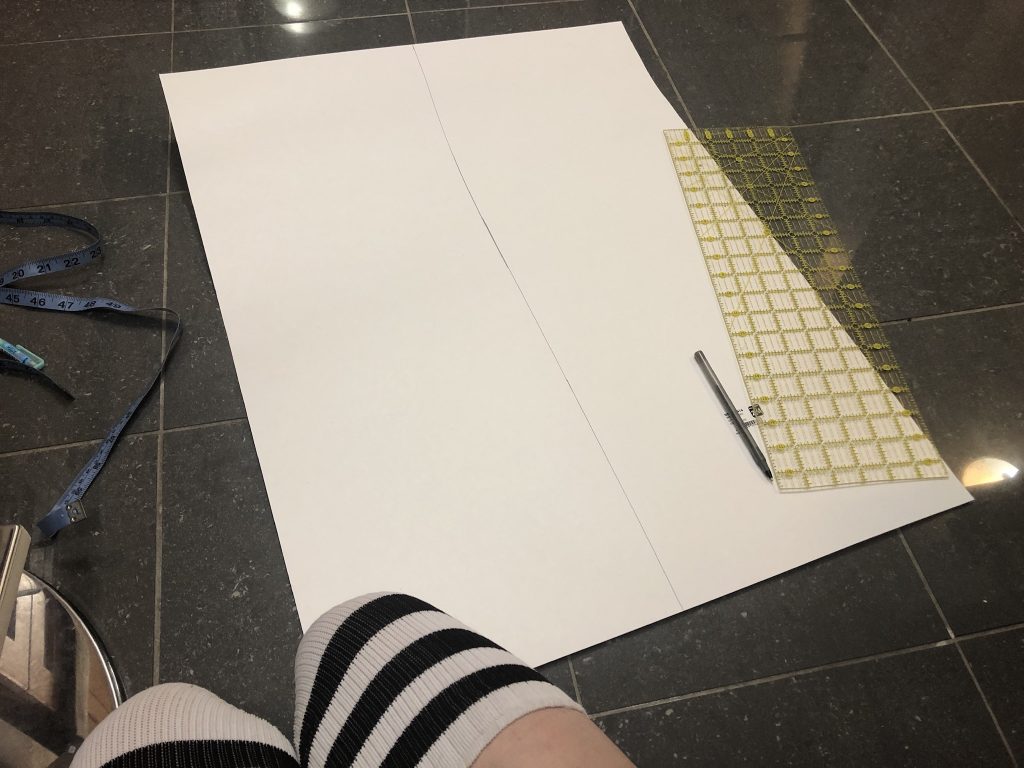
I draft primarily on dollar store Bristol board, because it’s way cheaper than buying rolls of pattern card stock, is readily available locally so I don’t have to plan ahead when I’m running out, haha.
I like card stock because it’s also hearty, and I can re-use it for a long time, but feel free to draft on regular paper as well.
The first thing we’re going to do is draw a line down the center of the board. This is going to be the middle of the pattern, we’ll draft outwards from here.
Next, we’re going to measure up the leg, how long we want the thigh-high to be. If this was a full-foot stocking, we’d start measuring from the toes, but since we’re doing a stirrup, I’m going to start measuring from midway up the foot.
You’ll notice I’m wearing thigh-high socks for this to get an idea visually while I’m measuring of where I want the new pattern to sit.
It turned out that my Bristol board was almost exactly as long as I wanted the pattern to be, so I’m just using the top and bottom of the board as the top and bottom of my pattern, but If it doesn’t work out that way for you, go ahead and mark where on the line those are going to be.
Next, we’re going to do this:
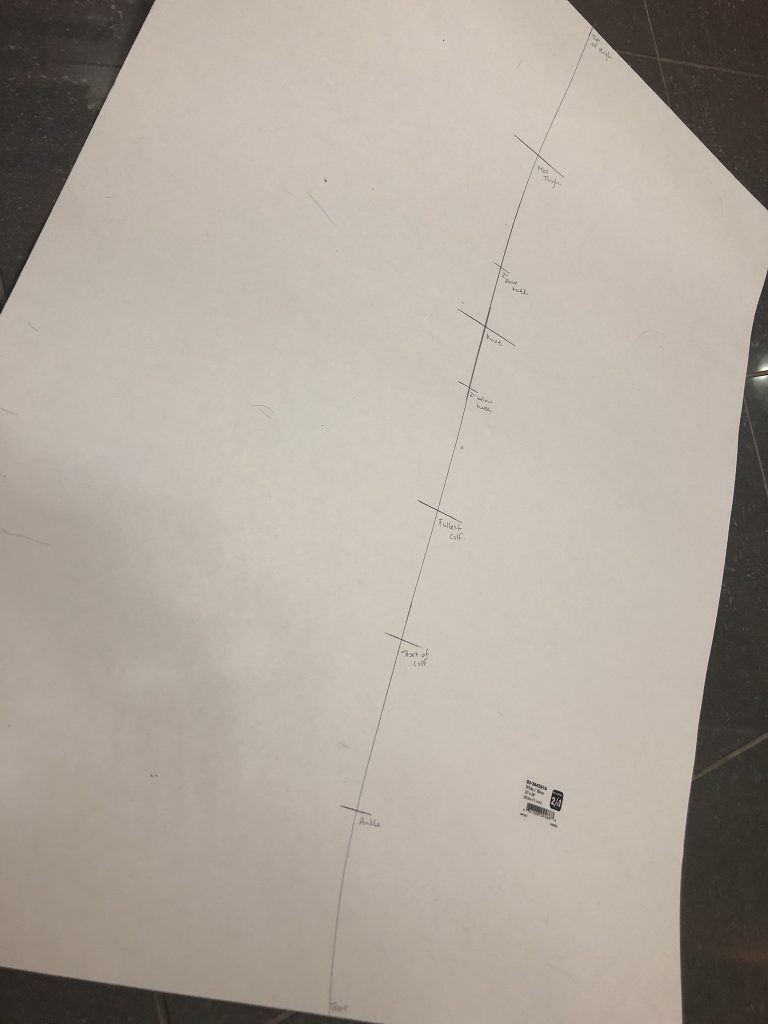
What I’ve done here is marked off all of the points on my leg, in relation to where the are along the line. It looks a little overwhelming, but it’s really not if you just go step by step.
For instance:
The first point is from the bottom of the pattern, to the ankle. That’s measured like this:
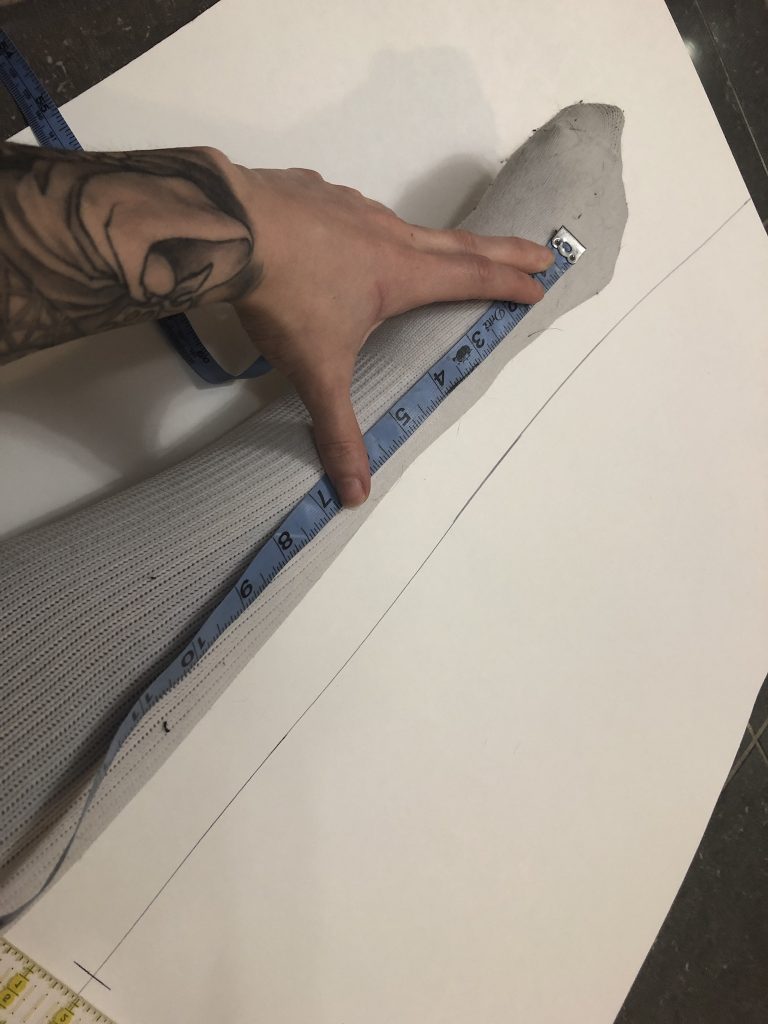
So it’s roughly four inches from the bottom of the pattern, to where my ankle is. Remember, this is all going to be out of stretch fabric, which is pretty forgiving, so an approximate measurement is generally good enough. I generally just get it to the nearest quarter inch.
So I mark “ankle” 4″ up from the bottom of my pattern.
Then the next mark is the start of my calf — where the muscle on the calf begins to swell — so I measure up from that same part of my foot, where the bottom of my pattern is, to where the calf begins to swell, and I mark that down as well.
Here are the measurements I generally mark for a thigh high:
- bottom of pattern (generally the middle of my foot for a stirrup, toes for a full foot stocking)
- Ankle (around where the ankle bone is)
- Start of Calf (where the calf muscle visibly starts)
- Fullest Calf (the largest part of the calf muscle)
- Below Knee (generally approx. 2″ below knee)
- Knee (around the middle of the kneecap)
- Above Knee (generally approx. 2″ above knee)
- Mid-Thigh (midway between the above knee measurement and the top of thigh measurement)
- Top of Thigh (generally an inch or two below the crotch, on me this is the largest part of the thigh)
Now, you are going to need to remember where these measurements are, because the next step is to measure the circumference of your leg at all of those points. If you’re worried about that, washable markers are your friend. Make little dots on your leg at all of these points, and just wash them off afterwards!
Once those are all marked down, we do this:
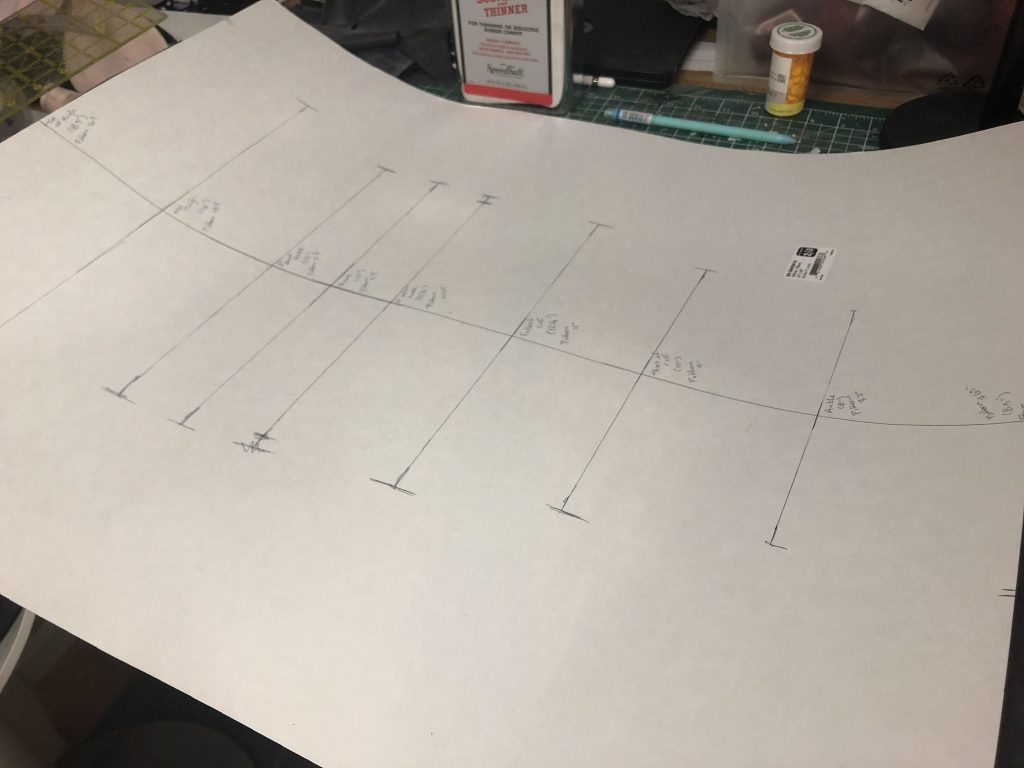
For this pattern, I’m doing a single-seamed stocking — that is, it’s all one piece, with only a seam up the center-back.
So what I’m doing here is taking the entire measurement around each of these parts of my leg, and laying it out, half on one side of the center line, and half on the other.
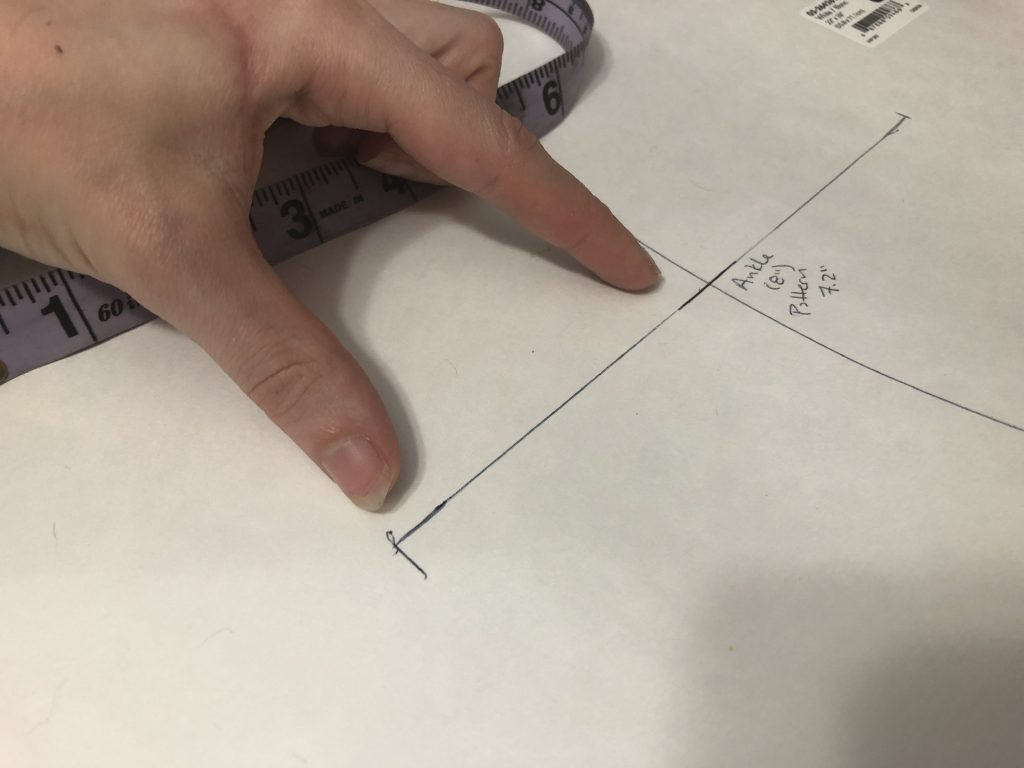
This same principle can be applied to drafting a stocking with side seams, you’d just be putting 1/4 of the entire pattern on either side of the side-seam, so that you’d wind up with a front and a back piece. (The front and back would be the same, except for where you’d cut a little hole for your ankle to stick out in the back.)
You might also notice that I’ve written down what the actual measurement is, and then what I’ve drafted onto the pattern — since this is for latex, I’ve done a 10% reduction in my pattern. I’d also recommend doing this for most four-way stretch fabrics.
Once all of these points are drafted, we do this:
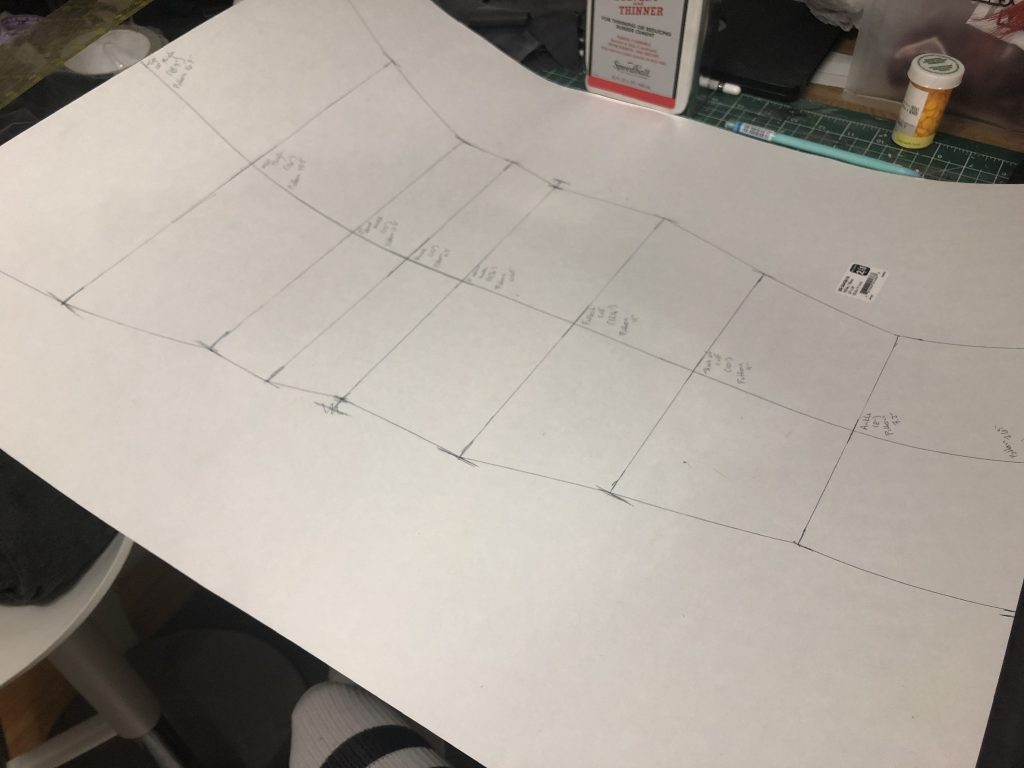
Here I’ve taken my ruler and just joined up all of the points with straight lines. Looks a little weird now, so the next step is to smooth a lot of this out.
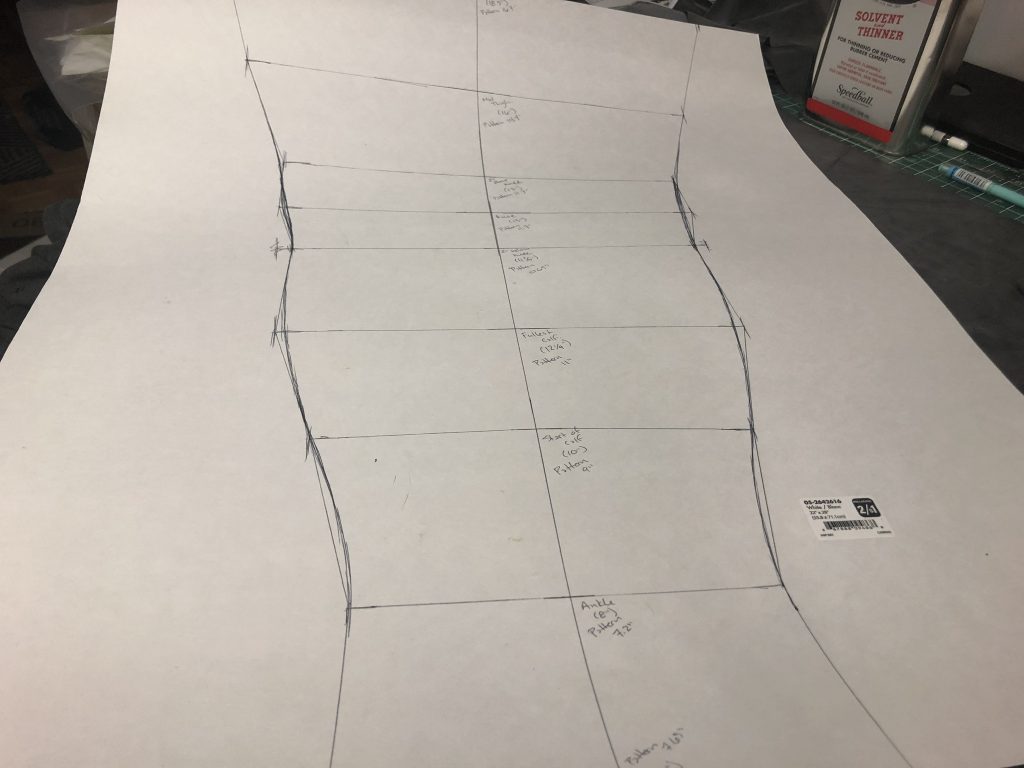
I like to do this by hand, but feel free to use a curve to guide you.
This might take a bit of practice, but basically, what you want to do now is recreate the actual curves of your leg. So you can see above the ankle to the beginning of the calf, I’ve stayed inside of the line — this is beause most of my leg there is still about as thin as my ankle. But at the widest part of the calf, I’m inside of the guideline — this is because the fabric will stretch to fit that widest part of the calf.
As a general rule of thumb, it’s best to try and equalise out points a little bit, rather than rigidly follow the points you just plotted. Smoother lines will lay better on the body.
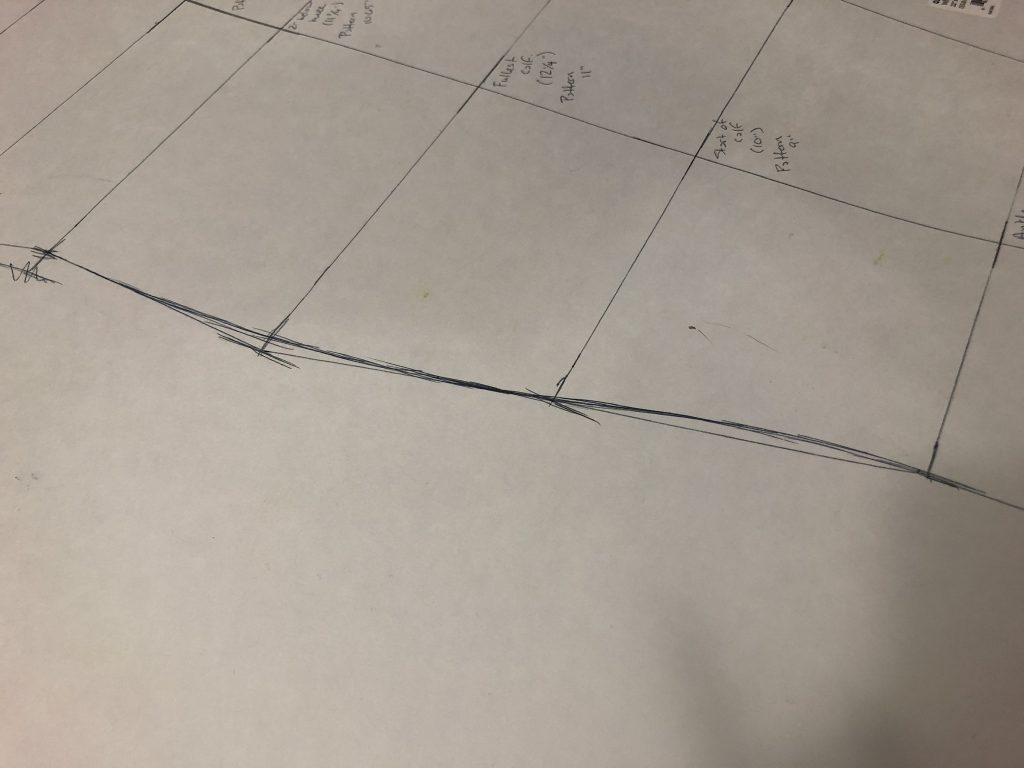
Here’s a bit of a closer look at that line.
Finally, we have to draft the stirrup bit. Honestly, this part is pretty easy — apparently so easy that I didn’t take photos of it at the time, good job me. But I have dug the pattern out so that you can have a visual reference anyway, after it’s all cut out.
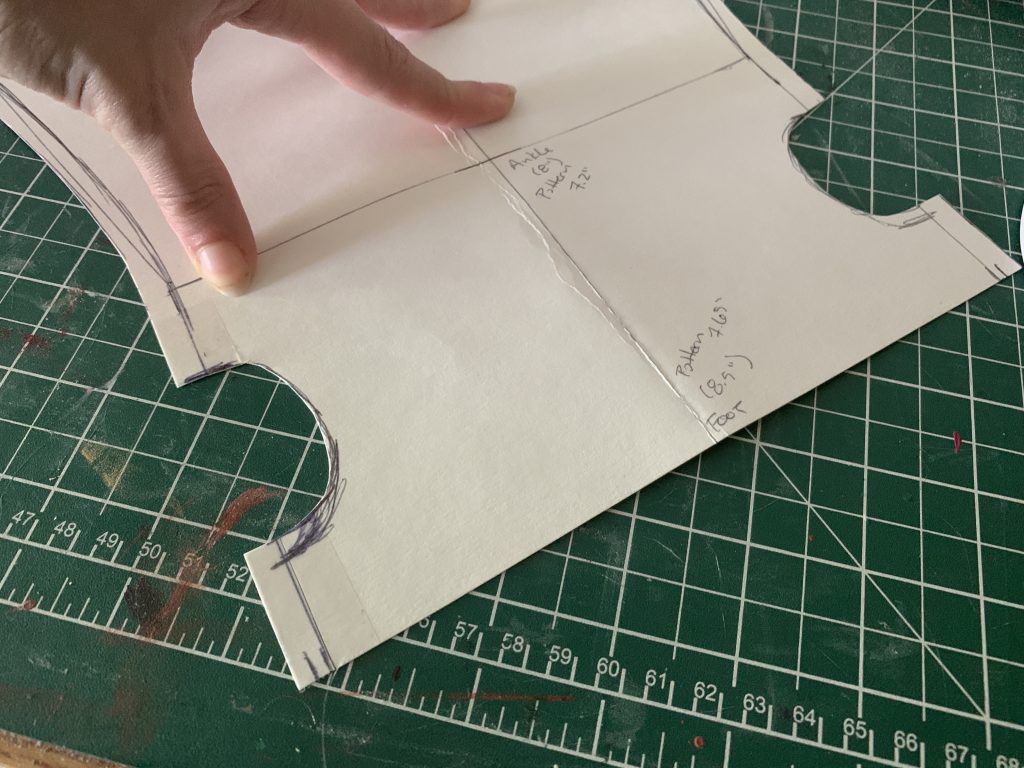
To find where my heel is, I just measured from that middle part of the foot where the pattern stops to the center of my heel, marked that on the pattern, and then drew in a 2″ diameter circle with the midpoint of my heel being the midpoint of that circle. 2″ is likely a good place to start for the heel hole, remember you can always cut it larger later, but you can’t make it smaller!
Don’t forget to add in your seam allowance! What exactly this is largely depends on personal preference; for latex I do 3/8″, but for fabric I generally do around 1/2″.
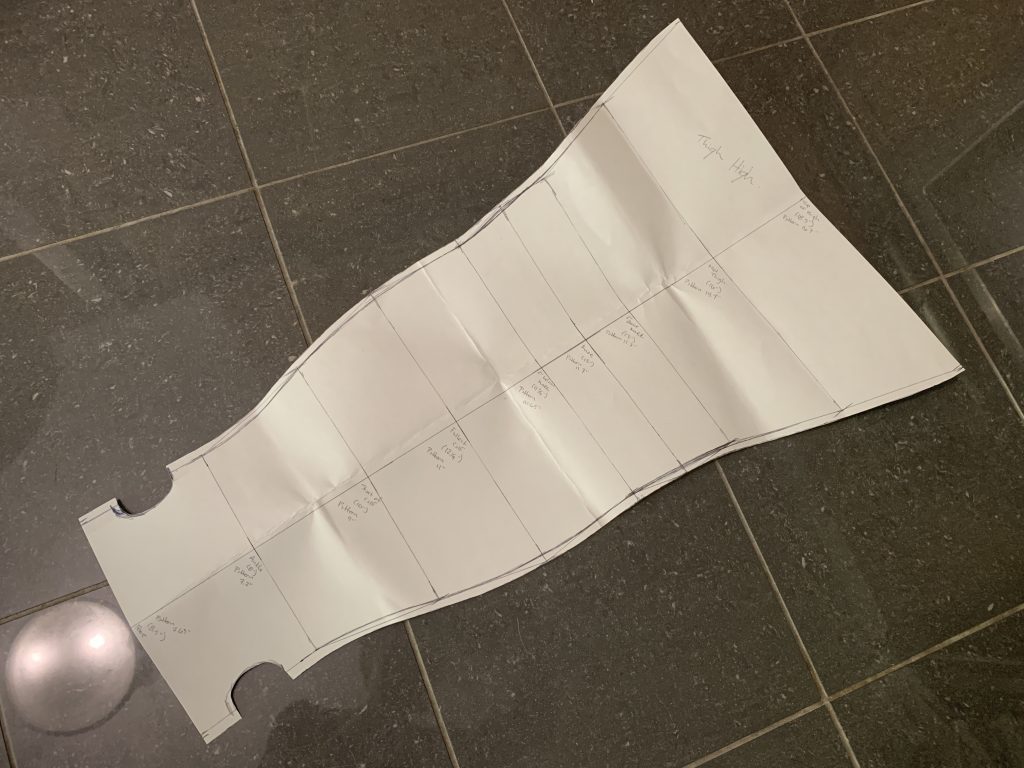
Et voila! There you have a thigh-high pattern!
Let me know if you try this out, how it works, and if you have any questions!

