Just a quick reminder at the top of this writeup to mention that I’m going to be taking a break from costume write-ups and tutorials for a little bit while I decide how best to separate them out from my NSFW stuff moving forwards! 💕 I won’t be deleting anything from the site until I find them a new home, though!
Alright, time to finally do this writeup! I’ve been meaning to do this one for a while, to be honest, because I feel like bodyshopping is one of my great strengths! Welcome to somewhere, where being a raging perfectionist is — well, I’m not going to say a plus, necessarily, but it will make perfectly body shopping things very satisfying.
Let’s start with the basics — What is 3D Printing?
Full disclosure: while I understand 3D printing, because I’ve worked for companies with 3D printers, and worked with people who own and are very knowledgeable about 3D printers, I don’t have my own because the idea of troubleshooting a 3D Print makes me want to scream. 😂 (I have space for one in my workshop now, though, and I continue to be tempted …)
The simplified version is that it’s using a digital 3D model in a special printer, to make things out of plastic or resin. There are two basic kinds of 3D printers (though dozens of brands, I believe), and they’re separated by the type of material they use to print!
The first kind is what I think most people think about when they think about 3D Printers, FDM (Fused Deposition Modeling) Printers. These work by extruding plastic filament through a heated head, which melts the plastic and sticks it together in layers.
The other kind, which I believe is newer technology, and which has been getting significantly more popular recently, is Resin Printing, which more or less uses a laser to solidify liquid resin into a shape. Resin then needs to be UV cured, and liquid resin is considered to be toxic (don’t lick the resin, no matter how much some of the colours look like forbidden Jolly Ranchers). You should wear gloves when dealing with uncured resin, and at minimum have good ventilation — though my general rule of thumb is that anything I can smell, I try to wear a Respirator for! (N95 masks are generally not good enough for fumes from prop work, protect your lungs!)
What’s the difference? Well, FDM has historically been cheaper, though Resin Printers are now much more affordable than they used to be. FDM printing tends to have a lower barrier to entry, as FDM doesn’t need to be cured before handling, though it requires more work after printing to achieve similar results — more on that later. FDM also generally prints faster, and the prints tend to be lighter-weight when finished. However, Resin requires significantly less bodyshopping, and can be printed in semi-transparent colours* that can be easily polished to a mirror finish that doesn’t require painting at all — which is excellent for gems or fake jewellery. However, Resin tends to be significantly heavier, especially if printed as a solid piece, and has to be filled with something else (like expanding foam or wood filler) in order to reinforce it if printed as a shell (which isn’t possible for all pieces). I also find that Resin tends to be stronger — I’ve definitely broken a couple of 3D printed items by just dropping them on the floor, as 3D prints tend to be largely hollow except for support structures.
*FDM is also available in semi-transparent colours, but in my experience, as soon as you bodyshop it, it looses its transparency and never properly recovers. Your Mileage may vary.
What 3D Printers should I work with?
Well, this is an interesting question. I tend to work with prop-makers who already own 3D printers — obligatory plug to Dangerous Ladies, but there are many prop makers who model and make 3D props. If you own your own printer, you can save some overhead cost by simply purchasing the files from modellers and printing them yourself — and then bonus, they don’t have to be shipped to you!
But it’s also easy to buy printed FDM or resin kits to finish yourself, and the bonus of a kit is that you don’t have to do any troubleshooting of the printers yourself! (FDM printers especially love to have strange issues, which is something that drives me insane personally, but you might enjoy tinkering!)
If you’d like to purchase your own printer, though, two entry-level printers that I can recommend from having done my research on which ones I’d get, are the Creatality Ender 3 for FDM (and I recommend upgrading to the glass print bed), and the Elegoo Mars 2 for Resin. (Don’t forget to buy a curing light as well!) (If I had big money to be putting into printing I’d be looking into getting an Ultimaker, but they’re very pricey.)
Let’s get Started!
The TL;DR of bodyshopping is that you want to get the 3D print to have the same texture as whatever item you’re trying to reproduce — usually, this is some degree of smooth and shiny, since it’s usually used for cosplay armour or props. I’m going to talk about both FDM and Resin prints at the same time here, because the steps are similar, and I’ll denote which one I’m talking about in each section.
What You’ll Need:
- Wet/Dry Sandpaper in (aprox) 150, 220, 400, 600, & 800 grits (I sometimes also use ~1200 & 3000 grits)
- Water (access to a sink is best)
- A Nail Brush or Old Toothbrush
- Automotive Filler Primer (I use Duplicolour)
- Automotive Scratch Filler (such as Bondo or Acrylgreen) OR Talc-Based Baby Powder (I’ll explain)
- Superglue (Cyanoacrylate Glue — I prefer the Bob Smith Industries one)
- Optional: A Sanding Block (this will save your wrist!)
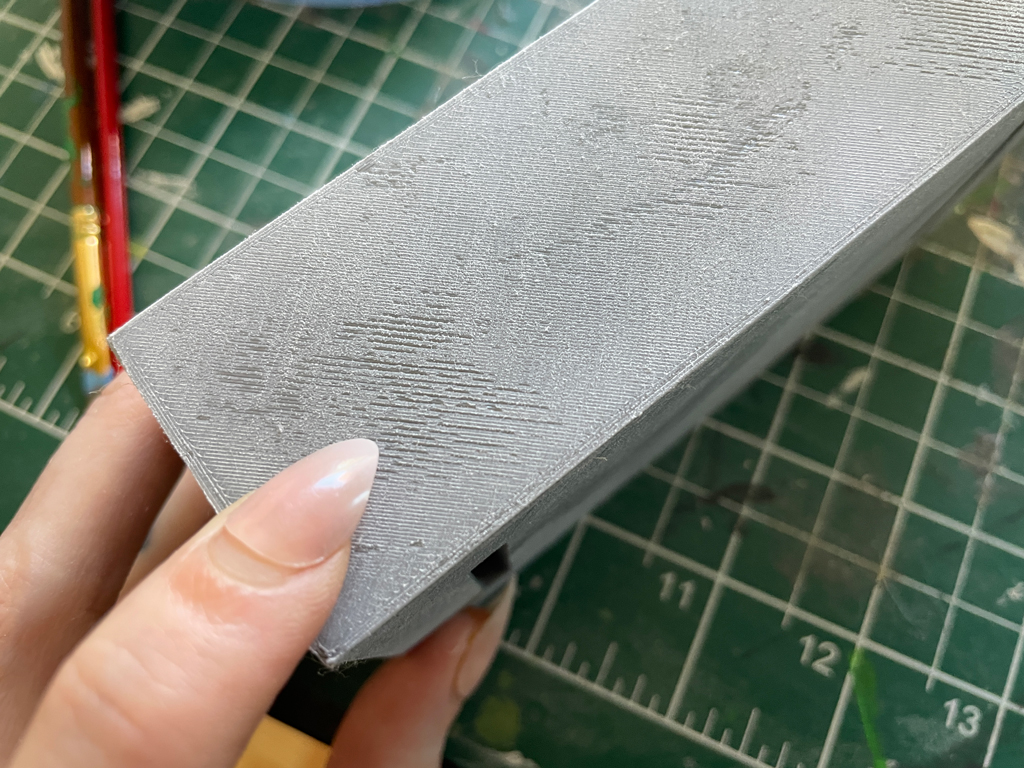
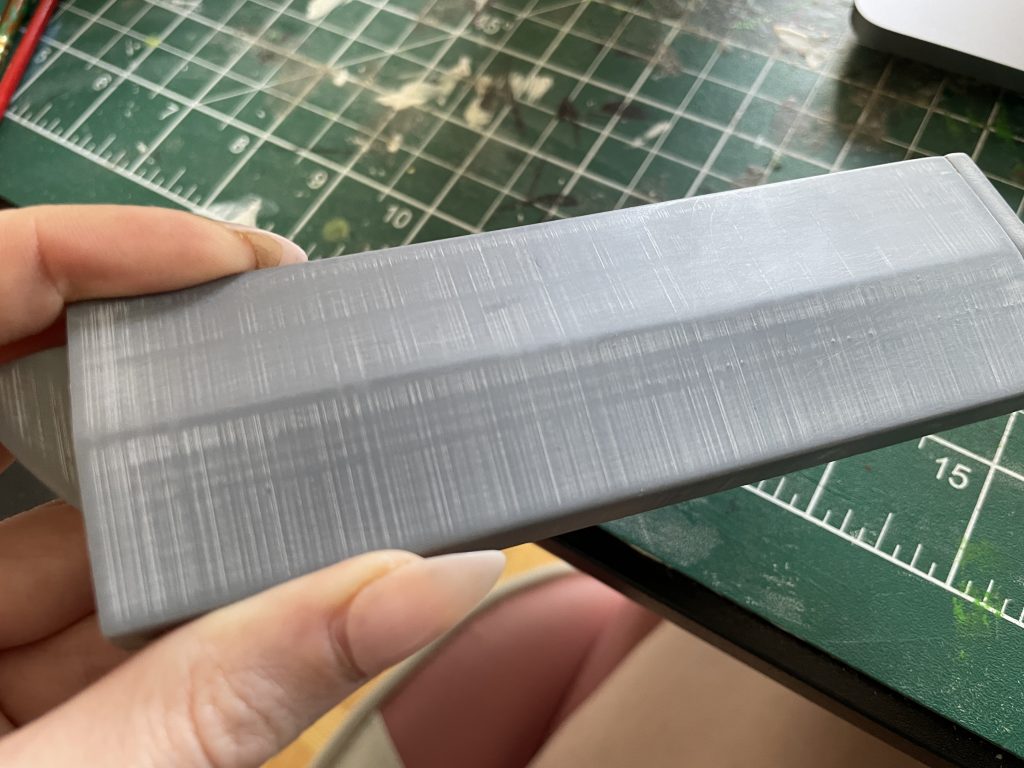
This is what an FDM Print looks like, raw off the printer:
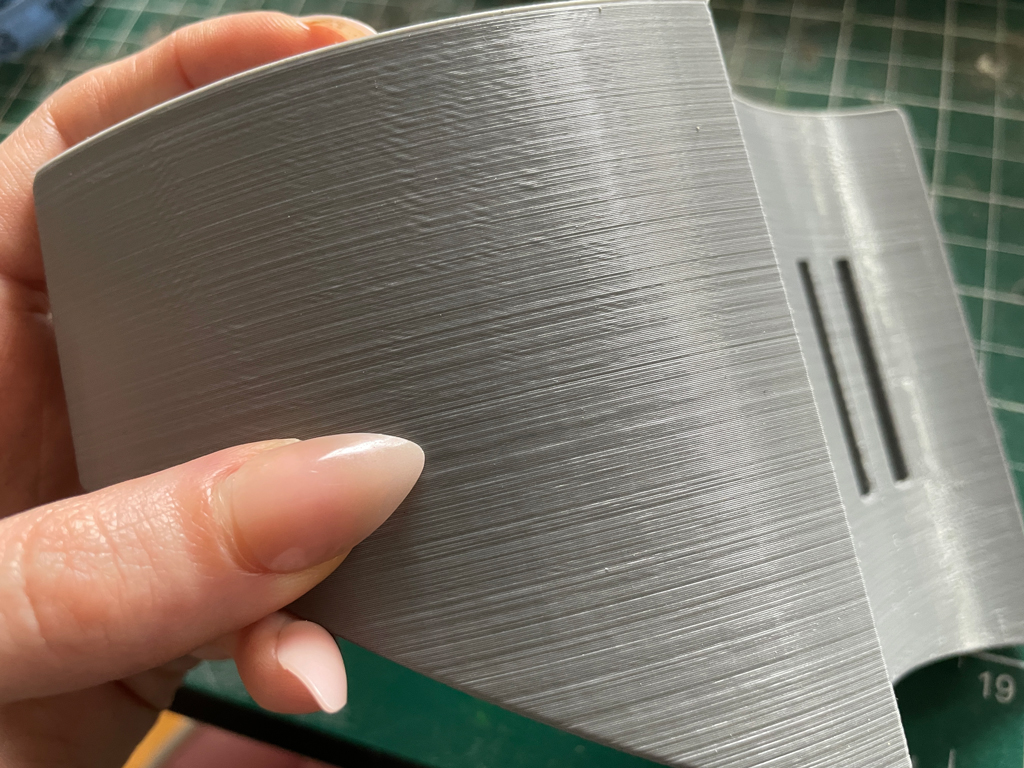
These are step lines, and essentially each one is a layer of extruded filament. These layers can be thicker or thinner depending on your print settings, and bodyshopping will by and large be easier if you have thinner print layers but you’ll use more filament and the print itself will take longer to complete.
This is what a Resin Print looks like, raw but after curing:
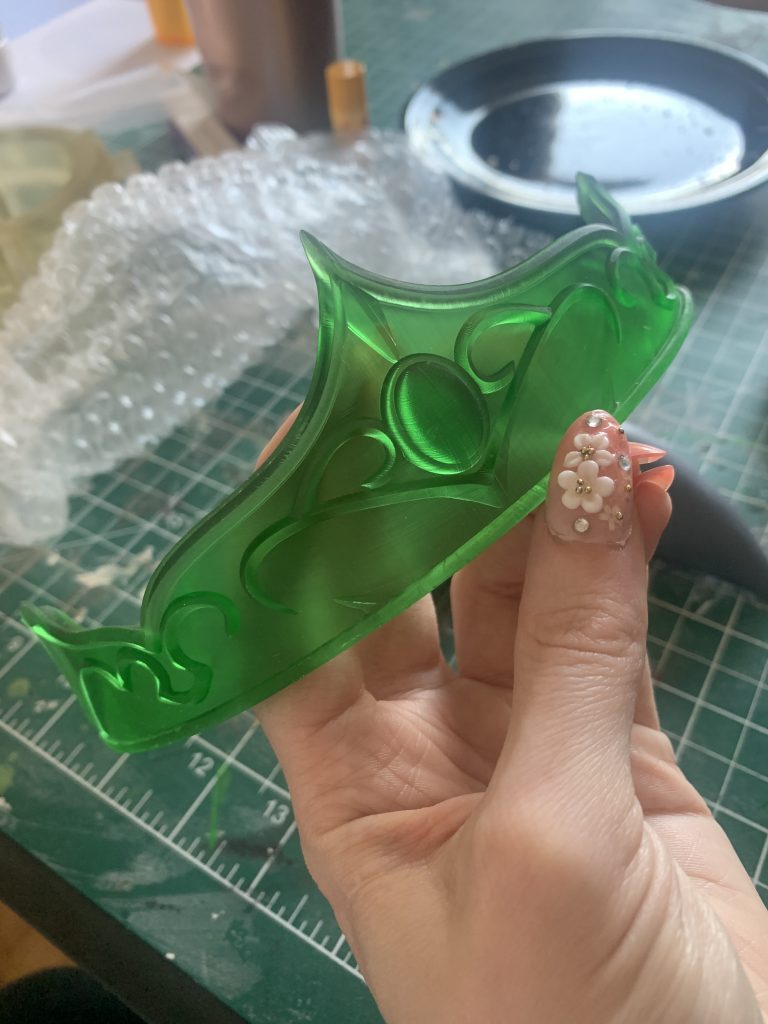
You’ll notice that the resin print doesn’t have step lines. Generally, a resin print will only have minor imperfections for you to sand off, and then most of your bodyshop work will be joining pieces together and polishing.
So we’re going to start with a lot on FDM, and then we’ll come back to the Resin once the FDM is significantly smoother!
My first step is always to dry sand with 150 grit. I tend to cut my large piece of sand paper into smaller, more handle-able pieces — larger if I’m going to put it on a sanding block (more on that below!). You want to sand either in small circles, or up and down perpendicular to the directions of your step lines — or both, tbh, any minor scratches will wind up being sanded off or filled ultimately, so sand however works best for the shape of the piece you’re working on.
Like so.
If you have large flat planes to sand, a sanding block will really save your wrist, and make everything much easier for you! They look like this:
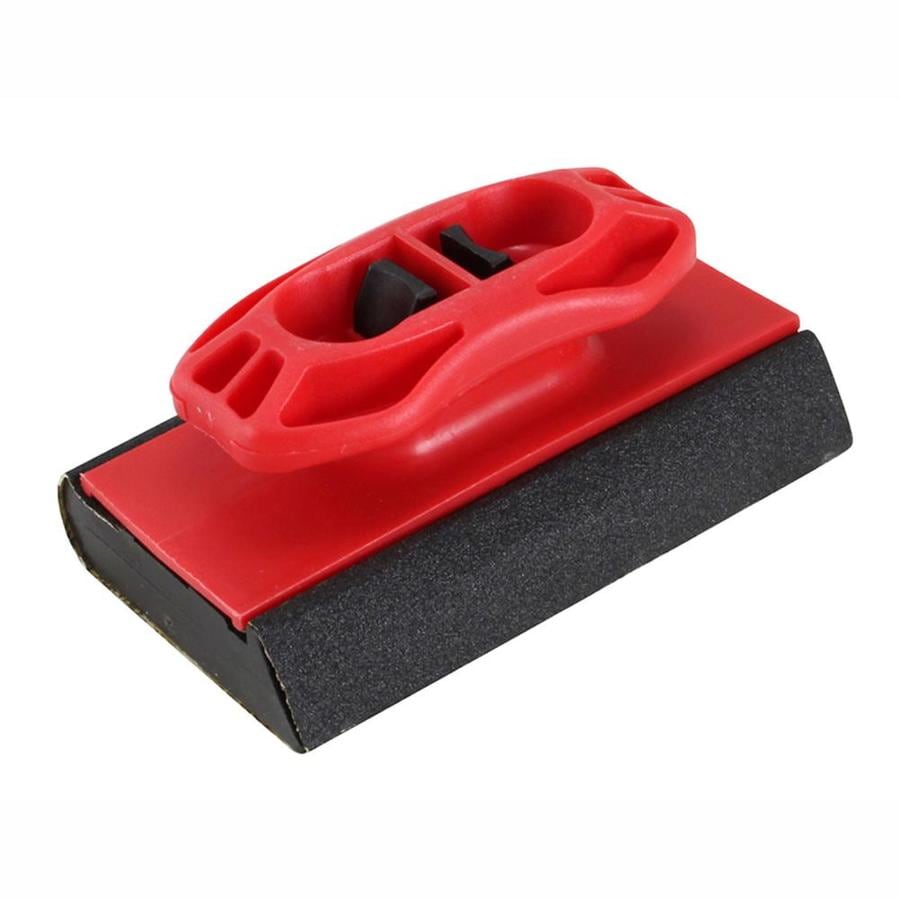
You take the top off, fold in your own piece of sandpaper, and then put the top back on, then hold onto the handle.
Now, there’s a bit of an art to sanding anything with fine details — you absolutely can sand the fine details right off of FDM if you’re too rough. It’s best to sand along the top layer of things like filigree until smooth, and then take either a needle file (if you do a lot of sanding, a set of needle files are absolutely worth it), the very edge of a folded piece of sandpaper, or a sanding stick (basically the disposable version of a needle file) to get in around the details, and in on the sides (if they stand up far enough to have steps on the sides — depending on how your print was done, some may not!)
Personally, in the 150 grit round of sanding, I aim to have most of the print lines almost all the way gone. This makes it the most time-consuming step, but I find that doing this makes every step after much easier.
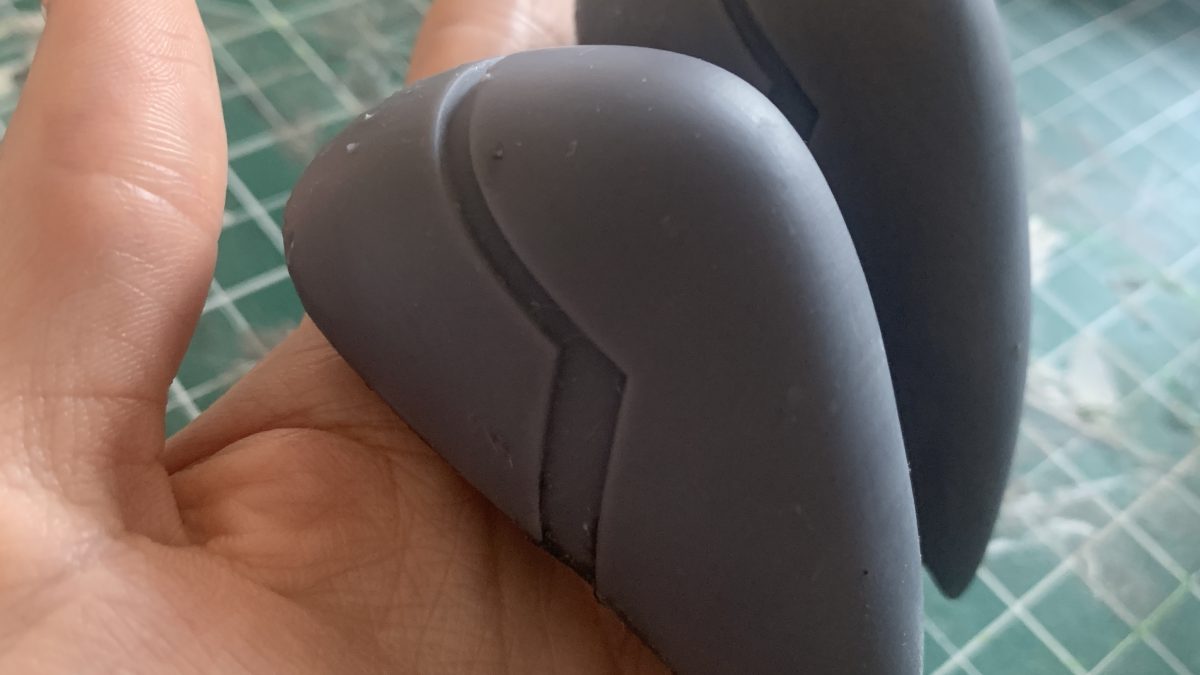
Here’s what a piece looks like, sanded that much:
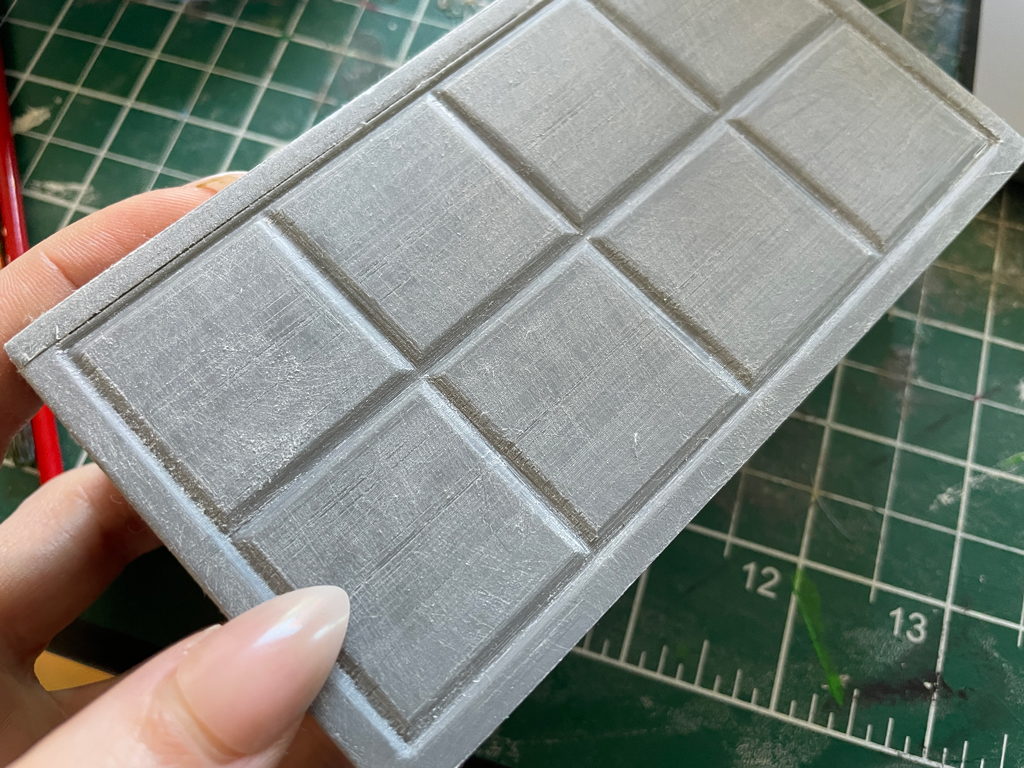
Depending on how your print comes out, you may have some step lines that are deeper than others — you can see one such example by my thumb nail in that picture. (Also, the little indents here? Good example of things that a needle file works great for!)
Here’s another, more egregious example of a deep line:
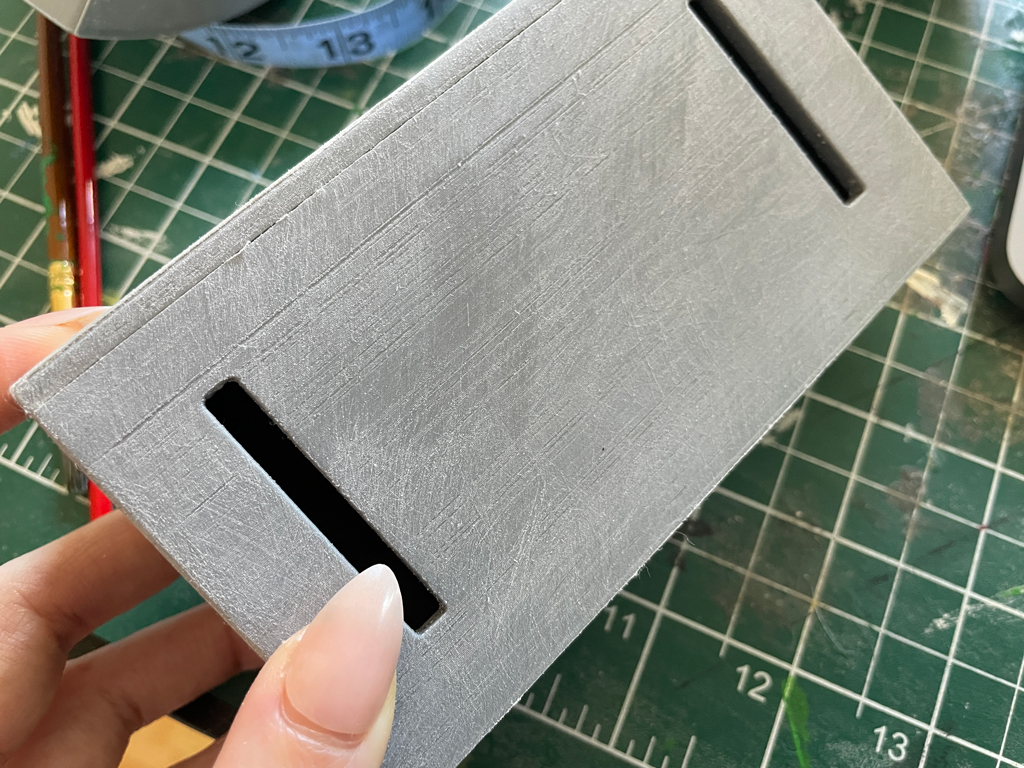
You can see several along the top of this piece.
As well as here, on a part of a print that was the bottom layer against the print bed:
You have a couple options for pieces like this. You can sand he hell out of everything, or you can fill these lines. I generally opt to fill lines like this, that are still pretty deep when everything else is relatively smooth. We’re going to do a couple of methods of filling in another section of the tutorial, so hang on for now.
Some pieces sand up much nicer than others, and that depends on a lot of factors — some pieces just sand really nicely! Some FDM filaments sand nicer than others, sometimes printer settings are just right, sometimes the printer just has a coronary and your print steps are all over the place, shit happens! It’s all fixable, though, no worries.
You can see a lot of sanding dust still clinging to this print in the above photos — this is where the toothbrush or nail brush comes in. Take your print to the sink, and give it a rinse and a scrub with the nail brush to make sure no dust is on it, because in the next step, we’re going to prime the piece, and we don’t want print dust in the way of paint adhesion!
Once you’ve given it a scrub and dried the piece, you can take it out and prime it.
I use Duplicolour Sandable Automotive Filler Primer — it looks like this.
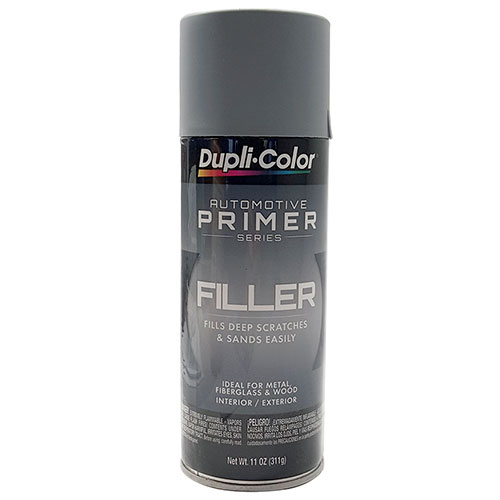
Filler Primer does what it says on the tin: it’s a thicker paint, made to fill scratches on cars. You might be tempted to put on a bunch of thick coats, but if you do, your print will take forever to dry — it’s best to do ~3 thin coats per priming session. Your first and second coats probably won’t completely cover your print, which is totally ok, as long as you have coverage by the third coat. Give each thin coat ~10 minutes to dry before putting on the second coat (more if it’s cold or particularly humid; don’t put more paint on if your paint is still tacky). I generally give my prints ~30 minutes to finish drying before I bring them back in to continue sanding.
Here’s a print after one thin layer of primer:
And here it is after 3:
I also generally move on to wet sanding at this step, as well as upping the grit to ~220. Wet sanding is what it sounds like: you want your pop and the sandpaper to be wet. I generally take a little bowl of water, dip my sandpaper in, and then sand. This will lubricate your sand and make it smoother, as well as help keep sanding dust down. (Personal preference, I don’t usually do this for 150 grit — but almost all of my prop friends that I’ve worked with exclusively wet-sand, so you can wet or dry sand essentially whenever works best for you. Pretty much the only time I’d insist on a wet sand would be if you’re polishing something, at 800-3k grit.)
Here’s a picture of the filler primer doing it’s job — the darker grey is the print, and the lighter grey is all of the filler primer!
By the time you finish your 220 grit sand, your prop should have no step lines left — unless you have ones that will need to be filled with something other than primer, which I’m going to cover below. The best way to figure out if you do have step lines left is to apply another layer of primer, because the flat colour will show you any imperfections you might have missed. Ideally, I like my piece to look like this around the 220-400 stage:
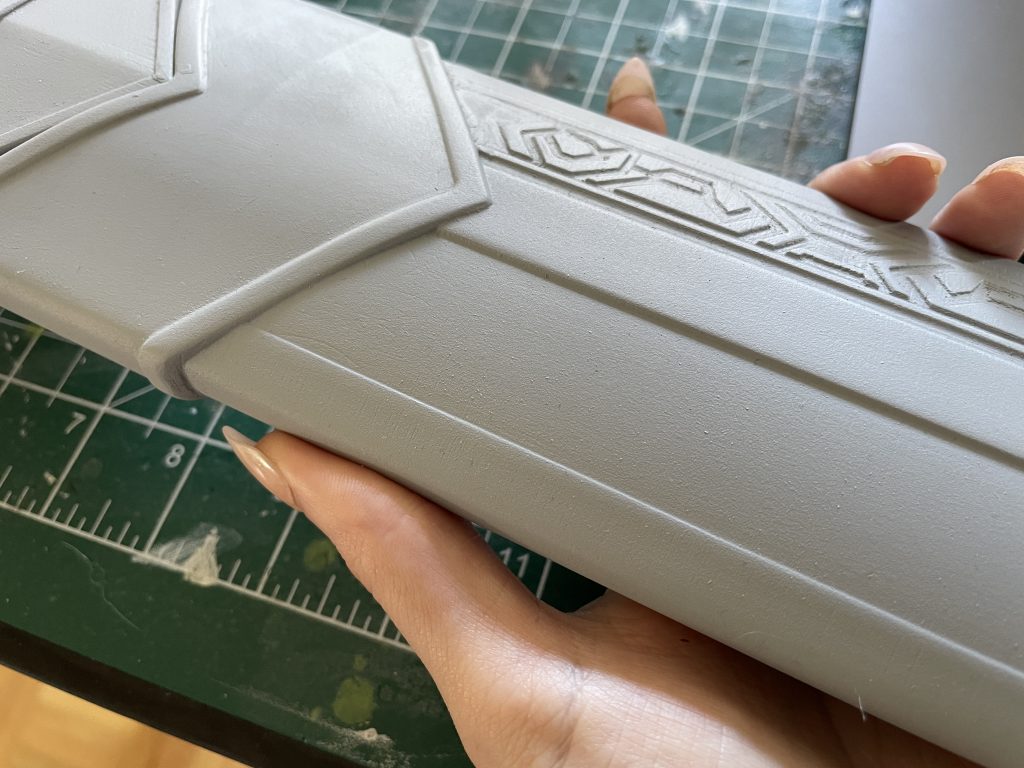
(Sorry about the many different prop photos in this writeup, I have a lot of things on the go right now in different stages and I’m almost out of filler primer and still in lockdown, so I’m just rolling with it. 😂)
Starting at about 600 grit, you’re going to largely get a polishing effect rather than help getting your step lines down. I consider 400 to be the last grit that will help you in
But what about Resin?
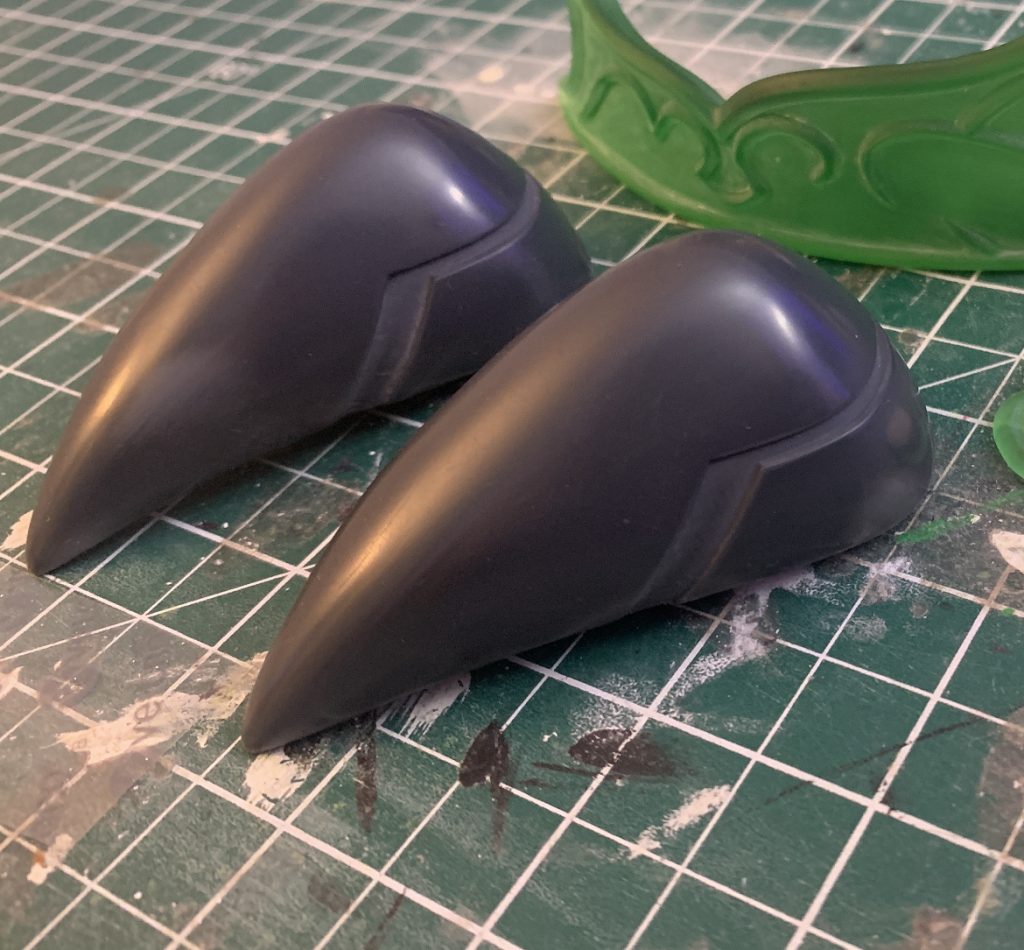
Resin is fun to bodyshop because it doesn’t have step lines. Depending on the printer, the quality of the model, what resin was used, etc. etc. it may be 400-ish grit smooth when you get it!
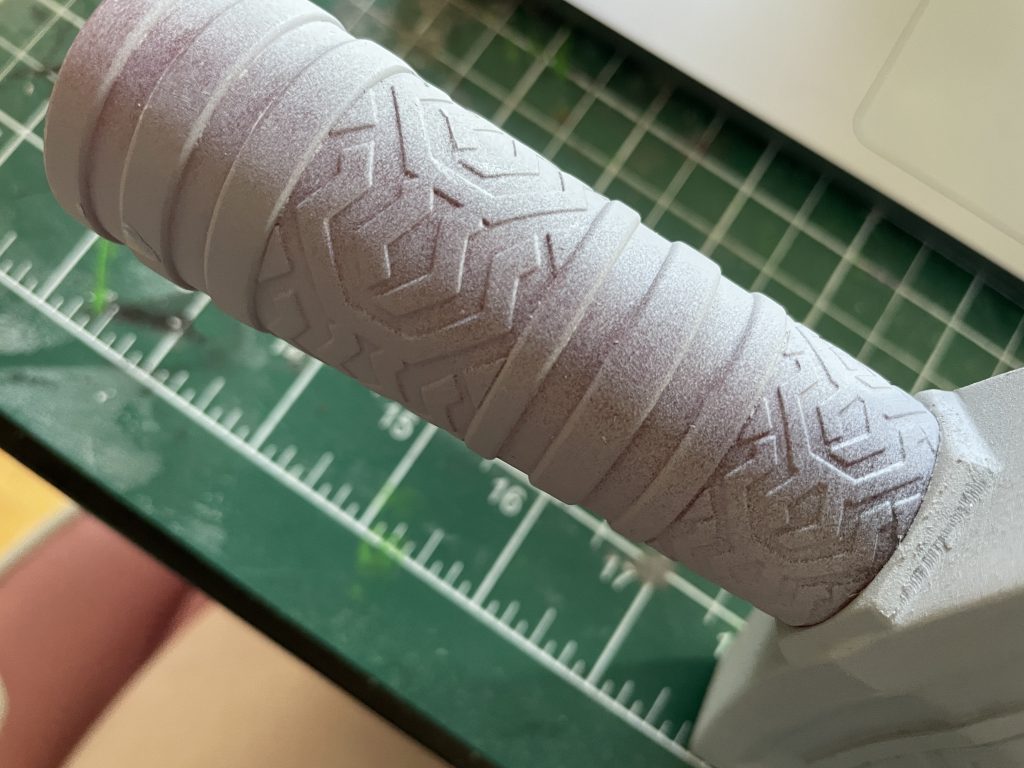
Here’s a recent resin print I received from the Dangerous Ladies’ new Resin printer — you can see some of the imperfections on the top from support structures on the print, but I sanded those off with a gentle rub of 220 grit, and then all that was left was polishing! (I believe 400 wet on the bit with the support, then 600, 800, and then 1200, in pretty quick succession. 
Some Resin prints will have some minor imperfections that you may not notice until your first coat of primer — If you look closely at this picture that I used earlier, you might notice some banding that looks a LITTLE like step lines! These are minor imperfections in the surface of the print that needed to be gently smoothed out with a 400 grit wet sand, and a couple of coats of filler primer, until they smoothed out.
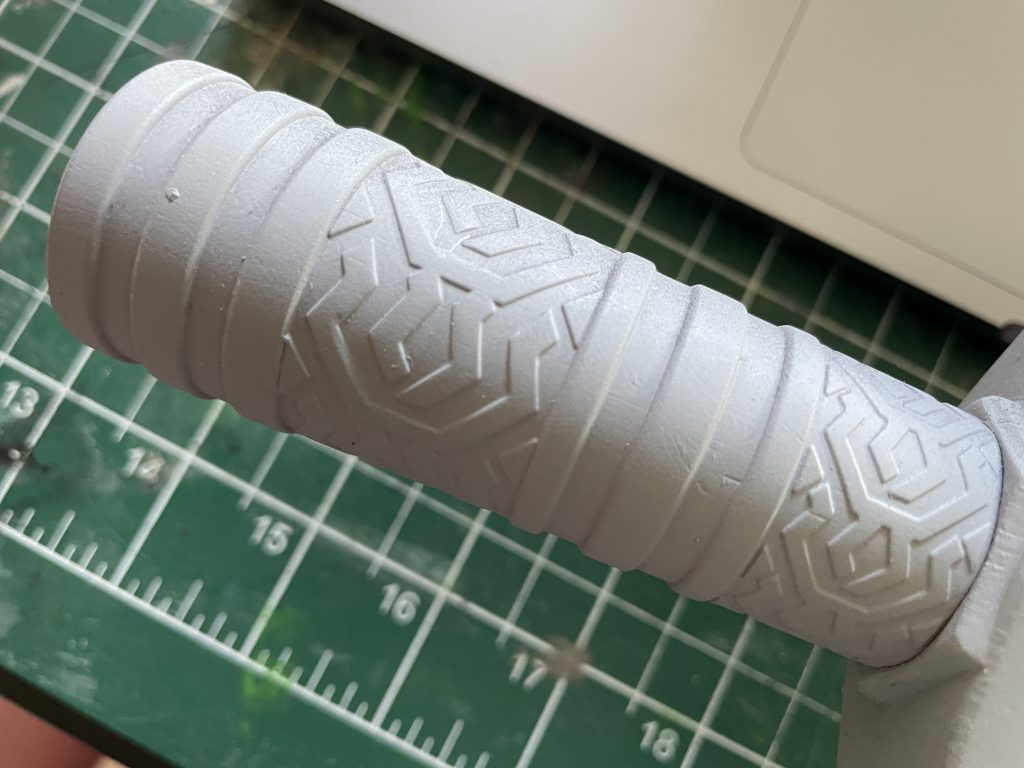
The difference in these two resin prints is just the printer that they came from, I believe — the nicer print is a significantly more expensive printer. Hobbyists probably aren’t looking at a resin printer worth a couple thousand dollars, but some prop makers do invest in these (like Dangerous Ladies, I love them, they’re local to me, great people, 10/10), so you might find it worth your time to pay them for resin kits and skip some of the bodyshopping yourself!
I only ever wet-sand resin, because I find that almost all of the work on it is polishing work and minor imperfections (like from support structures!), and mostly use 400+ grip to keep from scratching the surface! So I’d recommend starting with 400, and only going lower if you find that’s not enough.
As far as priming goes — I generally prime between 150, 220, and 400 grits — then by the time I read smoothness, I don’t prime again until I decide everything is smooth enough and it’s time to paint. We’ll cover that below, though because first — what if you’ve done your 220 grit sand and you still have a couple of stubborn step lines?
Gap Filling. (Ladies)
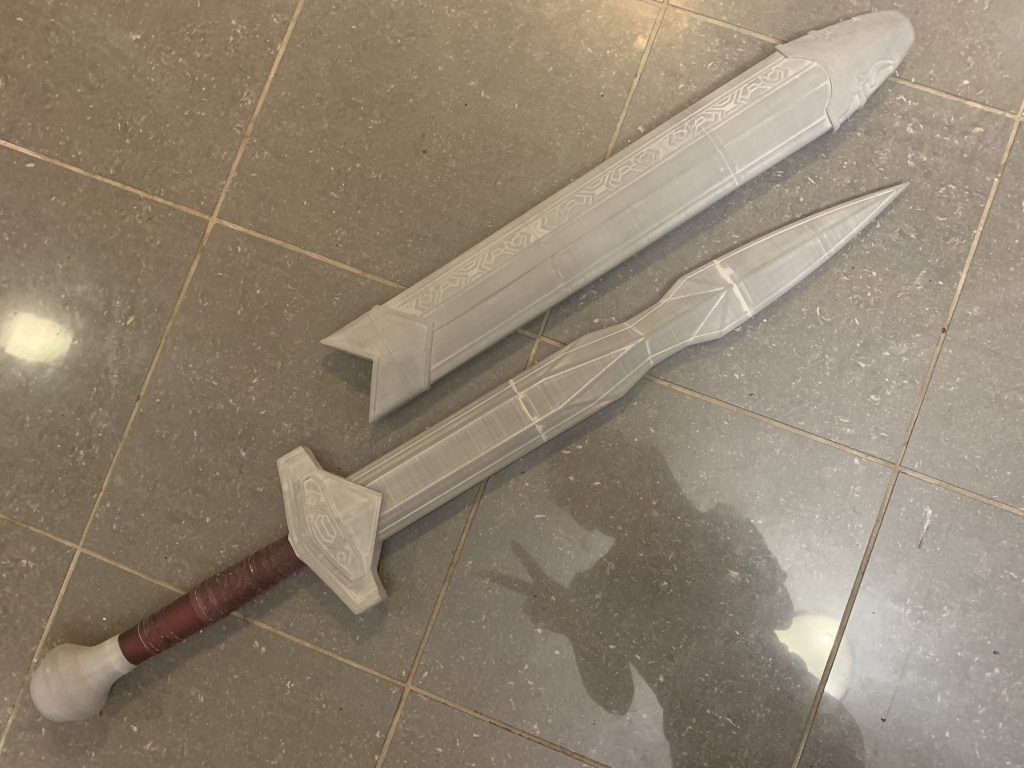
Gap filling is a really essential part of bodyshopping, especially in larger props that have to be printed in multiple pieces and then those pieces glued together! This tends to be the case for things like swords, as print beds tend to have a maximum height they can print to, and it tends to be shorter than most swords.
Most props will have keys in them to be put together, so that they fit together very specifically. (Sometimes, depending on your print allowances, you’ll have to gently sand these keys so that they’ll fit — this is pretty normal, especially in FDM.) 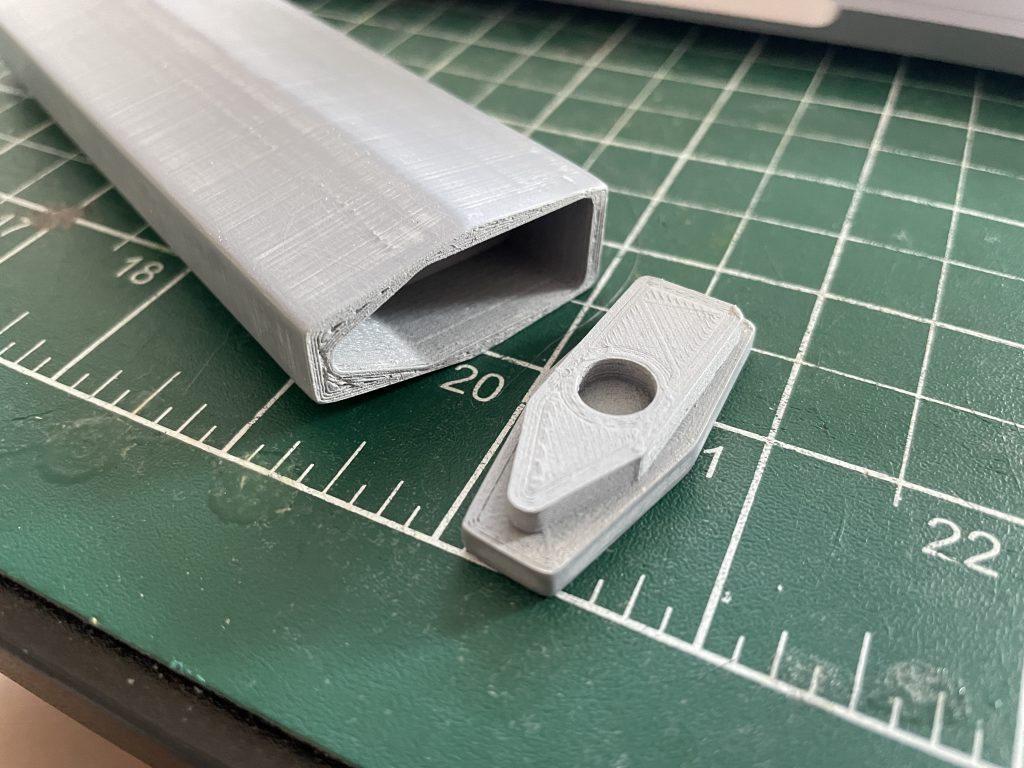
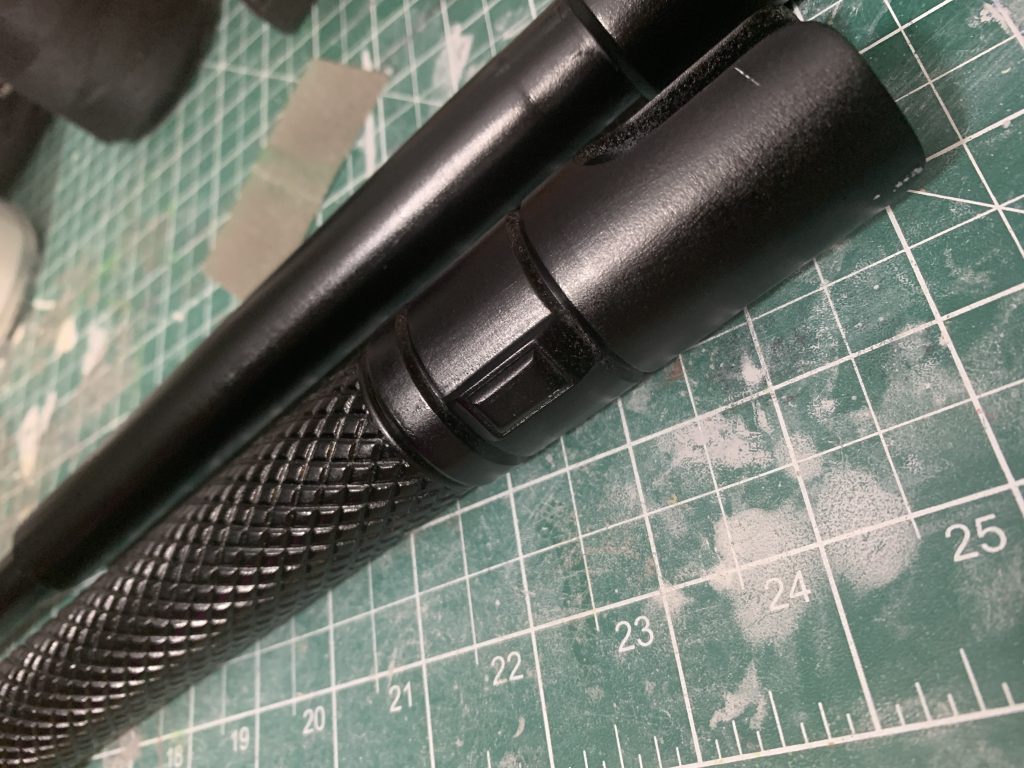
Here’s a print key on the “cap” piece of a knife I had printed (the little circle is for a spring!).
And here it is glued in!
I use Cyanoacrylate glue for this — which is superglue. Personally, I like the Bob Smith Industries glue, you can generally get it at craft and hobby stores. Use the glue sparingly, you usually only need a couple drops on a join, and it should dry in less than 10 seconds (if it takes longer, you’ve probably used too much!)
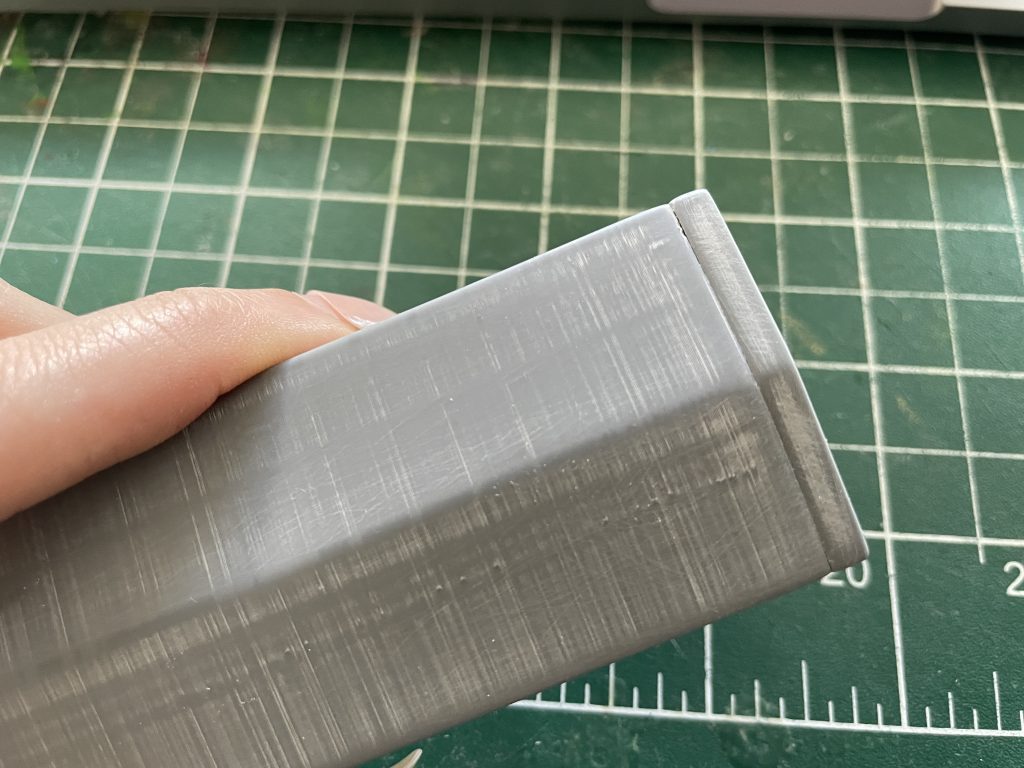
Now, you can see the gap here, it’s a little like a deep step line. There are a few products you can use to fill this.
First, you could use an automotive scratch filler, like Bondo. Bondo is a paste that’s sandable when dry. (It should be noted here that I, personally, am allergic to bond dust, it gives me a hell of a rash. 😂 So I tend not to use it.) It’s pretty easy to use, you apply the paste with an old credit card, popsicle stick, or a palette knife all over the crack.
Another option — which I am not allergic to, but which is not available in Canada where I live, so I’m out of it — is Acryl-green, which is more or less the same thing. But it’s green!
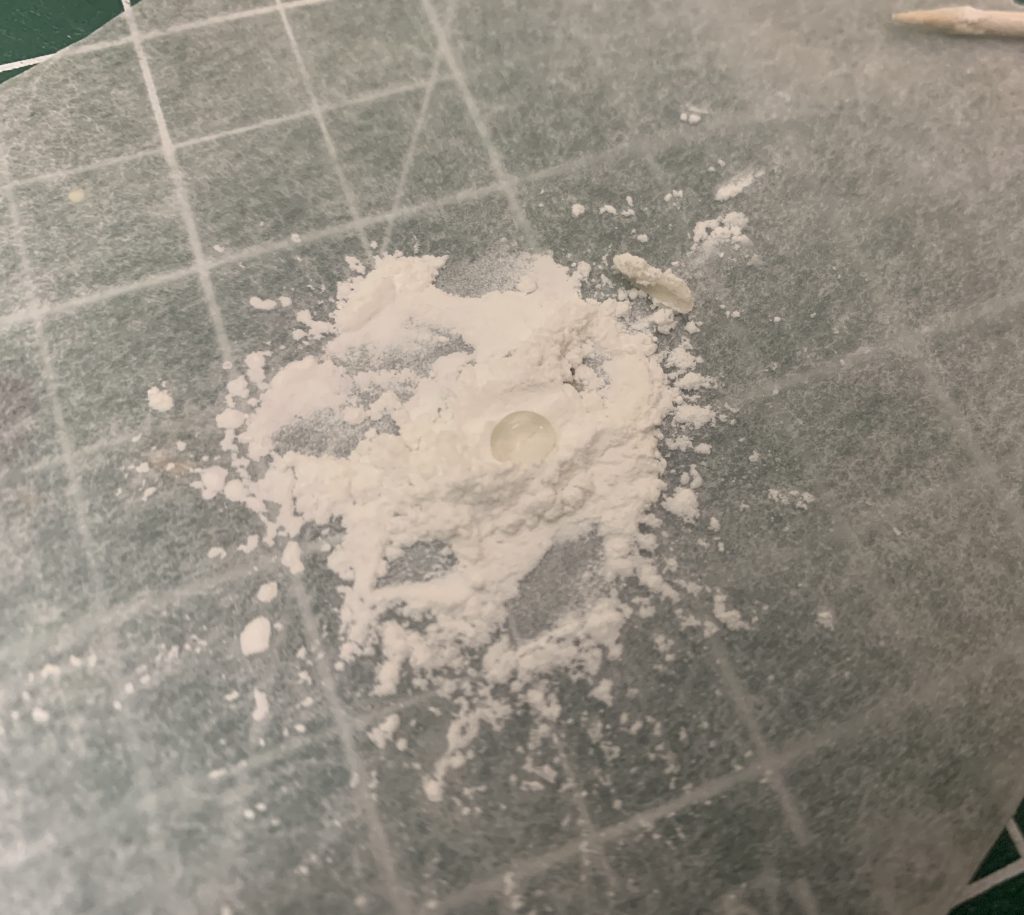
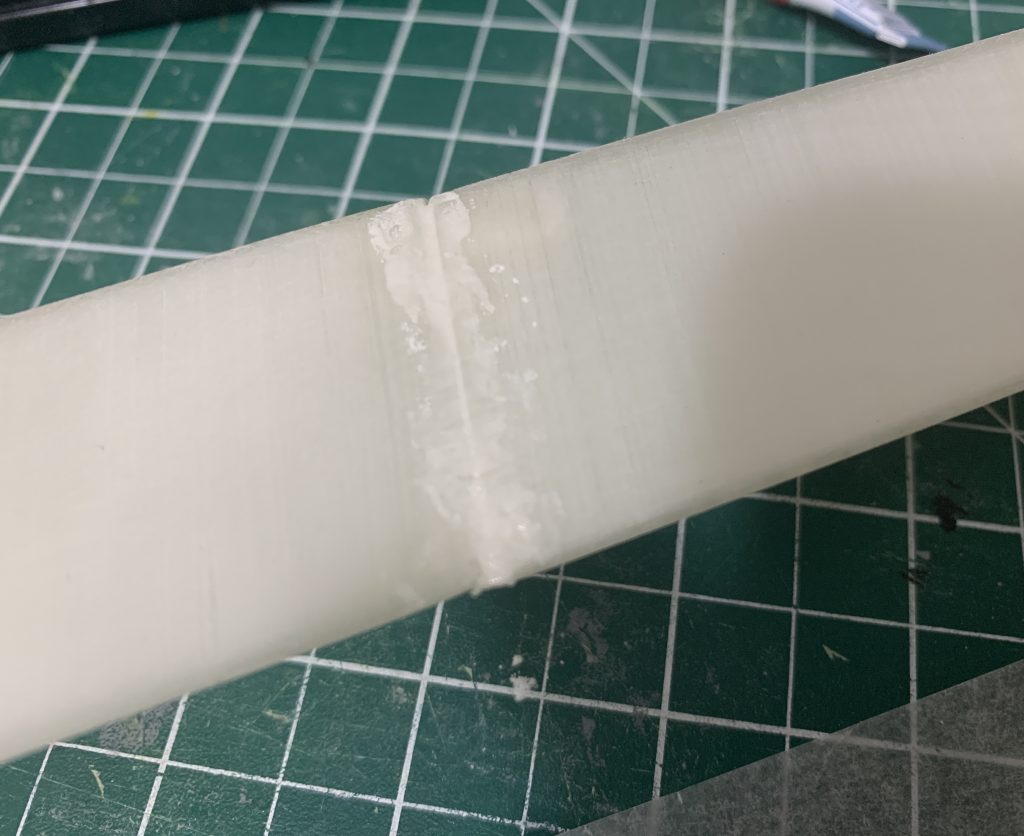
You can also make your own scratch filler, our of Cyanoacrylate Glue, and Talc-based baby powder. You mix the two together into a roughly toothpaste consistency paste — not like a gel toothpaste, an actual paste toothpaste. If you’ve ever made a gravy volcano with your mashed potatoes, or made pasta from scratch, this is sort of the same concept; you put your baby powder down on some paper (I’m using wax paper here because the glue won’t sink in, but anything works in a pinch), make a little well in the middle, and put a little bit of super glue in, then mix with a toothpick.
Mix this together to form your paste, and then apply it to your join. Make sure that you get it inside the crack/step line first, and then smooth it out over the surrounding area — ether with your toothpick, or a popsicle stick, depending on the area you have to cover. It doesn’t have to be neat at this stage, we’re just going to sand this off.
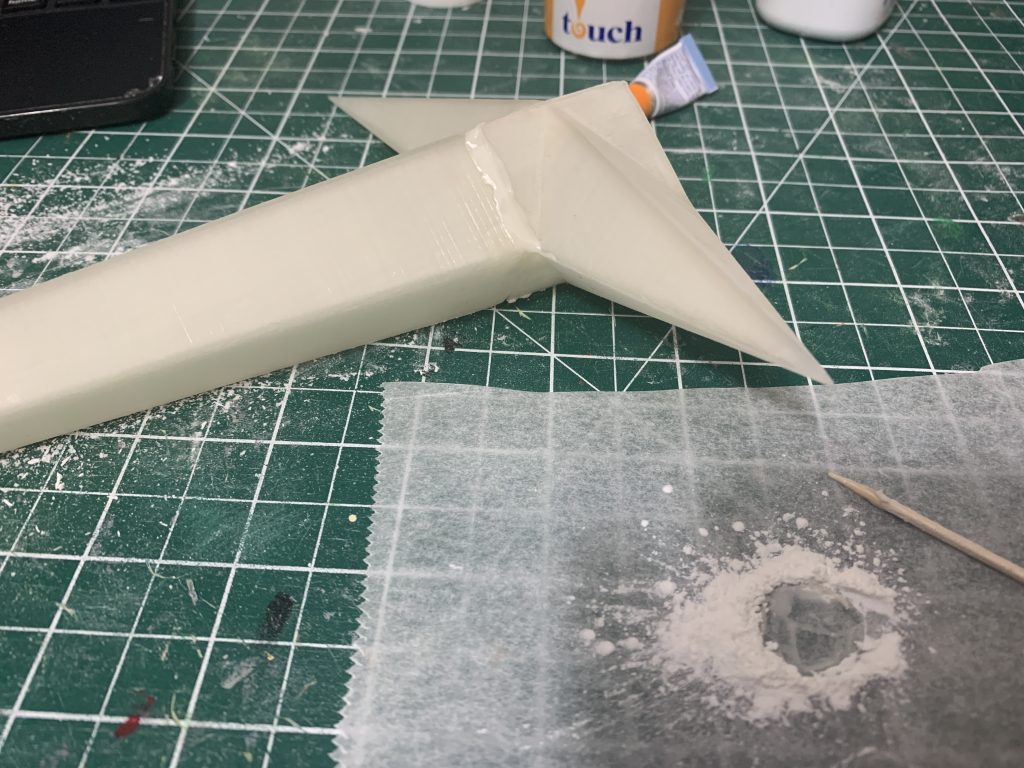
The big advantage that this has is that it’s sort-of a white/semi-transparent colour, where bondo is a dark red-brown and Acrylgreen is, well, green, so on pieces where the colour is important — like the semi-transparent sword I did for Lio — this is a good choice.
Once it’s fully dry (should be something like 10 minutes max, but you’ll be able to tell) —
It’s time to sand this down! I generally use 220 grit for this.
It should sand fairly easily — if it’s very difficult to sand, you might have used slightly too much glue, and if it’s VERY crumbly, you’ve probably used too much talc! It takes a little bit of practice to get the consistency just right for sanding, but you’ll get it!
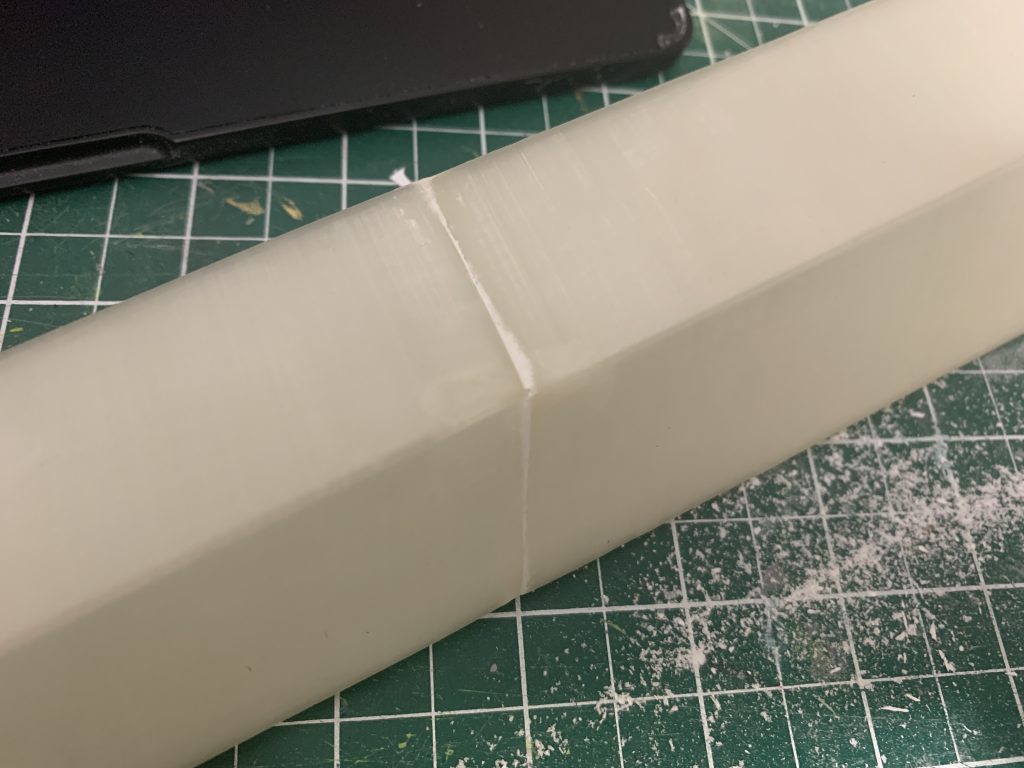
Once your joins are done, you should be able to then paint the joins, and have them be invisible — for instance, here’s another sword, with the joins visible —
And then primed —
(You can still see the joins just a little, so I might continue reworking this sword a little, to be honest, but you get the idea.)
You do exactly the same with bondo and acrylgreen — wait until dry (the tubes will say how long curing time is) and then gently sand off, until the area is smooth. You can also smooth any of these substances across problem areas on your 3D prints, where there are deep step lines, and then simply sand down everything — gently. I usually use no coarser than 220 grit, because I don’t want to scratch the scratch-filler.
Now we’re ready for —
Polishing and Painting
This is your last step of bodyshopping, and one that, depending on what you’re doing, you might not need polishing. Things that aren’t meant to be sword-smooth probably don’t need to be polished to 3k grit. (And some paints actually won’t stick to a 3K grit sand, more on that in a minute.) For most things, somewhere between 400-800 grit is REALLY smooth — and besides that, you might be completely done with sanding. Sand as smooth as you, personally, want your piece to be, because it’s your prop!
I usually do most things to a minimum of 800 — but for the hell of it, here’s what a 3K grit sand looks like:
Now, once I start polishing, I ditch the filler primer, and start using Sandable Primer — which is a similar paint, but thinner. I always prime, and then sand again, because the paint will go on as a different consistency and will need polishing. For example:
Raw Paint. (This is gloss black automotive paint; I use this as a first paint layer underneath metallics; a dark base will really make your metallics pop.)

And back to 3K wet sand! Now it’s ready to be painted.
I did mention earlier what happens when you try to put paint onto 3k grit sanded items, when the paint isn’t made for something that smooth. Well —
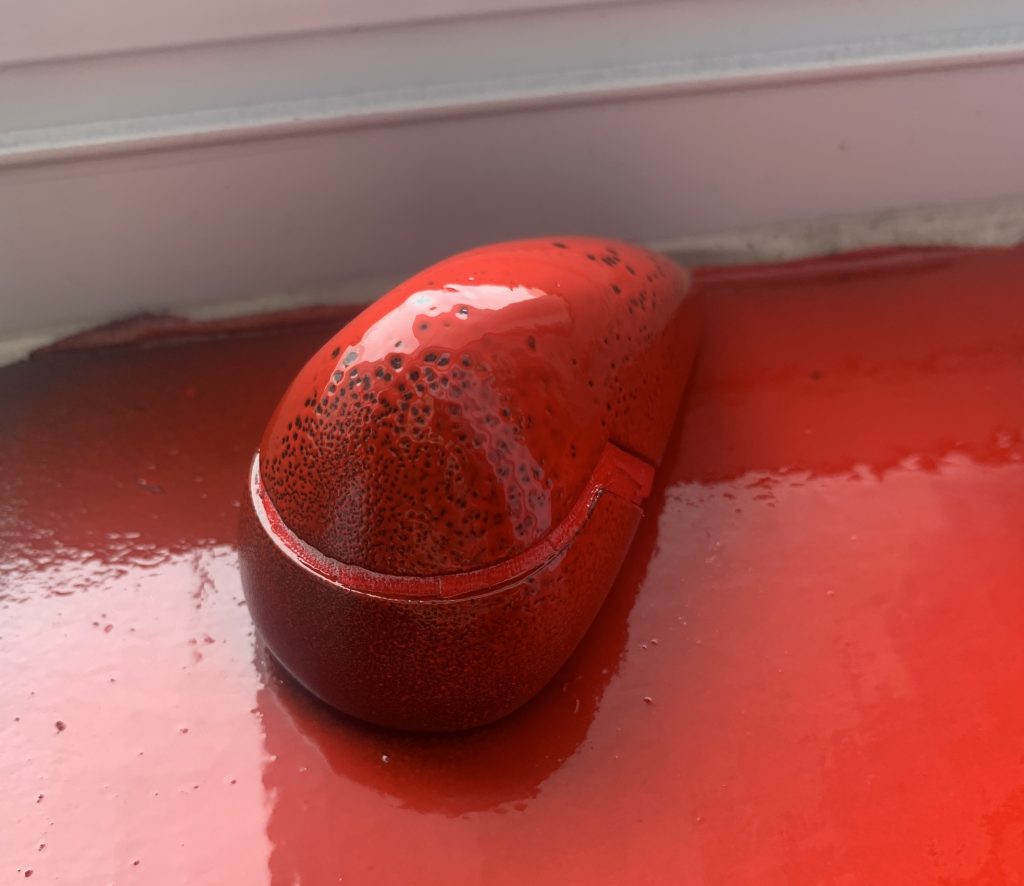
This happens. This particular paint is Rustoleum, it’s made to stick to plastics so I thought it would be fine, but this was too much for it, so I had to sand it off once it dried, put another layer of primer on my piece, and try again with less polish. (It stuck at about 800.)
Because of this, I usually recommend automotive pant for props. It’s more expensive, but it tends to be a more resilient finish, as well as a better metallic (might I recommend Duplicolour in Ford Galaxy Silver for all of your metallic silver needs? And can someone tell Duplicolour to sponsor me?), and it sticks to basically any grit you’d like.
As with priming, I tend to do ~3 coats of automotive paint on any of my props, to get good coverage. I’d also recommend doing a topcoat — for shiny things, I tend to also put a thin layer of gloss top coat on. Specifically, I use Rustoleum Painter’s Touch in Gloss for shiny things, and Matte for less shiny things — but I’ve also used the Duplicolour automotive Matte finish and it’s also excellent. (I need to try the gloss coat, but the Rustoleum one was the one I used when I worked in props and I love a sure thing.)
If you’re worried about your props being scratched, pretty much the best bet that I’ve found so far is a product called Clear Guard, made by Sculpt Neaveau — it comes in Matte and Satin finishes, in a spray bottle. It has a lengthy cure time — roughly 7 days — but it’s made for things like sculptures meant to be exposed to the elements, and it’s fantastic. I used it on a sword that was made to be in a 3D printed sheath, so the inside was impossible to sand down, and the sword didn’t scratch at all. I just wish it came in a gloss finish, but the satin worked fine.
For metal props, another option is to use a metal wax such as Rub N Buff — this is a wax that you rub onto your polished prop, leave to cure, and then gently buff to a mirror shine. As of my current time writing this, it’s been really hard to get in Canada (quarantine, y’all, whooo), and I’ve tried a couple other metal wax products and had a difficult time with adhesion thus far, but Rub N Buff specifically is an excellent product and I can heartily recommend it for props that you’d like to have a mirror-finish shine, if you have the lead time and patience to do several coats of the product.
And that’s it!
I hope this was helpful! Let me know if you have any questions down below in the comments, as per usual, and I’ll do what I can to give you a hand! Feel free to join the Discord Server if that’s something you’re into, and happy crafting!
