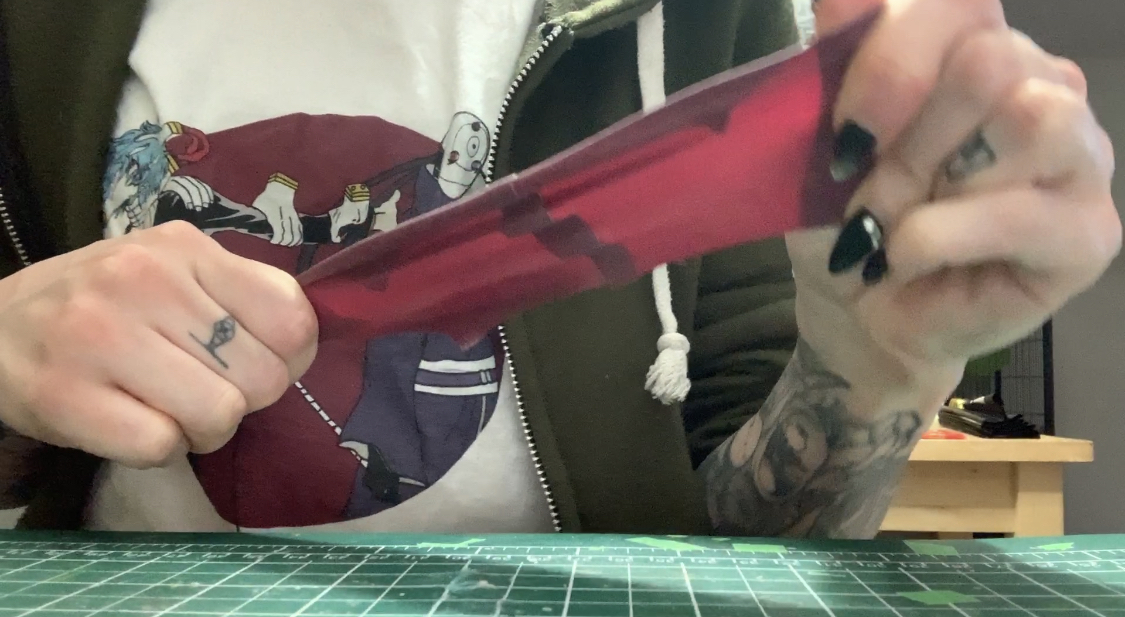
Latex comes in all sorts of colours and thicknesses. For this post we’ll be keeping it basic, but a few things to know:
- latex can discolour permanently if exposed to metal, markers, makeup, prolonged sunlight, etc.
- discolouration is most common on lighter colours (ie. red, yellow, pink, white), while black latex tends to be fairly hearty.
- latex is measured in mm, and standard weight for clothing is 0.4mm — 0.2 tends to be the thinnest weight commercially available, and is the most difficult to work with, while heavy gauges like 1mm tend to be mostly used for things like bondage gear and corsetry.
- latex needs to be stored treated and out of sunlight — we’ll go over that at the end!
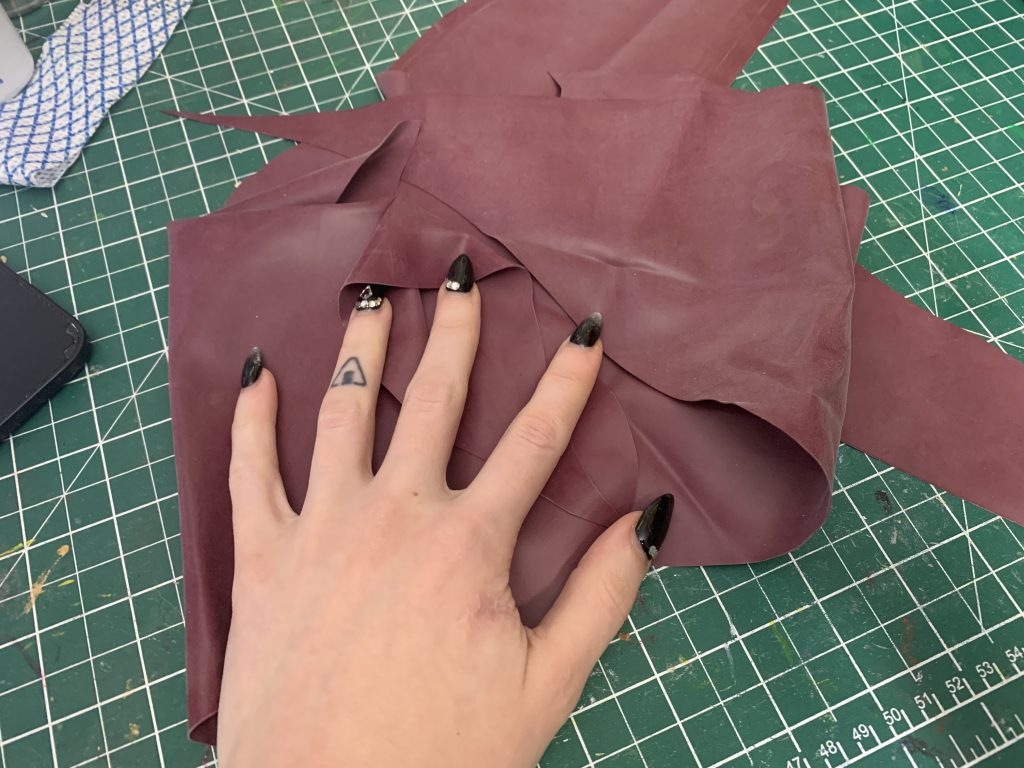
These are scraps left over from Panther’s Tail; it’s 0.4mm Latex in dark red. 0.4 is what you want to use for almost any fitted garment, though I do jackets out of 0.6 or 0.8.
Once you have latex, you’ll need all of this stuff:
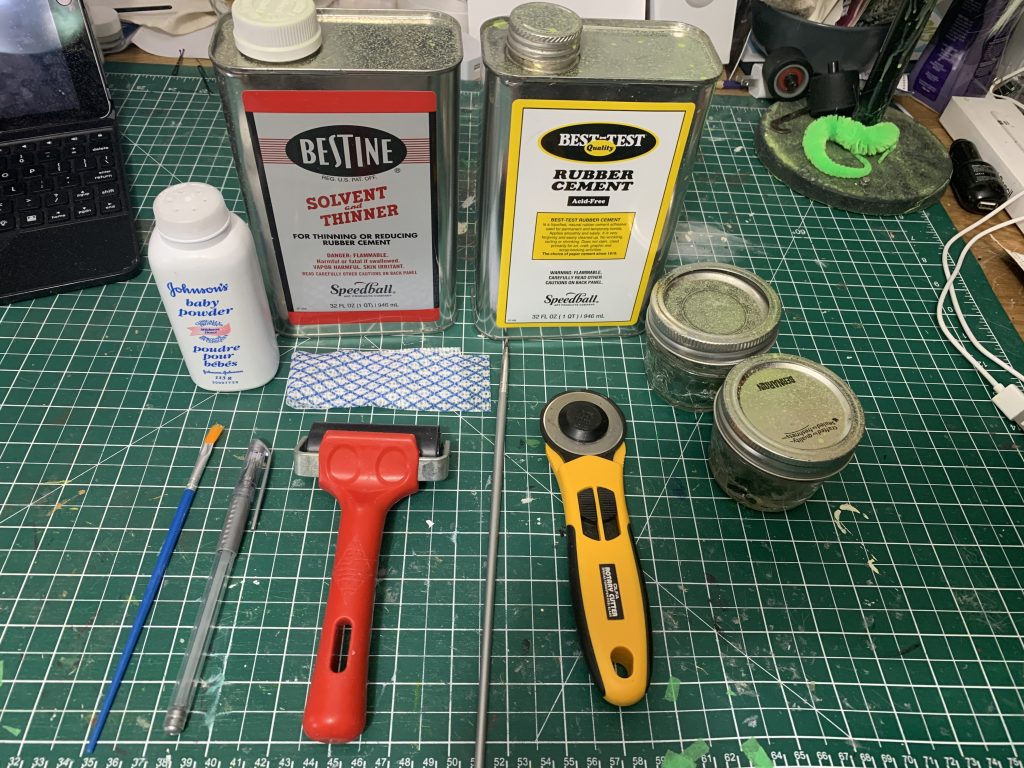
Let’s go over this in detail:
- Rubber cement and Rubber Cement Thinner (I generally use Best Test/Bestine, which are owned by Speedball and available at most art supply stores)
- Lidded jars for rubber cement and thinner (the lids are important so that your glue doesn’t dry up or off-gas into your face)
- J-cloth (cut up into strips, for cleaning your seams; sturdy paper towel like shop towels also works for this)
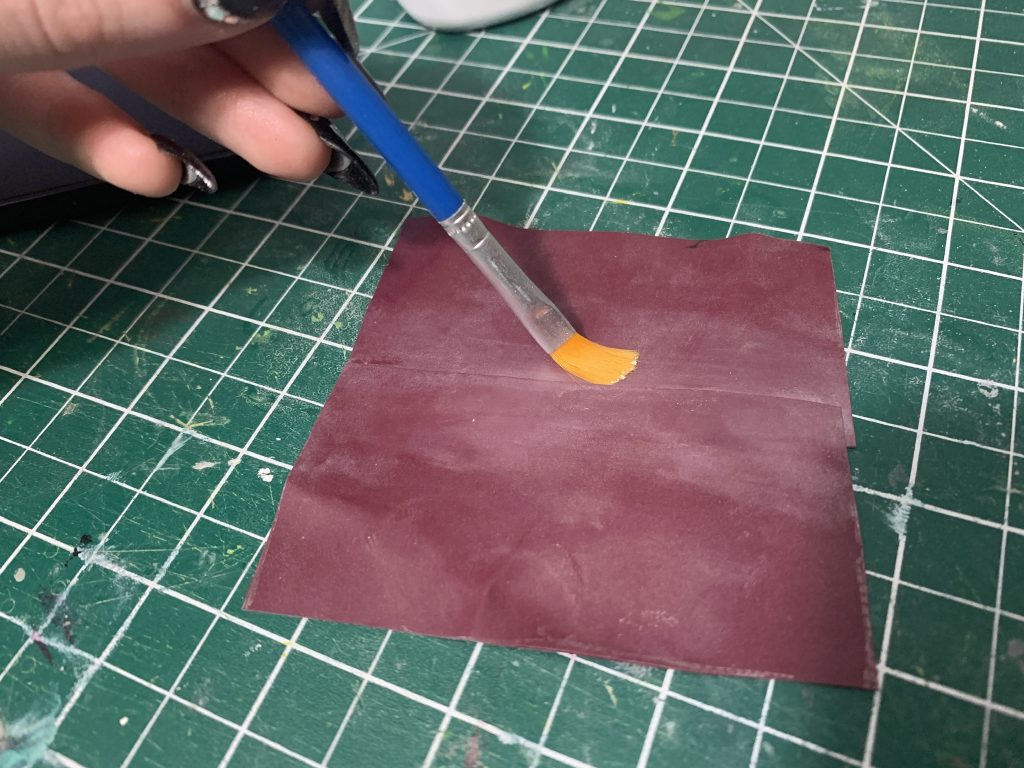
- Glue Brush (You will murder this brush, so don’t pick one you want to use for anything else)
- Rotary Cutter
- Roller (for pressing seams; this one is a screen printing roller)
- Gel Pen
- Talc-based baby powder (NOT CORNSTARCH; there seems to be some correlation between Corn Starch and latent latex allergy)
- Powder brush
Not pictured: Gloves because I just ran out and my new box won’t be here for a week, and Good Ventilation. Very important when you’re working with chemicals. You may also want to use a mask or respirator.
Adhesives
Latex is assembled by gluing it together, as any punctures in the latex make it far more likely to rip when stretched — like a condom breaking. So sewing actually compromises the structural stability of the fabric. (Of course, all rules are made to be broken, so there are ways to put stable holes in and even sew latex, but we’ll cover those another day.)
It’s important to note her that in Europe there are other popular adhesives that are used (like latex milk), but rubber cement is the most readily-available adhesive to hobbyists in North America.
First, we need to prep the glue.
It’s pretty simple — rubber cement is very viscous and difficult to paint on smoothly, so we thin it down roughly 50/50 with rubber cement thinner. Your glue should have roughly the consistency of an egg white when done.
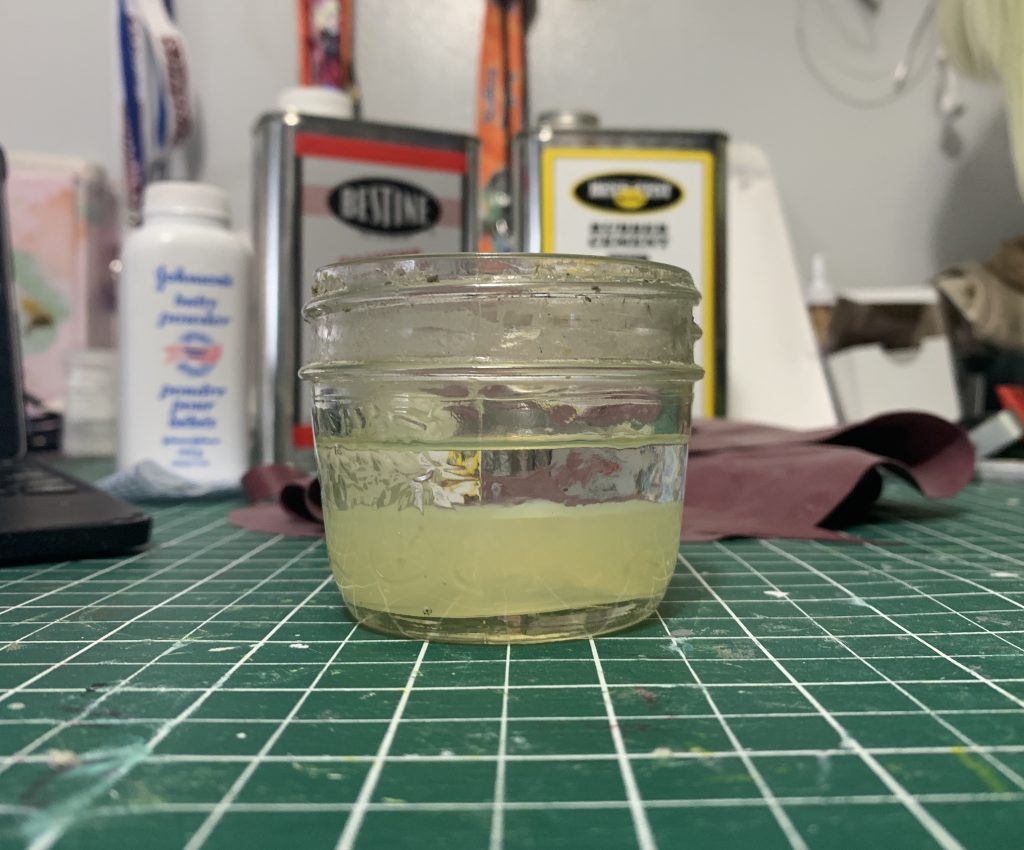
The half and half measurement doesn’t have to be exact, I generally just eyeball it like this.
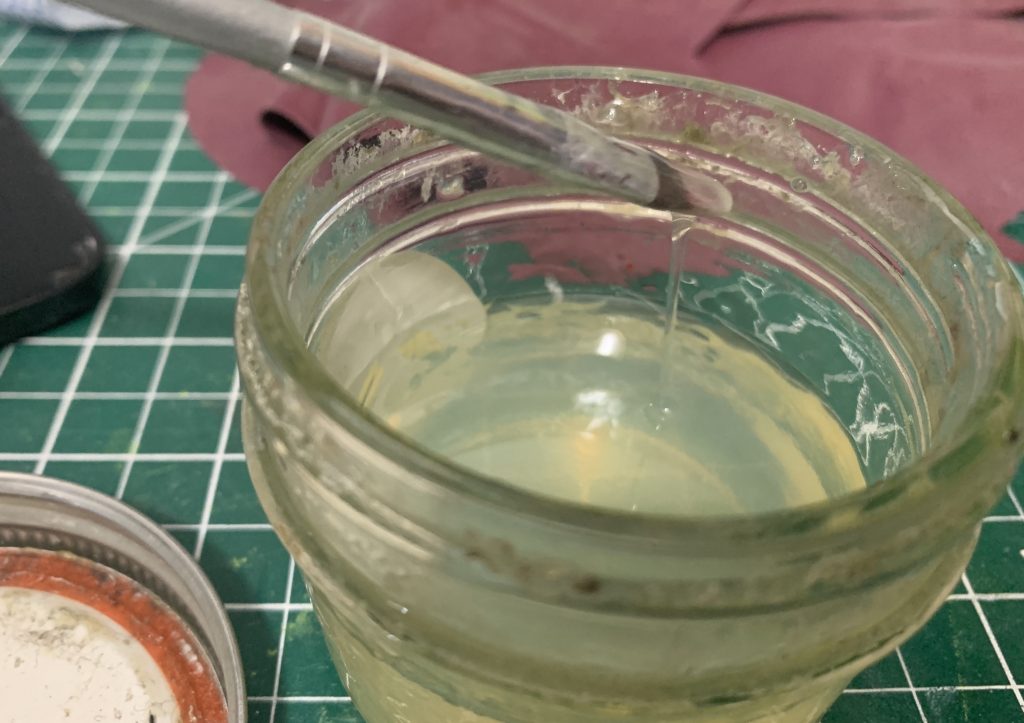
Mixed! It should have a smooth, paintable consistency, while being just a little bit thick — again, like an egg white. If your glue is too thick, you’ll have a hard time painting it on smoothly, which will affect both how difficult the whole thing is, and can affect the visual of your seam, if you wind up with dried glue “chunks”.
Prepping the Latex
For the purposes of this tutorial, I’m just going to be gluing together squares, but ideally you’ll be cutting out your pattern-pieces here. (For those of you who are well-acquainted with patterns, latex patterns generally should be approx. 10% smaller than your body measurements, and have 3/8-1/2″ seam allowance.)
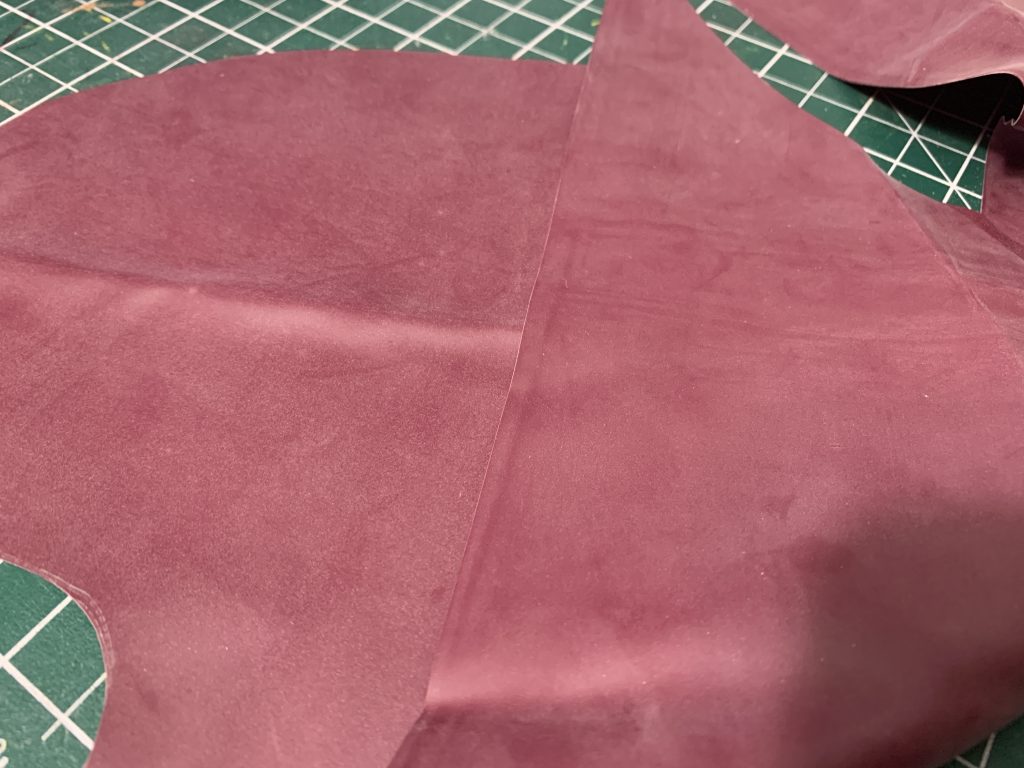
Two things about latex: first, you’ll notice it’s not shiny here! Latex comes powdered with talc, to protect the surface and keep it from sticking to each other. We’ll cover how to make it shiny later, for now don’t worry about it.
The second is that latex has a “right” and a wrong side. The right side will be perfectly smooth and already a little shiny (on the left in the photo above), and the wrong side will generally have machine marks or some kind of texture.
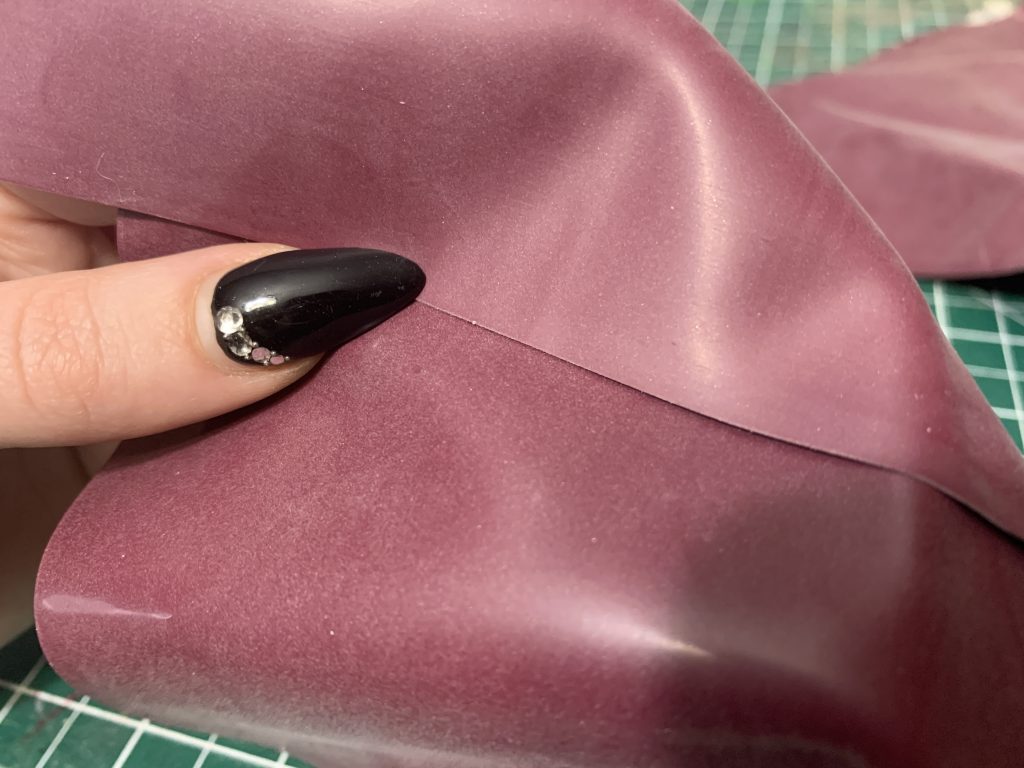
Here you can see the right side on the bottom and the wrong on the top.
When you’re gluing things together, you want to make sure all of the right sides are facing out, to make sure your shine will be cohesive throughout your finished garment.
(Just as a brief aside — the right and wrong sides are obviously just suggestions, I myself have used the “wrong” side out on clothing before, for things that are supposed to be matte finish. However, you do want to make sure things match as much as possible, because on some brands of latex I’ve had adhesion issues for seams long-term if I’ve accidentally glued right side to right side — I had a semi-transparent pink dress at one point that suffered like four or five seam blowouts and I couldn’t figure out why for the longest time! Turns out, I had glued two right sides together and it destroyed the structural stability of the whole dress.)
We’ll be using the gel pen to mark out the pattern pieces — we’re using Gel Pen to draw the pattern pieces out because Gel Pen is easily cleaned off of the latex later, so don’t worry about that. It should be noted here, though, that dark gel pens CAN stain lighter colours of latex like white or pastels, so I generally recommend silver or gold pens.
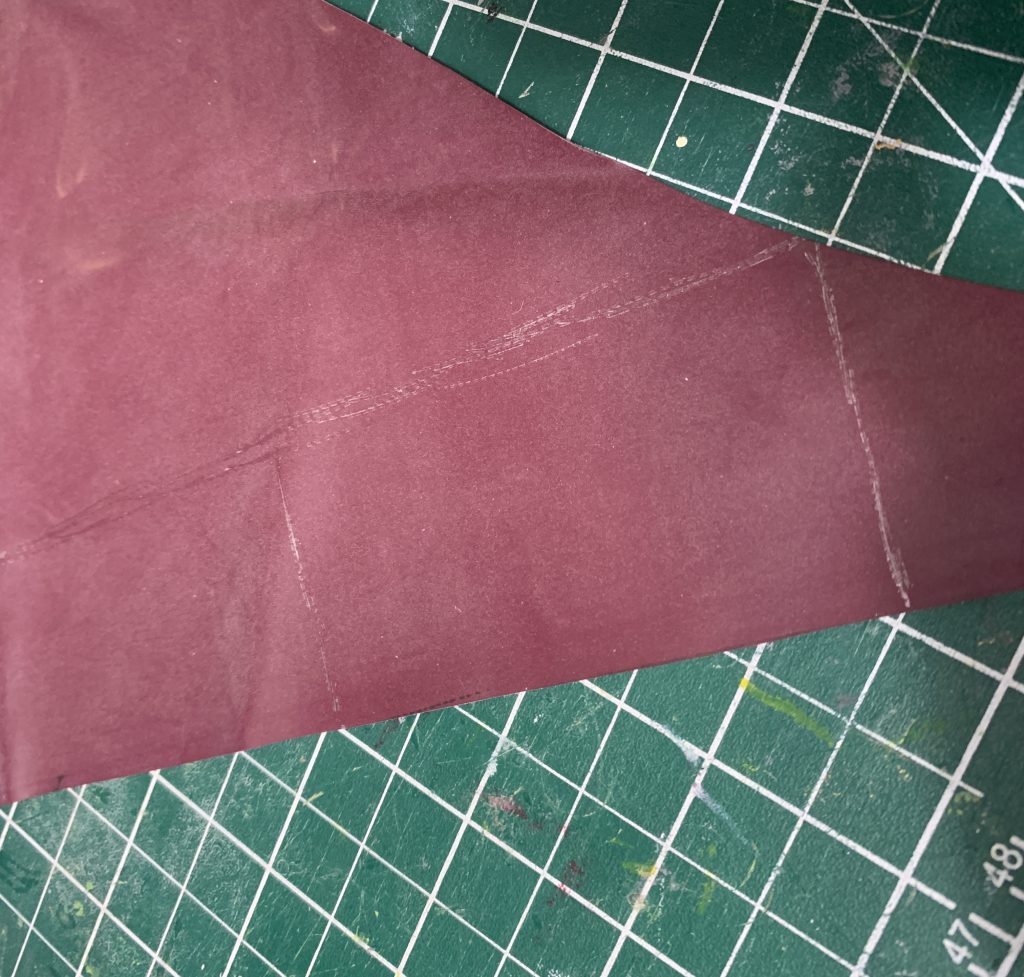
Once your pattern is drawn (again, I’m just using some rectangles for the sake of the tutorial), it’s time to cut it out, which is what the rotary cutter is for.
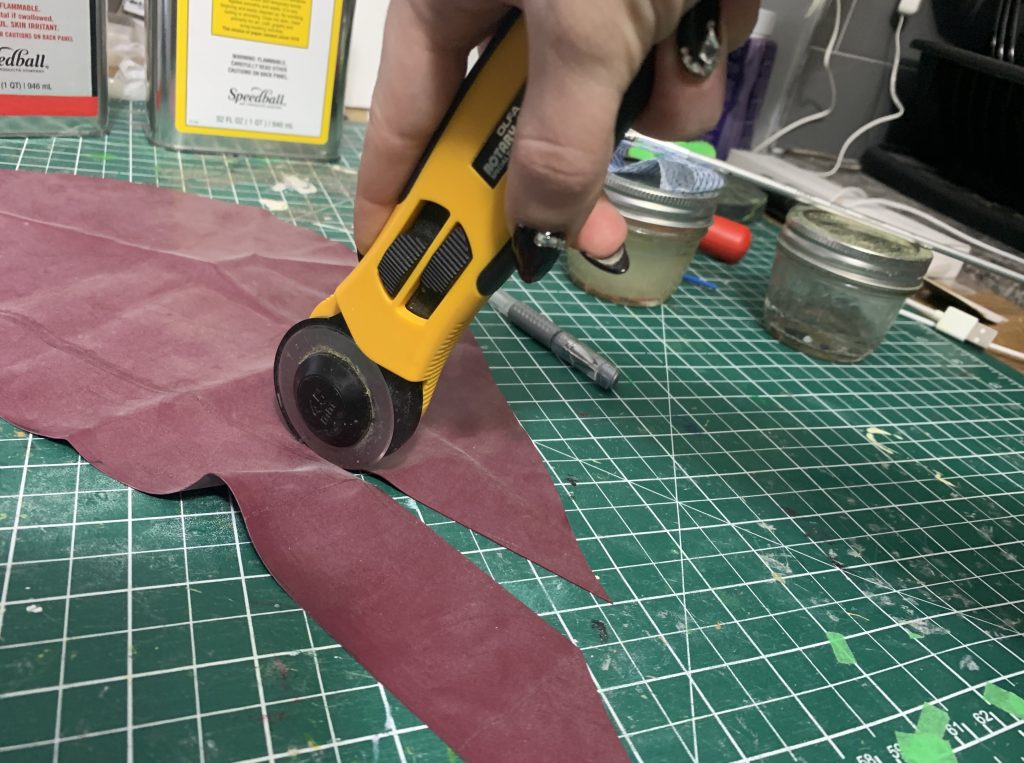
I recommend a rotary cutter, and to cut each side of the pattern piece in one fluid cut, because we’re trying to avoid stutters like this:
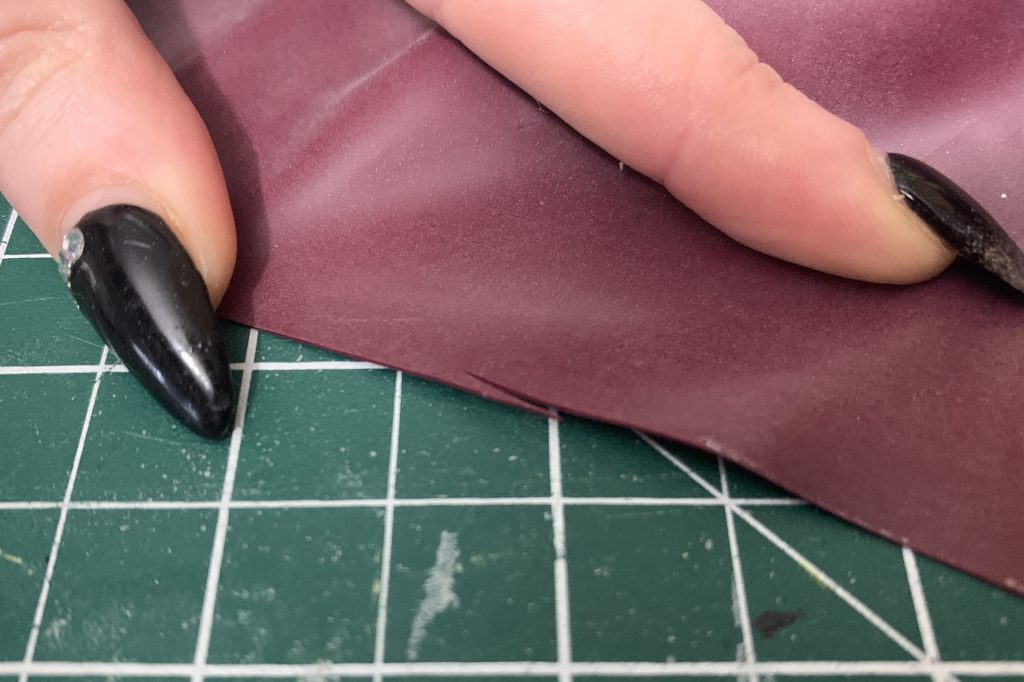
First, because they’re ugly, and you might see them in the finished garment. Second, because this is a structural instability in the latex and makes it more likely to tear in that area.
But sometimes things happen, like you run out of cutting mat in the middle of a cut and have to stop, so if you do —
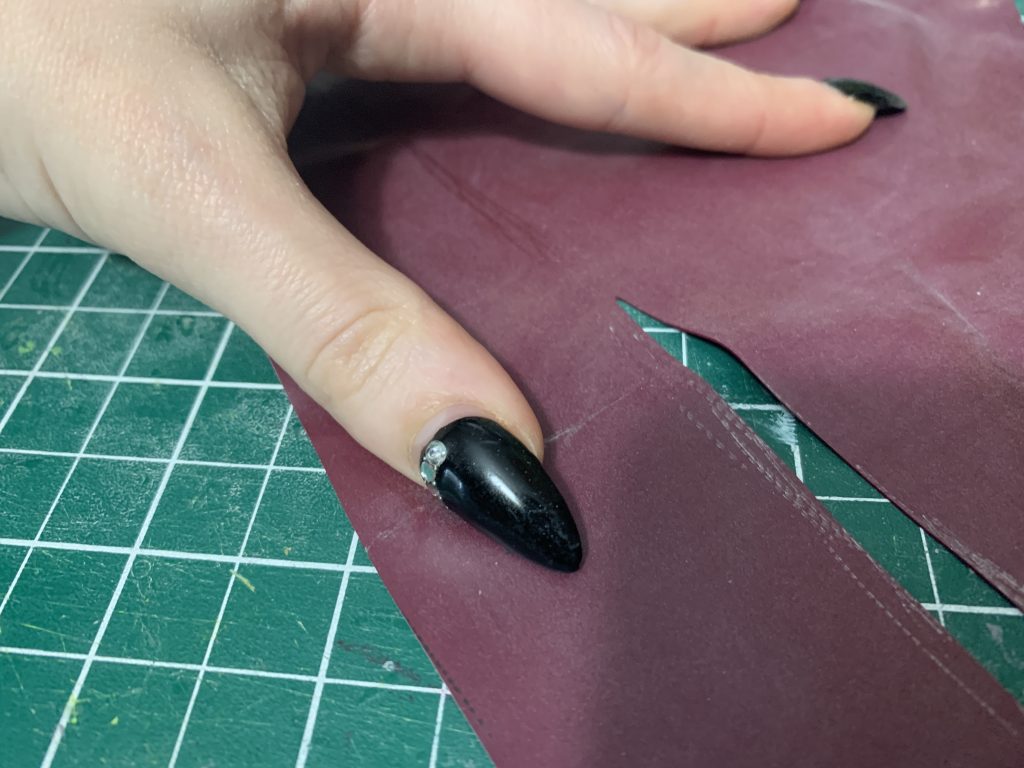
Pull the cut like this and with your other hand fit the rotary cutter very carefully into where you stopped the cut and continue, to get the new start of the cut as cleanly into the channel already cut as possible.
If you don’t press hard enough or your rotary blade needs to be sharpened or replaced, you might wind up with this:
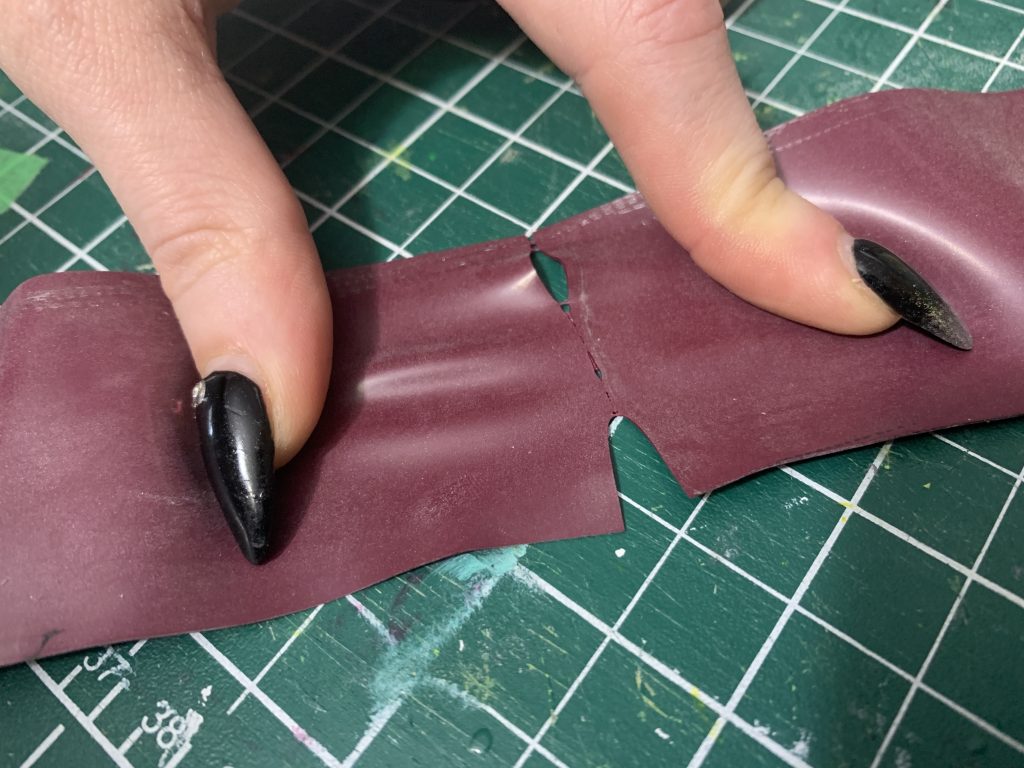
Which means that first you should change your blade, and second, do the same thing, carefully fit your rotary cutter in to where your cut stopped, and cut it again, trying to keep from getting stutters.
(Alternately, if you know your blade is new and sharp, if might mean that you’re using variable pressure on the latex, which can be a big problem especially if the latex is thicker — try to keep solid and constant pressure on your rotary cutter while you’re doing the cutting!)
Now that everything’s cut out, let’s move to gluing!
Adhering Latex Together
Latex is glued together flat, which is more like gluing paper or foam, rather than sewing.
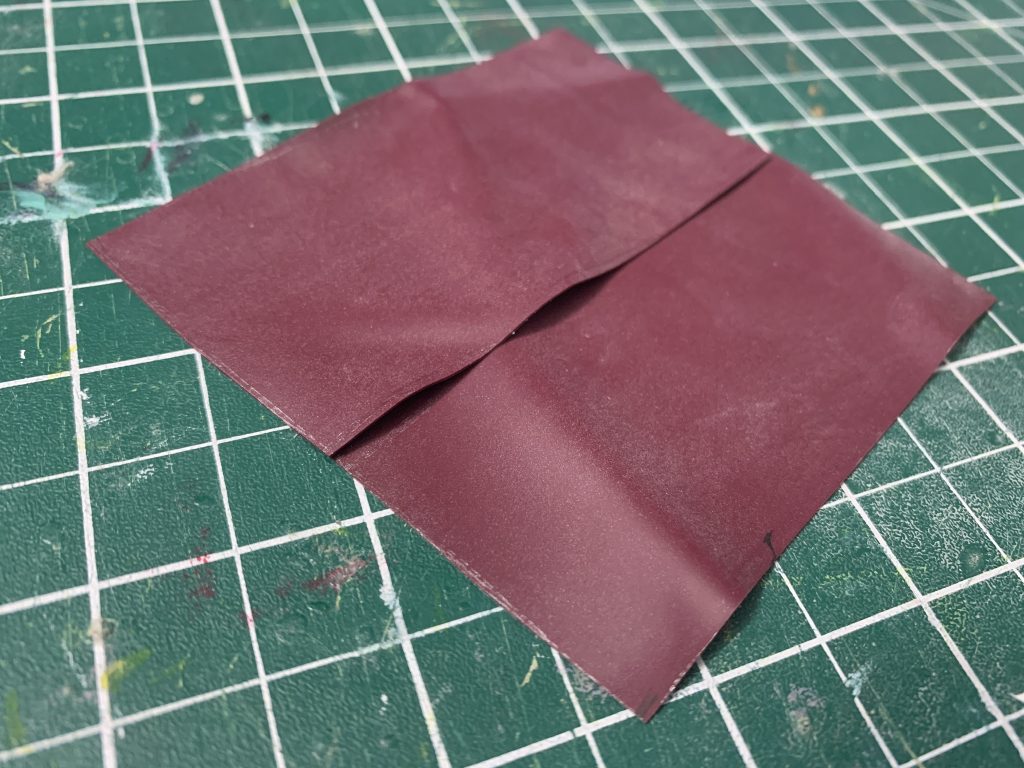
We want it to look like this, but glued together.
So what this means, is that the bottom piece will need glue on the right side, and the top piece will need glue on the wrong side.
So let’s talk about prepping seams.
The latex is covered in a little bit of talc, and some gel pen, which we need to get rid of. We do this with rubber cement thinner, and the piece of j-cloth from before. Dip the cloth in some thinner — you don’t want it to be dripping wet, just damp. If your cloth is too wet, your latex will curl too much, and you’ll waste time waiting for it to dry, and it’s entirely possible the latex will roll back onto itself and just dirty your seam with talc again.
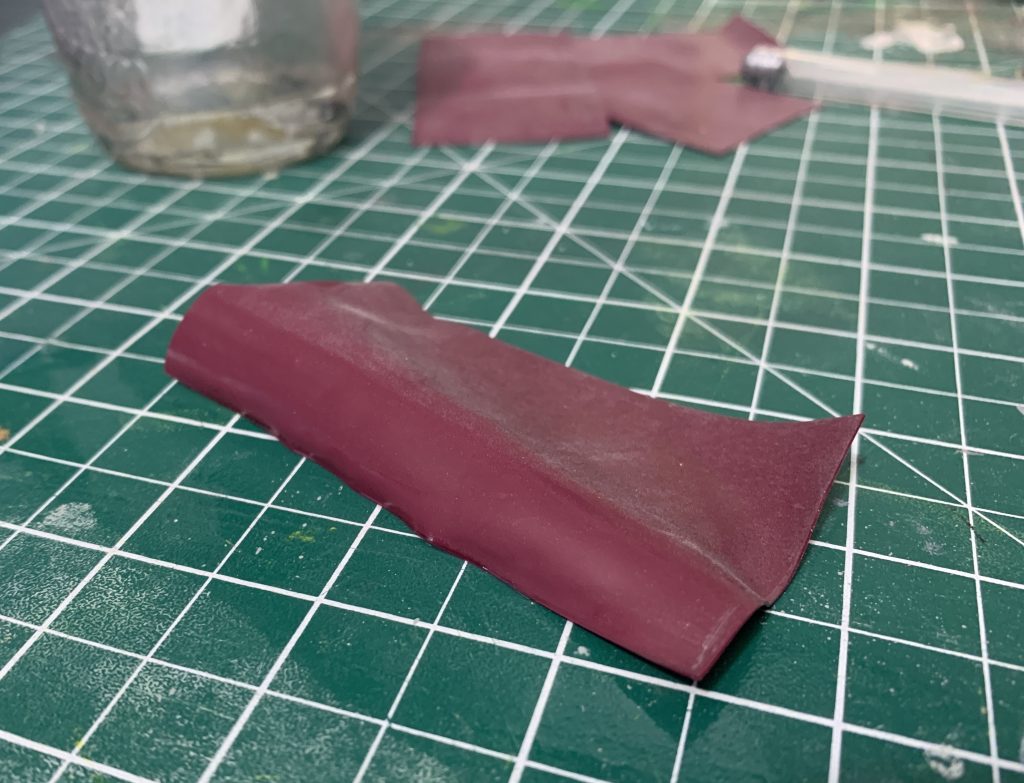
Pictured: latex curling. The latex is going to curl when you clean it, at least a little bit — the more it curls, the longer you’ll have to wait for it to uncurl, which should happen naturally as the latex dries. (Usually within a minute or two.) Usually, I prep as many seams as I have room for at once, so that I’m still working while I wait for uncurling, glue drying, etc.
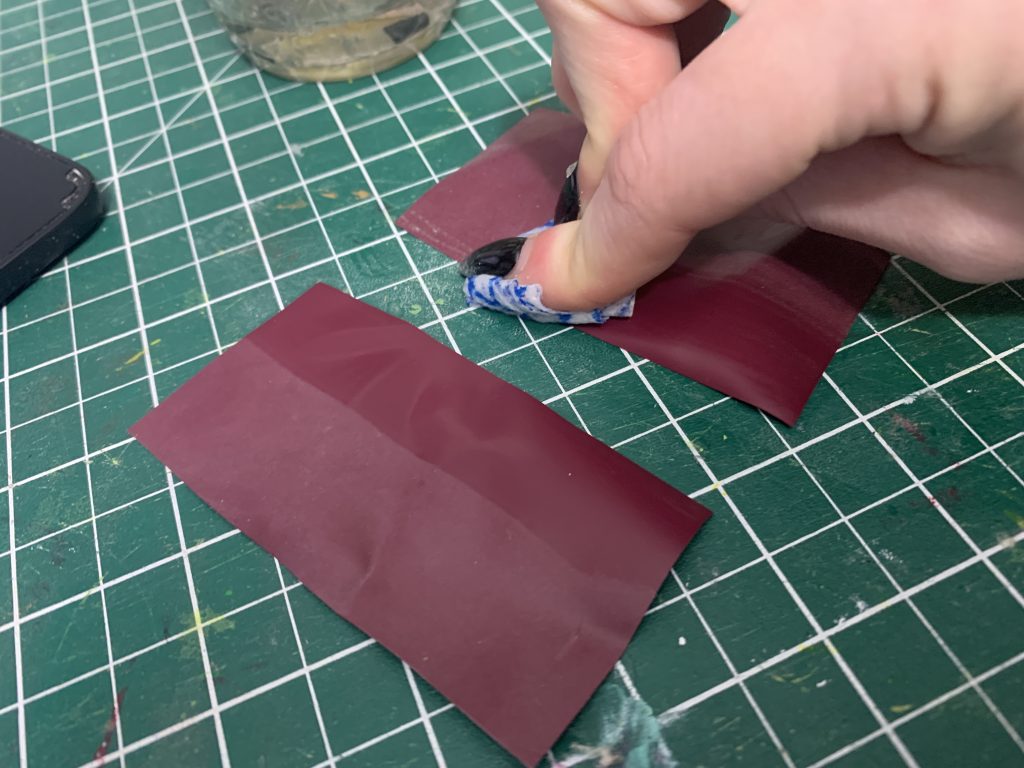
Here I am cleaning the talc off. You’ll notice I’m using some pressure — I want to push the talc off of the area I’m going to be gluing.
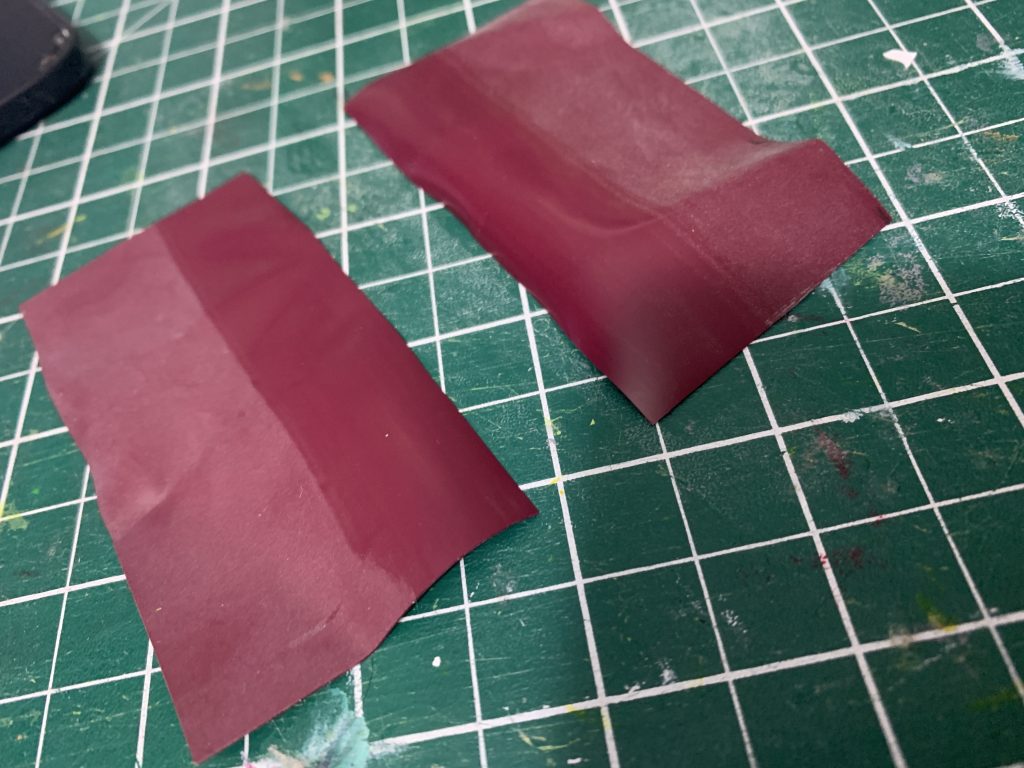
Clean!
Don ‘t be afraid to throw your J-cloth away when it starts to get dirty and cut yourself a new piece; if your latex isn’t clean enough, your seam may not adhere correctly. You need the seam completely free of talc or your seam might pull.
Now we’re going to mark the seam allowance with our gel pen:
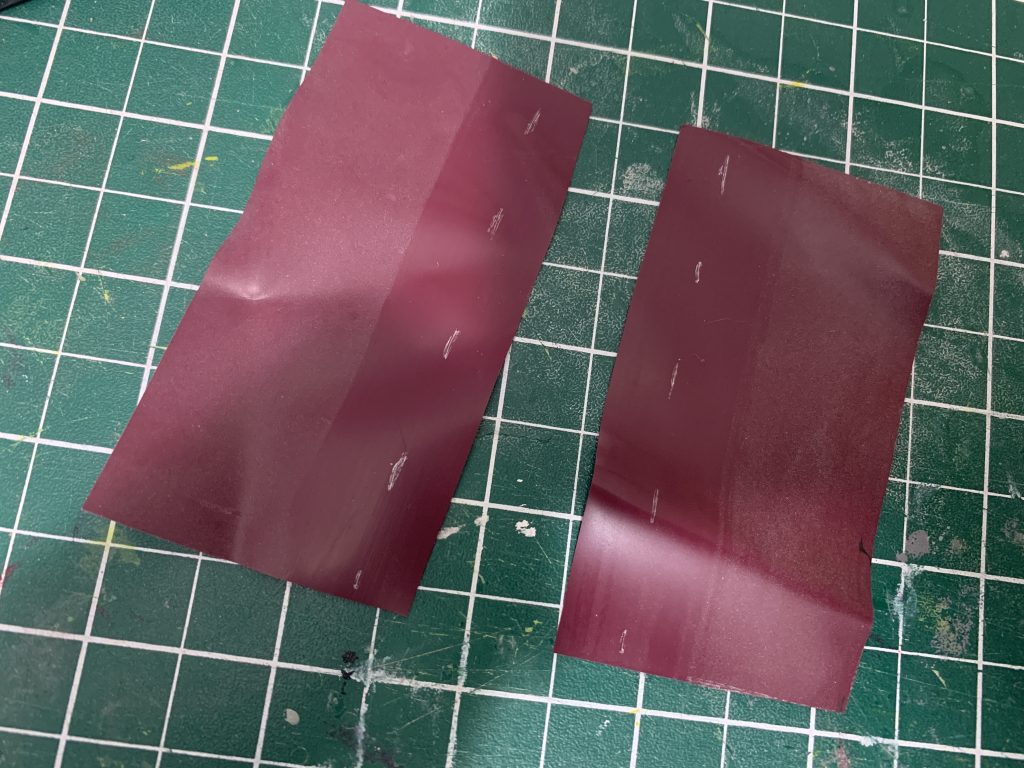
Personally I like a seam allowance of ~3/8″, but I have known people who do as little as 1/4″, or as much as 1/2″. Just keep in mind that a thicker seam allowance is harder to take around curves smoothly. (We’ll go over curved seams in-depth in another tutorial, because they are a whole ‘nother animal.)
Next, paint the glue mixture onto your seam allowance.
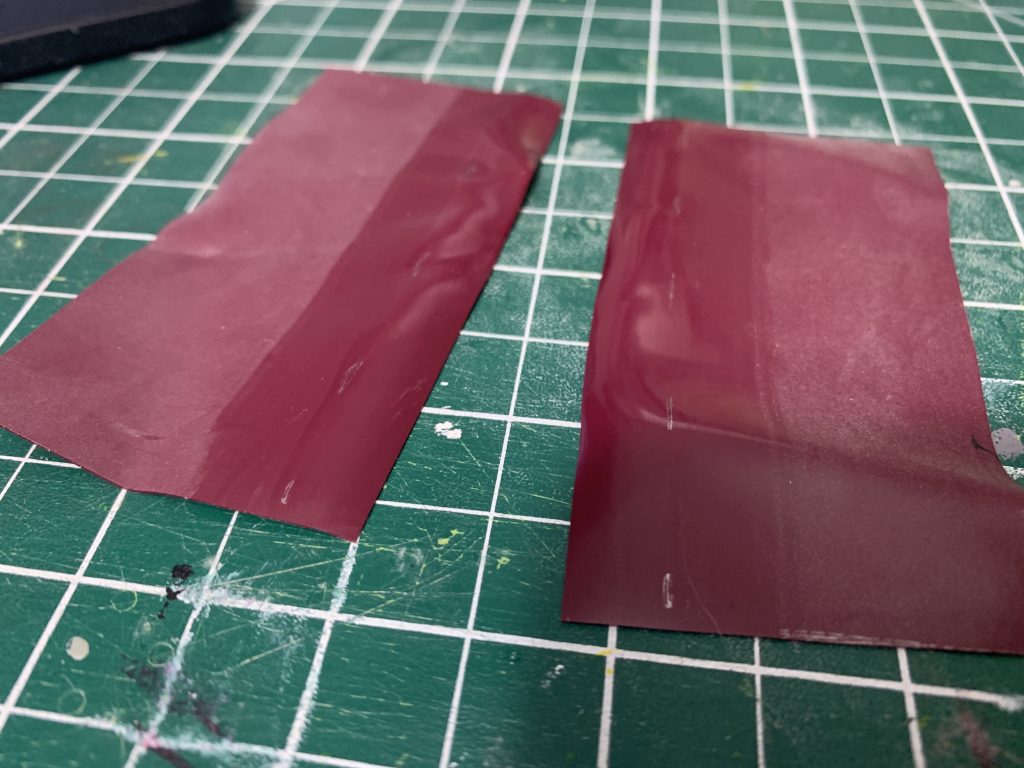
Your latex will likely curl just a little bit while you’re doing this; this is fine. Now, the most important part here: patience. Let the glue dry completely. The latex will completely uncurl. If you work with foam and contact cement, this next step is much the same as that. We’re going to dry-mount these pieces together.
For those of you who don’t know what I mean, dry mounting literally just means that all of the adhesive involved has to be dry, and will be adhering to only itself — so anywhere. that doesn’t have glue on it, will be impossible for any other dried glue to adhere to! Much less messy than working with wet rubber cement.
We start by lining up the edge of the pieces …
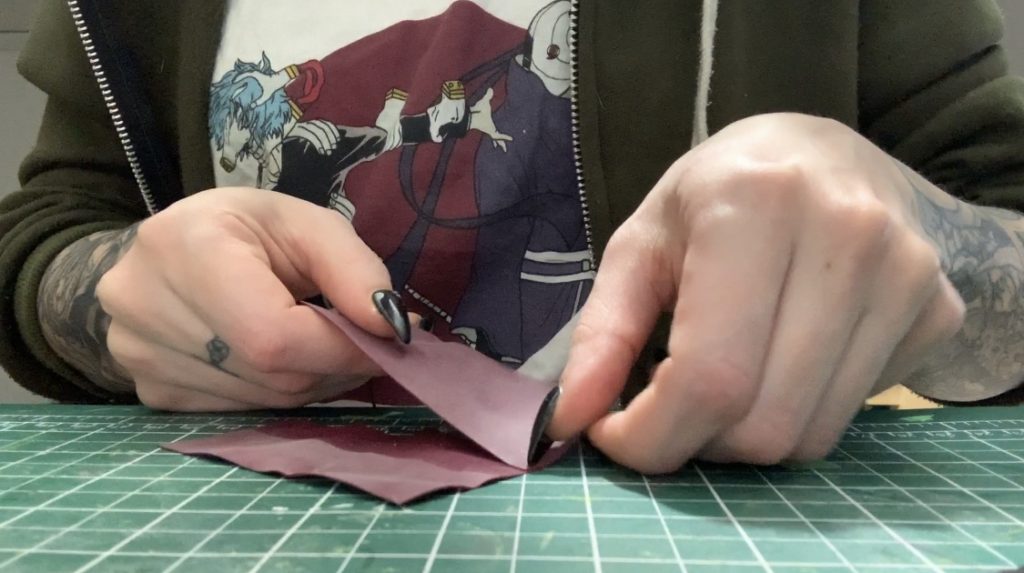
Then, while holding the top piece with your non-dominant hand, gently press the seam down with your dominant hand — I use my pointer finger.
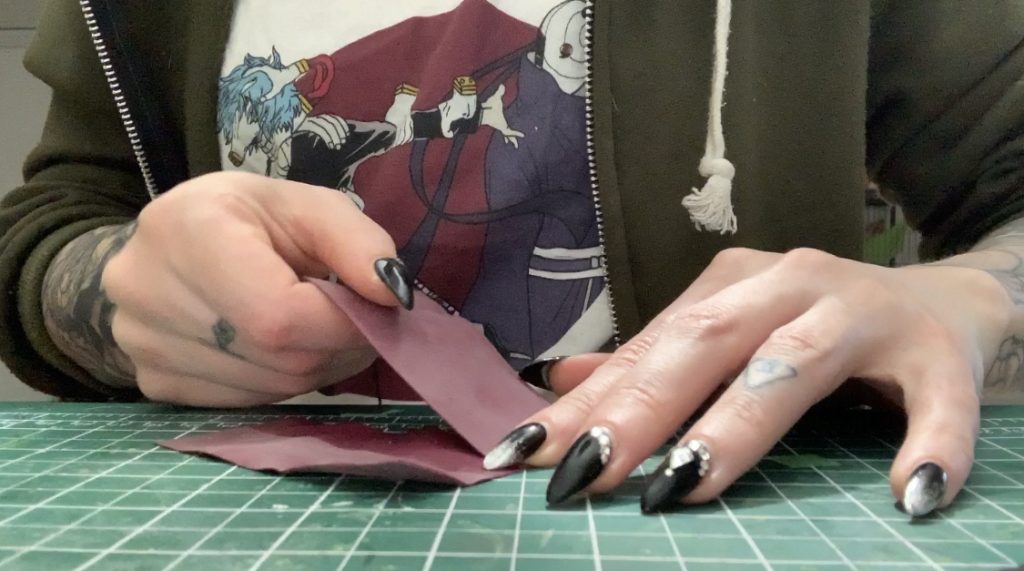
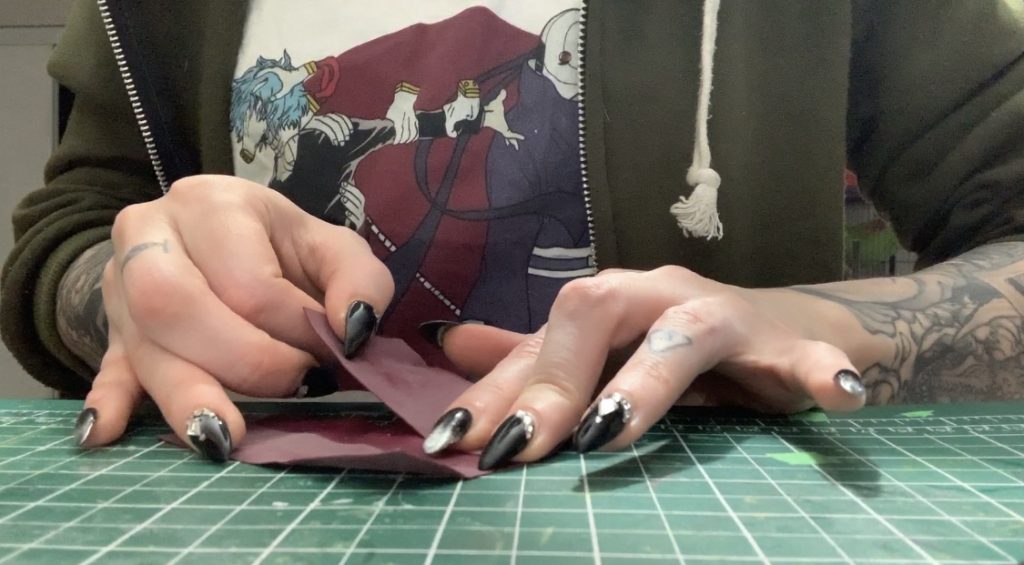
For a short video of me doing this, please CLICK HERE!
The name of the game with seams is trying not to stretch either of your pieces, which is easier said than done.
Ideally, your seam should look like this:
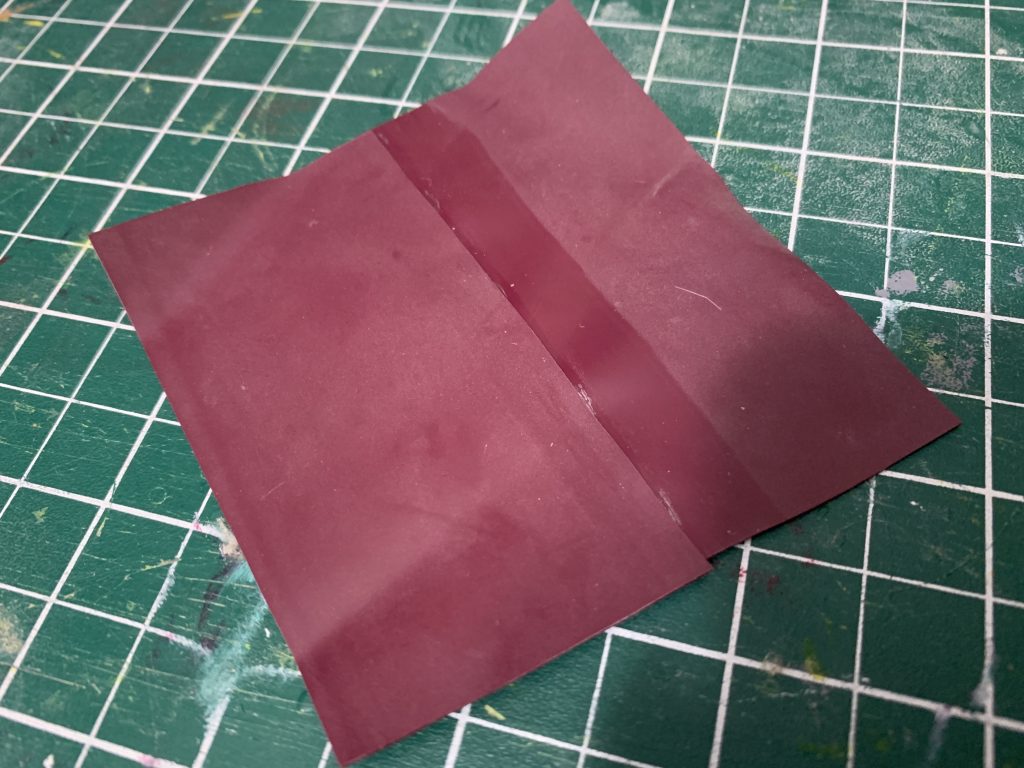
Your seam should be smooth, with no wrinkles or pressure marks from your fingers, and the pieces should roughly match up. (A few mm off isn’t a big deal, but on longer pieces, to help them match, I generally stop halfway down the seam and flip everything, so that the bottom is now the top piece. This helps even out any stretch you might accidentally be putting in, especially around curves.)
However, your seam might look like this:
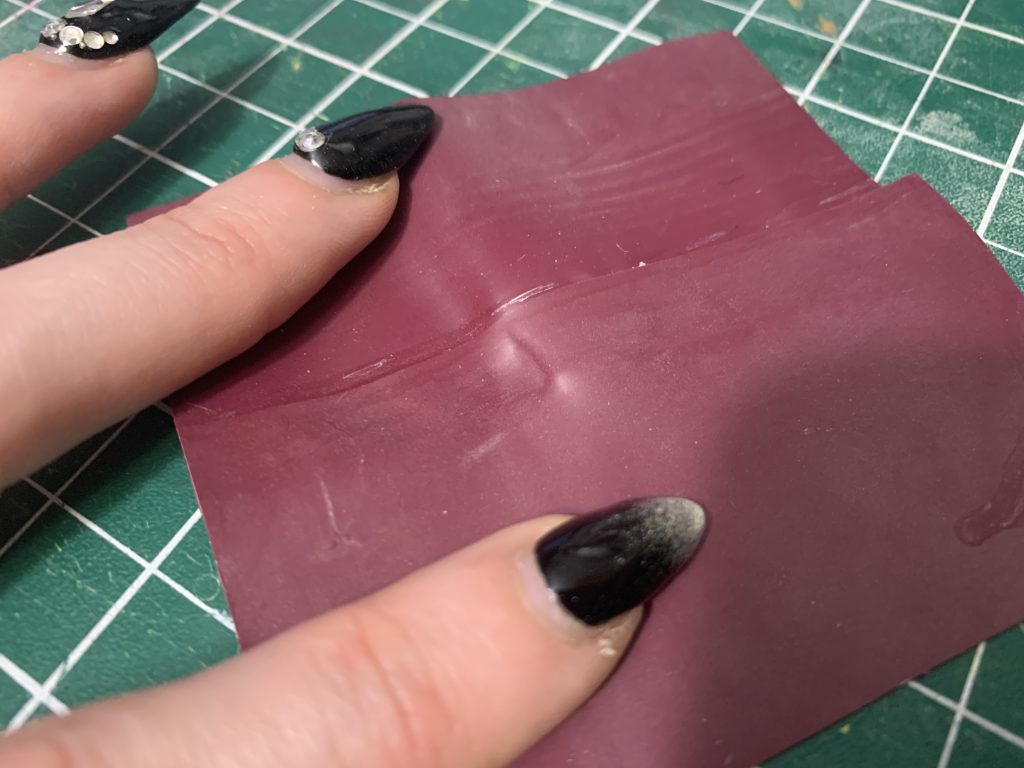
Which is a pressure mark from your finger, and a sure sign that you’re been pressing too hard or following your other hand too close while applying the top piece of latex.
Or this:
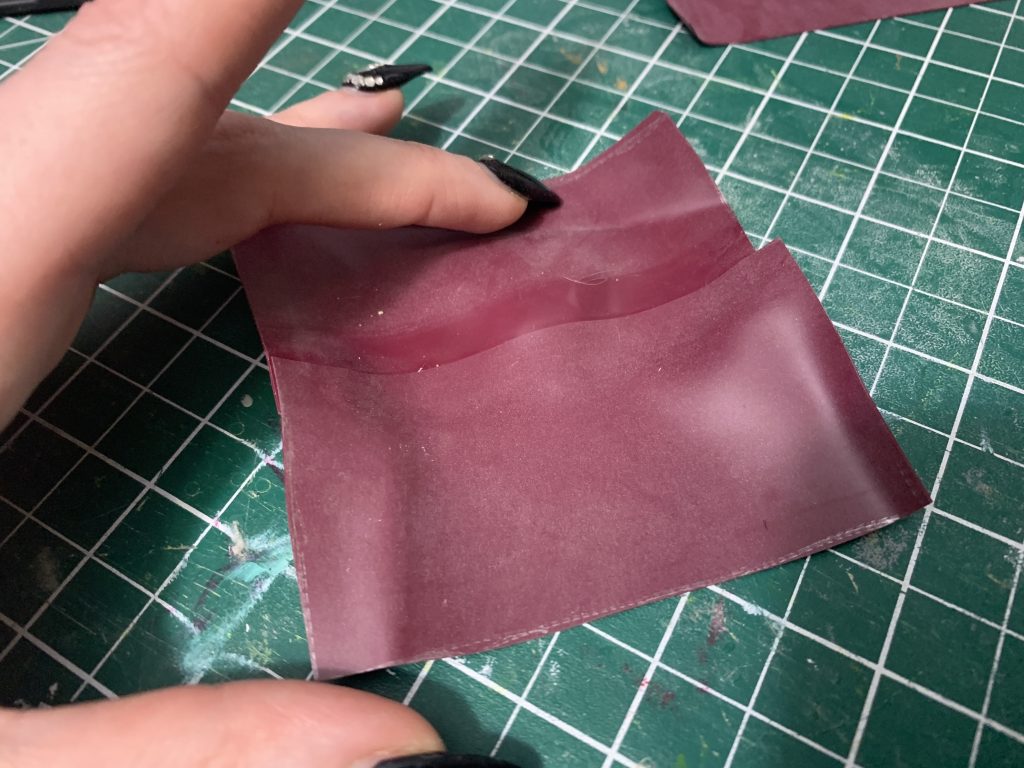
Which shows you’ve stretched the top piece too much.
If you do mess up a seam, no worries: a q-tip dipped in rubber cement thinner will help you gently pry apart the seam.
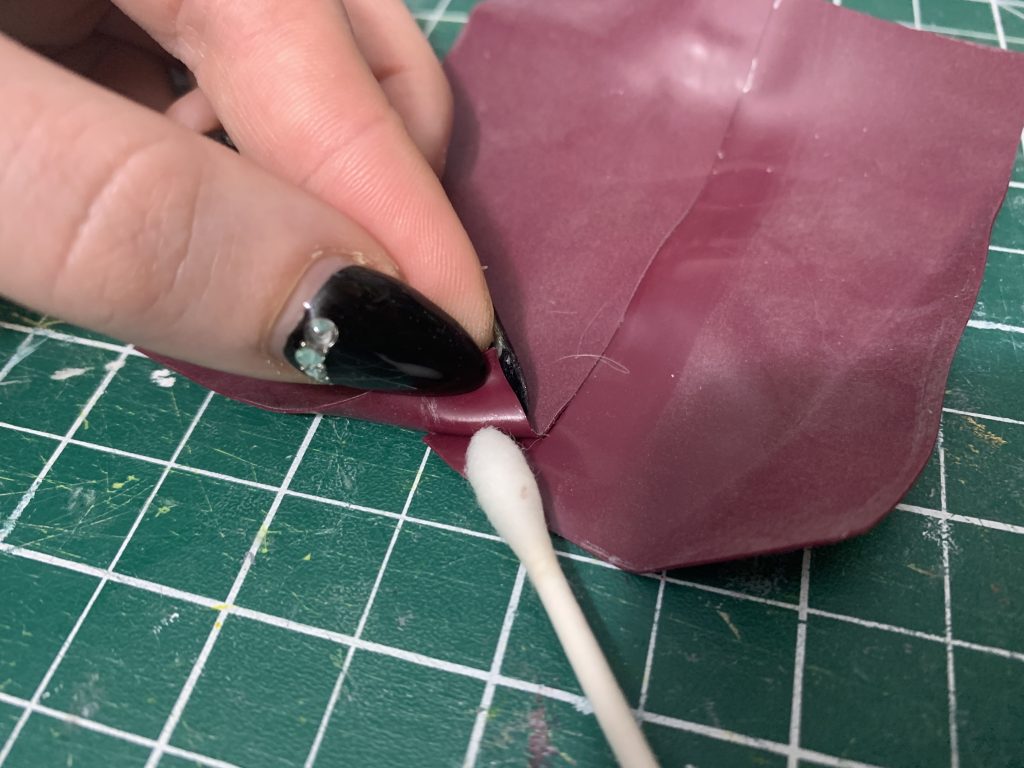
Careful about pulling the seam apart without thinner; this is a good way to rip your latex.
Once you’re happy with your seam, it’s time to press it with the roller:
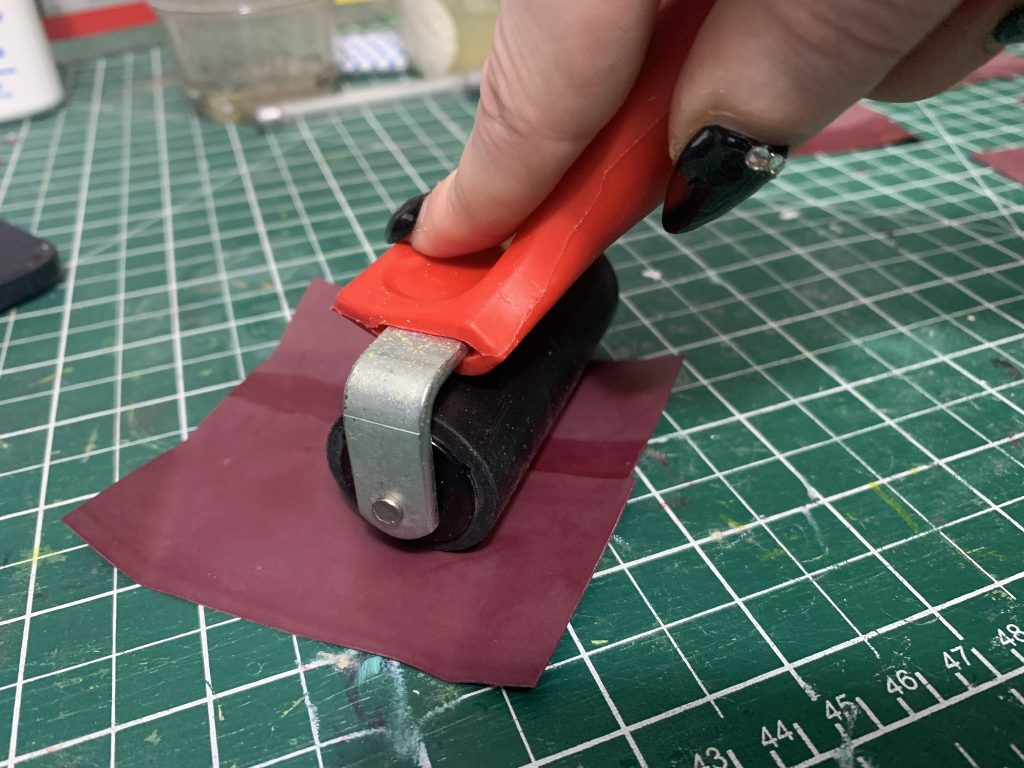
I’m using a screen printing roller, but honestly anything smooth and cylindrical will do (as long as it’s not metal, remember that metal discolours latex). I’ve used small sections of PVC tubing or even beer bottles before.
Go over your seam a couple of times to really press it down. Once that’s done, your seam should be totally adhered together:
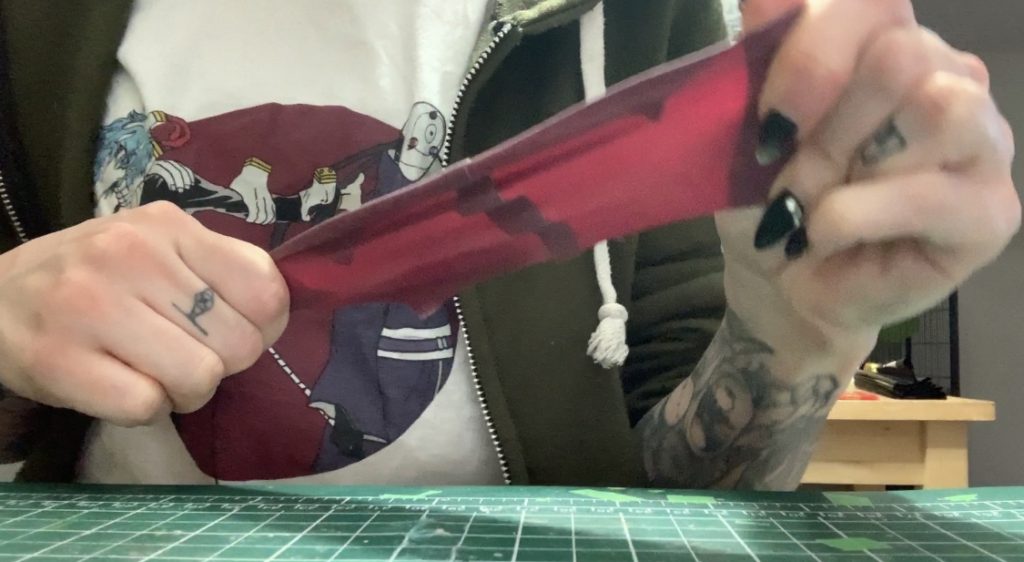
Latex stretches up to 200% of its own size, so feel free to really give it a tug to test it out.
The last thing we need to do is clean off any remaining gel pen or glue — and that’s just done with a piece of j-cloth and a little bit of rubber cement thinner.
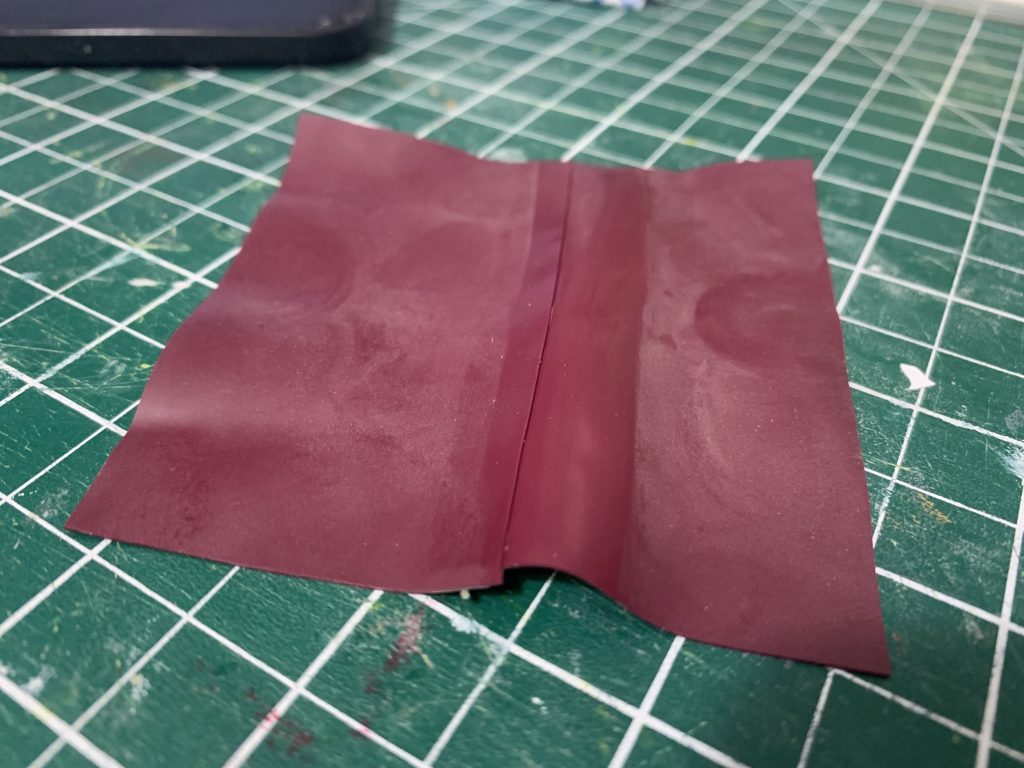
Your latex might curl a little when you do this, as pictured, but it will dry flat again. If your seam comes apart, you’re either using too much thinner and it’s creeping into the seam and breaking down your glue bond, or your seam wasn’t completely fast to begin with. Either way, it’s best to gently pull it apart with a q-tip, clean it, re-glue and try again.
The last step to doing a latex seam is to re-apply a protective layer of talc-based baby-powder with your powder brush.
Clean pieces of latex like to stick together, so re-talc-ing your seams will keep your garment from sticking to itself as you continue to assemble it.
That’s really it for assembling basic straight seams out of latex! Obviously there’s a lot more to go over, but for this tutorial, I’m going to leave you with a final couple things …
Shining Latex
We’ve been working with powdered latex, but latex is known for being shiny. This is generally done with silicone lubricant — yup. Silicone sex lube. Any body-safe, silicone-based lube is fine, but if you want a couple recommendations:
- Wet Platinum is the most cost-effective silicone lubricant that I like for latex
- Pjur is, without a doubt, the highest-gloss shine, but expensive
- if you want something latex-garment-specific, I recommend Vivishine, which is a product that you add to water, and then hang your latex to dry; the silicone stays on and the water drips off. Personally I store most of my costumes vivishined and ready to go, and then touch up with a silicone lubricant before I shoot
To wash the powder off, make a bath of warm water and add dish soap or baby shampoo to the water, and wash the latex by hand, then rinse with warm water and hang to dry. I generally vivishine immediately and then store my latex, but you could wait until the garment is dry, and then baby powder it thoroughly to store as well, then shine the outside before wear.
You can use powder or lubricant as a dressing aid — I personally prefer to lube up the garment and myself, because I find that powder basically makes sweat gravy (ew), that drips out of the garment really disgustingly. But that’s a personal preference thing.
Wait — a dressing aid? That brings us to —
Dressing in and Wearing Latex
Latex is a strange fabric — if you’ve ever played with balloons or condoms or even just latex gloves, you’ll have some idea of what it’s like. Especially in the case of things like stockings, leggings, gloves, and long sleeves, you can’t just pull latex on, that would be an excellent way to pull a bunch of your hair out on the offending body part, and also rip the latex.
So you need a dressing aid. In the case of condoms, most come pre-lubricated — which is more or less exactly what I do with my latex clothing, storing it shined and then lubing it and myself as I dress in it.
Latex medical gloves generally come pre-powdered, which is another option — you could store your clothes in powder, dress with them powdered, and then clean the outside of the latex once you have the garment on. This is easily achieved with either some soap and water, or, hilariously enough, Windex or another glass cleaner. Then once you have. the majority of the powder gone, you can shine with silicone.
There’s also a method, which I have spoken with people about but honestly never tried, of dressing where you fill a bathtub with hot water and then get in there with your latex and use the water as a dressing aid. I’ll let y’all look that one up yourselves, because that sounds just way too involved for little ol’ me.
Storing Latex
Latex needs to be stored clean, either powdered or shined, and away from direct sunlight — if it’s not clean, it might grow mould, if it’s not powdered or shined it might stick to itself and rip, and if it’s stored in sunlight the latex will eventually discolour. (Latex can be worn in direct sunlight as long as it’s shined up, though!)
Personally I get large ziplock bags, fold my shined latex, push the extra air out, seal it, and then it all goes into an opaque rubbermaid container that also seals and lives in the bottom of my closet.
Resources for Purchasing Latex:
I have no affiliation to any of these, I just appreciate Them! (Although I wouldn’t say no to a sponsorship I’m just saying …)
- Kink Engineering
Full disclosure, I did used to work here, a couple years ago now, and I still get most of my latex here because they’re local to me (Canada). Latex supplier, they have several different brands of rubber, starter kits, trims, and also laser cut designs. Note that Kink Eng also sells 18+ fetish items. - Radical Rubber
Europe-based, latex manufacturer. They also have starter kits which may be more cost-effective if you’re in Europe. - Supatex
My favourite brand of rubber to work with. Europe-Based, more expensive than Radical. - Yummy Gummy Latex
One-off, artisan pours of latex from an independent designer. Should be noted that whenever I’ve ordered it’s been a very variable timeframe (not good for deadlines in any way, shape, or form) and the colour and thickness tends to vary even within the same sheet of rubber. Quality control and colour-matching can be iffy depending on the batch. Beautiful and unique products though.
And that’s it!
Any questions, feel free to write them down below, I’ll do what I can to answer them! Happy crafting!


2 Comments
[…] that! Currently there are around a dozen tutorials and write-ups on how I made costumes, including introductions to working with Latex, Chainmaille, Wig Dyeing, and detailed write-ups on costumes like my Honeybee. (Note that you can […]
Hi there! I simply would like to give you a huge thumbs up for your great information you have got here on this post.
I am coming back to your web site for more soon.