
Let’s talk about the updates I made to 2b’s outfit this year!
She’s a bit of an older costume — when I originally made her, it was pretty early on in NieR Automata’s life. There were no 2B figures, there were no hi-res renders, and I swear there was no design on the middle white part of her body. Or if there was, it was white on white, and very difficult to see. Here’s one of the older 2B figures, showing the white on white …

When her Soul Caliber renders came out, though, they’d changed her up a bit, and all of the renders from that have this silver design on her! All of the figures that have come out recently have these designs, that look like this —

So, same shape, but much more visible.
The fun thing about working in Latex, specifically, is that there’s only a couple companies, historically, that make it. (I say historically, because there are a few smaller companies that do small-batch new colours now that offer some interesting options like glitter and things!) So compared to most fabrics, there aren’t a lot of colour options. For instance, there are roughly 3 white colours that I usually have access to, and the two that I had on-hand didn’t go together very well. So, silver it was!
(For people who are latex-colour savvy, this is Radical Rubber Metallic Silver on top of Polymorphe White.)
The first thing I did was gently pull the garment apart, which was a little difficult, given that this outfit is, I believe, at least 3 years old. The older latex is, as a general rule of thumb, the harder the seams are going to be to pull apart. It took me something like an hour to pull the white bottom pieces off of the top black pieces — in the usual manner that you pull latex apart, which is: soaking a q-tip in rubber cement thinner, and gently pushing/pulling the latex, mm at a time, being very careful not to rip the latex. The older the latex is, the more likely it is to rip instead of pulling apart cleanly on the seams! (Full disclosure, I did wind up with a couple rips.
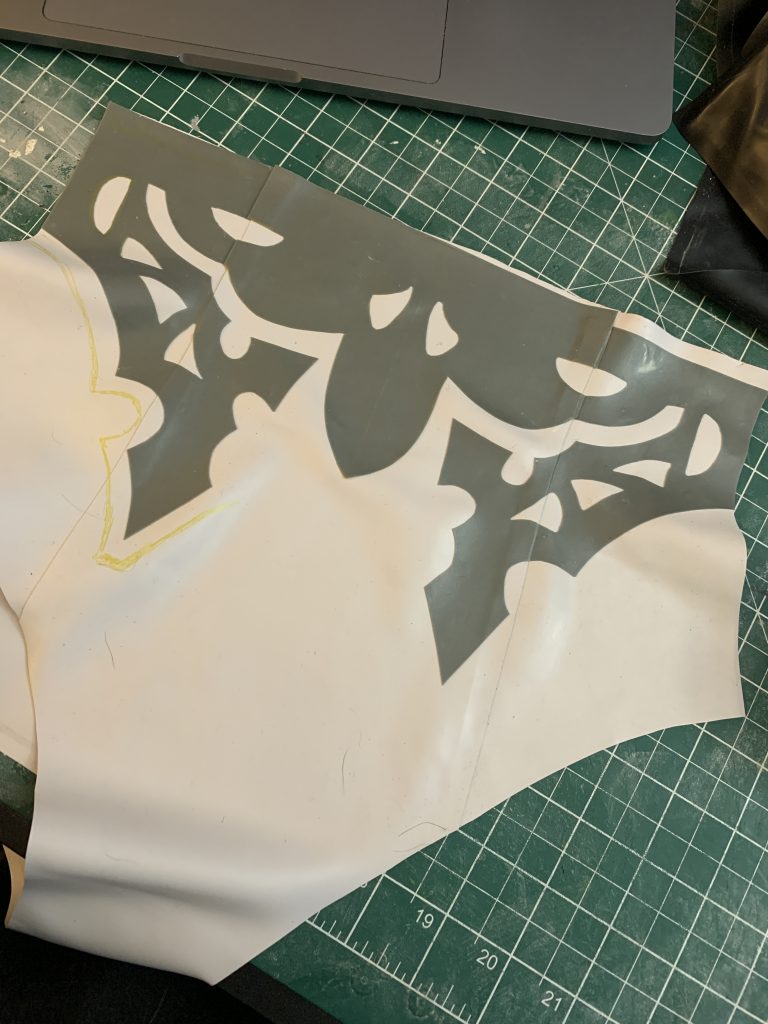
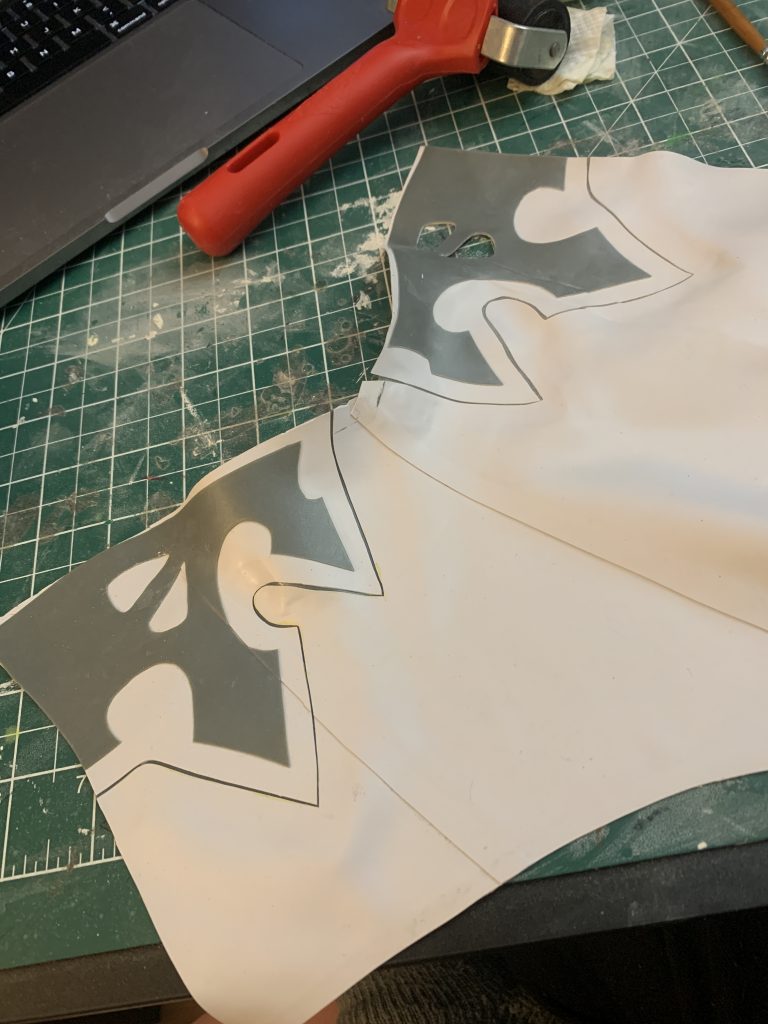
Once I had the white pieces off, I decided I wanted to do the front and back separately, so I pulled the side seams apart, so that it would lay flat, and then traced the dimensions onto some paper, so that I could draw out the pattern freehand.
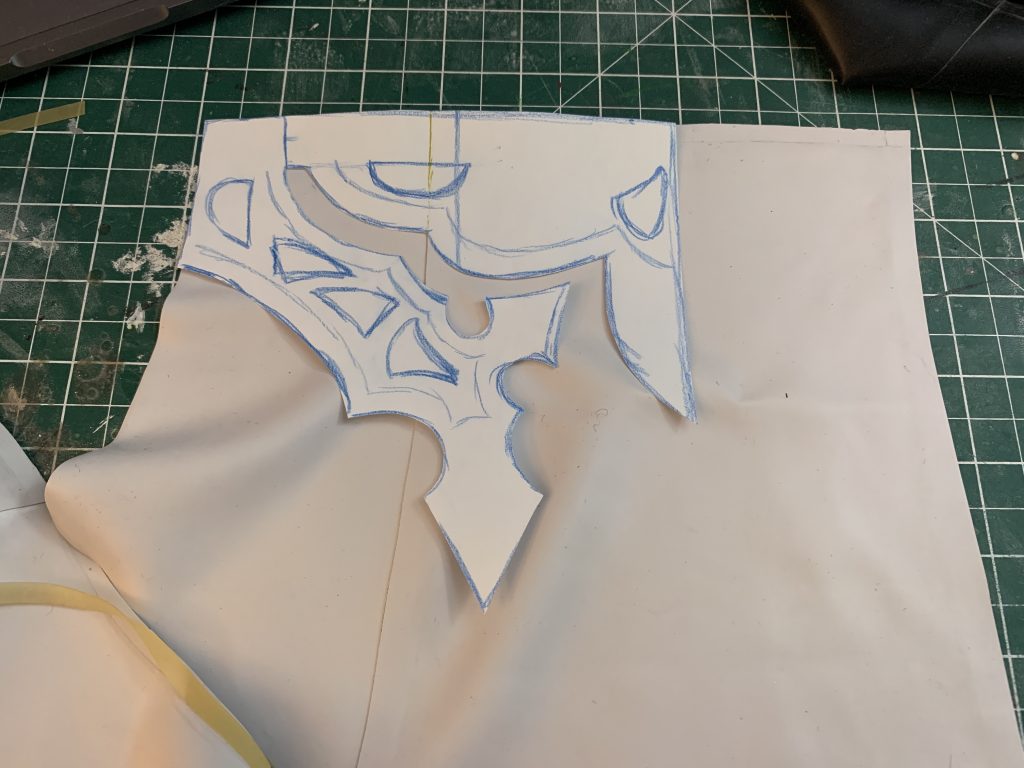
On my piece of paper that I used for this, I drew my side seam, along my top seam, and marked where the centre-front was (which is where the pattern stops), and where the princess-line seam was (which is the seam you see running down the left-hand side there, that’s still attached). With latex overlays, you want to make the pieces as small as possible, in order to make them more manageable, so I planned to cut it at the princess line seam along the top, but not along the bottom — let me show you what I mean.
Here you can see that I’ve pulled the side-front off, to make my life a little easier, and prepped the seam to put it back together. Once I had the seam back together …
And then continued to put this part of the overlay down, once I’d gotten the seam together. Then the top-middle part of the overlay is one piece, and the other side looks identical to this.
Now, I am getting ahead of myself a little bit — let’s discuss how exactly to put an overlay down.
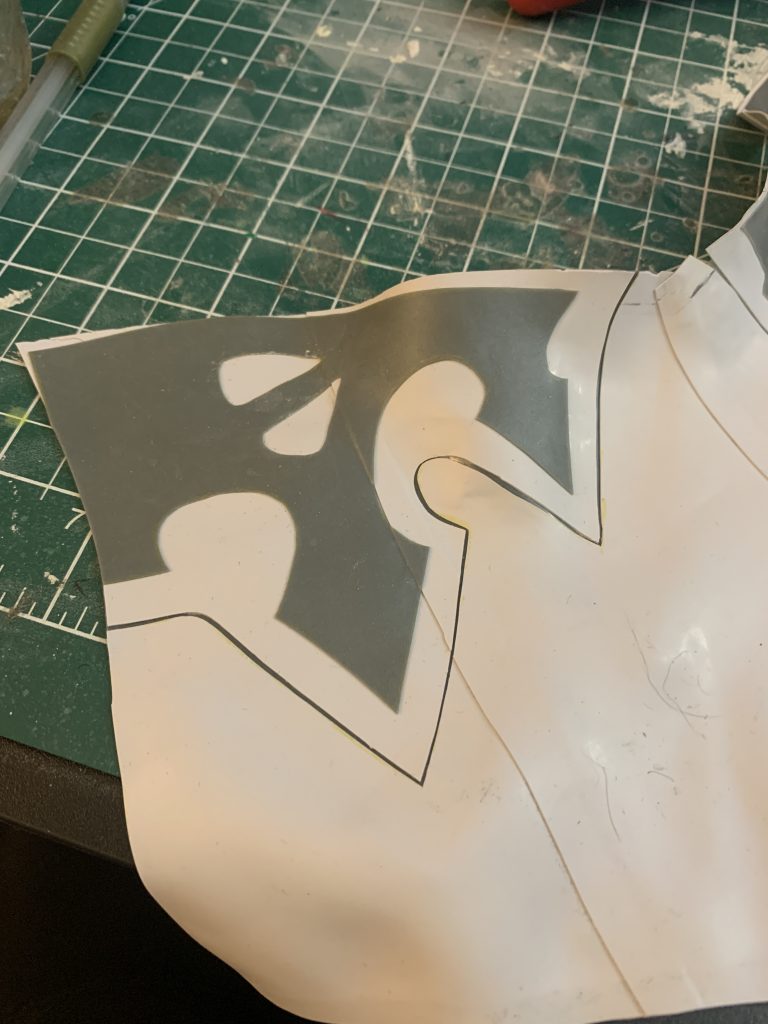
The first thing I do is, without any glue or cleaning done at all on the latex, place the overlay. Just lay the latex on top of where you want it, and decide where exactly it needs to lay. I then generally roughly mark down where it’ll sit —
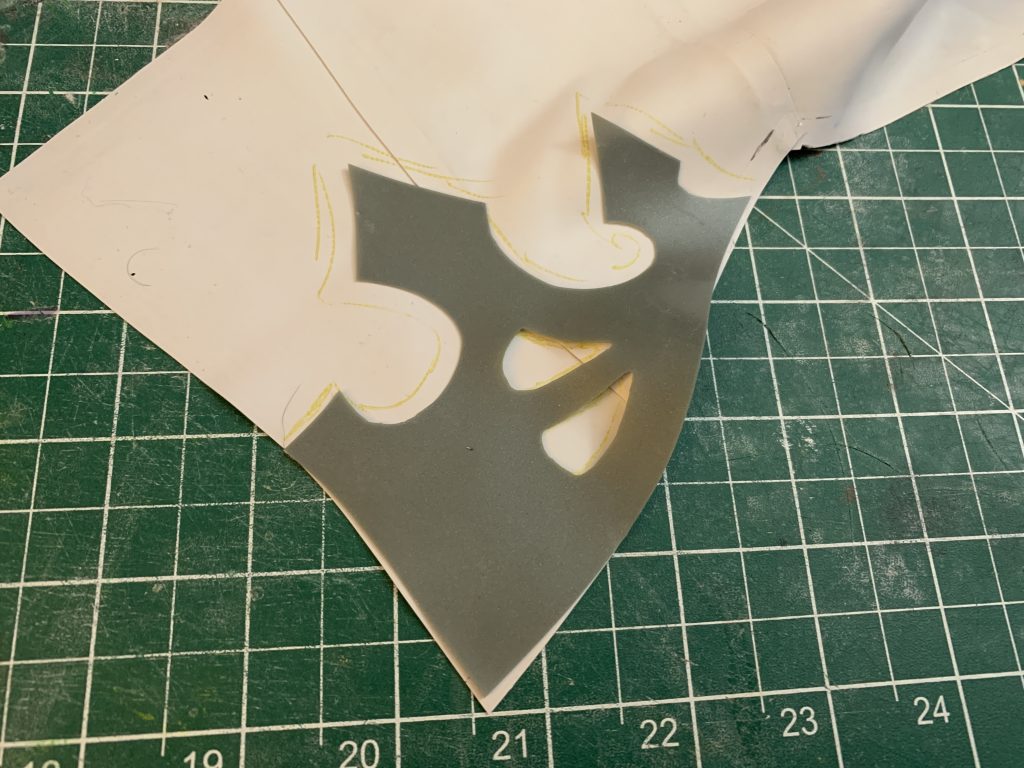
Like so! I generally just sketch roughly the area that it’s supposed to be in — it’s better to have too much area prepped, instead of not enough! And I’ve found from experience, you just about never get the latex back exactly where you just had it when you marked it, so give yourself some wiggle room.
Then you want to prep the back of the overlay in the usual manner — clean, apply glue, leave to dry.
Now here’s where something different than what you might be expecting happens: personally, for most overlays, I don’t glue the other side. I do clean it extremely well, I generally go through several cleaning cloths, making sure it’s completely clean. The glued bit will adhere to this almost as well as long as this isn’t a structural seam. Because this is just an overlay, your garment isn’t going to break if it comes up a little, it’s just decorative, so you can get away with everything being a little less adhered.
I do this because I find that scrubbing glue off of the area around the edges of the overlay is incredibly likely to make the fiddly corners and edges of the overlay pull up. So by avoiding that, you’ll save yourself a lot of time trying to put little fiddly bits back where they belong.
I do generally go back through after I’ve finished, and pick at all of the points and edges, and gently apply glue to anywhere that comes up easily when I pull on it, just for longevity.
Some tips for overlays:
- Try not to put down a shape bigger than your hand at once; if you’re working with a larger overlay, try to chop the overlay into smaller pieces
- If you’re working with a large piece, you can use clean pieces of paper to “block off” areas that you’re not working on yet
- Applying the overlay is largely the same as doing a seam, just bigger — and you’ll have the same problems with making finger marks if you try to push it down too hard, and wrinkles if you don’t push it down hard enough!
Also like seams, this will just take some getting used to, and the best thing you can do is start small and simple (ie. cut yourself some squares and try it out!) and work your way up from there.
Anyway, once you have the overlay down, roll the hell out of it, just like a seam!
Once I had the sides on and re-adhered, it was time to put the middle down as well …
You can see that the top is a little messy; I forgot to add the seam allowance on the right-hand side there. 😂 It wasn’t a big deal, though, because that’s hidden beneath the seam allowance!

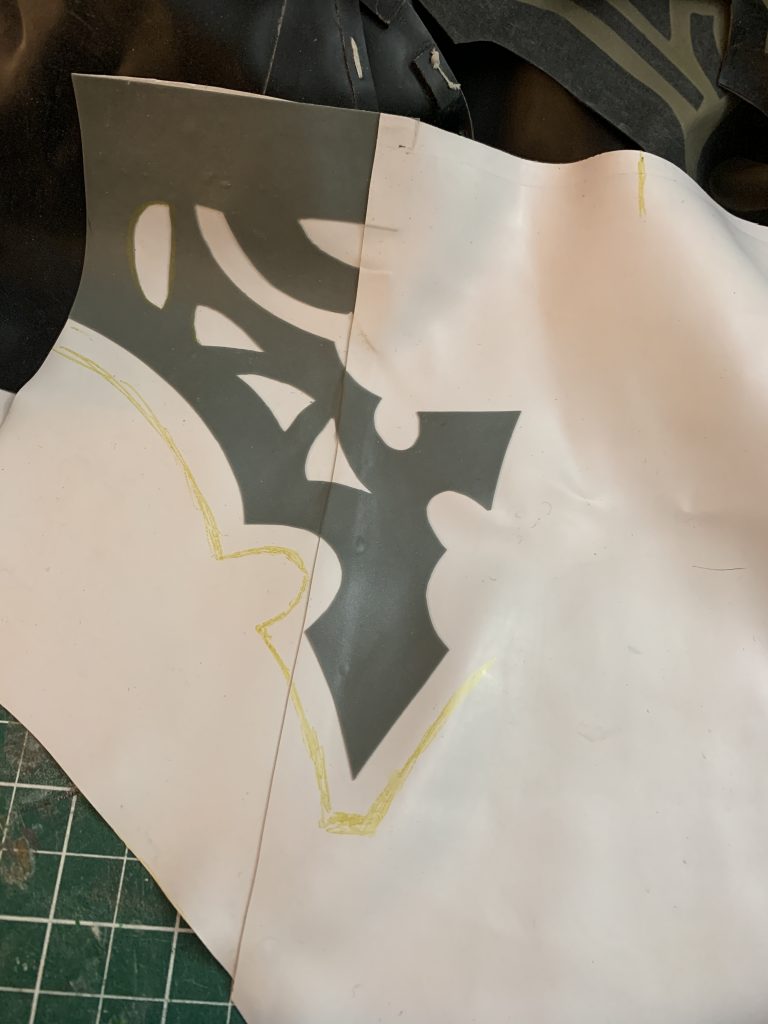
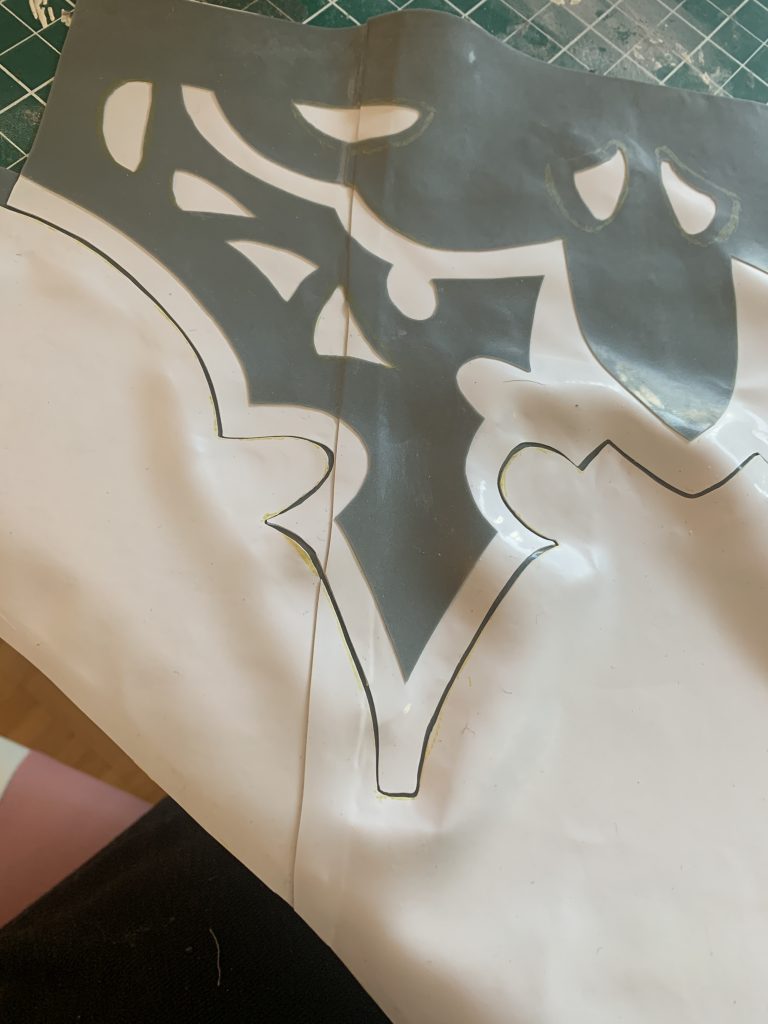
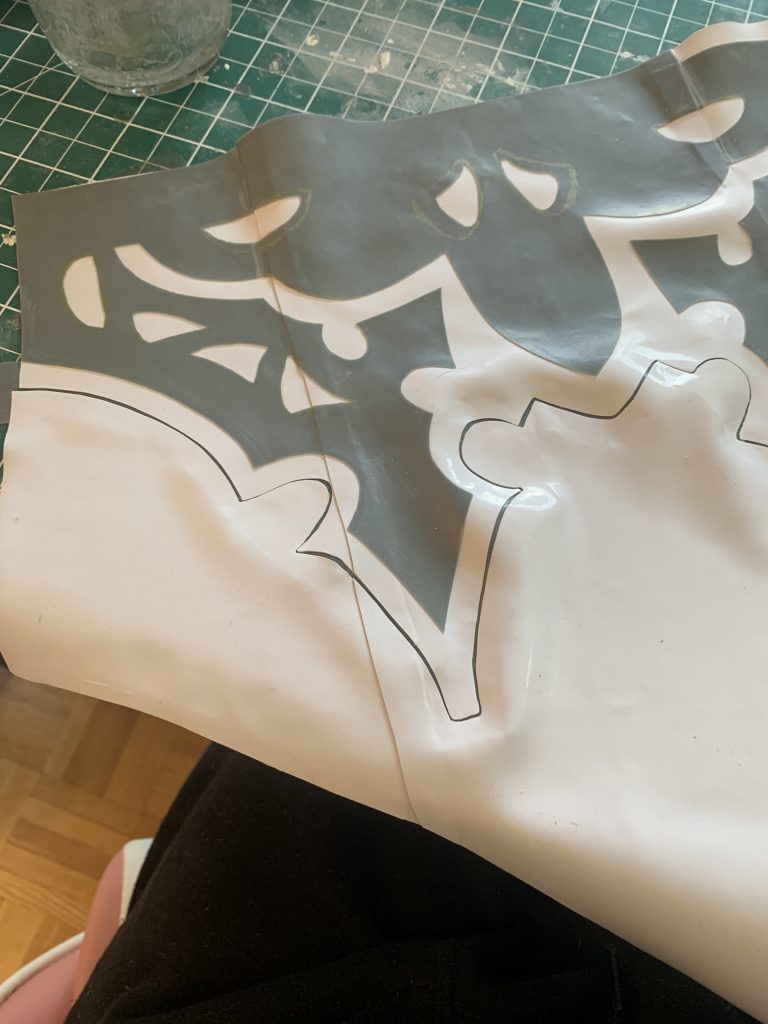
I then did the same on the back — it was harder to find concrete reference for the back, but this is what I came up with for the shape:

Here’s the back, once the overlay was applied —
It also has the underlay applied, which is the next thing I want to talk about. In some of the earlier photos, you’ve probably seen my rough pen marks, planning where this is going to be. Essentially, I marked out roughly 1/4″ from the straight sides of the design, to plan the underlay.
Now, why is this an underlay, and not an overlay, like the rest of them?
Well, if you’ve ever tried to cut very thin pieces of latex, even with the life hack I have for cutting thin strips, it’s really difficult! Not to mention, it wouldn’t be very well-adhered, just because of how small it is. So for things like thin lines, an underlay is generally a better choice.
For this underlay, because it’s so thin, what I did was mark out where I wanted to cut, and then very carefully cut it with a rotary cutter along the line. Then I traced the shape onto my silver latex, and then gave it a seam allowance of roughly 1/4″ on either side of that line that I drew, and cut that shape out, which gave me a very squiggly piece of silver.
Then I applied glue to the back of the white pieces, and the front of the silver piece.
From there, I laid the silver piece down on the table, and then carefully applied first the top of the white — the part with the overlays on it, with that 1/4″ seam allowance I drew.
Then I applied the bottom piece, just a tiny bit down from where it originally was.
This was incredibly fiddly. I’m not 100% sure how long it took because, honestly, I kept getting frustrated, pulling the white back up, re-applying glue, and giving it another go after it had dried and I’d scrolled Twitter for a bit. But it was surprisingly time consuming. You’ll notice that the latex isn’t 100% flat — that smooths out once it’s on my body, and comes from me having to gently stretch and manipulate the latex to get it exactly where I want it. Sometimes I would have to pull the top bit, sometimes I’d have to stretch the bottom while I gently pressed the top down … If you’re trying to do a very thin line like this, take your time.
Here it is done and cleaned! Don’t scrub too hard, because the underlay is so thin that even if there is some glue in there, you likely won’t be able to see it.
Then, of course, I also did the back — which honestly I should have done first, these were far easier shapes. 😂
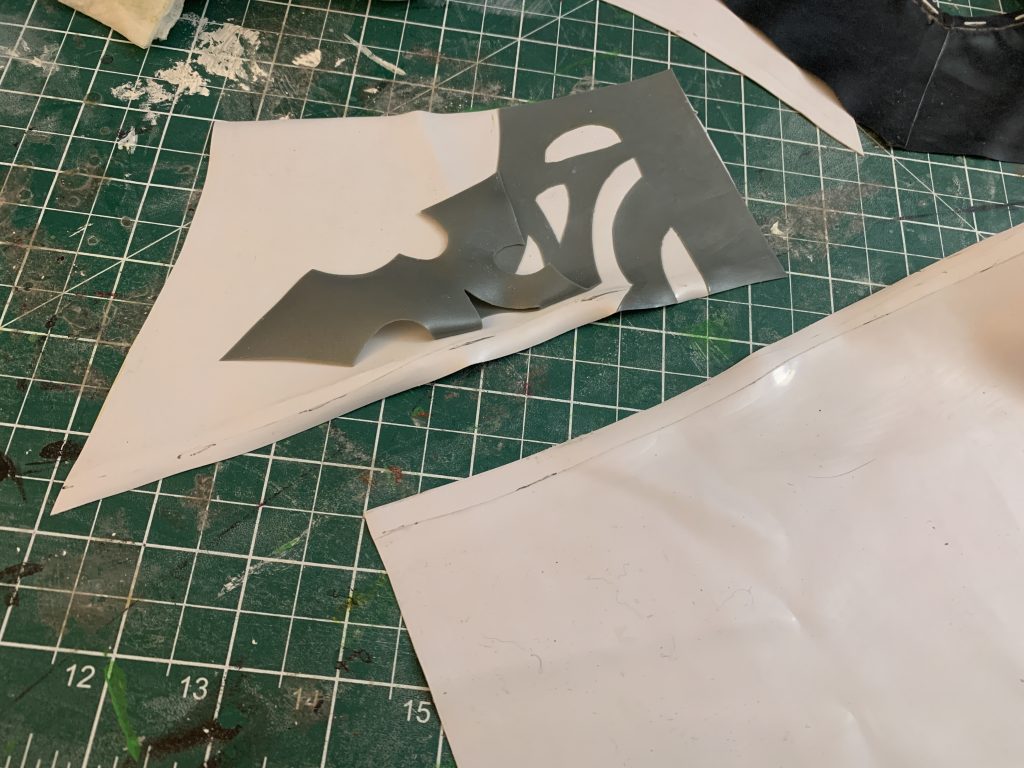
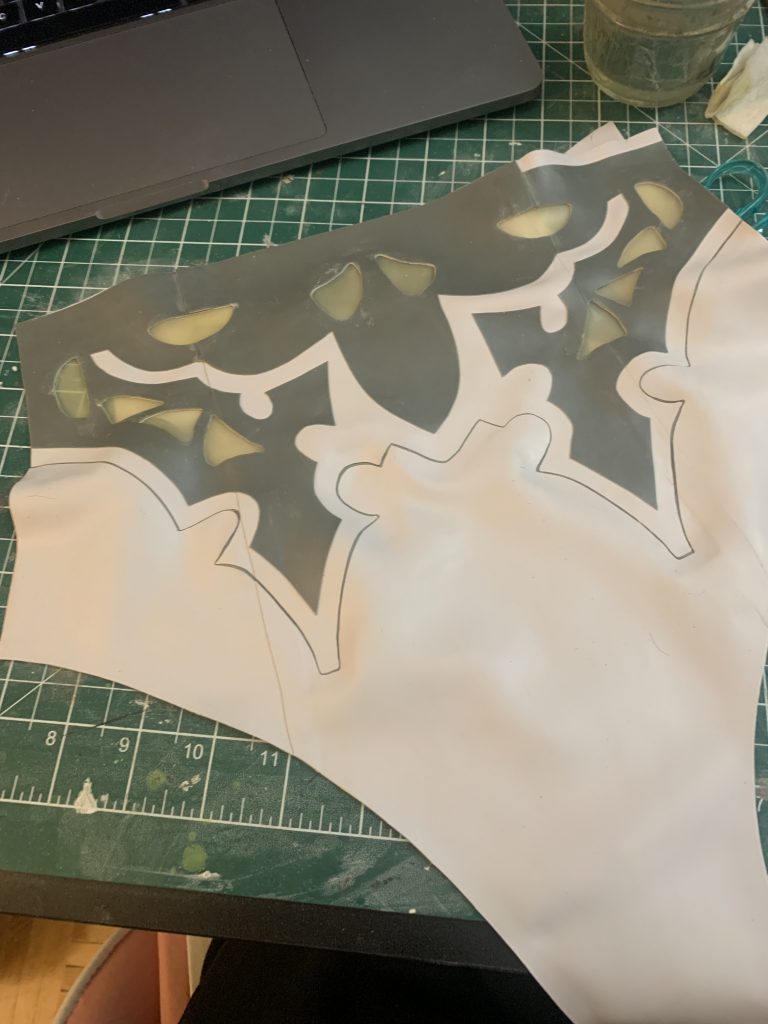
Now there’s one last thing we need to talk about — you can see that I’ve already prepared for the cutouts in the silver, roughly, because I wanted to visually see them — but I’ve cut them slightly smaller than I wanted them ultimately, because it’s much easier to cut multiple layers of latex at once and have them match, than it is to try and make the same exact shape twice.
I hope you’re sitting down for this, because I’m about to explain why I broke one of the cardinal rules of latex.
I cut these with scissors.
Now, usually we use a rotary cutter because they’re less likely to make stutter cuts, which make a weak point in your latex that will have to be reinforced. However, all of these little shapes are going to be reinforced — by and large, I wouldn’t recommend having holes like this, at random, in your garment, because those holes will stretch differently than the rest of the garment, they’re likely to gap. It’s also just much stronger to reinforce them with more latex, if that’s an option.
However, these holes were so small, that I found even my smallest rotary cutter was clunky.
So I used a pair of embroidery scissors:

Embroidery scissors are generally this shape, have a relatively small, sharp cutting area, and thin blades. I usually use them for snipping thread (or cutting out wig wefts!), but in this case they were perfect.
If you’ve ever cut a circle out of a piece of paper, this is pretty similar in method — fold your shape roughly in half, cut a small snip out of it, and then flatten it back out and cut out to the edge of your shape, and then slowly and carefully around the perimeter. For curves, I wound up gently stretching the latex with one hand so that the line of the curve I had drawn was as straight as possible, then gently cut along the line, and then un-stretch it. Be very gentle when stretching, though, because you can rip the latex. (Especially if it’s only one layer of latex that you’re cutting — more layers than that, it’s less likely.)
Once those were all cut, I made new underlays with transparent natural — by tracing through the hole, and then adding 1/4″ seam allowance, then cutting them out and gluing them to the inside of the garment.
Then the last step was to re-attach this to the top, and then close up the side-seams again — and with anything with colour-blocking, I generally match up the pieces that are most important first, which in this case is the black edge, and then also the silver, and then work out from there.
Here’s another look at the side! 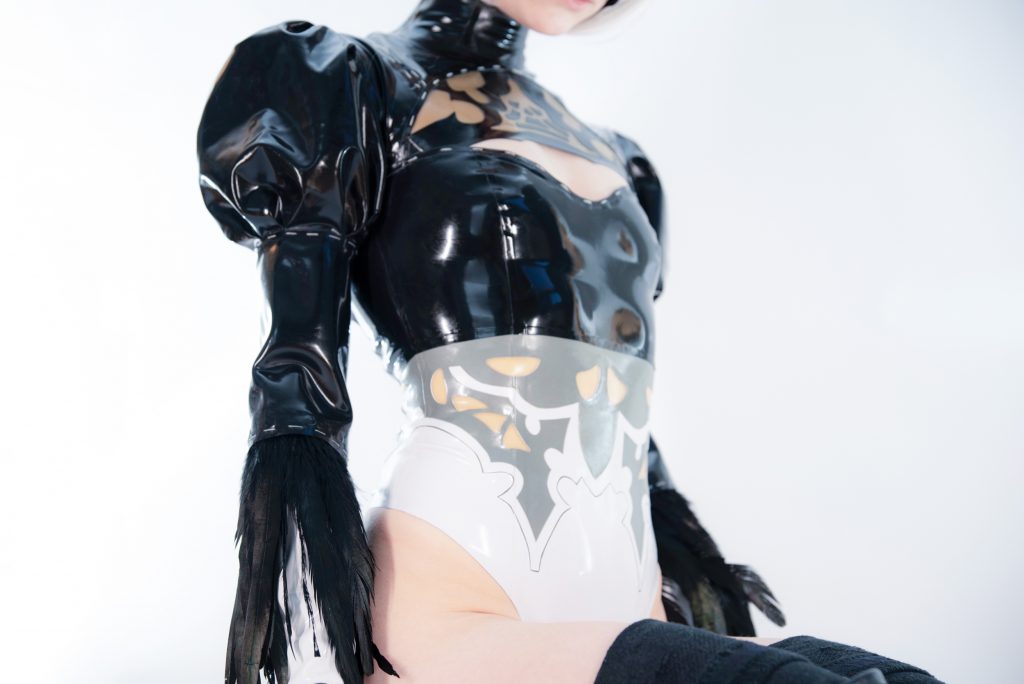
And that’s it! I’m thinking that I’d like to do more of a writeup about overlays, maybe with a video … what do you think? 🤔
